
Ah, the aroma of fresh bread—it’s like a warm hug from the oven. These homemade dinner rolls are, quite simply, little clouds of joy that melt in your mouth. Whether you’re gathering for Thanksgiving, or just another Tuesday night, these rolls are the unsung heroes of the table, holding the power to steal the spotlight from even the most lavish main dish.
Steps
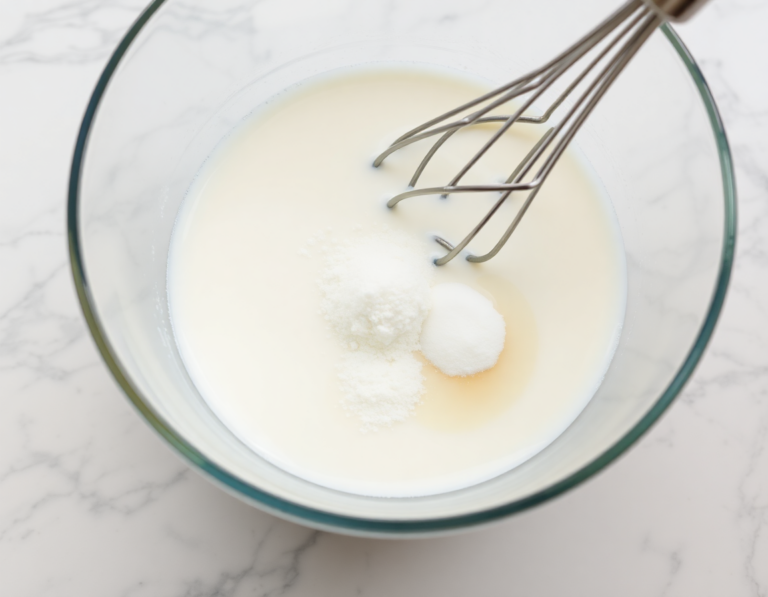
- Begin by whisking warm milk, yeast, and a tablespoon of sugar in a mixing bowl. Let the mixture rest for five minutes to activate the yeast.
- Add the remaining sugar, egg, butter, salt, and one cup of flour to the yeast mixture. Mix on low speed with a dough hook until combined, then gradually add the rest of the flour and mix until the dough forms and pulls away from the bowl.
- Knead the dough for five minutes, either by hand on a floured surface or using the mixer. If the dough is sticky, add flour sparingly until manageable. The dough should be soft and slightly sticky but bounce back when poked.
- Lightly grease a large bowl, place the dough inside, and cover it. Allow it to rise in a warm place for 1-2 hours until it doubles in size.
- Grease a baking pan and punch down the risen dough. Divide it into 14-16 pieces and shape each into a smooth ball. Arrange them in the prepared pan.
- Cover the shaped rolls and let them rise for about an hour until puffy. Meanwhile, preheat your oven to 350°F (177°C) with the rack positioned lower to prevent burning.
- Bake the rolls for 20-25 minutes until they achieve a golden brown color. Optionally, brush them with a honey-butter mixture after baking for added flavor.
- Store any leftovers tightly covered at room temperature for 2-3 days or refrigerate for up to a week.
Ingredients
- 1 cup (240ml) whole milk, warmed to about 110°F (43°C)
- 2 and 1/4 teaspoons instant yeast (such as Platinum Yeast from Red Star)
- 2 tablespoons granulated sugar, divided
- 1 large egg
- 1/4 cup (4 tablespoons or 56g) unsalted butter, softened and cut into pieces
- 1 teaspoon salt
- 3 cups (390g) all-purpose flour or bread flour
- Optional topping: 2 tablespoons (28g) melted unsalted butter mixed with 1 tablespoon honey
FAQ
- What type of yeast should I use for these dinner rolls?
- You can use either active dry yeast or instant yeast. If you opt for active dry yeast, keep in mind that the rise times may be slightly longer. The recommended yeast for this recipe is Platinum Yeast from Red Star, which is an instant yeast with natural dough improvers.
- Can I prepare the dinner rolls ahead of time?
- Yes, you can prepare the dough and let it rise, then shape the rolls and refrigerate them for up to 16 hours. Three hours before you need them, take the rolls out of the fridge and let them rise at room temperature for 1-2 hours before baking. You can also freeze the shaped rolls and bake them later.
- What is the best type of flour to use in this recipe?
- You can use either all-purpose flour or bread flour. All-purpose flour is more common, but bread flour will produce chewier rolls. Both options will result in soft, fluffy rolls, so use whichever you have on hand.
- How do I ensure my dinner rolls turn out soft and fluffy?
- The key to soft and fluffy dinner rolls lies in using a rich dough, which contains fat from ingredients like milk, butter, and eggs. Ensure that your dough is soft and slightly sticky, but still manageable to knead. Proper kneading and rise times are also crucial for optimal texture.
- Can I add different flavors to the dinner rolls?
- Absolutely! You can mix in ingredients like chopped rosemary, shredded cheddar cheese, or garlic and herbs when adding the flour for various flavor variations. These additions can enhance the rolls and complement different meals.
Tips
- Choose the Right Flour: For a chewier texture, opt for bread flour, though all-purpose flour works well too. Whichever you choose, make sure to measure it by spooning and leveling to prevent dense rolls.
- Mind the Yeast: Ensure your yeast is fresh for optimal rise. Instant yeast, like Platinum Yeast from Red Star, is recommended for quicker rise times, but active dry yeast will also work with slightly longer rise times.
- Perfect Kneading Technique: Knead the dough until it passes the “windowpane test” – stretch a small piece of dough until it’s thin enough for light to pass through without tearing. This ensures the dough is kneaded well and ready to rise.
- Make-Ahead Convenience: If short on time, prepare the dough and shape the rolls ahead of time, then refrigerate for up to 15 hours. Allow them to rise on the counter for 1-2 hours before baking, or freeze for later use, thawing and rising before baking.
Equipment
- Electric Stand Mixer – Useful for mixing and kneading the dough.
- Dough Hook or Paddle Attachment – Often comes with a stand mixer but can be purchased separately if needed.
- 9×13-inch Glass Baking Pan – Recommended for baking the rolls.
- Bench Scraper – Helps in dividing and handling dough.
- Pastry Brush – Used for brushing butter or other toppings on the rolls.