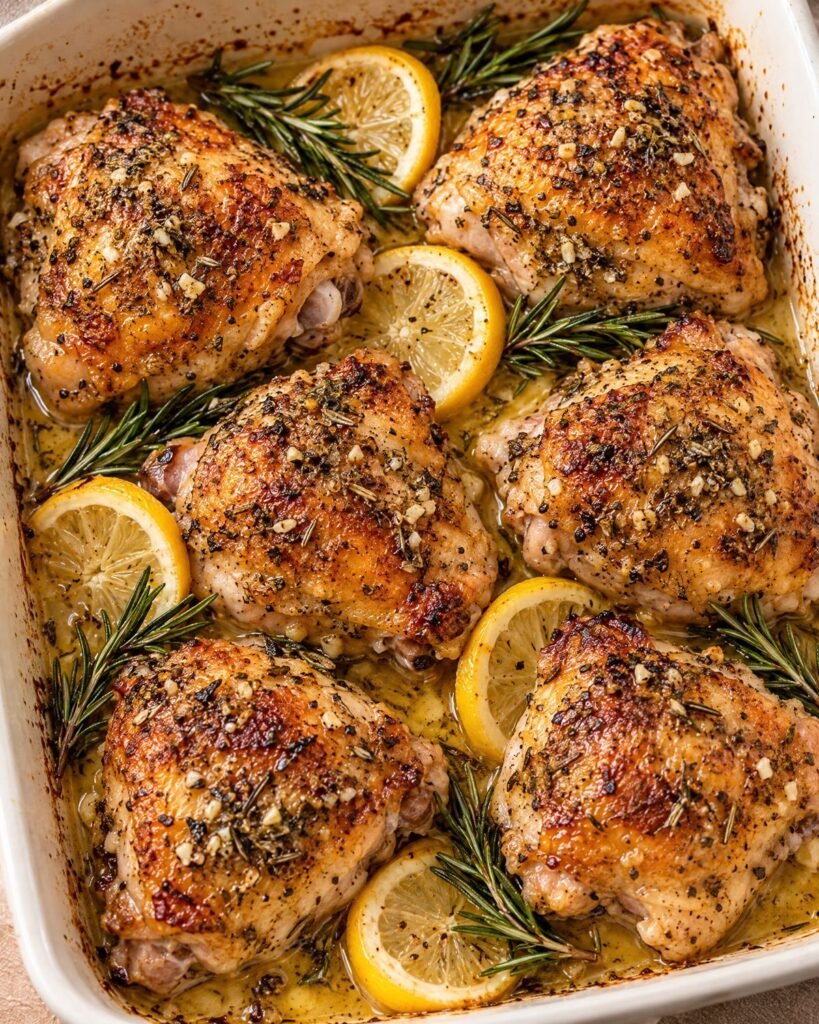
Lemon Rosemary Chicken
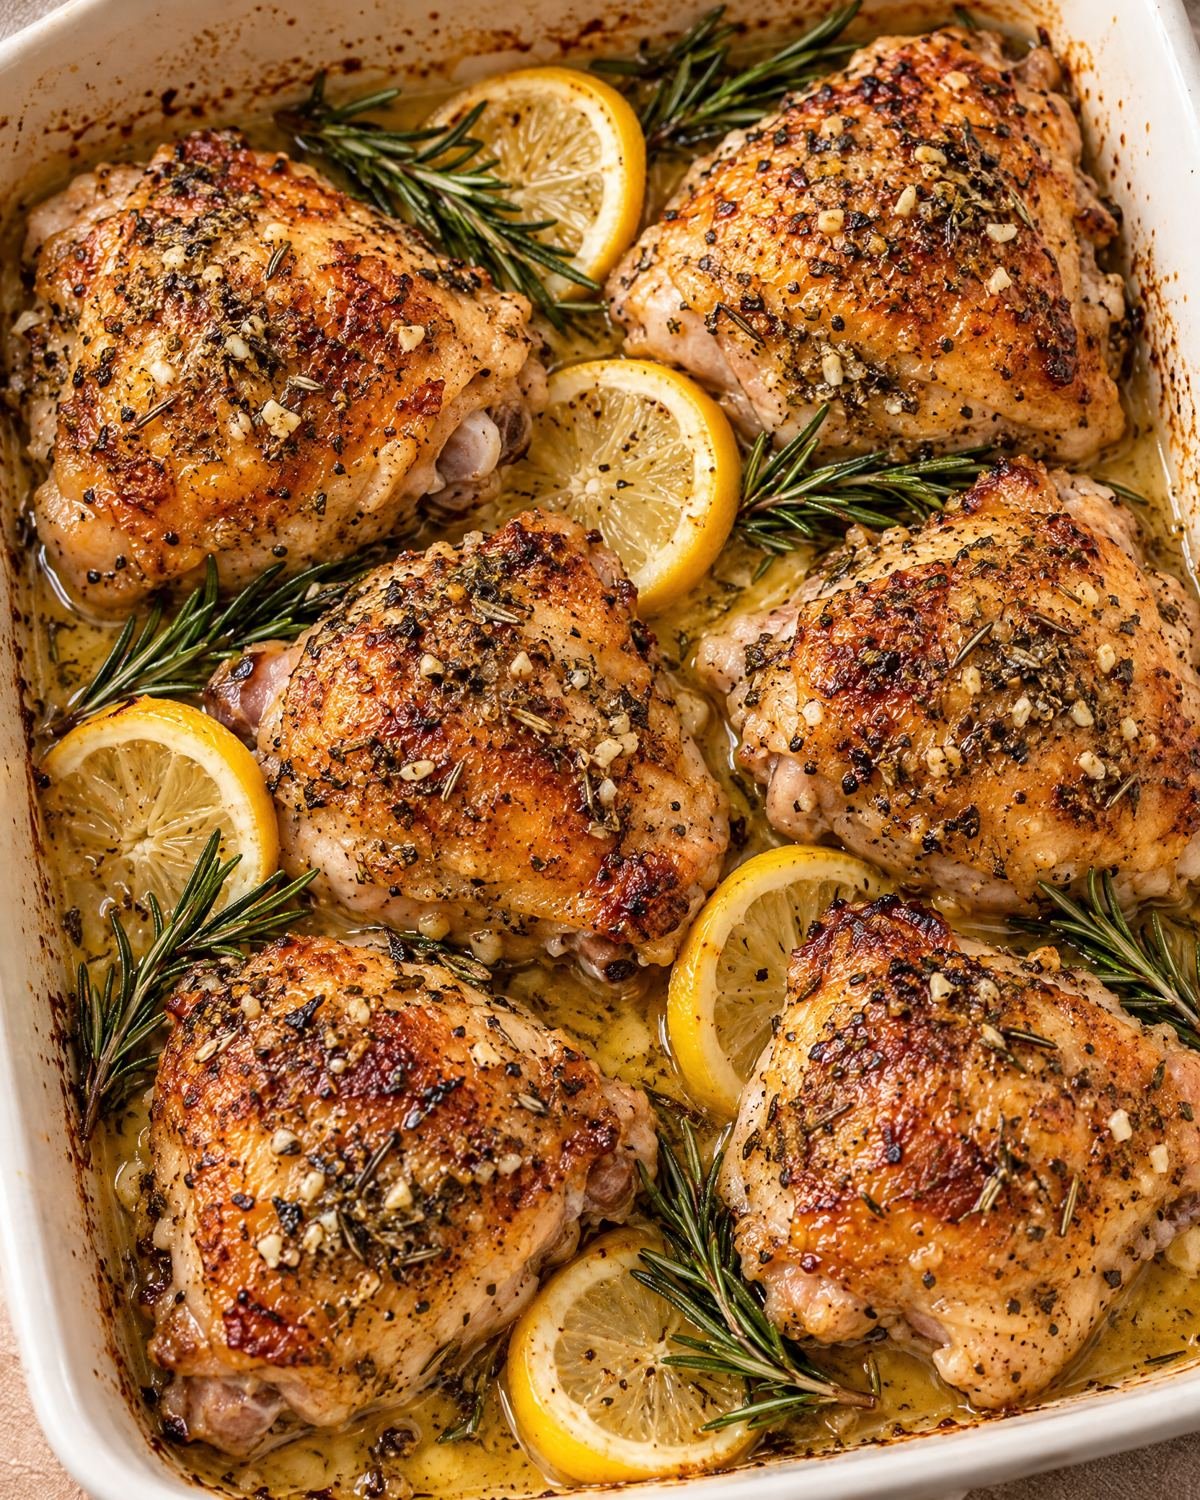
Lemon rosemary chicken is a one-dish oven dinner with crisping skin, tender bone-in thighs, and buttery pan juices that carry garlic, mustard, lemon, and rosemary. The method is straightforward, but two details decide the result: keep the skin exposed after the first bake, and check the thickest thigh with a thermometer instead of judging doneness by color alone.
The recipe suits a weeknight because the coating is mixed in one bowl and the chicken cooks in a single 13-by-9-inch baking dish. The lemon keeps the pan juices bright; smoked paprika and rosemary give the surface a savory roasted flavor.
Recipe Overview
- Prep time: About 5 minutes
- Cook time: About 45–55 minutes
- Total time: About 50–60 minutes
- Yield: One 13-by-9-inch baking dish of chicken thighs
- Method: Oven-baked
- Equipment: Small bowl, whisk or spoon, 13-by-9-inch baking dish, tongs, and an instant-read thermometer
Ingredients
For the chicken
- 2 pounds bone-in, skin-on chicken thighs, similar in size when possible
- 1 tablespoon stone-ground mustard
- 3 tablespoons fresh lemon juice
- 2 tablespoons olive oil
- 2 tablespoons unsalted butter, melted
- 3 garlic cloves, minced
- 2 tablespoons fresh rosemary, finely chopped
- 1 teaspoon smoked paprika
- 1/2 teaspoon red pepper flakes, optional
- 1 teaspoon kosher salt
- 1/2 teaspoon freshly ground black pepper
For serving
- Lemon slices, optional
- Extra rosemary sprigs, optional
The butter adds richness and helps carry the herbs across the chicken. Lemon juice brings acidity, while mustard gives the coating a sharp edge and helps it cling to the meat. Fresh rosemary has a stronger aroma than dried rosemary; if using dried, use less and crush it between your fingers before adding it.
The recipe contains dairy from the butter, and mustard may be an allergen depending on the product label. Check packaged ingredients if you are cooking for someone with a specific allergy. The chicken is naturally free of gluten only when every packaged ingredient, especially the mustard, is labeled accordingly.
How to Make Lemon Rosemary Chicken
1. Mix the lemon-rosemary coating
Set the oven to 425°F and place a rack in the center. Put the mustard, lemon juice, olive oil, melted butter, garlic, rosemary, smoked paprika, red pepper flakes if using, salt, and black pepper in a small bowl.
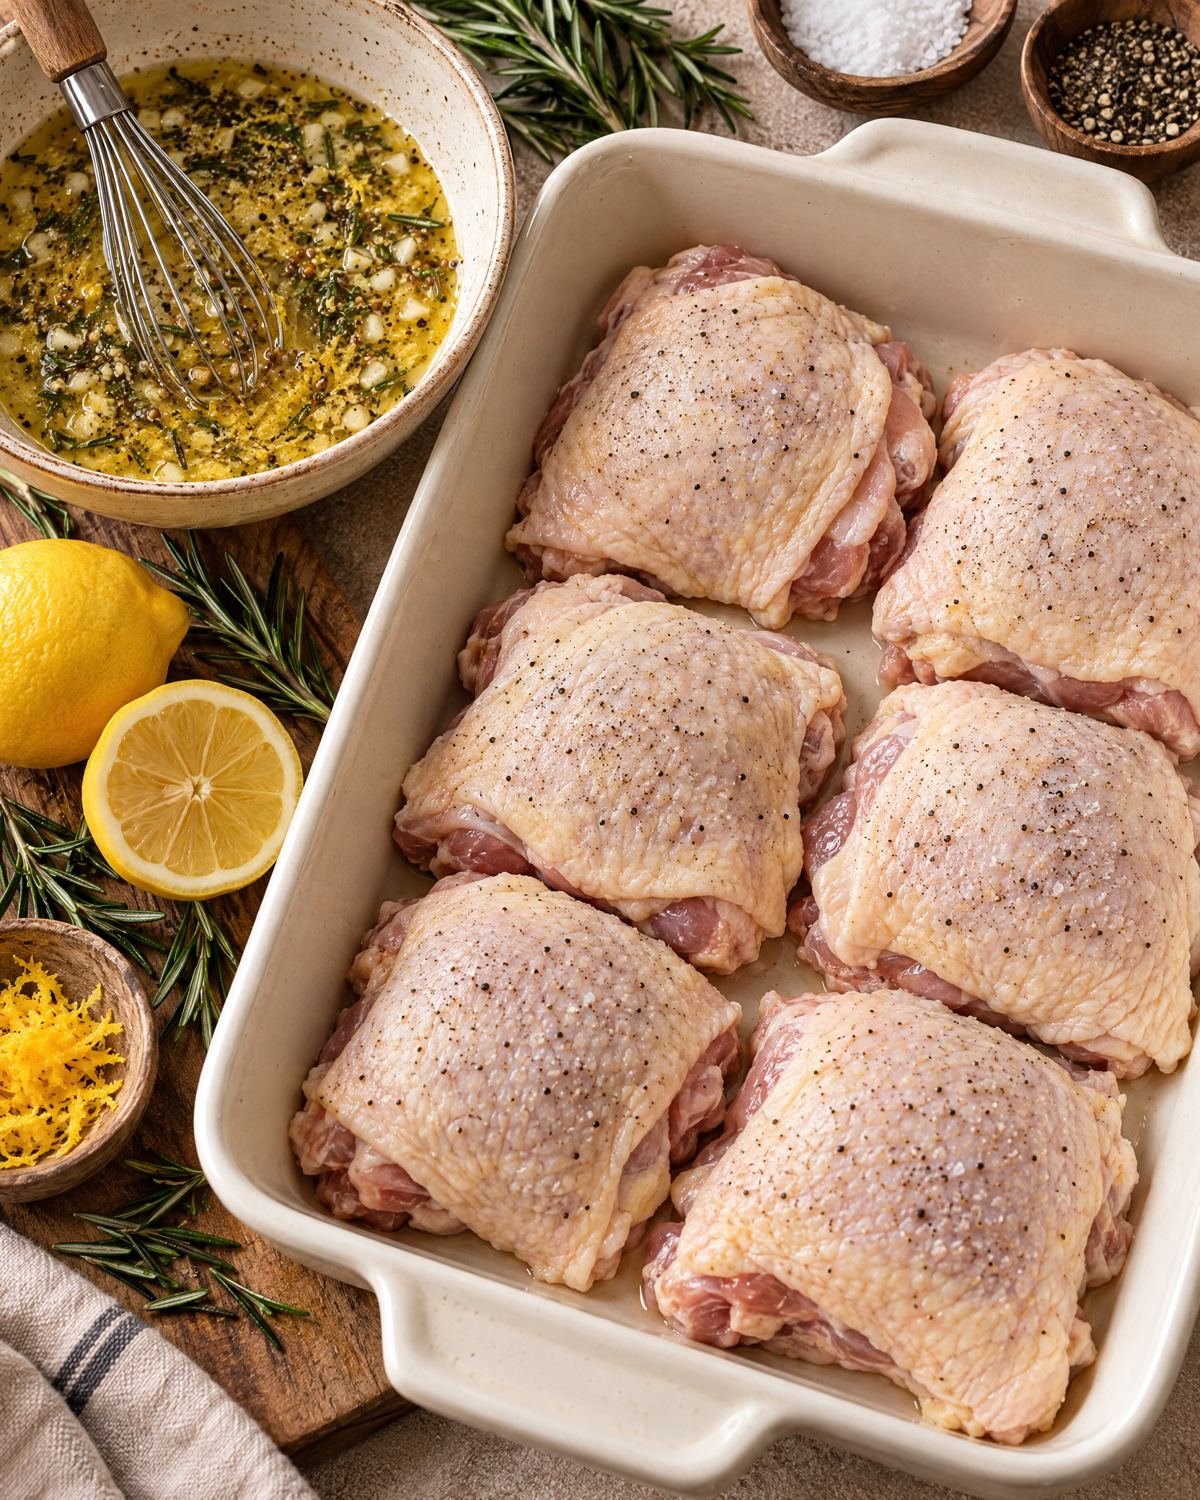
Whisk until the butter is spread through the liquid and the herbs are evenly distributed. The mixture should be loose enough to pour, with small flecks of rosemary and garlic throughout. If the butter starts to firm up, let it sit briefly and whisk again.
The bowl is ready when no large pocket of plain oil or butter remains. Keep the mixture nearby while you arrange the chicken.
Where this mixture can fail: Very hot melted butter can separate as soon as the lemon juice is added. A quick whisk usually brings it together; the coating does not need to look perfectly smooth.
2. Arrange the raw chicken in the baking dish
Pat the chicken thighs dry with paper towels. Dry skin browns more readily and gives the coating a better surface to cling to.
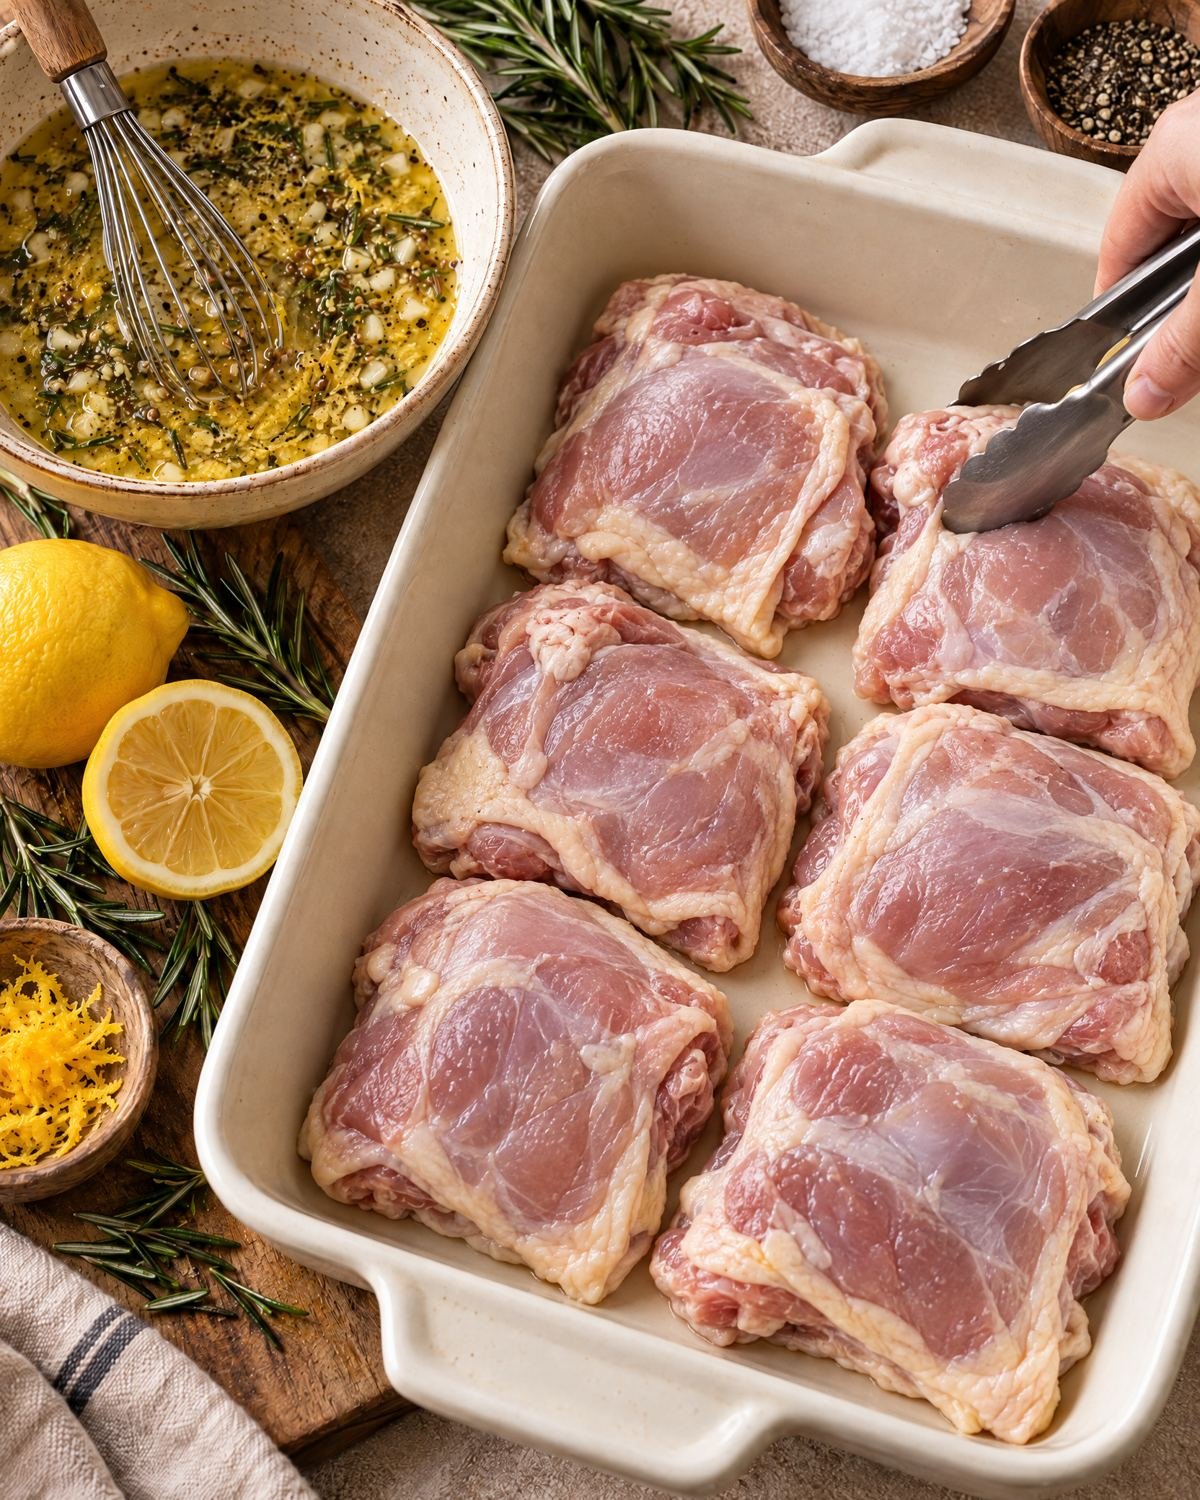
Place the thighs skin-side down in a 13-by-9-inch baking dish. Keep them in one layer. They may touch, but do not stack them. This arrangement gives the first bake room to heat the pieces evenly and leaves the skin ready to be turned upward later.
At this point, the chicken should still look pale and raw, and the dish should not yet contain a pool of coating. Keep the bowl of lemon-rosemary mixture beside the dish for the next action.
3. Pour over the coating and turn the pieces
Pour the lemon-rosemary mixture over the chicken, directing it across the tops and into the spaces between the pieces.
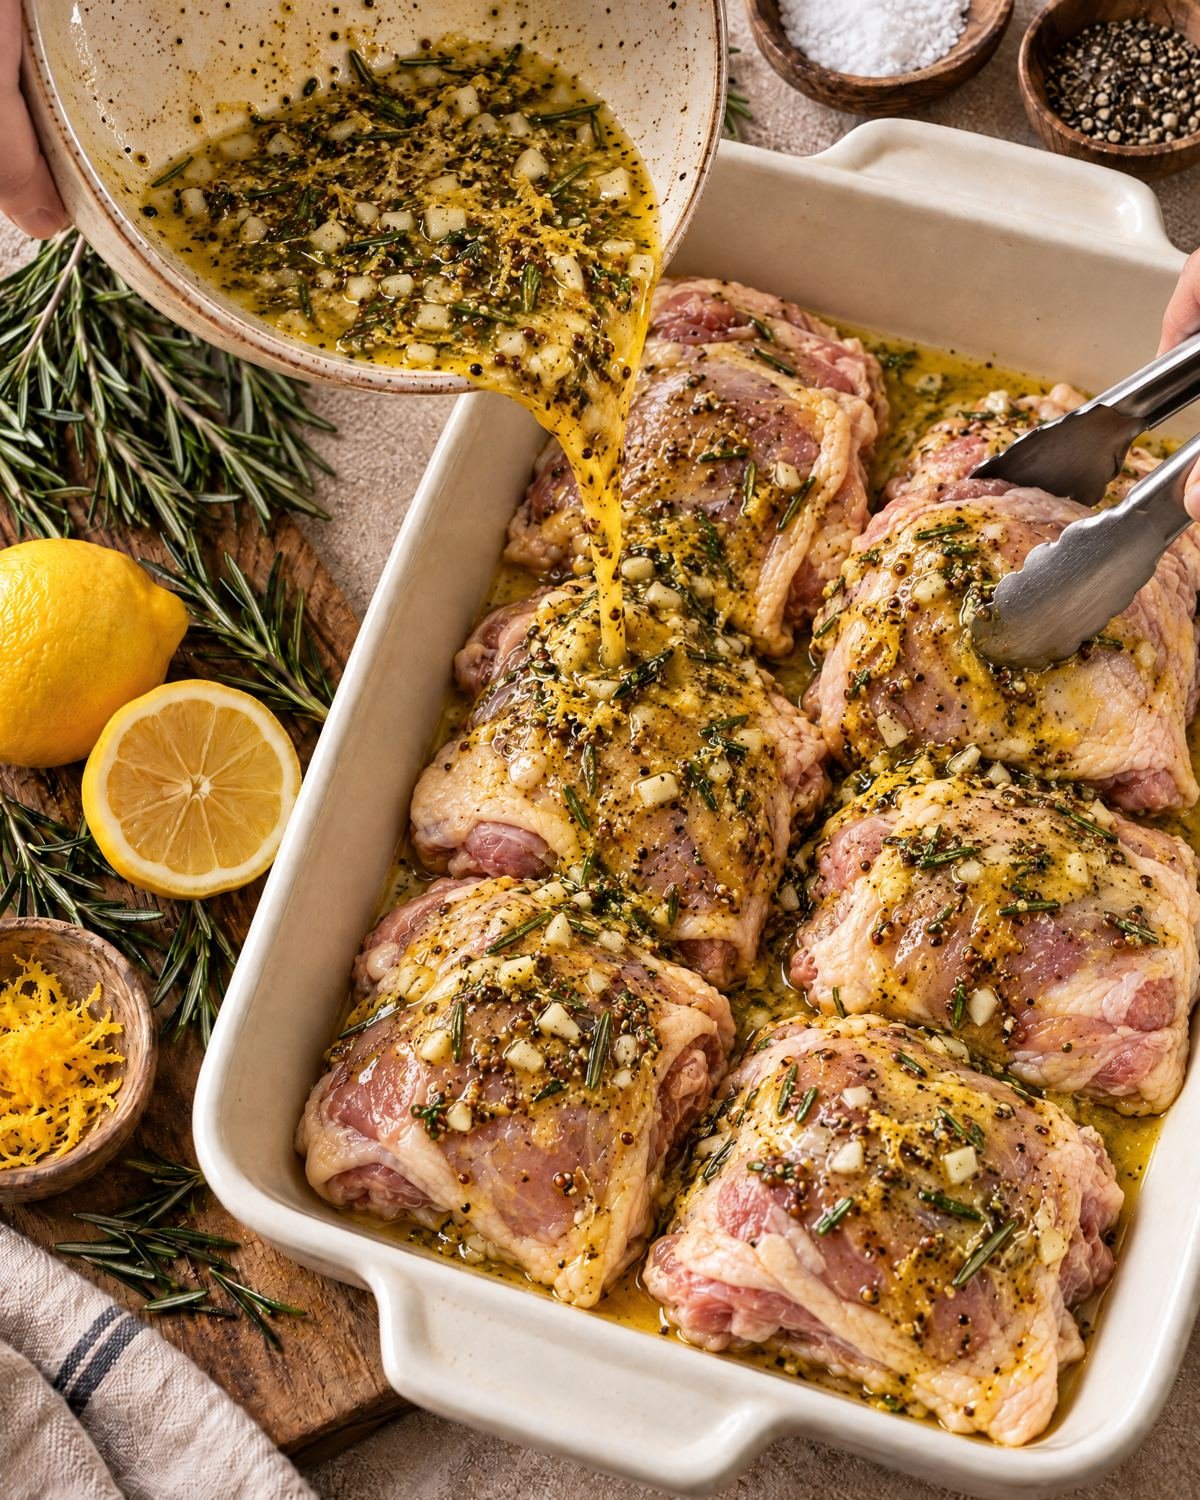
Use tongs to turn the thighs gently so the coating reaches both sides. Return the pieces to a single layer, skin-side down. If you are using lemon slices or rosemary sprigs for serving, place them around the chicken after the coating has been distributed rather than covering the skin.
A small amount of liquid should collect at the bottom of the dish. The chicken remains raw at this stage; the coating should look glossy and thin, not thick like a paste.
Wash the tongs, bowl, and any surface that touched raw chicken before using them for cooked food.
4. Bake the chicken skin-side down
Place the dish on the center rack and bake at 425°F for 20 minutes.
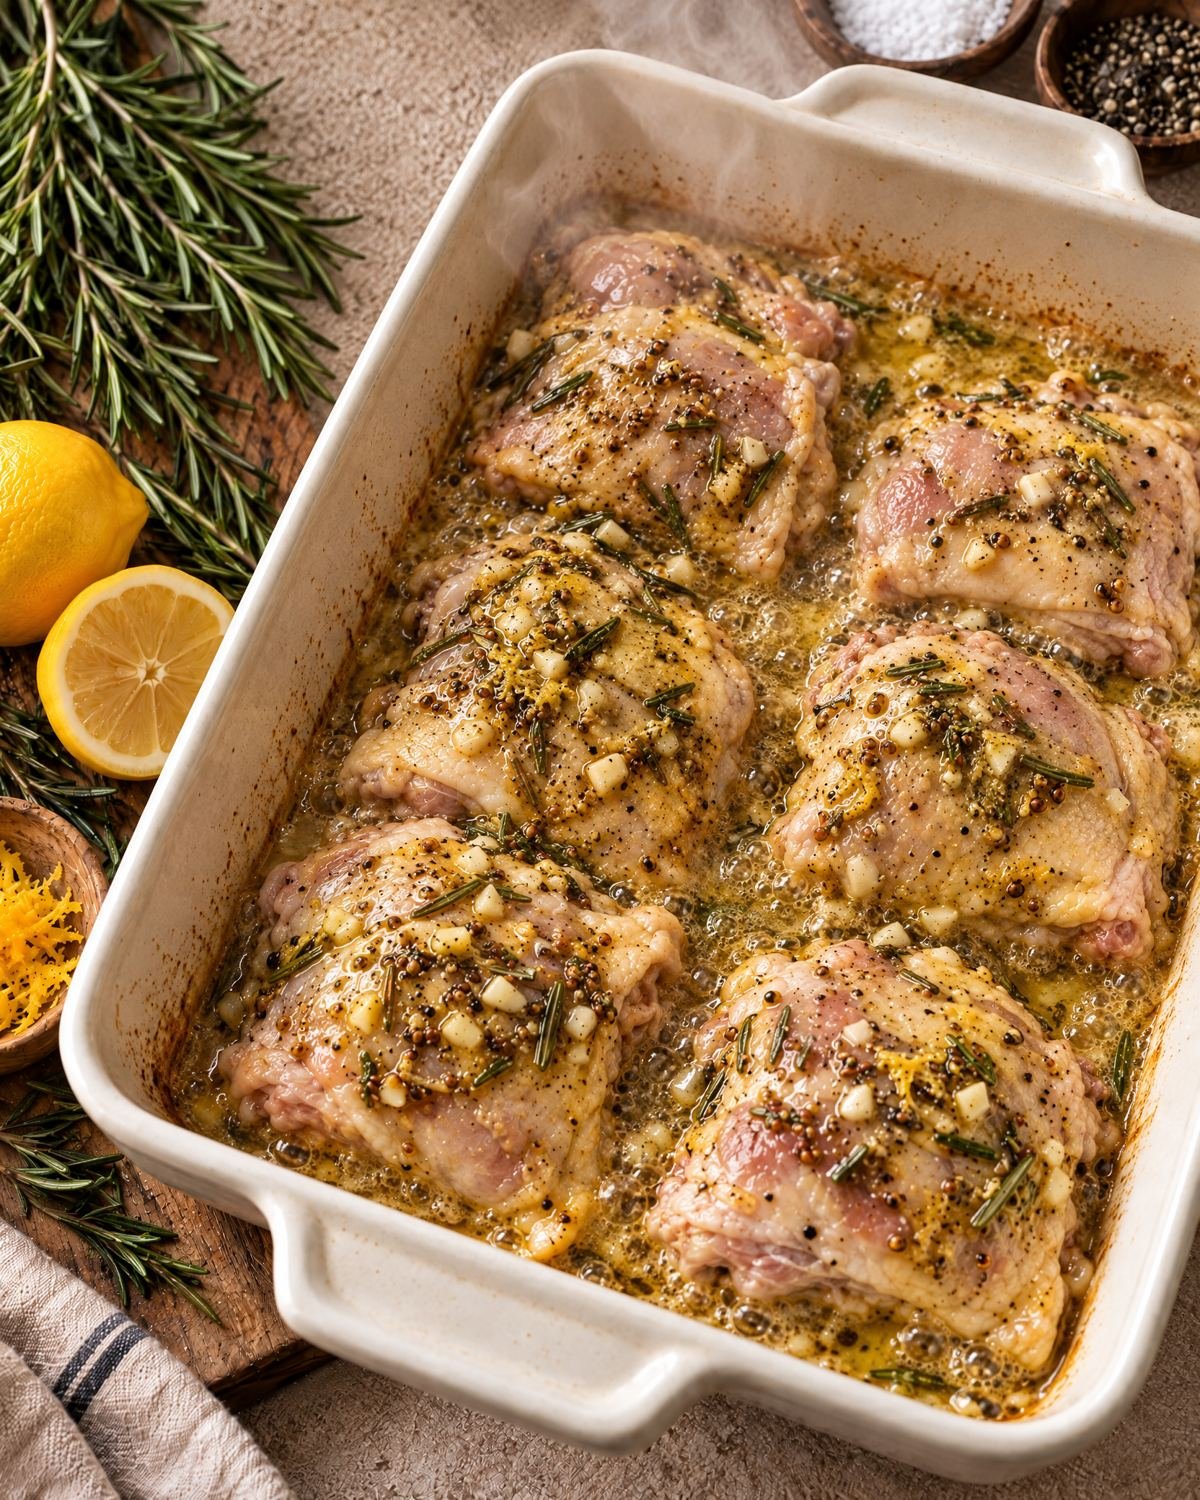
The first bake heats the chicken through while the skin rests against the bottom of the dish. Near the end of the 20 minutes, the pan juices should be hot and bubbling around the thighs. The visible meat side will look cooked around the edges, but the chicken is not finished yet and the skin will not have its final color.
Use oven mitts when pulling out the dish. Hot liquid can splatter when the pieces are turned. If the bottom of the dish looks dry before the chicken is ready to turn, add a small splash of water or unsalted chicken stock around the thighs rather than over the skin.
5. Turn the chicken and baste the meat
Remove the hot dish carefully. Turn each thigh skin-side up with tongs, keeping the pieces in one layer.
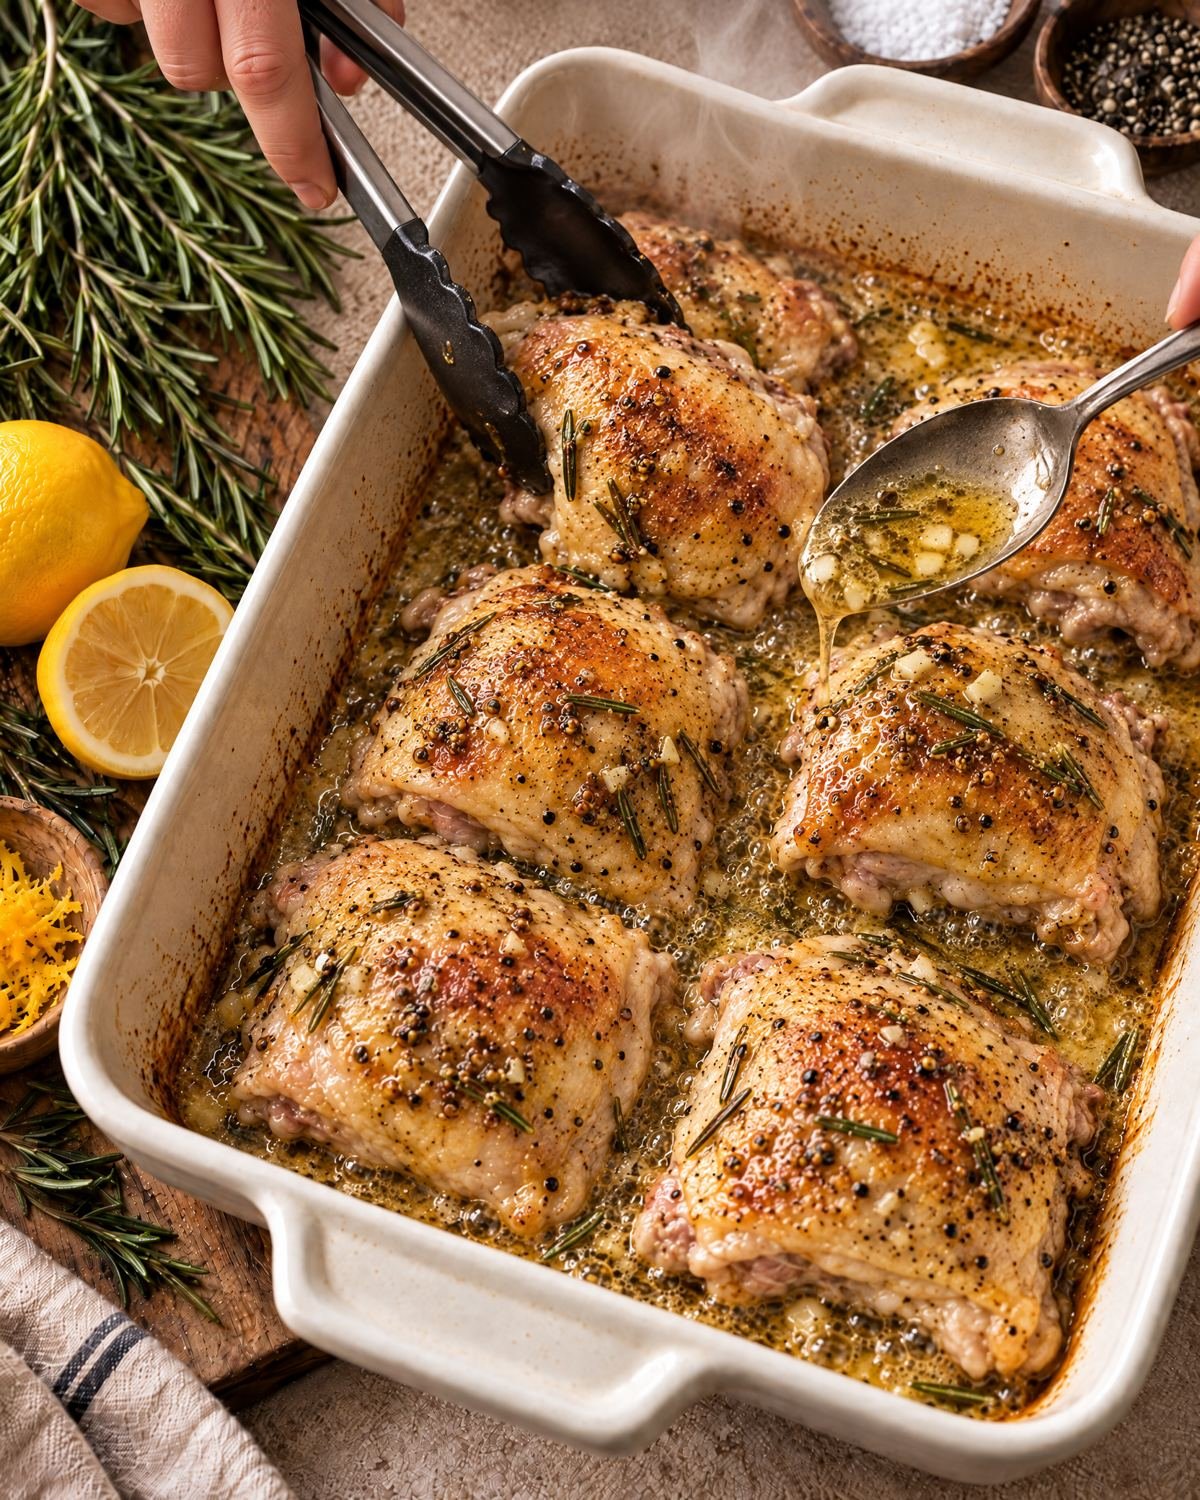
Spoon a little of the hot pan juice over the meat while leaving most of the skin uncovered. The skin should now begin to take on a light golden color, and the juices should bubble around the edges. Return the dish to the oven for another 30–35 minutes.
The exposed skin needs direct oven heat to brown. Pouring a thick layer of liquid over it can slow that browning, so baste the meat and leave the skin visible.
6. Finish baking and check the thickest thigh
Continue baking until the skin is deeply golden and the pan juices are bubbling. Timing depends on the size of the thighs and how accurately the oven holds 425°F.
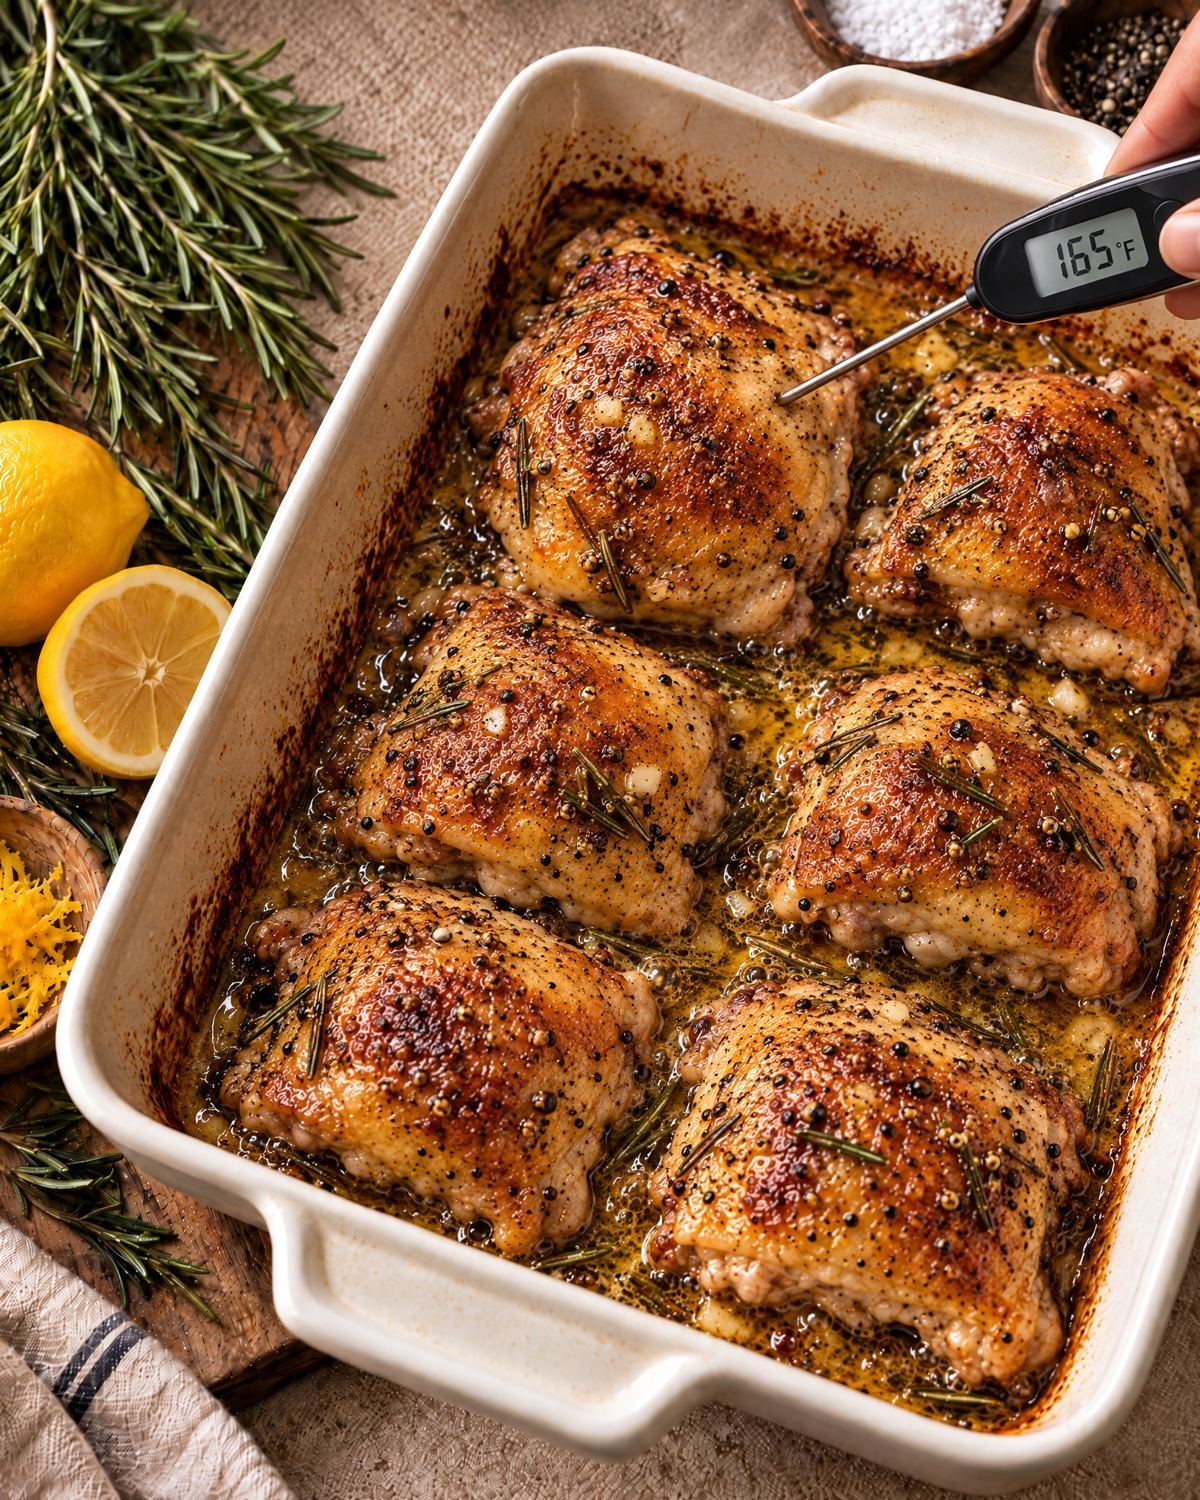
Insert an instant-read thermometer into the thickest part of the largest thigh without touching the bone. Remove the dish when the chicken reaches 165°F. The USDA safe temperature chart lists 165°F as the minimum internal temperature for all poultry, including thighs.
The surface should be browned and slightly firm, and the liquid should look glossy rather than watery. Color supports the check, but the thermometer makes the safety decision.
If the skin is already dark while the center is below 165°F, lay foil loosely over the dish and continue baking. If the center reaches 165°F before the skin has enough color, leave the dish uncovered for a few more minutes and watch it closely.
7. Rest, plate, and spoon over the pan juices
Take the dish out of the oven and let the chicken rest for 5–10 minutes. During this short rest, the pan will stop bubbling so the juices are easier to spoon without burning your hands.
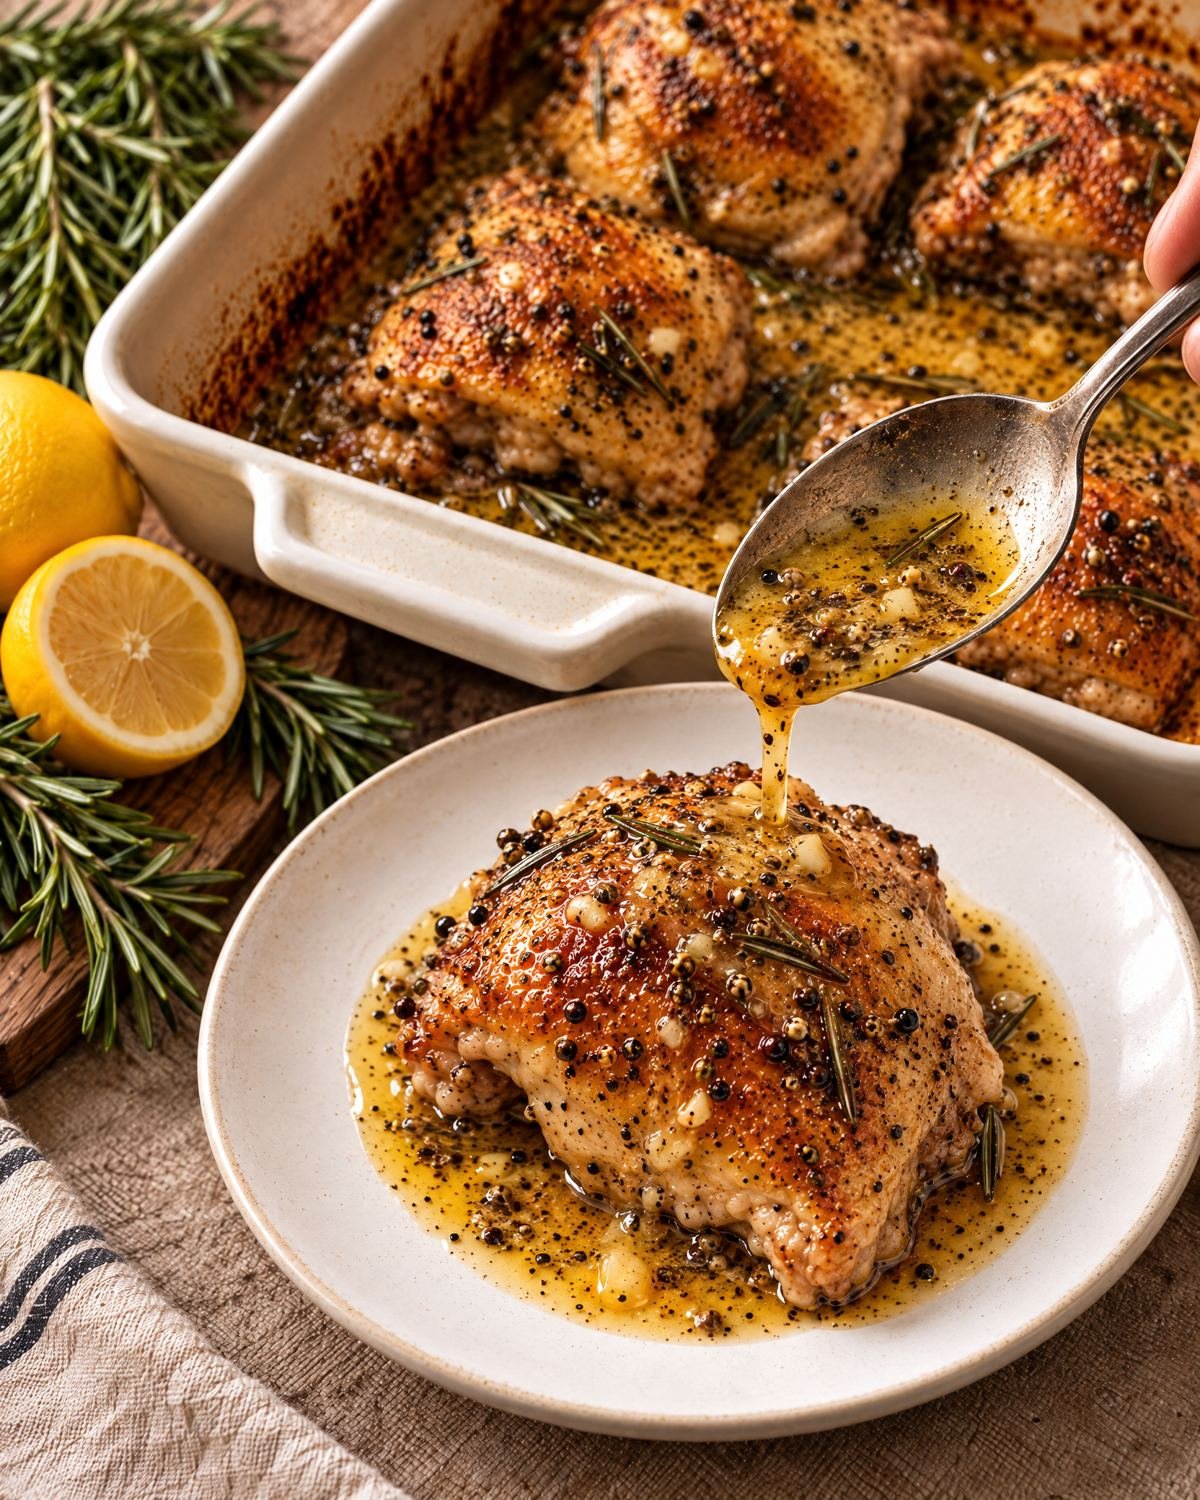
Lift the thighs with a wide serving spatula. Spoon the lemon-butter juices over each piece and add lemon slices or fresh rosemary if desired. Remove any woody rosemary stems before serving.
Rice, mashed potatoes, roasted vegetables, or a green salad all work with the pan juices. The dish is also good with crusty bread for soaking up the liquid.
What the Main Cooking Cues Mean
The 20-minute first bake is a turning point, not a finish line. Bubbling liquid tells you the dish is hot enough to continue, while the pale skin tells you it needs to face upward before the second bake.
After turning, a light golden surface and bubbling juices show that the oven is browning the skin and reducing the liquid. The largest thigh may need a little more time than the smaller pieces, so check the biggest one first and verify the temperature in more than one piece if their sizes differ greatly.
If the Skin Browns Before the Chicken Is Done
Loosely cover the dish with foil and keep baking. The cover slows surface browning while the center continues to heat. Remove the foil near the end if the skin needs a little more color.
If the skin stays soft, check whether it is covered by pan juices. Spoon liquid over the meat instead of across the skin, then continue uncovered for a few minutes once the center is close to 165°F.
Ingredient Swaps That Keep the Method Intact
Dijon mustard can replace stone-ground mustard. It will make the coating smoother and less textured, but the amount can stay the same. Mild paprika can replace smoked paprika when you want less smoke. Leave out the red pepper flakes for a milder dish.
Boneless thighs cook faster than bone-in thighs, so start checking them well before the listed finishing time. Drumsticks or leg quarters can use the same coating, but their shape and size change the cooking time; use the thermometer rather than copying the schedule.
Keeping Leftovers Good for the Week
Place leftover chicken in a covered container and refrigerate it within two hours. The USDA advises keeping leftovers refrigerated for 3–4 days or frozen for 3–4 months; its leftovers and food-safety guidance explains the storage and reheating limits.
Reheat the chicken uncovered in a 350°F oven with a spoonful of pan juices or stock in the dish. Heat until the center reaches 165°F. The skin will soften somewhat after refrigeration, but uncovered oven reheating keeps it firmer than tightly covered steaming.
Facts About This Recipe
- Chicken thighs can tolerate a longer oven cook than very lean chicken cuts because the thighs contain more connective tissue and fat.
- Bone-in pieces take longer to cook than boneless pieces of similar weight, which is why the recipe uses a thermometer rather than a fixed time alone.
- Mustard helps the lemon, oil, and melted butter stay together long enough to coat the chicken evenly.
- A short rest makes the hot pan juices easier to spoon and gives the chicken time to cool slightly before serving.
FAQ
Can I use boneless chicken thighs?
Yes. They usually finish sooner than bone-in thighs. Begin checking early and remove them when the thickest part reaches 165°F.
Can I prepare the coating ahead?
Yes. Mix the coating shortly before cooking and keep it covered in the refrigerator if you need to pause. Bring it back to a pourable consistency before using. Do not reuse a mixture that has touched raw chicken unless it is cooked thoroughly.
Do I need to sear the chicken on the stove?
No. The recipe uses the oven for both cooking and browning. The first stage keeps the skin-side down, and the second stage exposes the skin to the oven heat.
What if the thighs are different sizes?
Place the largest pieces toward the hotter center area of the dish when possible, and check the thickest thigh first. Smaller pieces may reach 165°F earlier; remove them if needed while the larger pieces finish.
Can I freeze the cooked chicken?
Yes. Cool it promptly, seal it well, and freeze it for up to 3–4 months for best quality. Thaw it in the refrigerator and reheat the center to 165°F.
Recipe Card
Recipe: Lemon Rosemary Chicken
Summary: Bone-in chicken thighs are coated with lemon juice, rosemary, garlic, mustard, butter, and spices. They bake skin-side down first, then are turned and browned until the thickest part reaches 165°F.
Prep time: About 5 minutes
Cook time: About 45–55 minutes
Total time: About 50–60 minutes
Yield: One 13-by-9-inch baking dish of chicken thighs
Equipment: Small bowl, whisk or spoon, 13-by-9-inch baking dish, tongs, and instant-read thermometer
Ingredients:
- 2 pounds bone-in, skin-on chicken thighs
- 1 tablespoon stone-ground mustard
- 3 tablespoons fresh lemon juice
- 2 tablespoons olive oil
- 2 tablespoons unsalted butter, melted
- 3 garlic cloves, minced
- 2 tablespoons fresh rosemary, finely chopped
- 1 teaspoon smoked paprika
- 1/2 teaspoon red pepper flakes, optional
- 1 teaspoon kosher salt
- 1/2 teaspoon freshly ground black pepper
- Lemon slices and rosemary sprigs, optional for serving
Instructions:
- Heat the oven to 425°F. Whisk the mustard, lemon juice, olive oil, melted butter, garlic, rosemary, smoked paprika, red pepper flakes, salt, and black pepper in a small bowl.
- Pat the chicken dry and arrange the thighs skin-side down in a 13-by-9-inch baking dish.
- Pour the coating over the chicken. Turn the thighs with tongs until coated, then return them to one layer skin-side down.
- Bake for 20 minutes, until the pan juices are bubbling and the chicken is ready to turn.
- Turn the thighs skin-side up and baste the meat with pan juices while keeping the skin exposed.
- Bake for another 30–35 minutes. Check the thickest part of the largest thigh without touching the bone. Remove the chicken at 165°F and when the skin is browned.
- Rest for 5–10 minutes. Plate the chicken and spoon over the lemon-butter pan juices.
Storage: Refrigerate leftovers within two hours and use within 3–4 days, or freeze for 3–4 months. Reheat to 165°F.
Allergen note: Contains dairy from butter and mustard. Check packaged ingredient labels for additional allergens.
Conclusion
Prepare the coating before the oven heats fully, keep the thighs in one layer, and reserve the final decision for the thermometer. The dish is ready to serve when the skin is browned, the pan juices are glossy, and the thickest thigh reaches 165°F. For another chicken dinner on Tasty Hearth, try Easy Chicken Alfredo Pasta.