5 Crispy Chicken Sandwiches (Hot Honey, Korean & More)
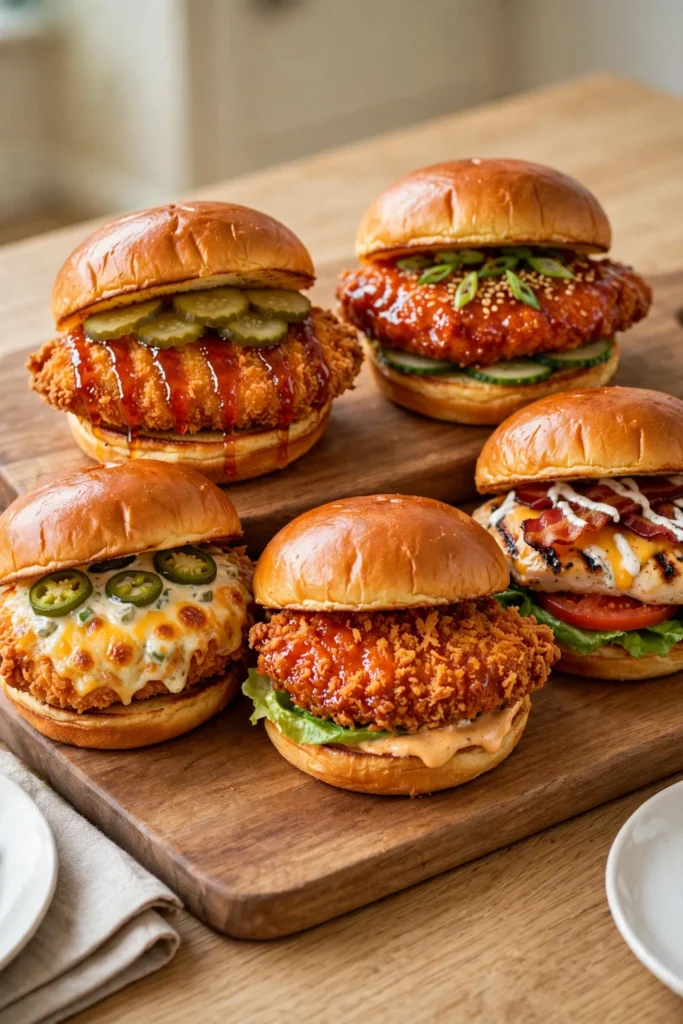
Five crispy chicken sandwiches from one batch of golden cutlets: hot honey pickle, Korean gochujang, jalapeño popper, spicy fried, and bacon ranch.
 Pin it
One batch of golden, shattering-crisp chicken cutlets — and five completely different sandwiches from it. There is a hot honey and pickle one with sweet heat running down the crust, a Korean-style sandwich lacquered in gochujang glaze, a jalapeño popper version with a molten cheddar cap, a spicy fried one brushed with red chile oil, and a bacon ranch built on a grilled (not fried) cutlet for contrast. The first section below makes the shared crispy base once. After that, pick a sandwich and follow only its section.
- Sandwich 1: Hot Honey Pickle Chicken Sandwich
- Sandwich 2: Crispy Korean Chicken Sandwich with Gochujang Sauce
- Sandwich 3: Jalapeño Popper Chicken Sandwich
- Sandwich 4: Spicy Fried Chicken Sandwich
- Sandwich 5: Bacon Ranch Chicken Sandwich
The Shared Base: Crispy Chicken Cutlets
Everything here starts with the same cutlets, so make this part once no matter which sandwich (or sandwiches) you are building. Four cutlets get the full panko breading and a shallow fry; the fifth stays plain for the grilled bacon ranch sandwich. The whole base takes under an hour, and the frying is the only part that asks for your full attention.
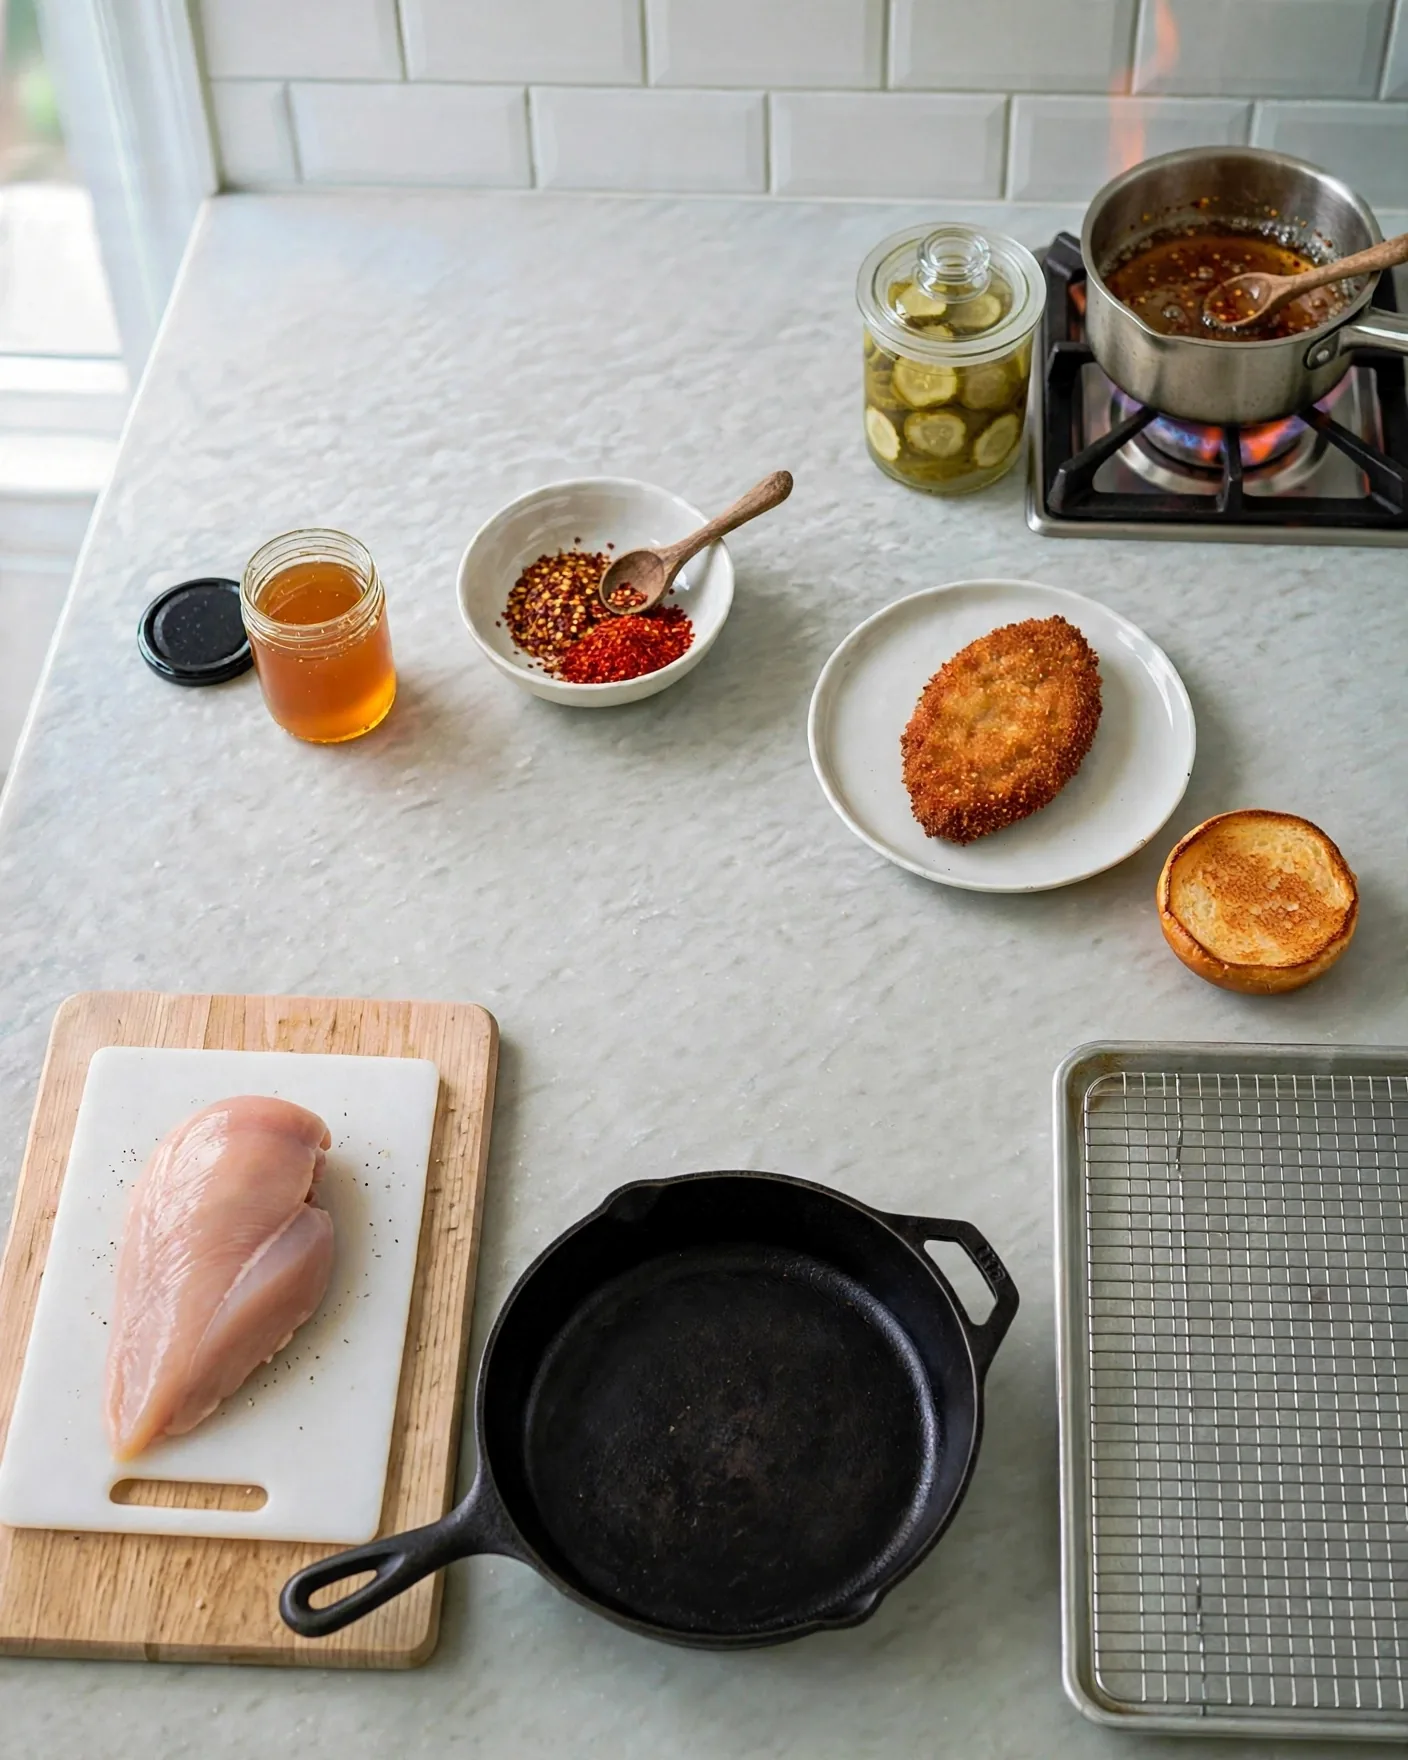
Here is everything the base needs, laid out before you start.
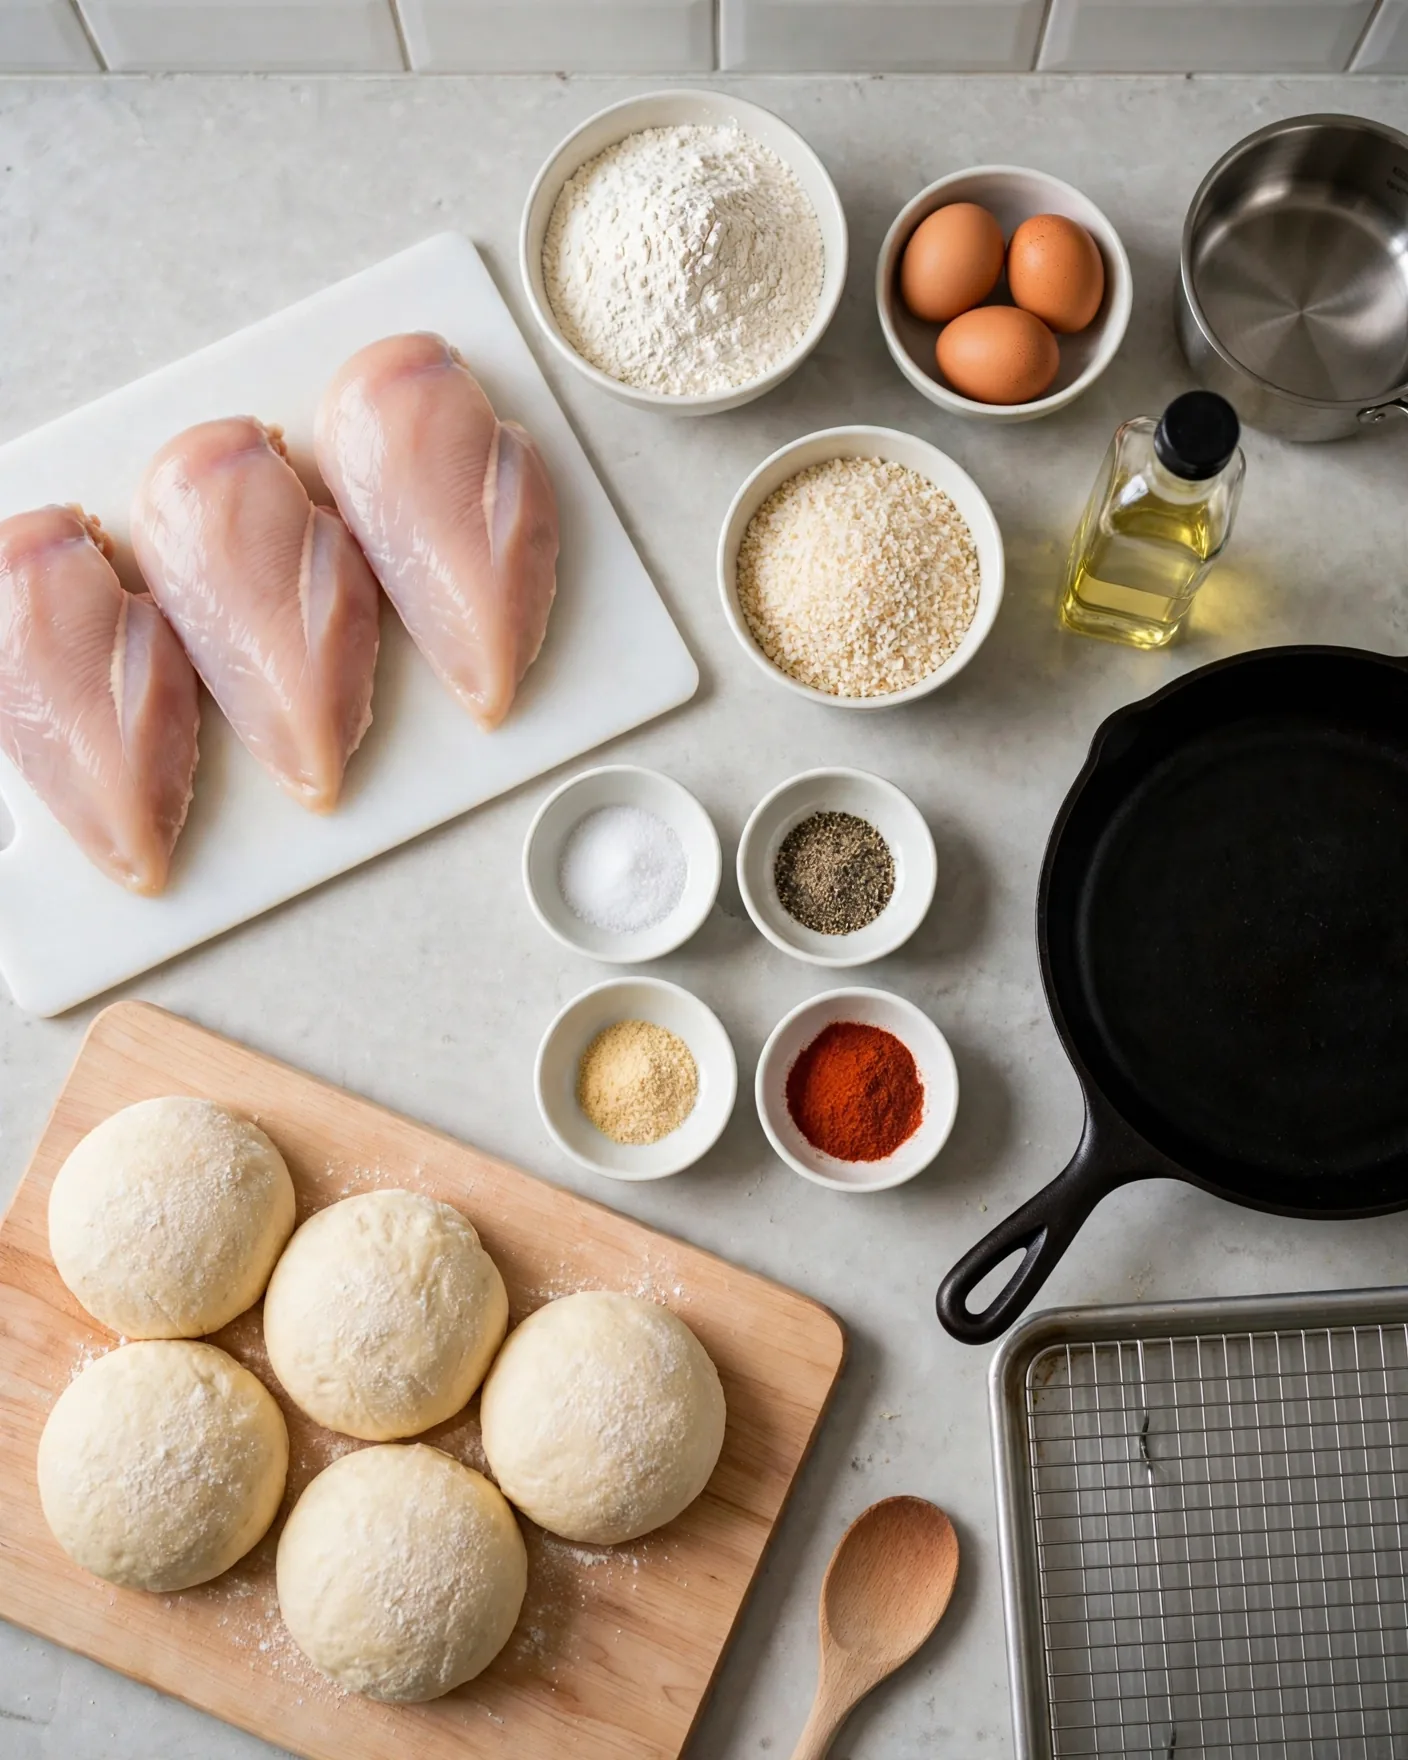
Ingredients — Shared Base (makes 5 cutlets and 5 buns)
- 3 large boneless, skinless chicken breasts (about 2 to 2¼ lb / 900 g to 1 kg)
- 1 teaspoon kosher salt, plus more for the flour
- ½ teaspoon black pepper
- 1 cup (125 g) all-purpose flour
- 1 teaspoon garlic powder
- 1 teaspoon paprika
- 3 large eggs
- 2 cups (about 100 g) panko breadcrumbs
- Neutral oil with a high smoke point, such as canola, vegetable, or peanut — about 2 cups, or enough for ½ inch in a 12-inch skillet
- 5 brioche buns, split
You will also need: a 12-inch cast-iron skillet, a wire rack set on a rimmed baking sheet, a meat mallet (or heavy rolling pin), three shallow dishes for breading, tongs, and an instant-read thermometer.
Step 1: Slice and Pound the Chicken
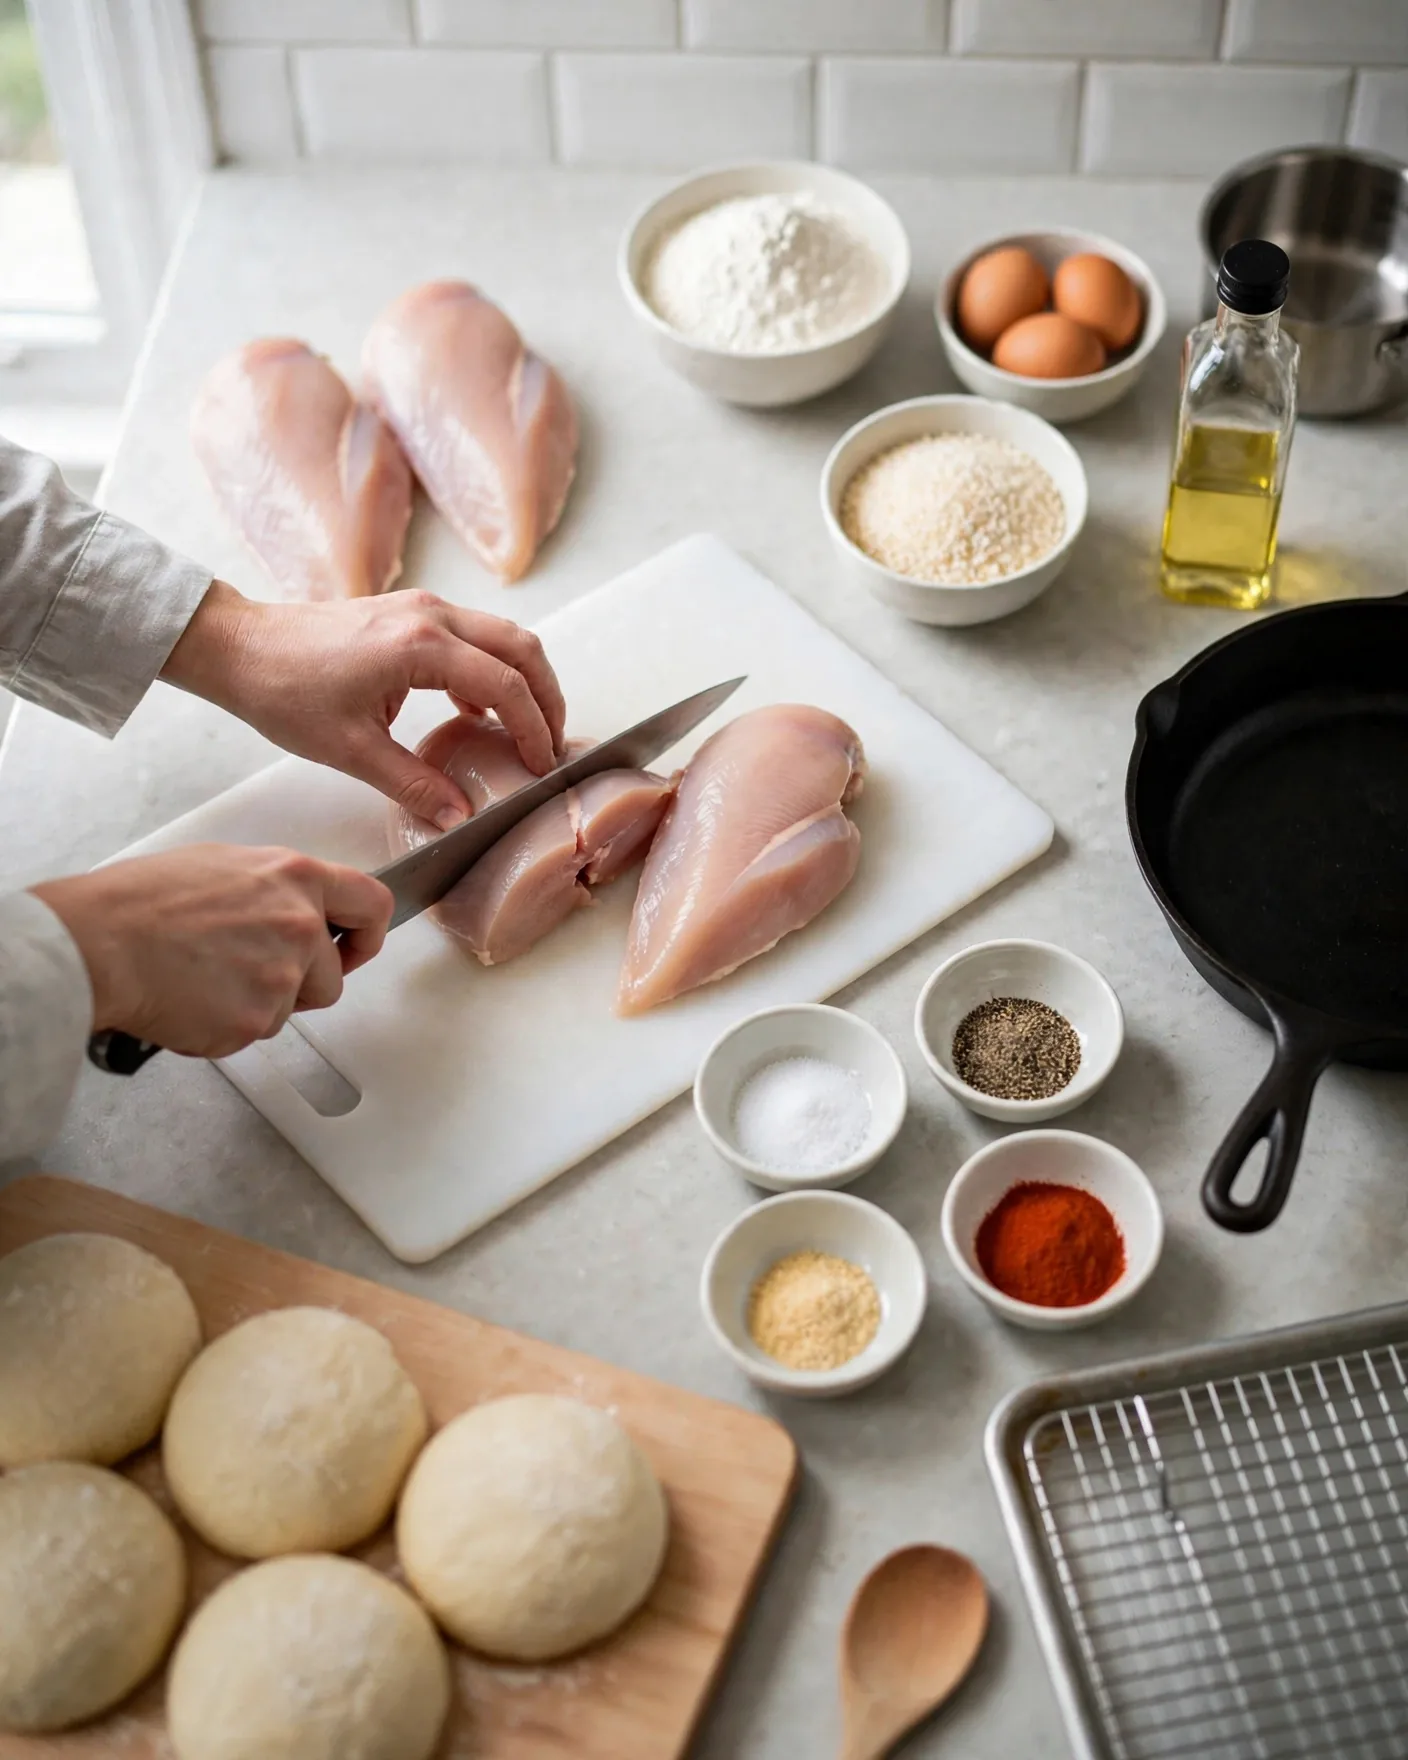
Lay a chicken breast flat on the white plastic board — keep raw chicken on this board only, away from the maple board you will use for vegetables later. Slice each breast horizontally into thin cutlets, holding your knife parallel to the board and cutting with long, even strokes. You need 5 cutlets total.
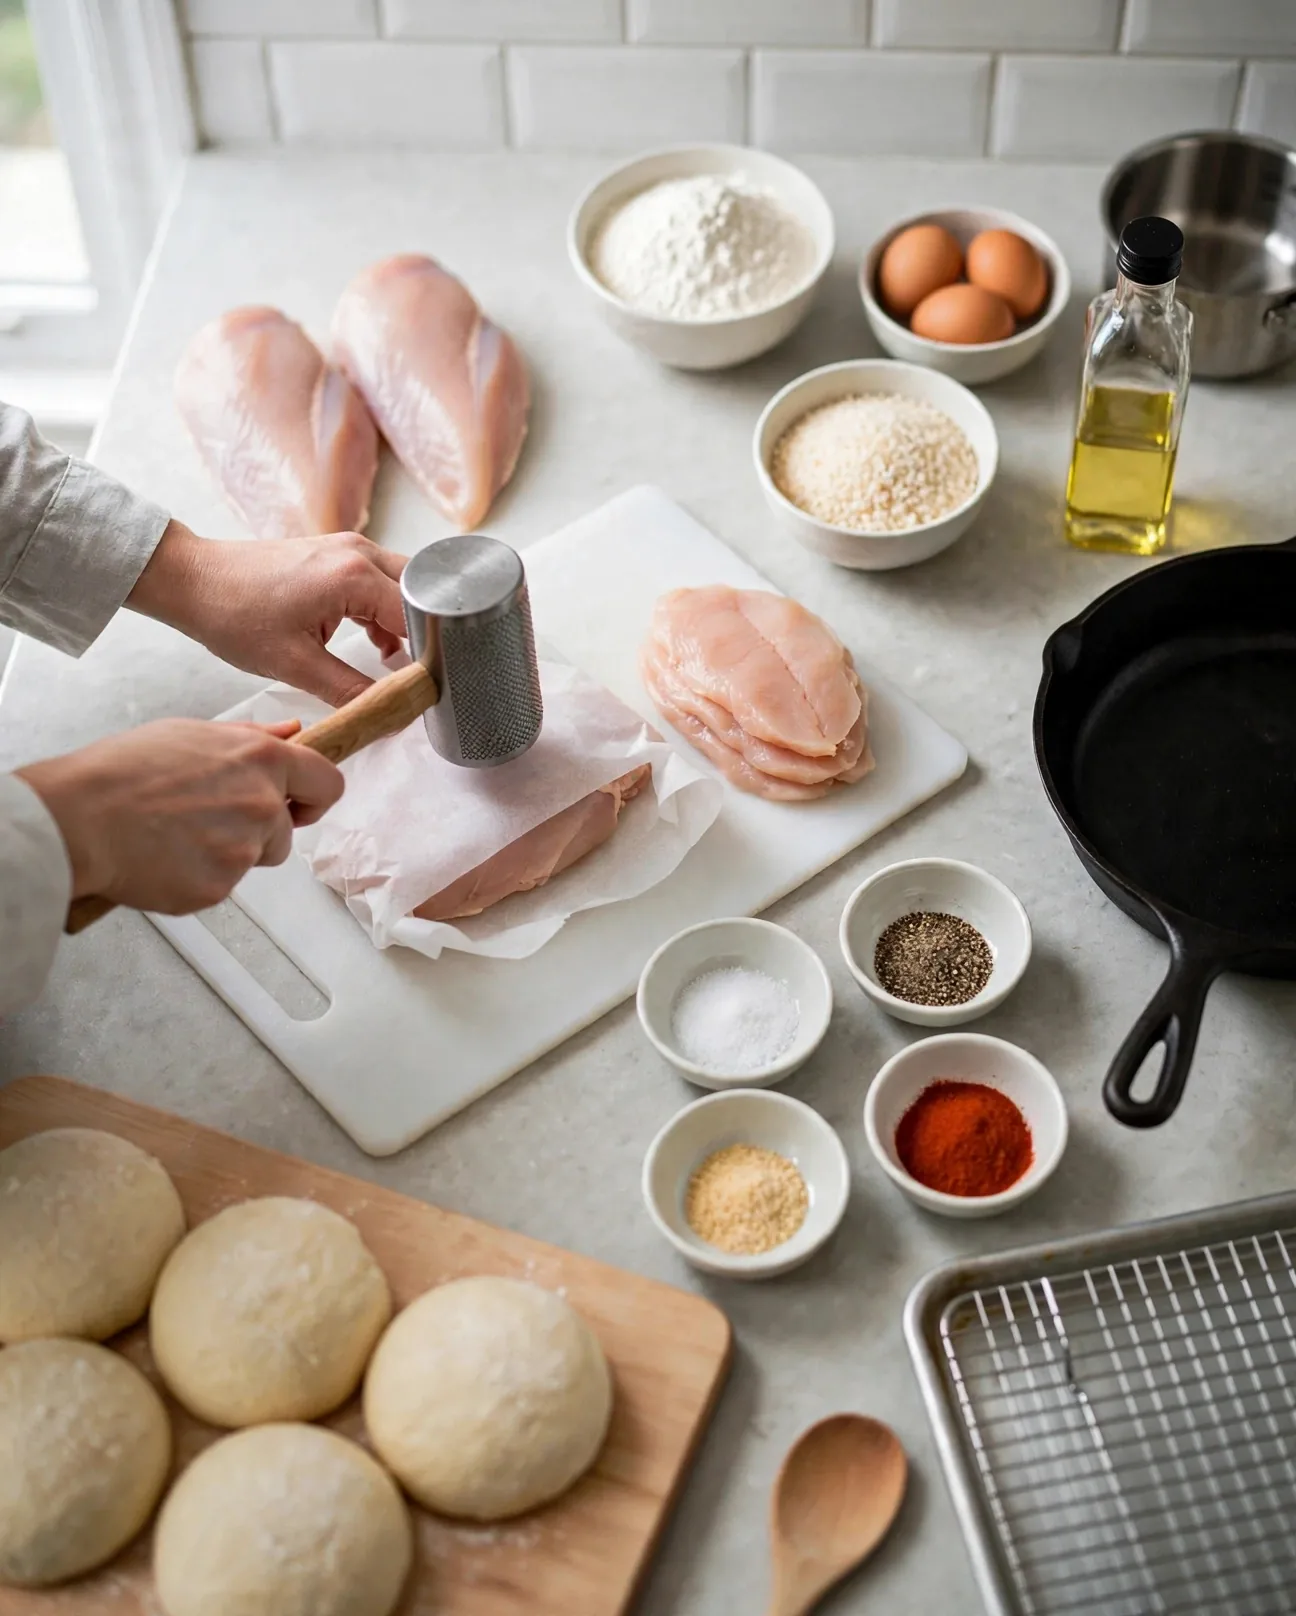
Cover a cutlet with parchment and pound it to an even ½-inch thickness, working from the center outward. Uneven cutlets cook unevenly: thin edges dry out while the thick middle stays underdone. Repeat with the rest.
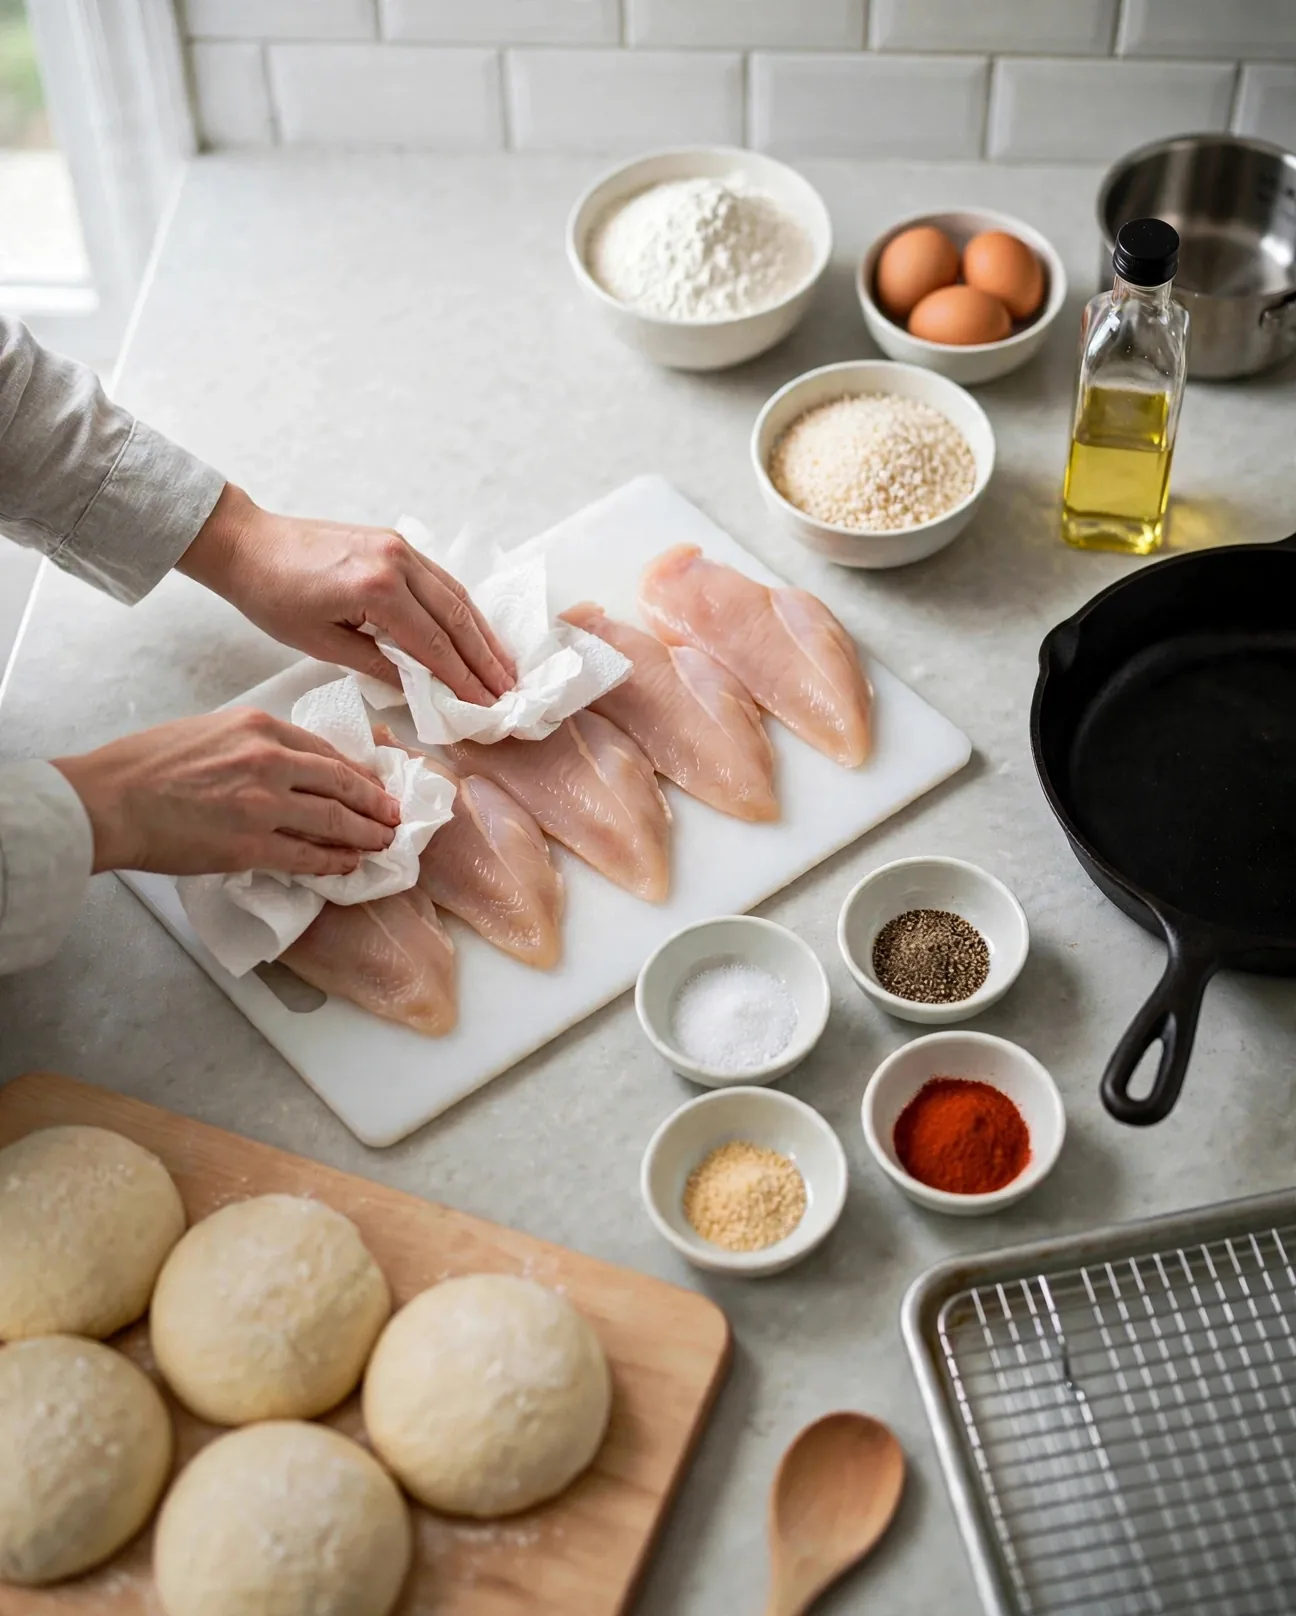
Press paper towels firmly onto both sides of each cutlet until the surfaces look matte, not wet. Breading clings to dry chicken and slides off wet chicken, so this dull little chore decides how well your crust sticks.
Season all five cutlets on both sides with the salt and pepper. Set the fifth cutlet on a small plate, cover it, and put it in the refrigerator — it stays unbreaded for the grilled bacon ranch sandwich.
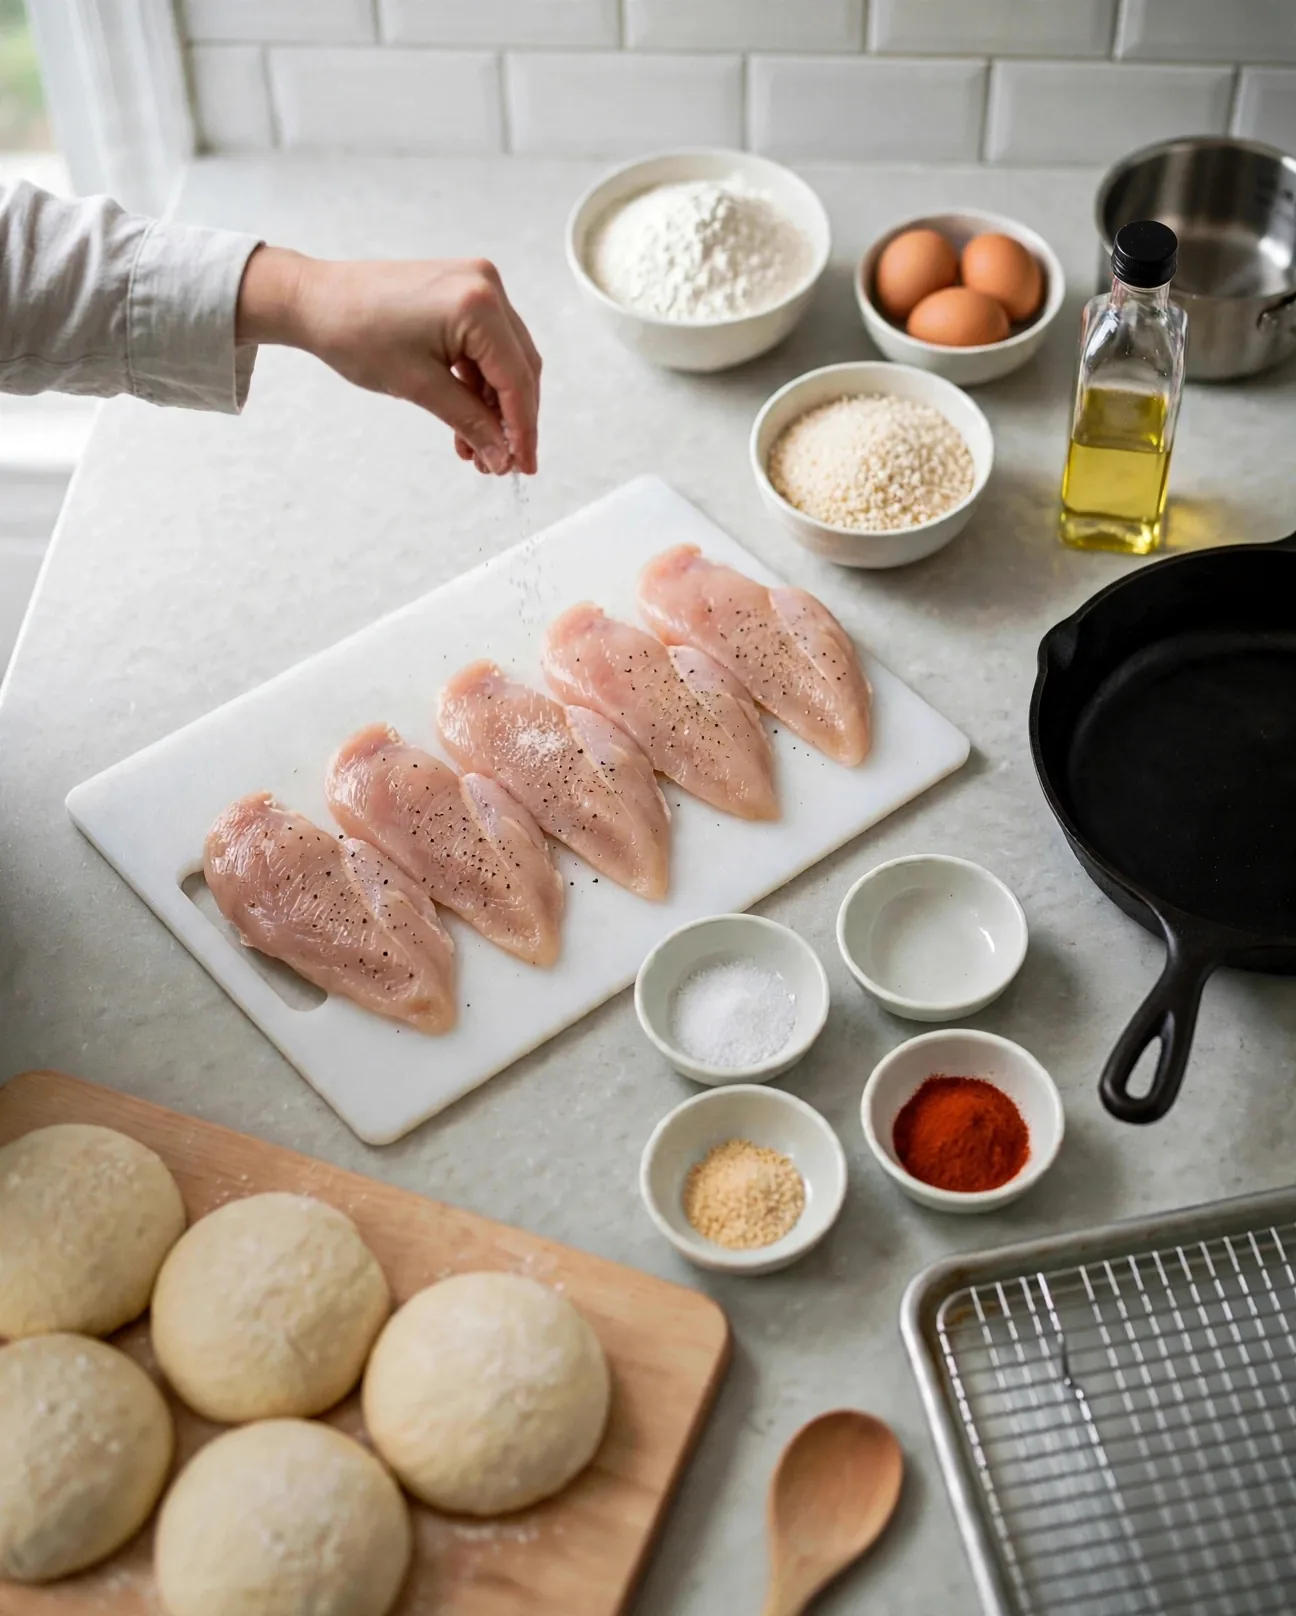
Safety note: wash your hands, the knife, and the plastic board with hot soapy water after handling raw chicken, before you touch anything else.
Step 2: Set Up the Breading Station
Whisk the flour, garlic powder, paprika, and the extra teaspoon of salt together in the first shallow dish until the paprika is evenly streaked through. The seasoned flour is the flavor foundation under the crust.
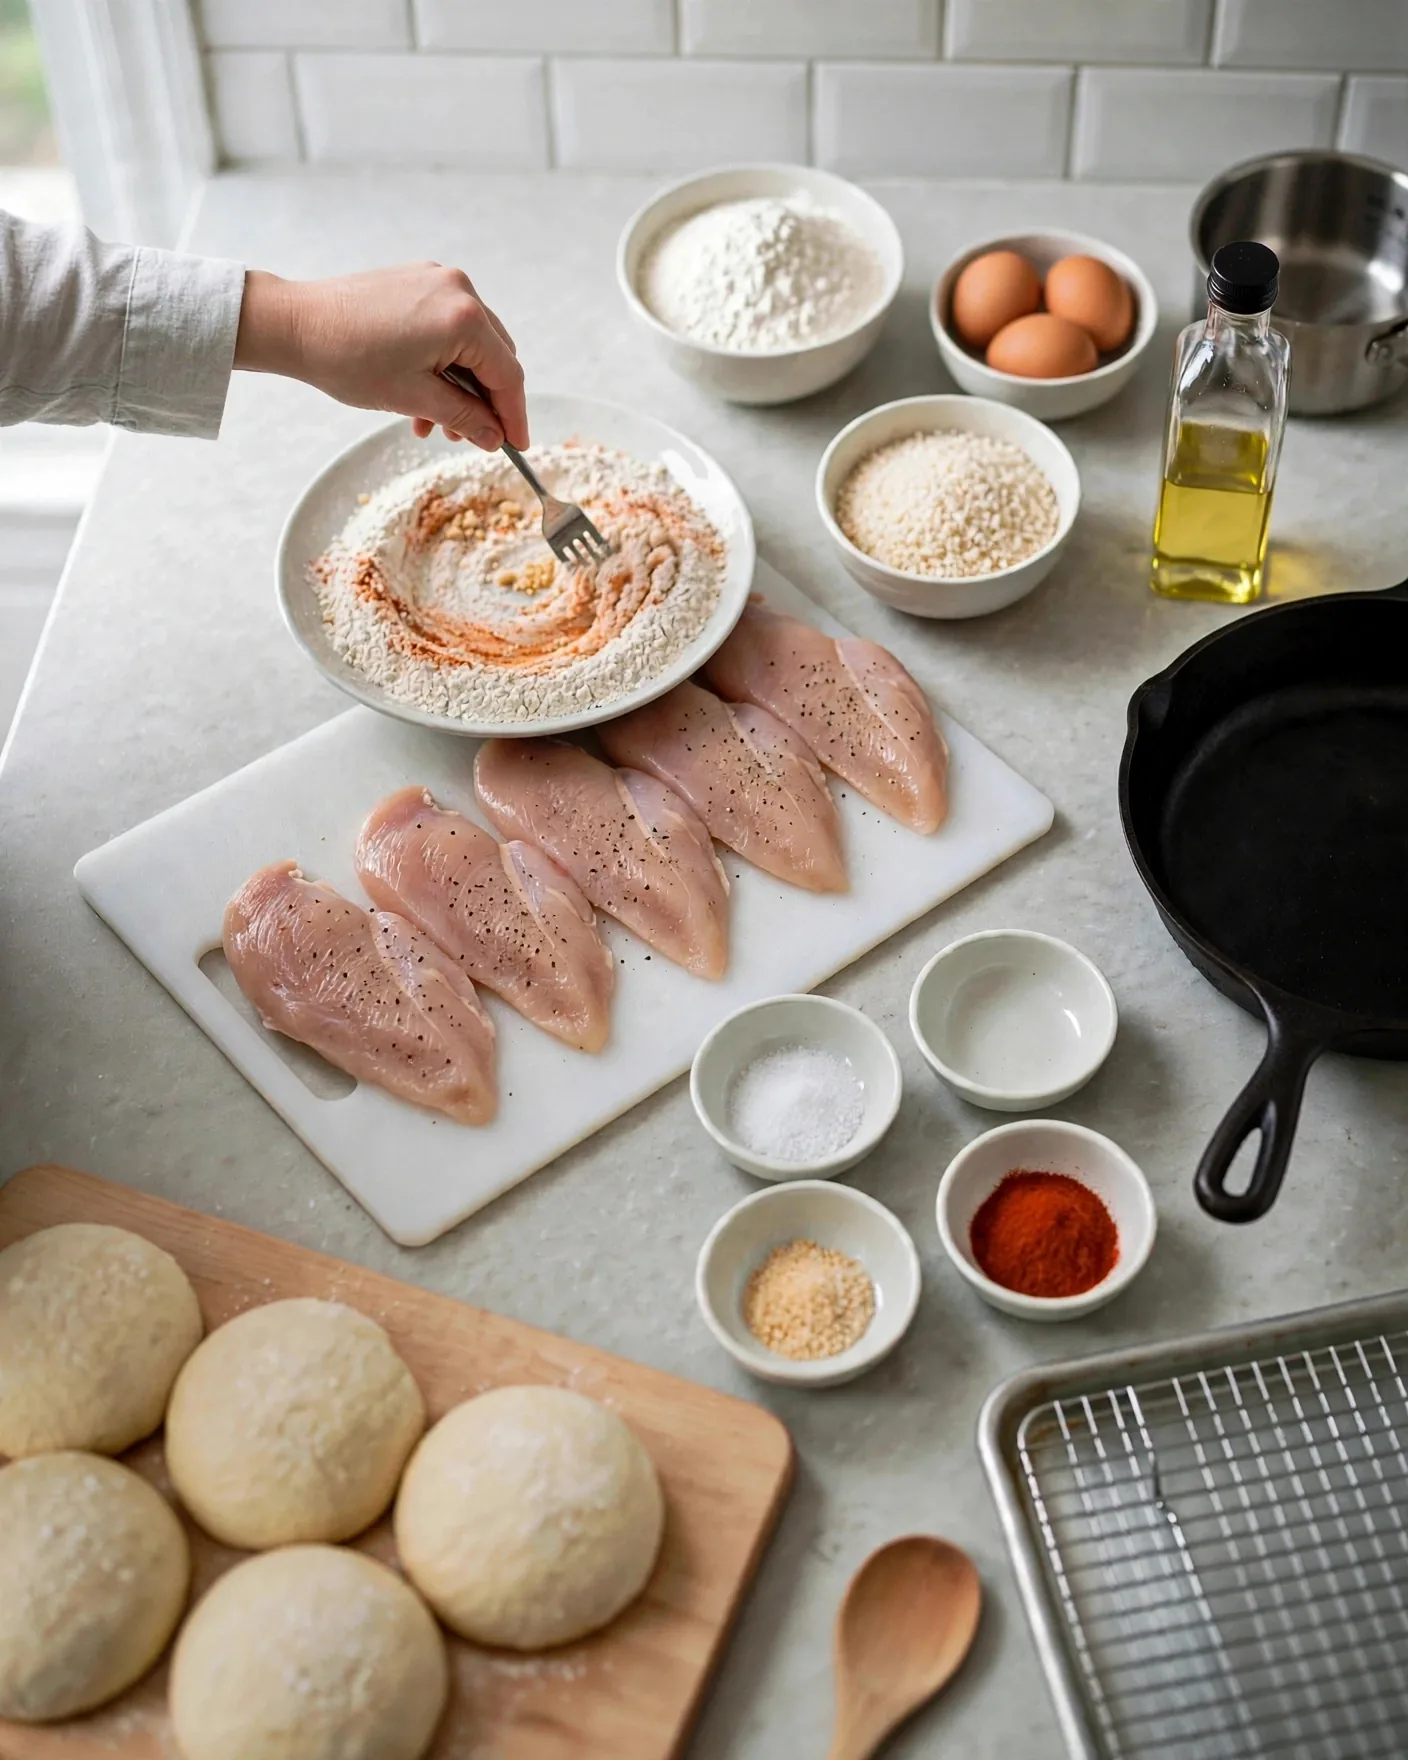
Crack the eggs into the second dish and beat them with a fork until no streaks of white remain.
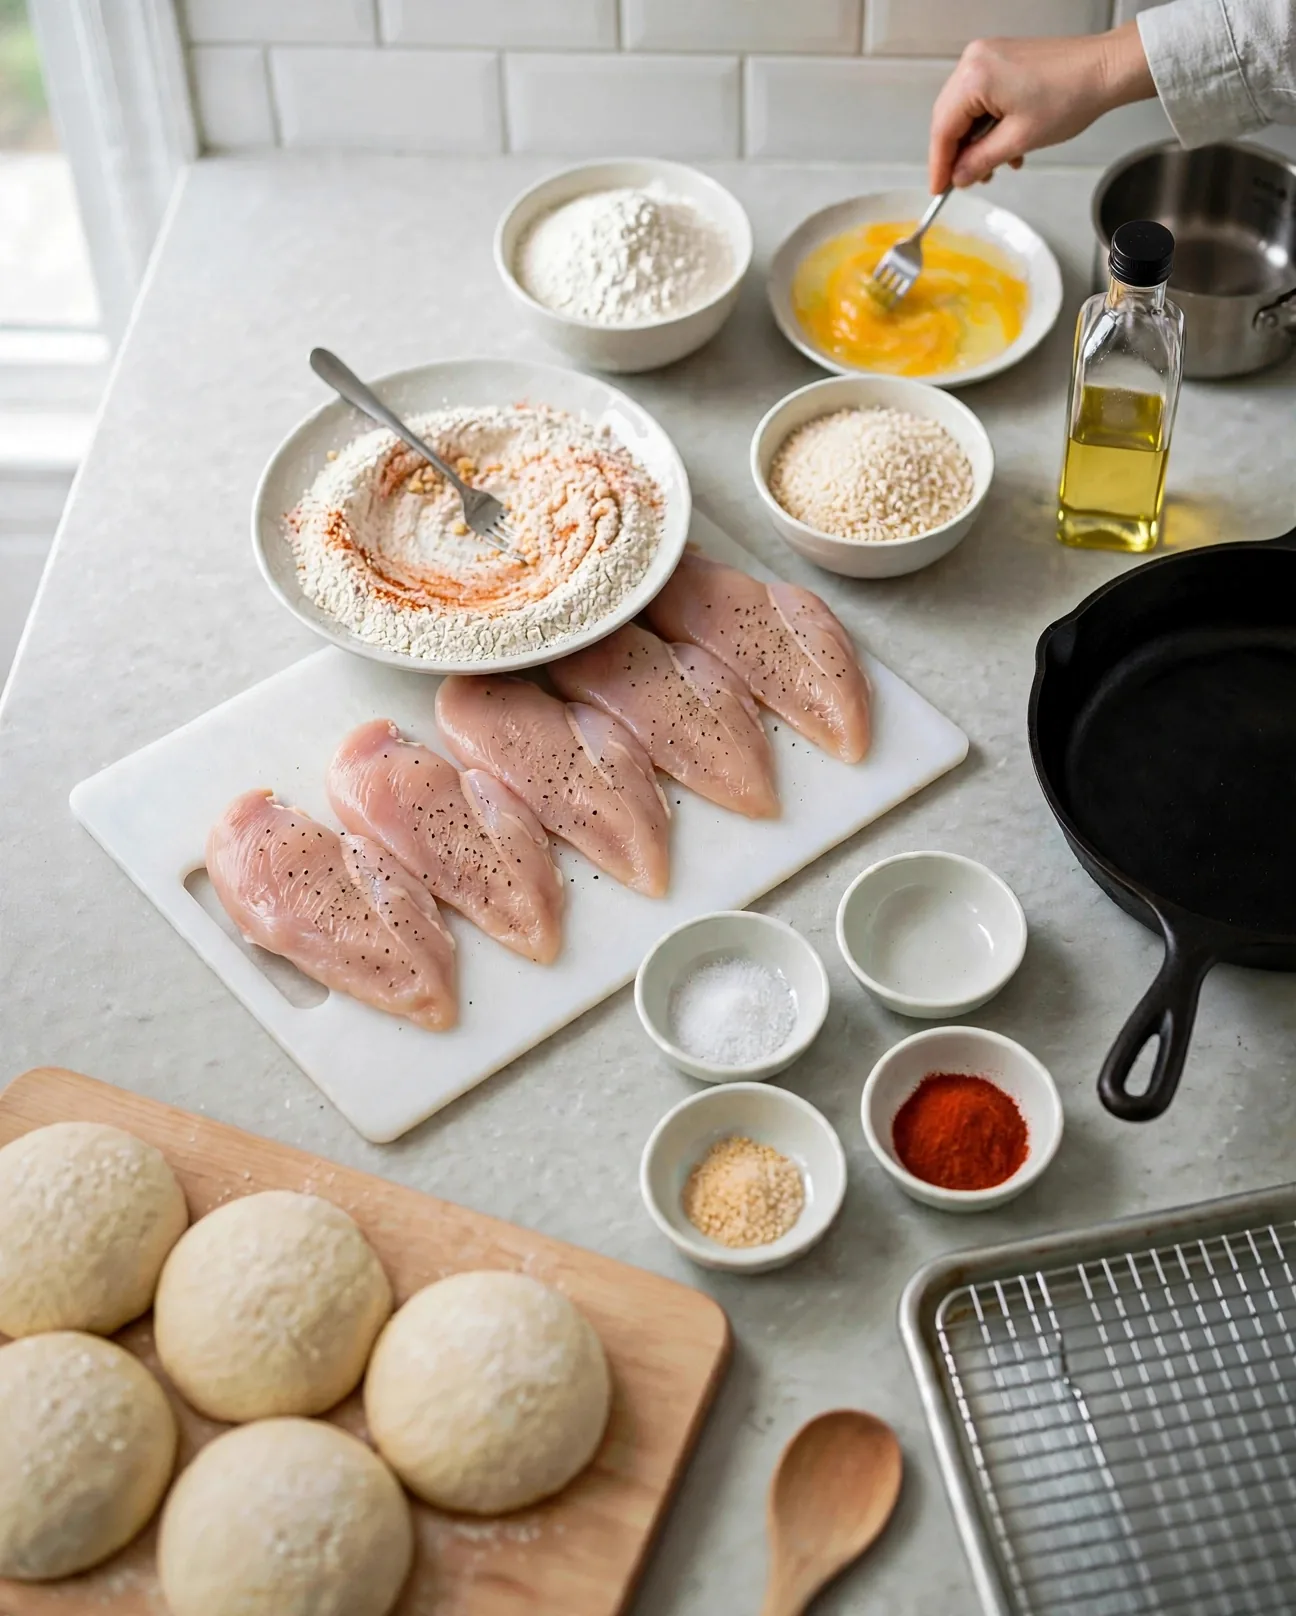
Line everything up left to right: the board with the four seasoned cutlets, the flour, the eggs, the panko, and the wire rack on its baking sheet at the end. A set station means you are not hunting for the next dish with eggy hands.
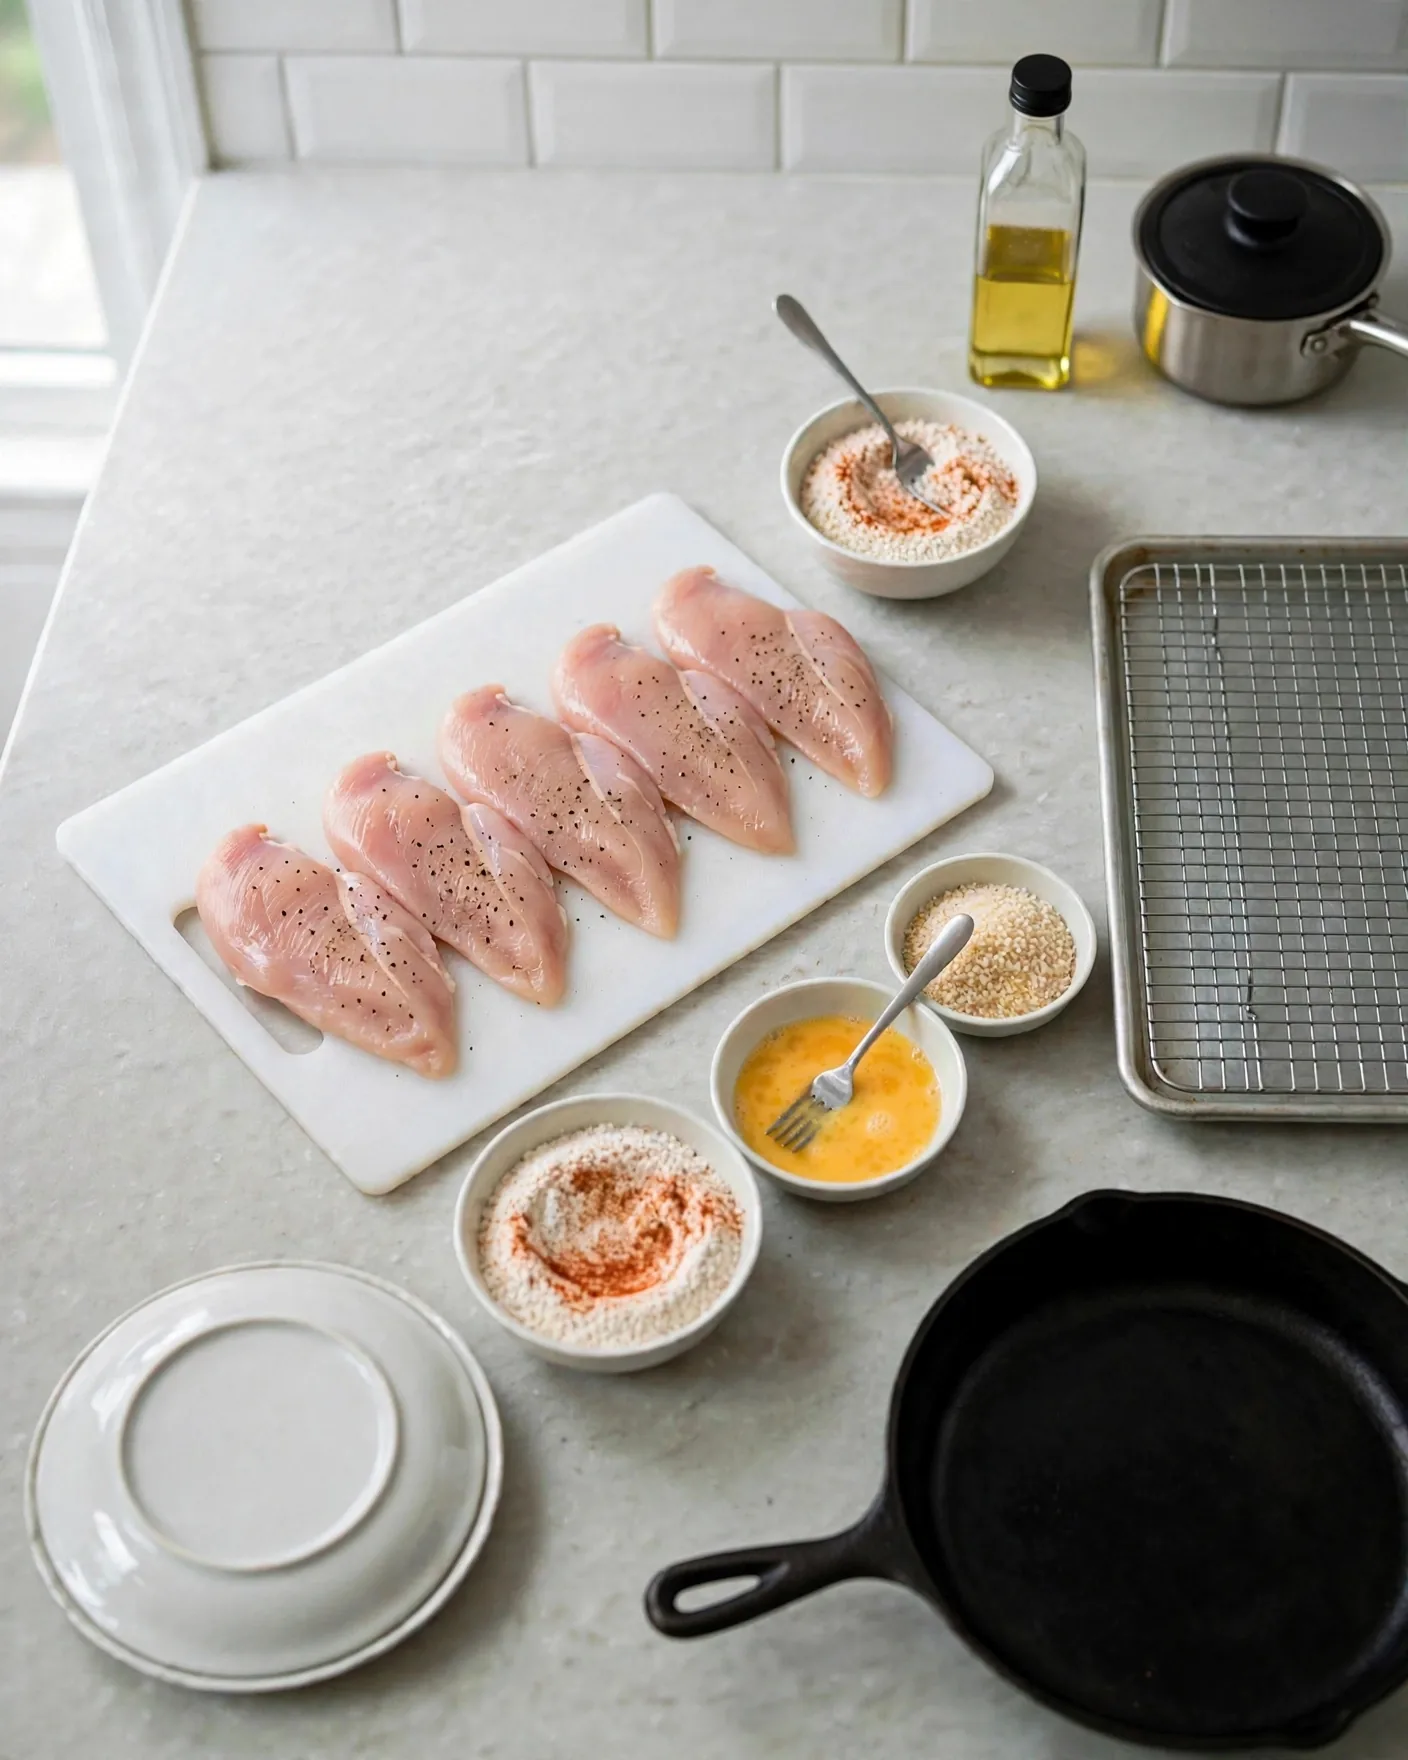
Step 3: Bread the Cutlets
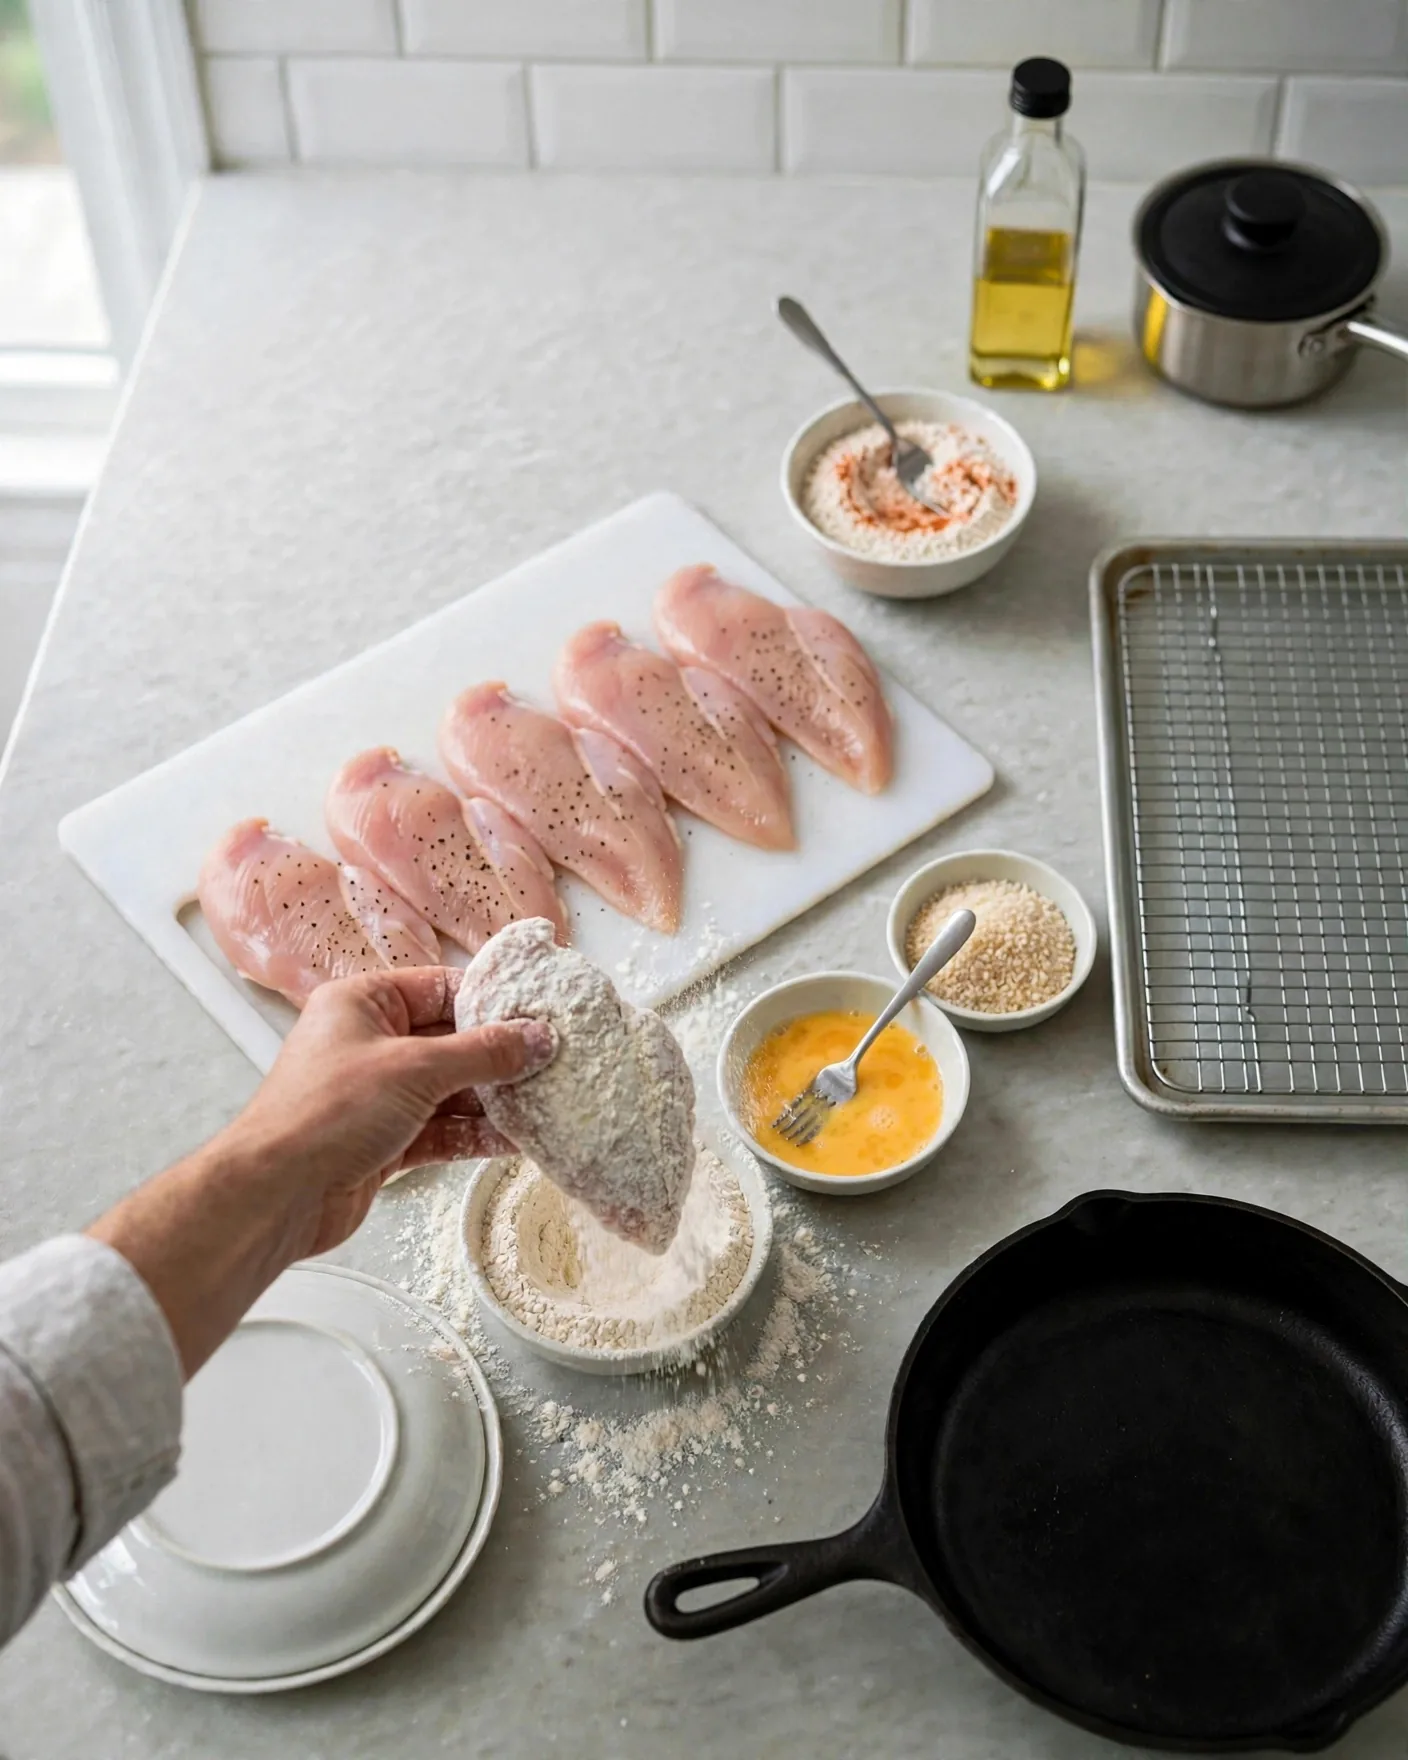
Working with one cutlet at a time, dredge it in the seasoned flour and shake off the excess — you want a thin, even dusting, not a thick paste. Too much flour makes a gummy layer under the crust.
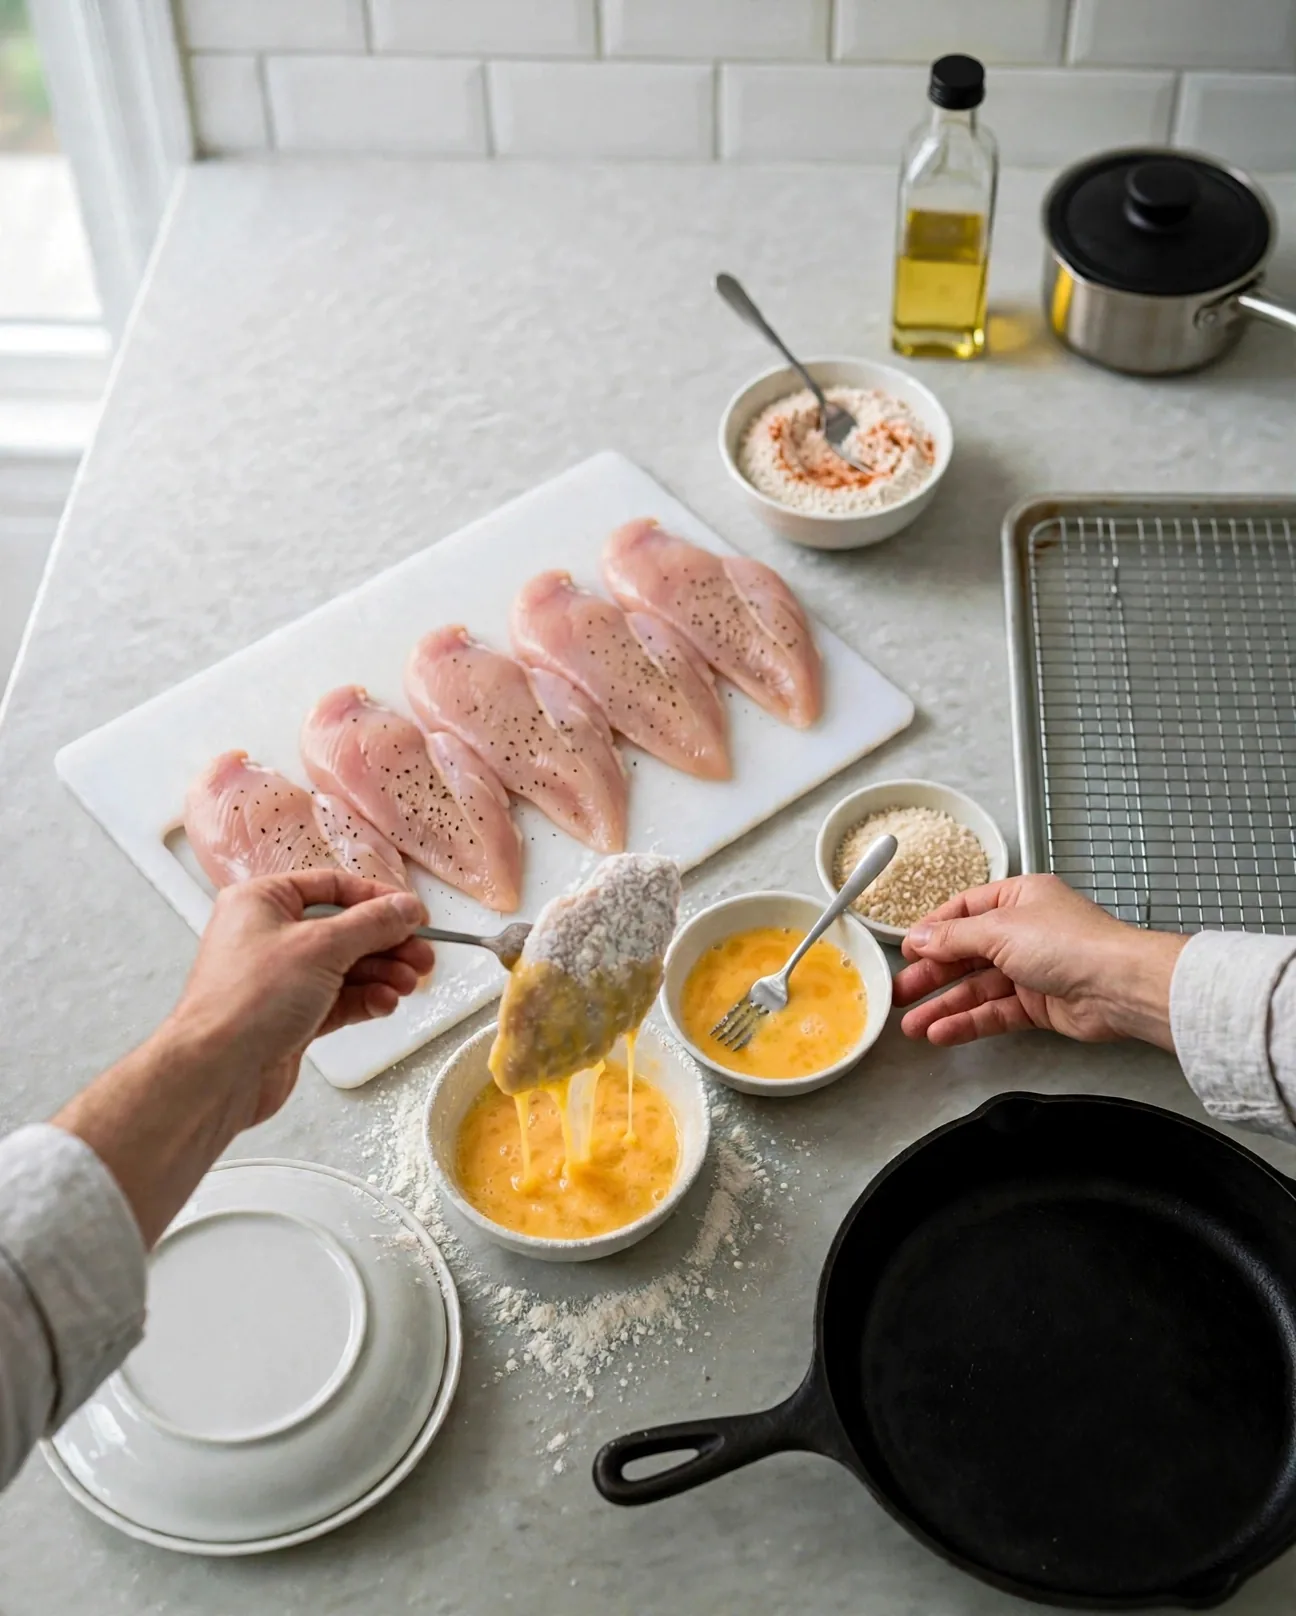
Dip the floured cutlet into the beaten eggs, letting the excess drip back into the dish for a few seconds.
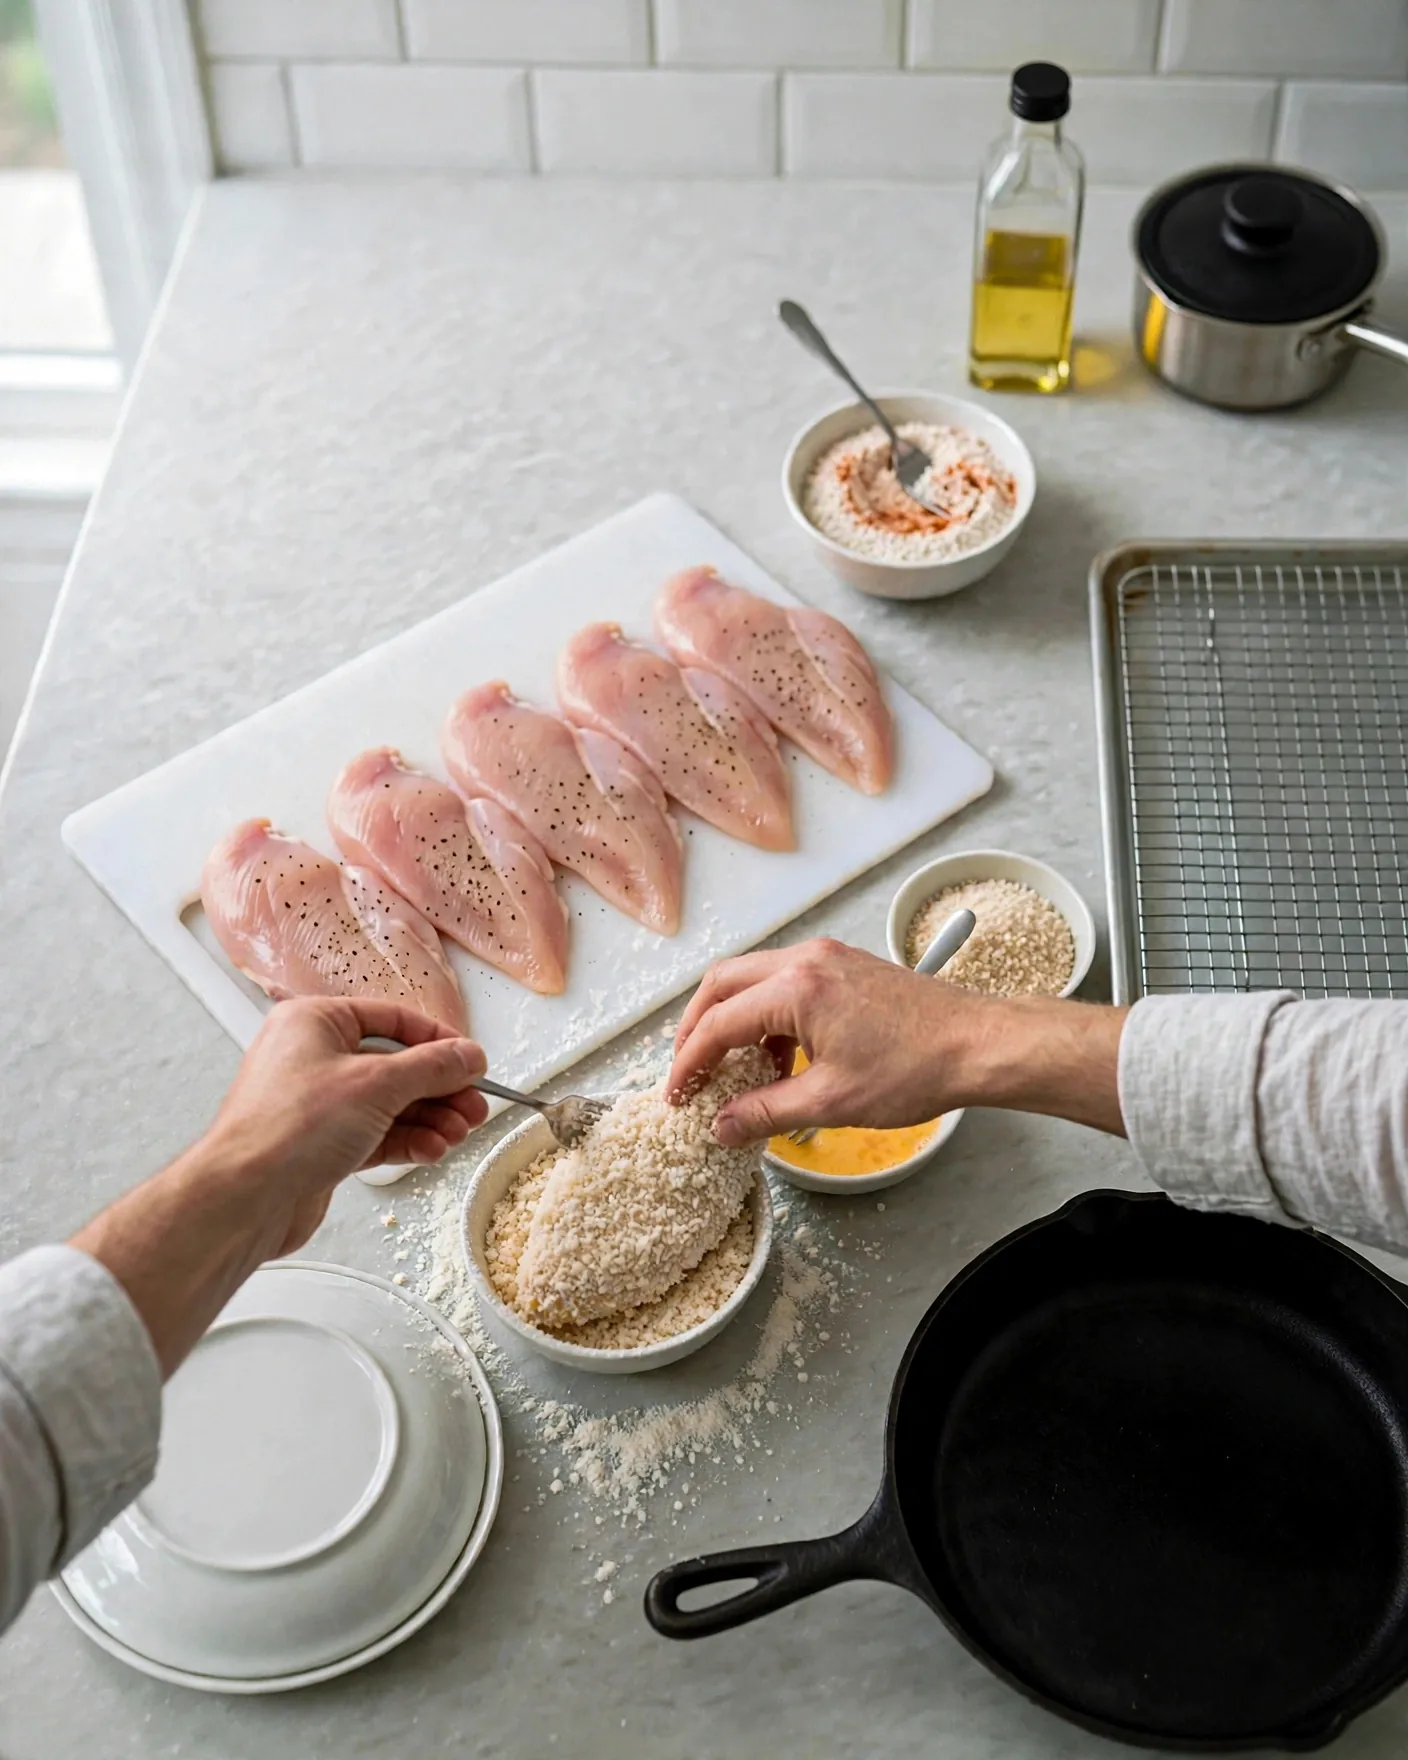
Lay it in the panko and press the crumbs firmly onto both sides with your dry hand. Really press. Crumbs that are packed on fry up craggy and extra-crunchy; crumbs that are only resting there fall off in the oil.
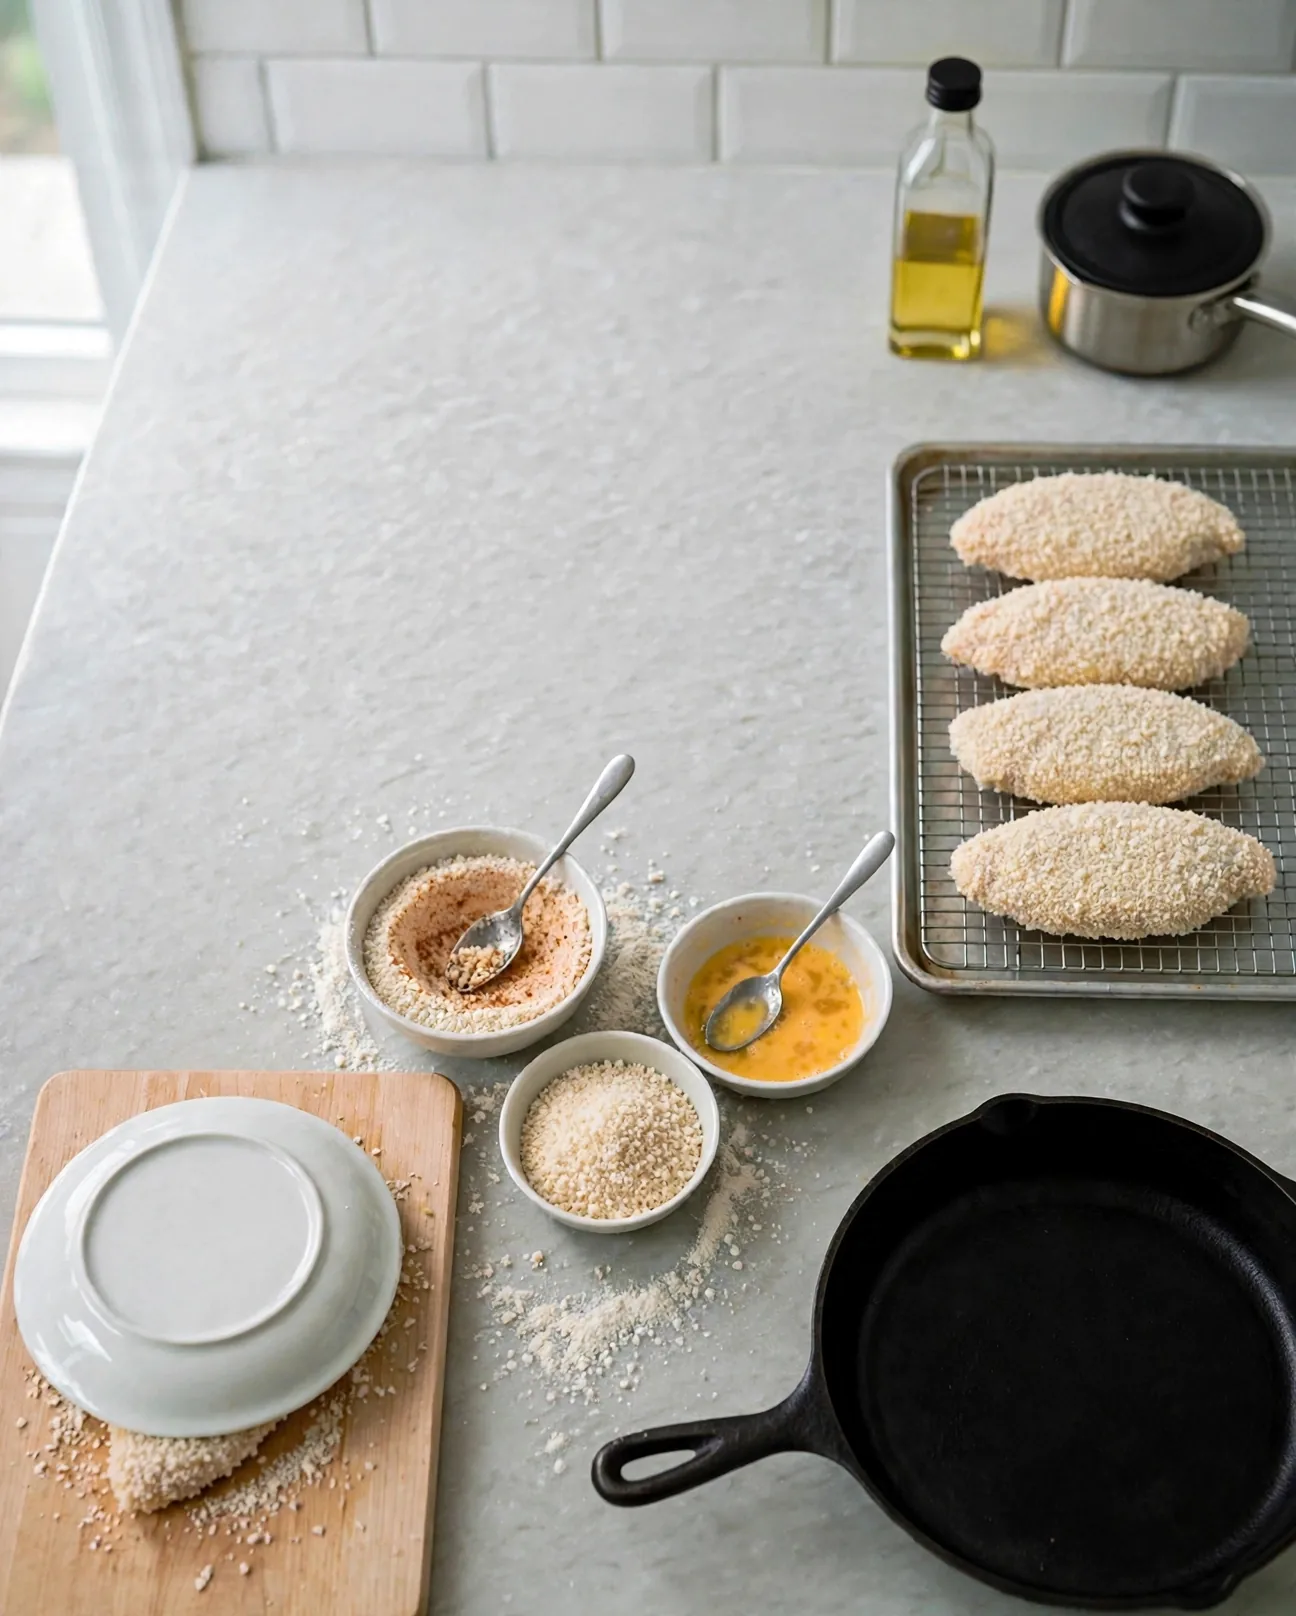
Set each breaded cutlet on the wire rack. Let all four rest for 10 minutes while the oil heats. The rest firms up the coating so less of it falls off in the pan.
Step 4: Fry Until Deep Golden
Pour oil into the cold skillet to about ½ inch — roughly a finger’s depth — and set it over medium-high heat. When a pinch of panko sizzles vigorously on contact, the oil is ready, around 350°F (175°C). If the oil smokes, it is too hot; pull the pan off the heat for a minute.
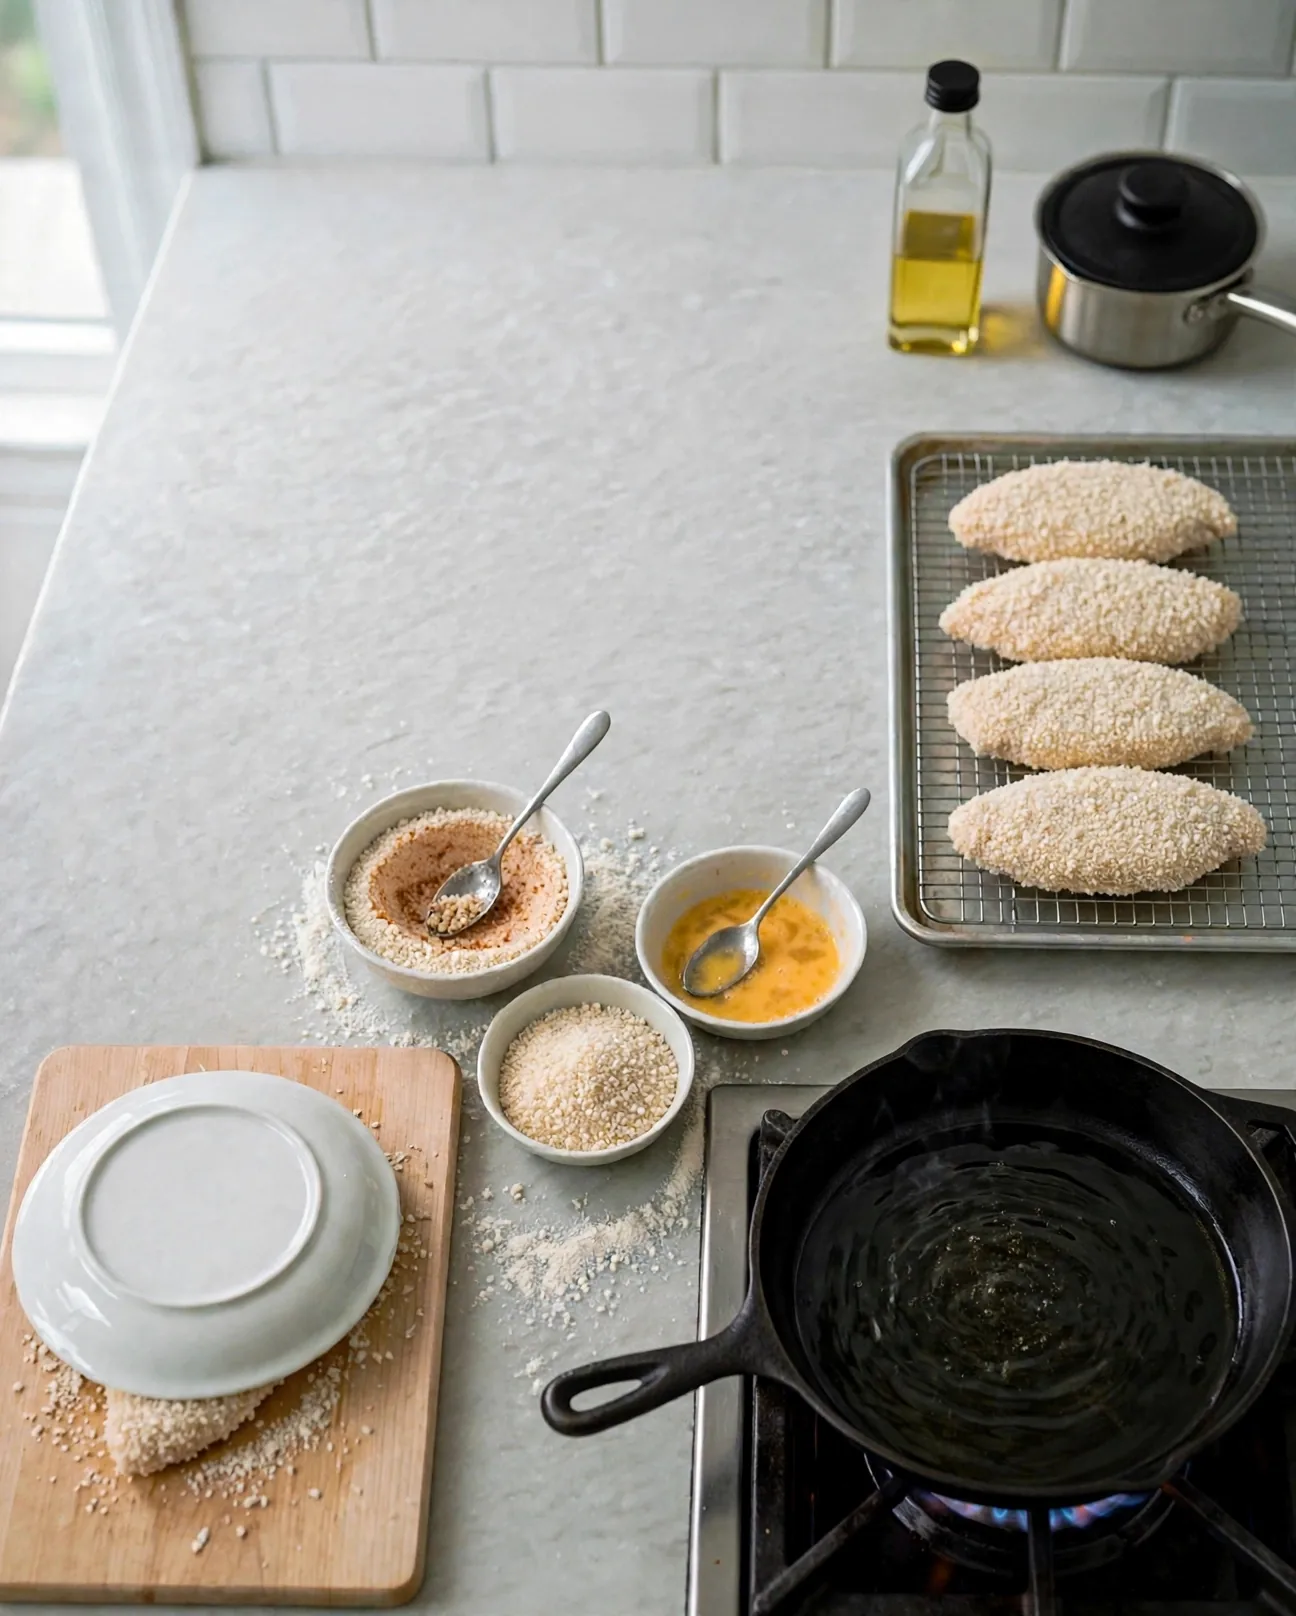
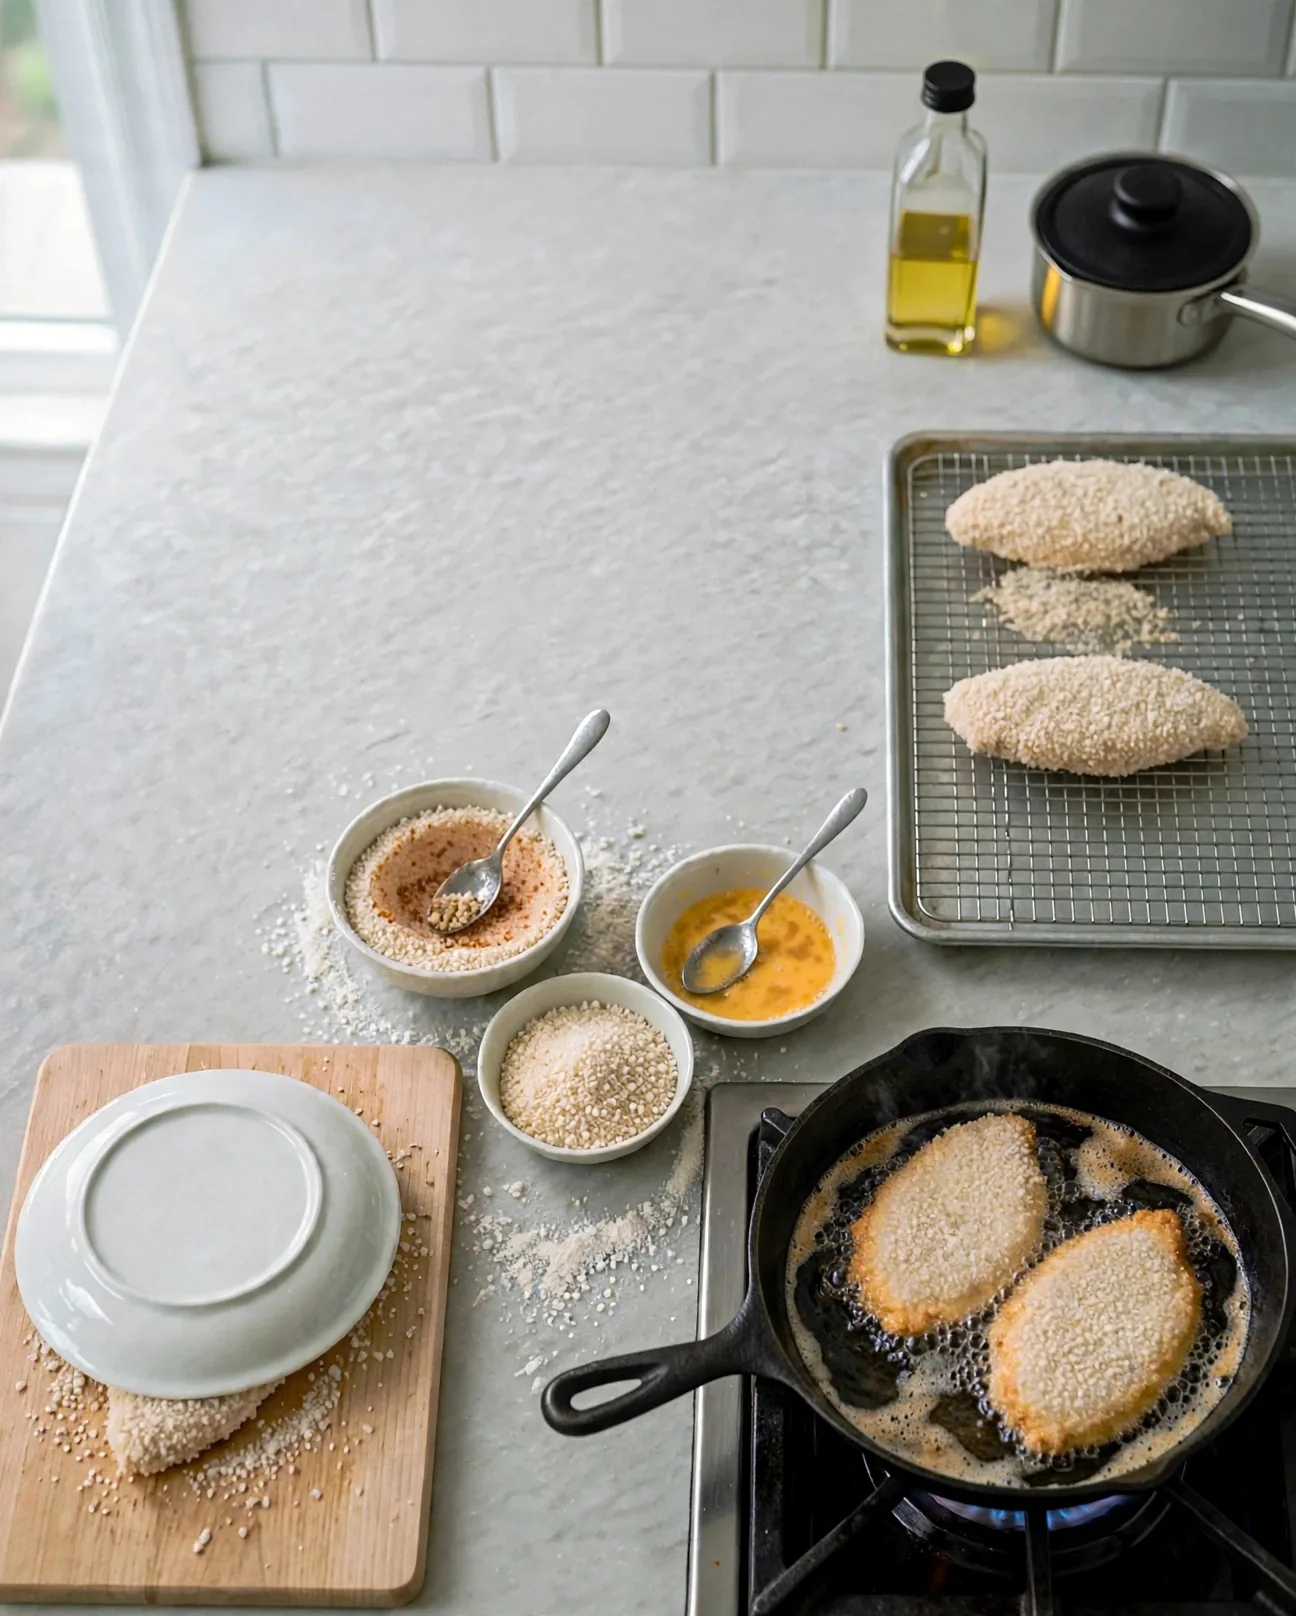
Lay two cutlets into the oil away from you, so any splatter goes away from your hands. Give them space; crowding drops the oil temperature and the crust absorbs oil instead of crisping.

Fry undisturbed for 3 to 4 minutes. You will see the edges where crust meets oil turn golden while the tops stay pale — that color creeping up the side is your cue that the first side is nearly done.
Turn with tongs and fry 3 to 4 minutes more. The crust should be deep golden-brown and the thickest part of the chicken should read 165°F (74°C) on an instant-read thermometer. Color alone cannot tell you the chicken is safe — the thermometer can.
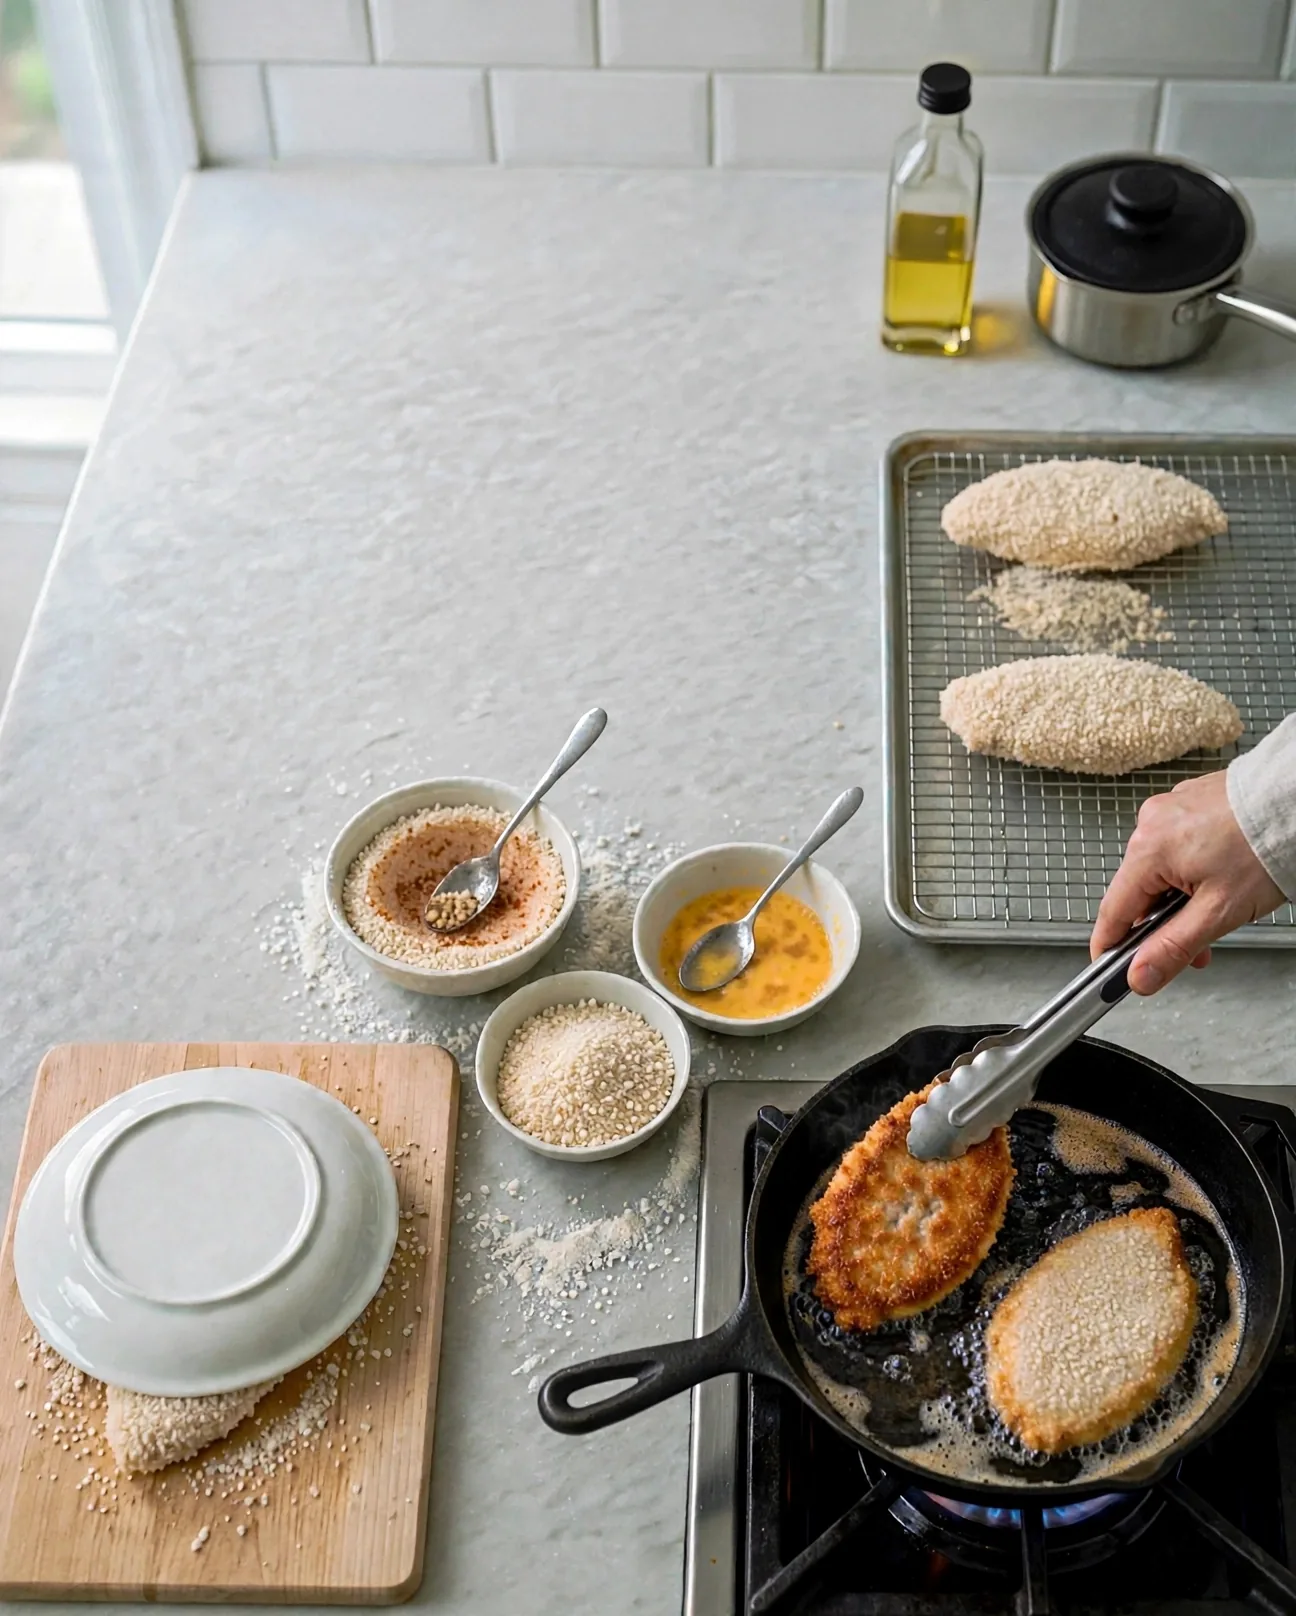
Common mistake: pulling the chicken by color alone. A dark crust with a cool center is the classic fried-chicken failure. Check the temperature every time.
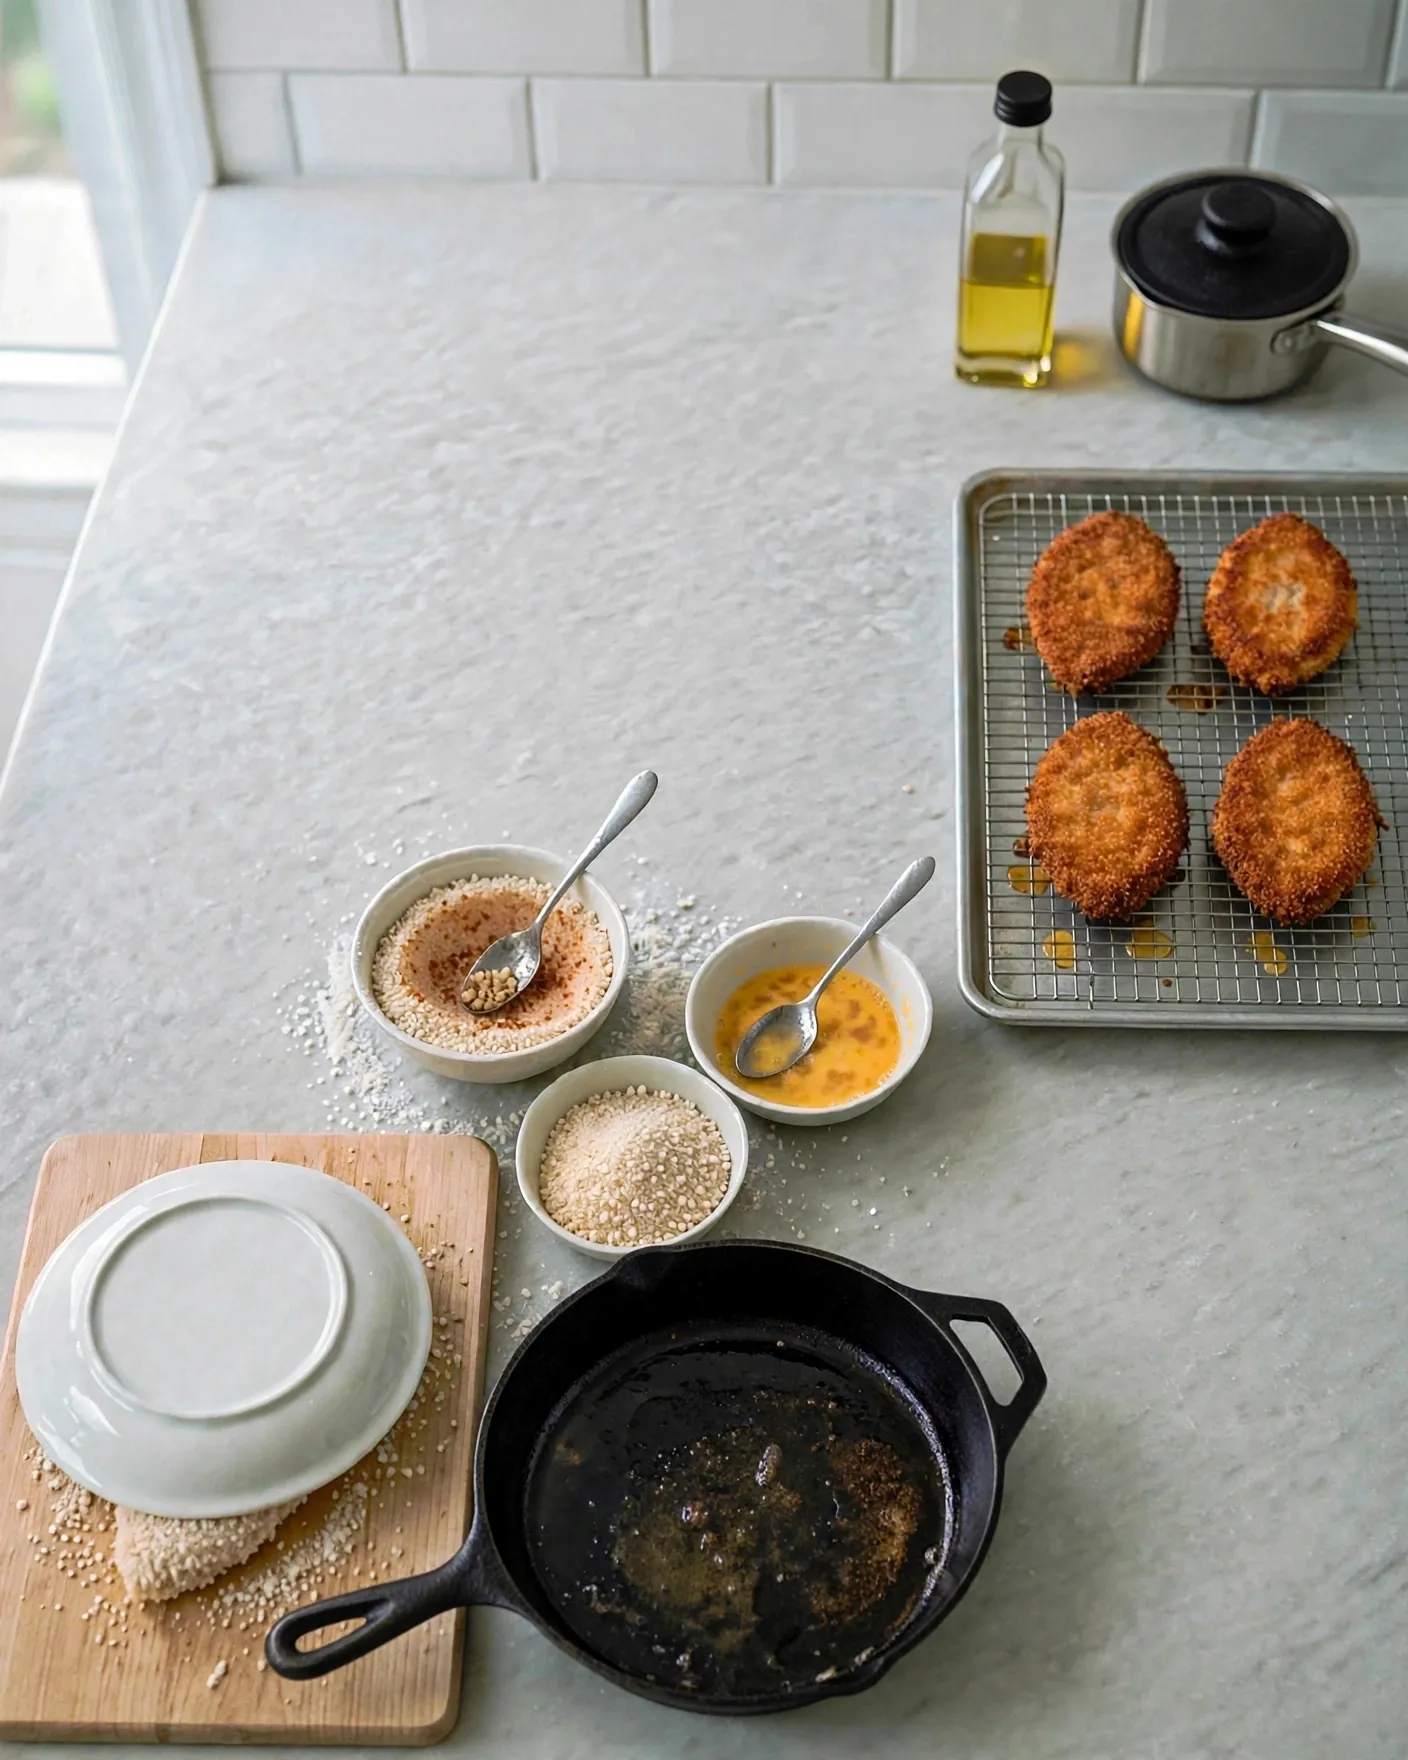
Lift the cutlets onto the clean wire rack (not paper towels — the rack keeps the bottom crust crisp instead of steaming it soft) and fry the remaining two the same way, letting the oil come back up to heat between batches.
Step 5: Toast the Buns
Wipe out the skillet, or use a clean dry pan over medium heat. Lay the split buns cut-side down and toast 1 to 2 minutes until the faces are lightly golden. Watch them — brioche goes from golden to burnt fast because of its sugar content.

The base is done: four crispy cutlets, one plain cutlet waiting in the fridge, five toasted buns. Now pick your sandwich.
Crispy Chicken Cutlets (Shared Base)
Ingredients
Method
- Slice the chicken breasts horizontally into 5 cutlets; pound to an even ½ inch. Pat dry and season with salt and pepper. Reserve the fifth cutlet (covered, refrigerated) for the grilled sandwich — do not bread it.
- Set up the breading station: seasoned flour (flour + garlic powder + paprika + 1 tsp salt), beaten eggs, panko, and a wire rack on a baking sheet.
- Bread 4 cutlets: dredge in flour (shake off excess), dip in egg, press firmly into panko. Rest on the rack 10 minutes.
- Heat ½ inch oil in a 12-inch skillet to about 350°F (175°C). Fry 2 cutlets at a time, 3–4 minutes per side, until deep golden and 165°F (74°C) inside. Drain on the rack.
- Toast the split buns cut-side down in a dry pan 1–2 minutes until golden.
Notes
Sandwich 1: Hot Honey Pickle Chicken Sandwich
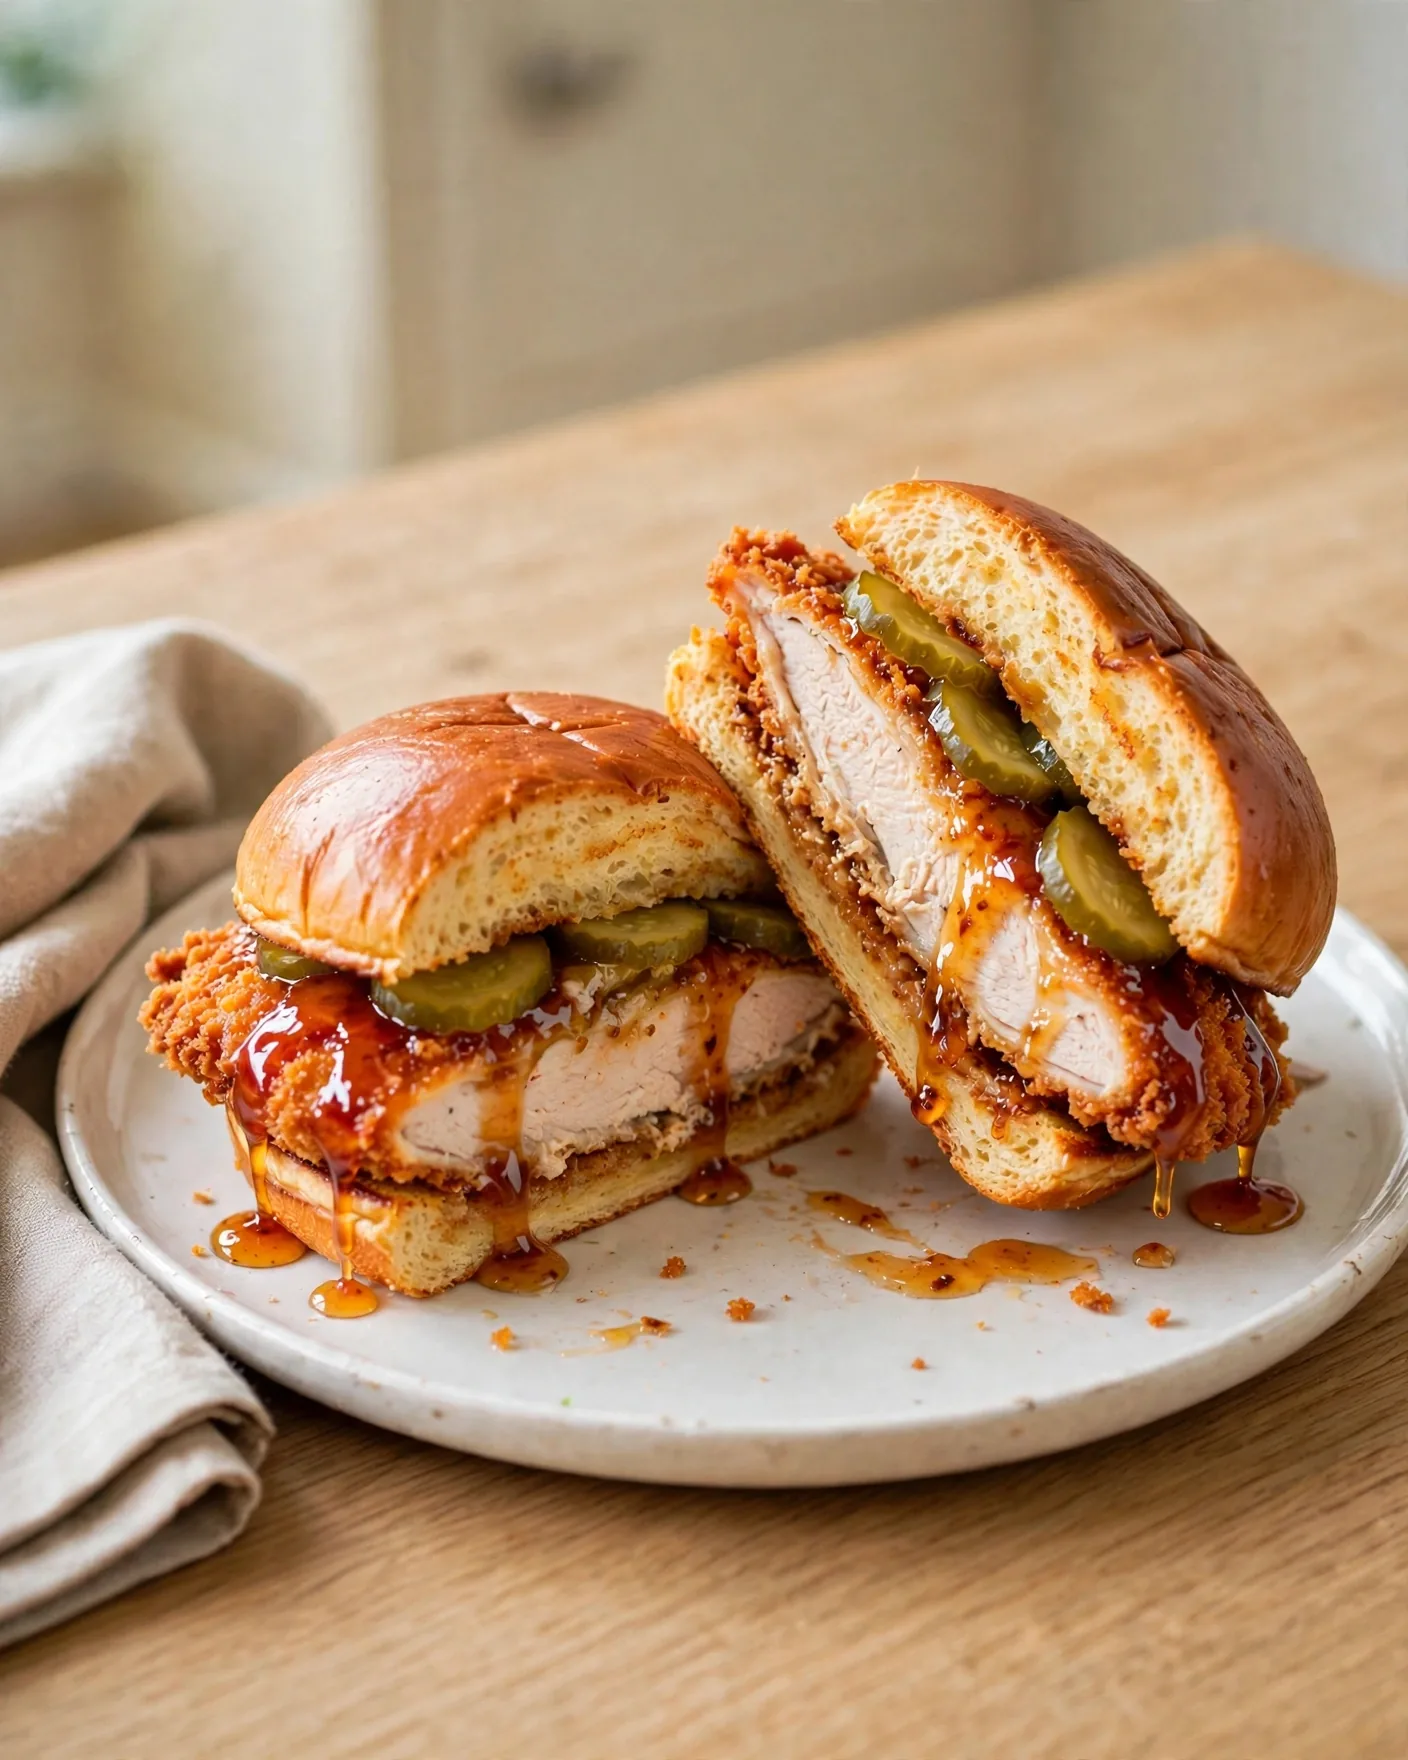
Sweet heat over crunch, cut with cold briny pickles. The honey gets warmed with chili flakes until it pours in slow ribbons — that is the whole sauce, and it needs nothing else.

Ingredients — Sandwich 1 (makes 1 sandwich)
- 1 crispy fried cutlet and 1 toasted brioche bun, from the shared base
- ⅓ cup honey
- 1 to 2 teaspoons crushed red pepper flakes (1 for gentle warmth, 2 for real heat)
- 8 to 12 dill pickle chips
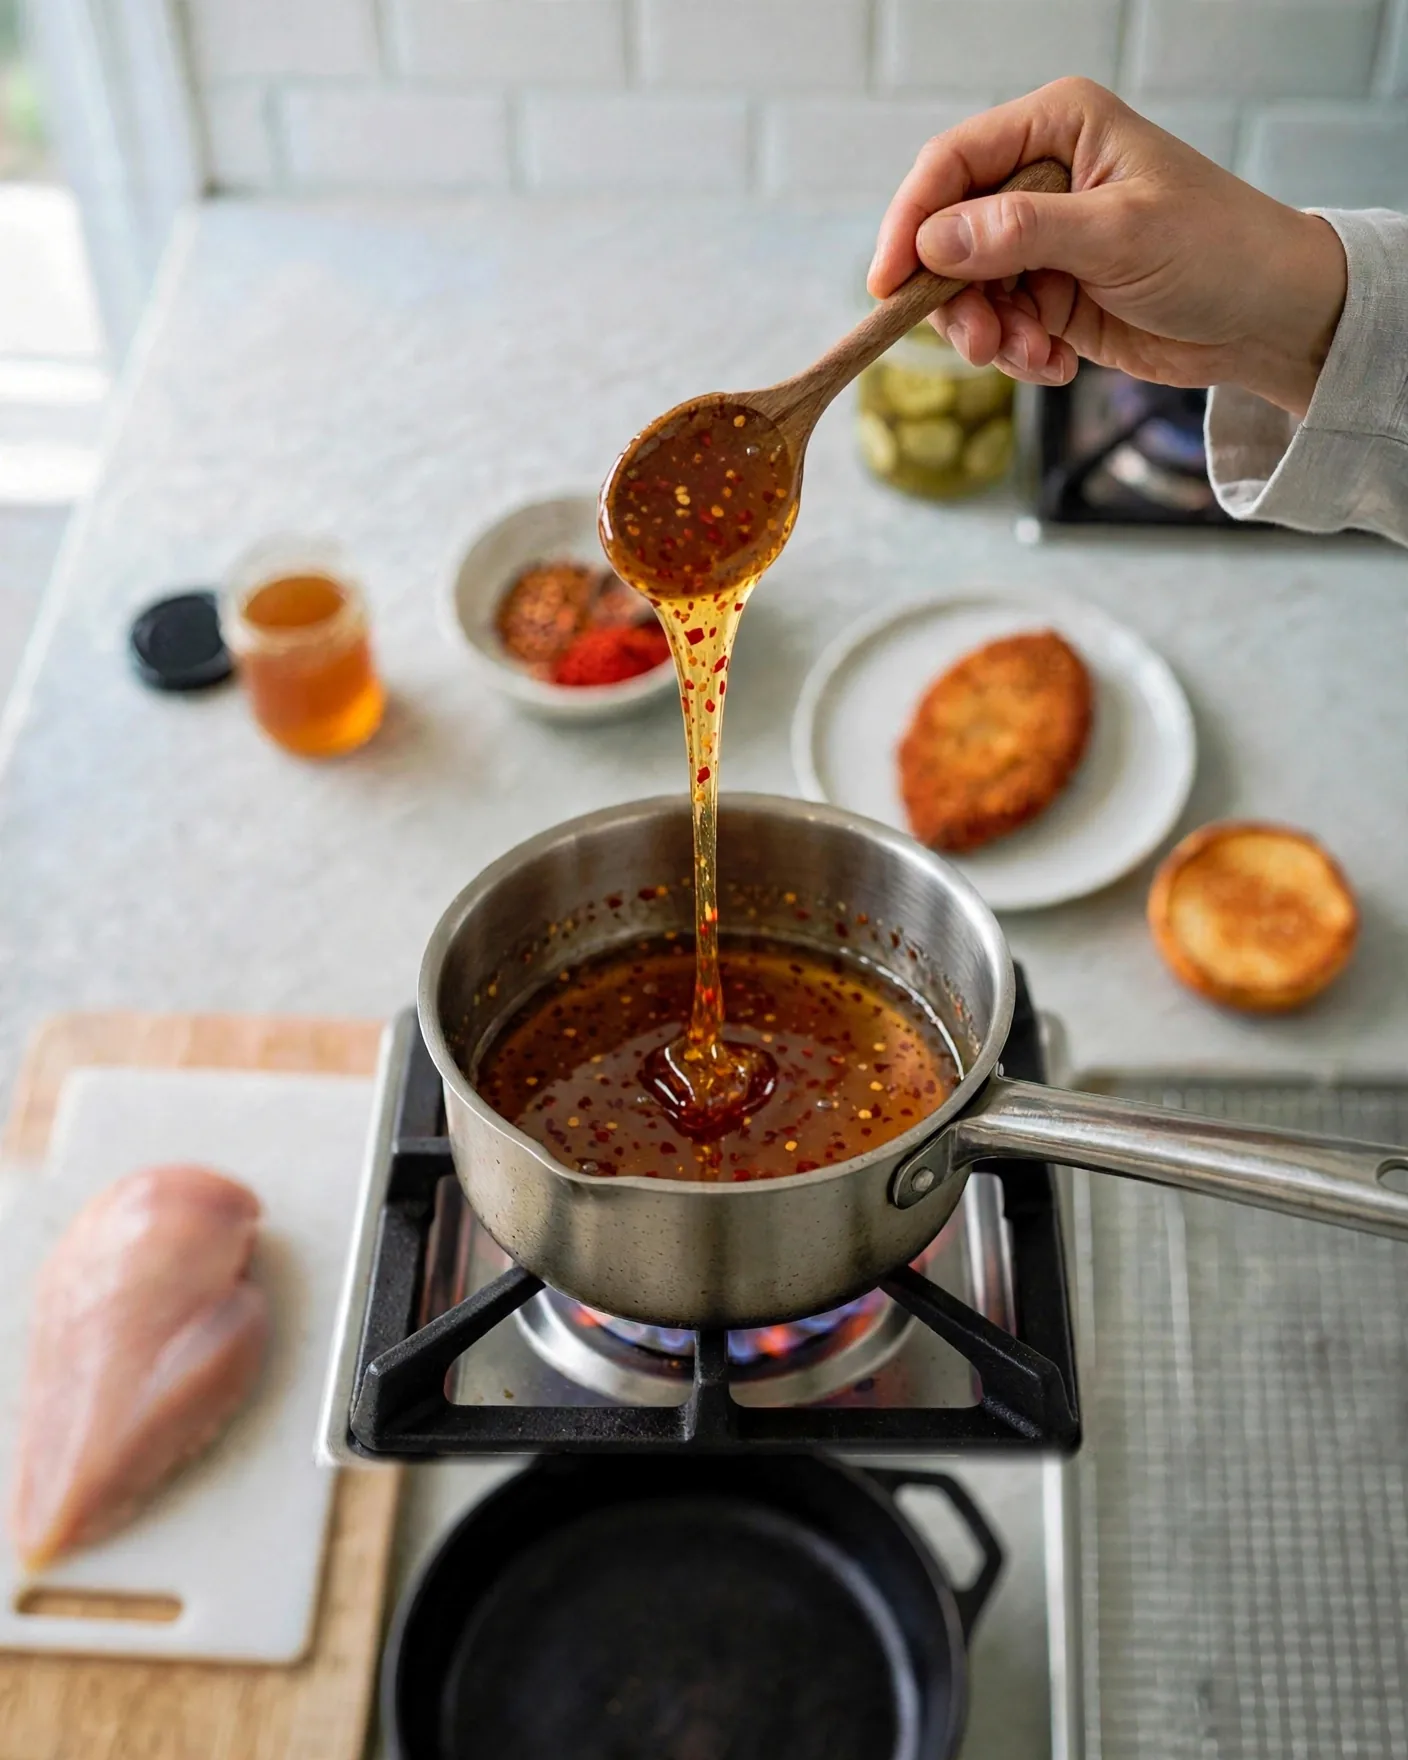
Warm the honey and pepper flakes in the small saucepan over low heat, stirring, until small bubbles appear at the edges — about 2 minutes. Do not boil it; boiling makes honey bitter and foamy.
Lift the spoon and check: the honey should fall back in a slow, glossy ribbon with red flecks suspended through it. If it runs like water, it needs another minute; if it is thick and sluggish, it got too hot.
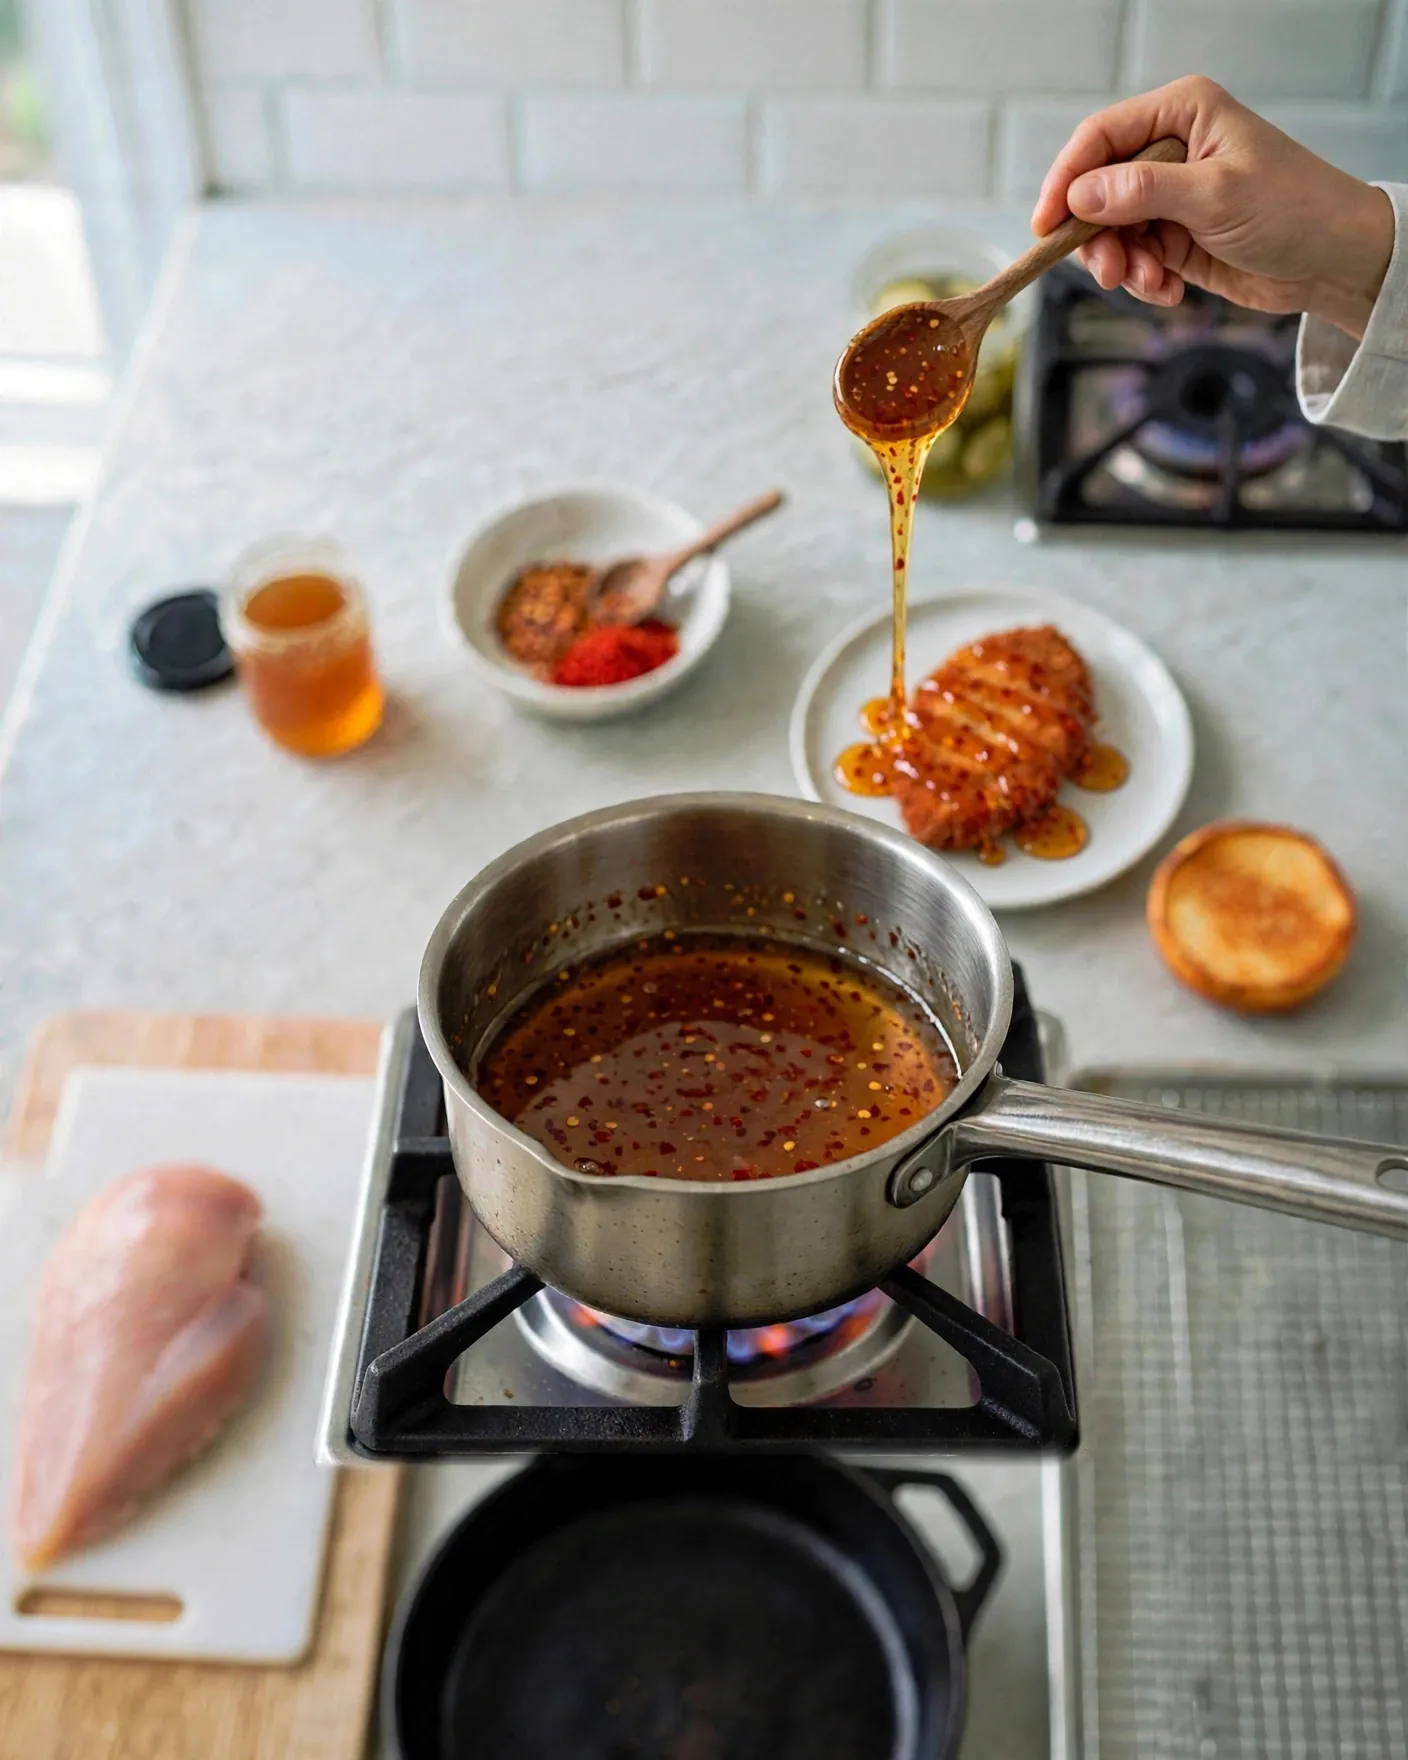
Drizzle the hot honey generously over the fried cutlet, letting amber-red ribbons run down the crust and pool a little on the plate. Put it on while the cutlet is still warm so the glaze melts into the crags instead of sitting on top.
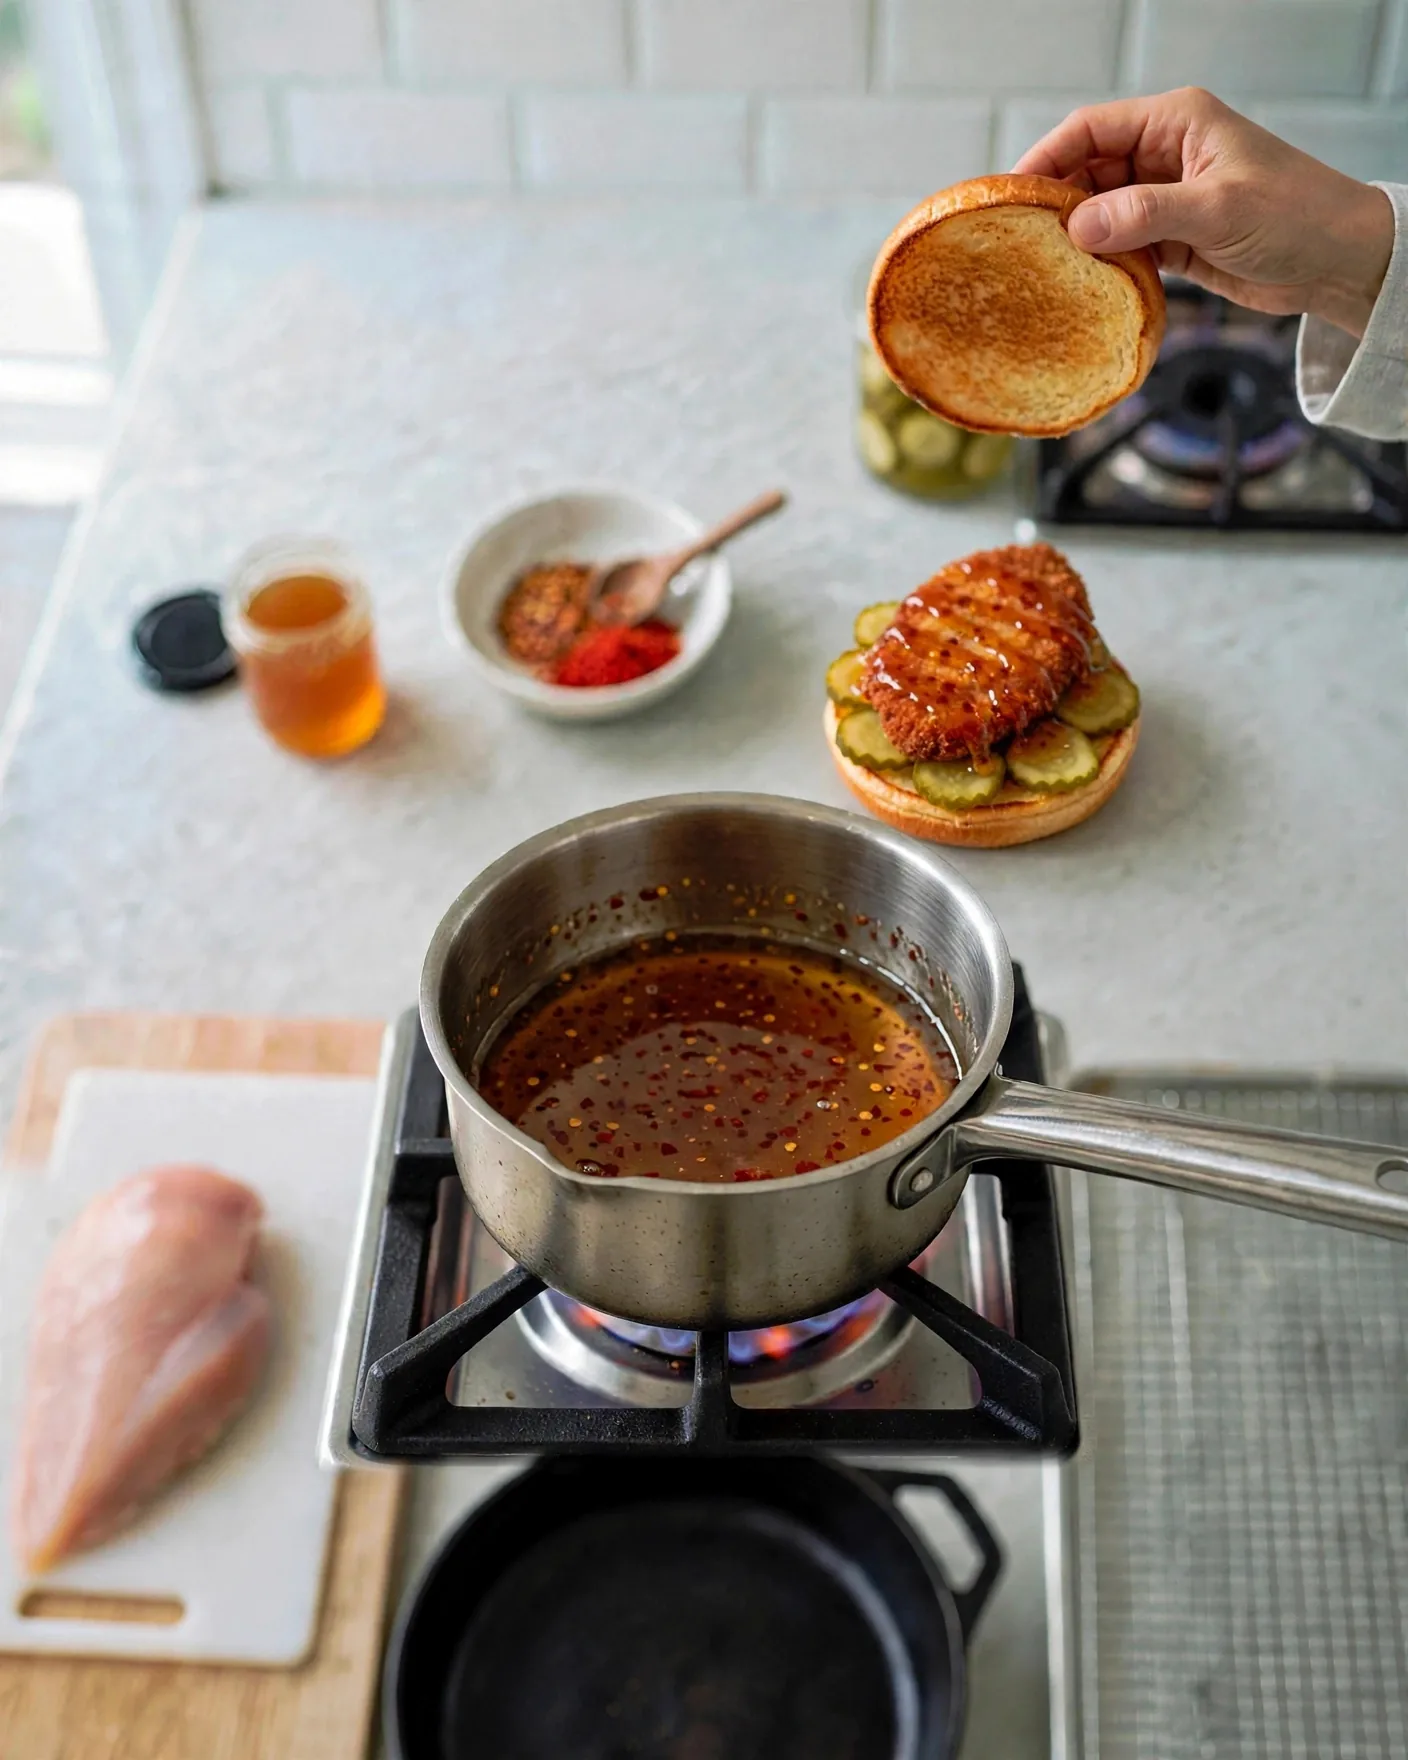
Layer the pickle chips over the bottom bun, set the glazed cutlet on top, and close with the top bun. The cold pickles against the warm, sticky chicken are the contrast that makes this sandwich work.
Hot Honey Pickle Chicken Sandwich
Ingredients
Method
- Warm the honey and pepper flakes in a small saucepan over low heat, stirring, until small bubbles form at the edges, about 2 minutes. Do not boil.
- Drizzle the hot honey over the warm fried cutlet.
- Layer pickle chips on the bottom bun, add the glazed cutlet, and close with the top bun. Serve right away.
Notes
Sandwich 2: Crispy Korean Chicken Sandwich with Gochujang Sauce
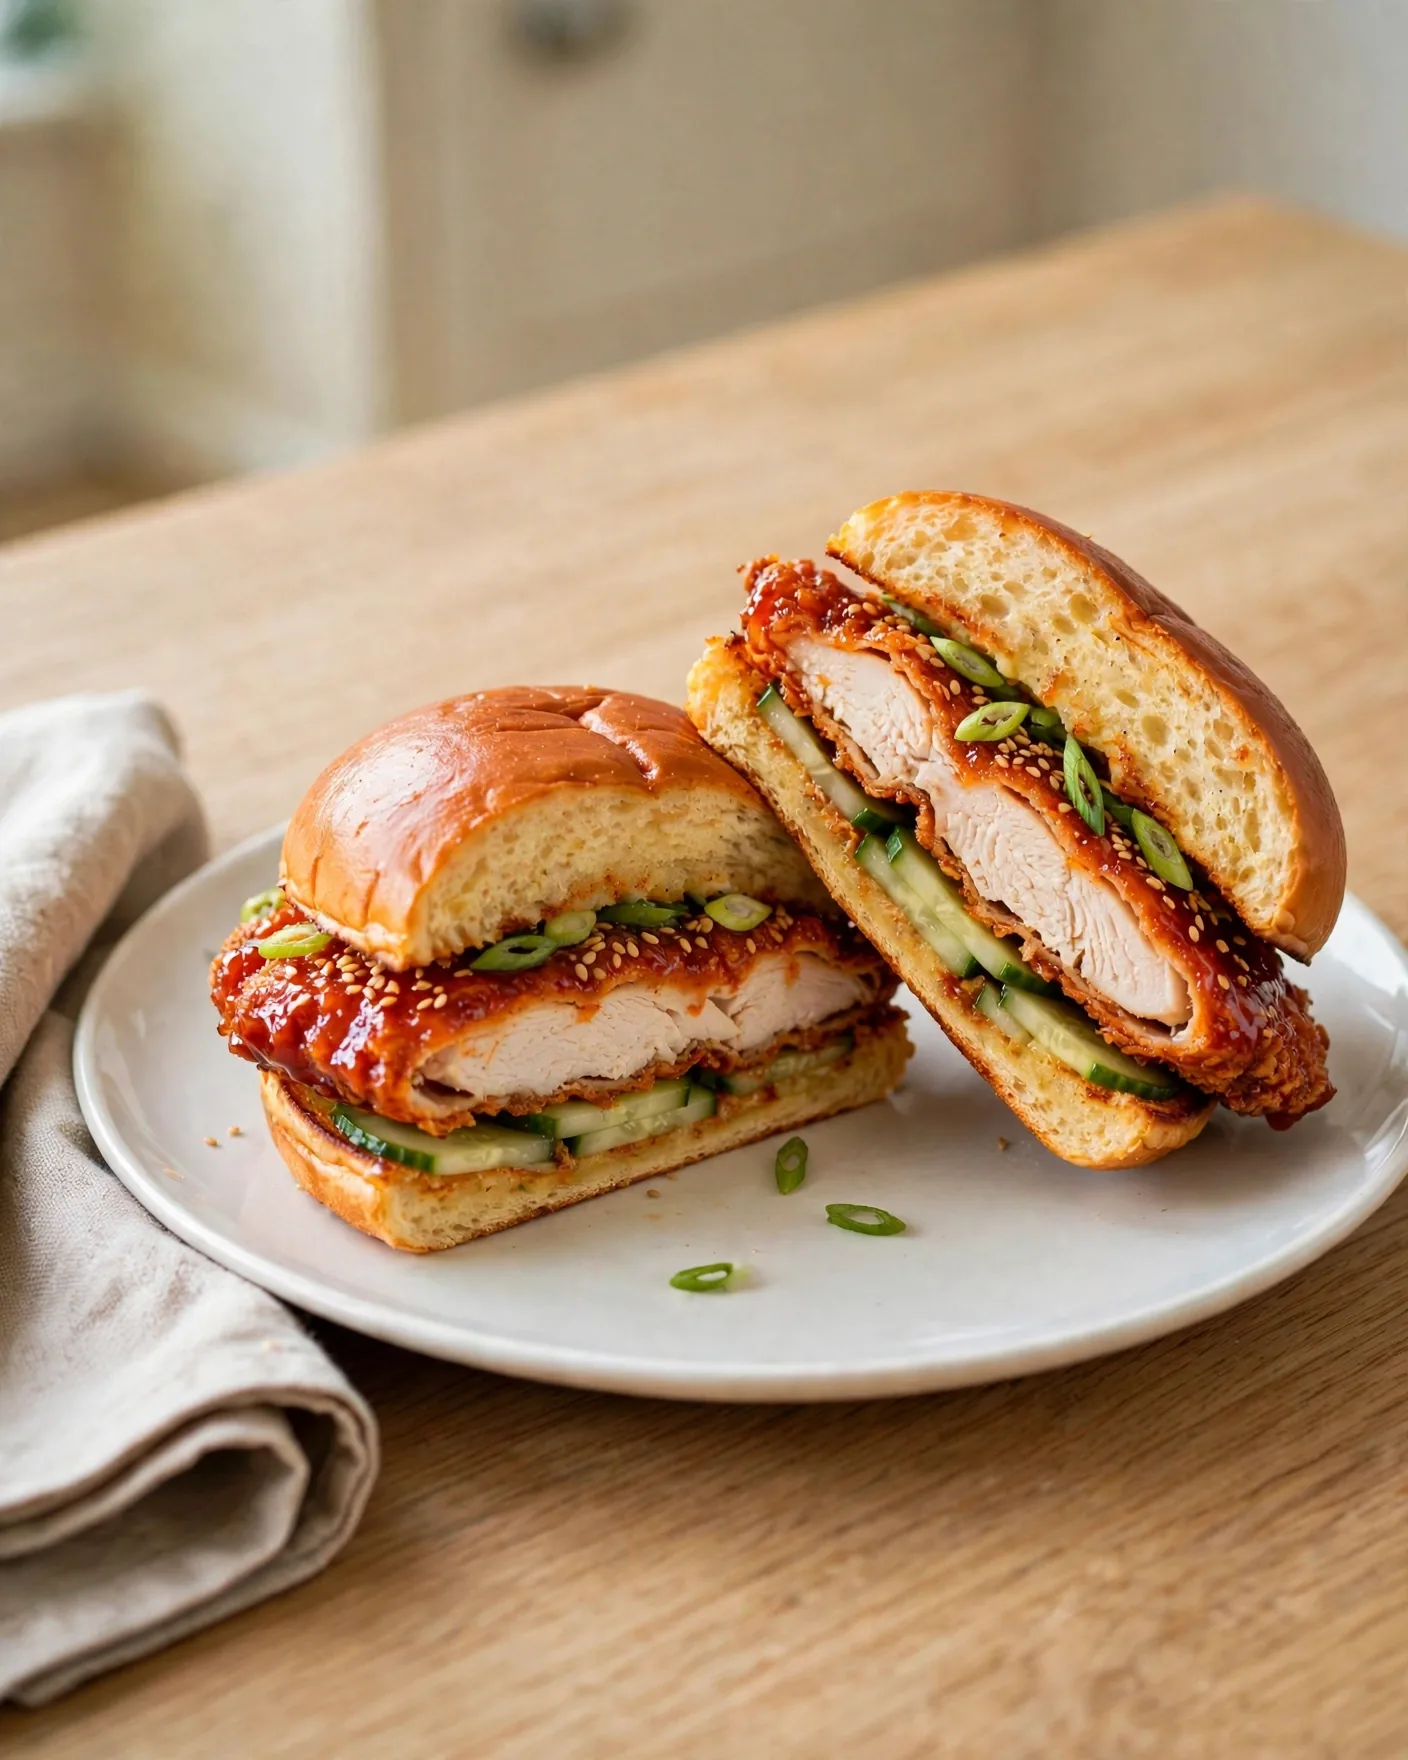
This one borrows from Korean fried chicken: the cutlet gets tossed in a glossy gochujang glaze — sweet, savory, and warmly spicy — then finished with cool cucumber, green onion, and sesame. The sauce simmers for just a few minutes until it thickens enough to coat instead of slide off.

Ingredients — Sandwich 2 (makes 1 sandwich)
- 1 crispy fried cutlet and 1 toasted brioche bun, from the shared base
- 3 tablespoons gochujang (Korean chili paste)
- 2 tablespoons honey
- 1 tablespoon soy sauce
- 2 garlic cloves, minced
- 1 teaspoon rice vinegar
- 1 teaspoon toasted sesame oil
- ½ cucumber, sliced into thin rounds
- 1 green onion, thinly sliced
- 1 teaspoon toasted sesame seeds
Slice the cucumber into thin, even rounds. Thick slices slide out of the sandwich; thin ones stay put and give crunch in every bite.
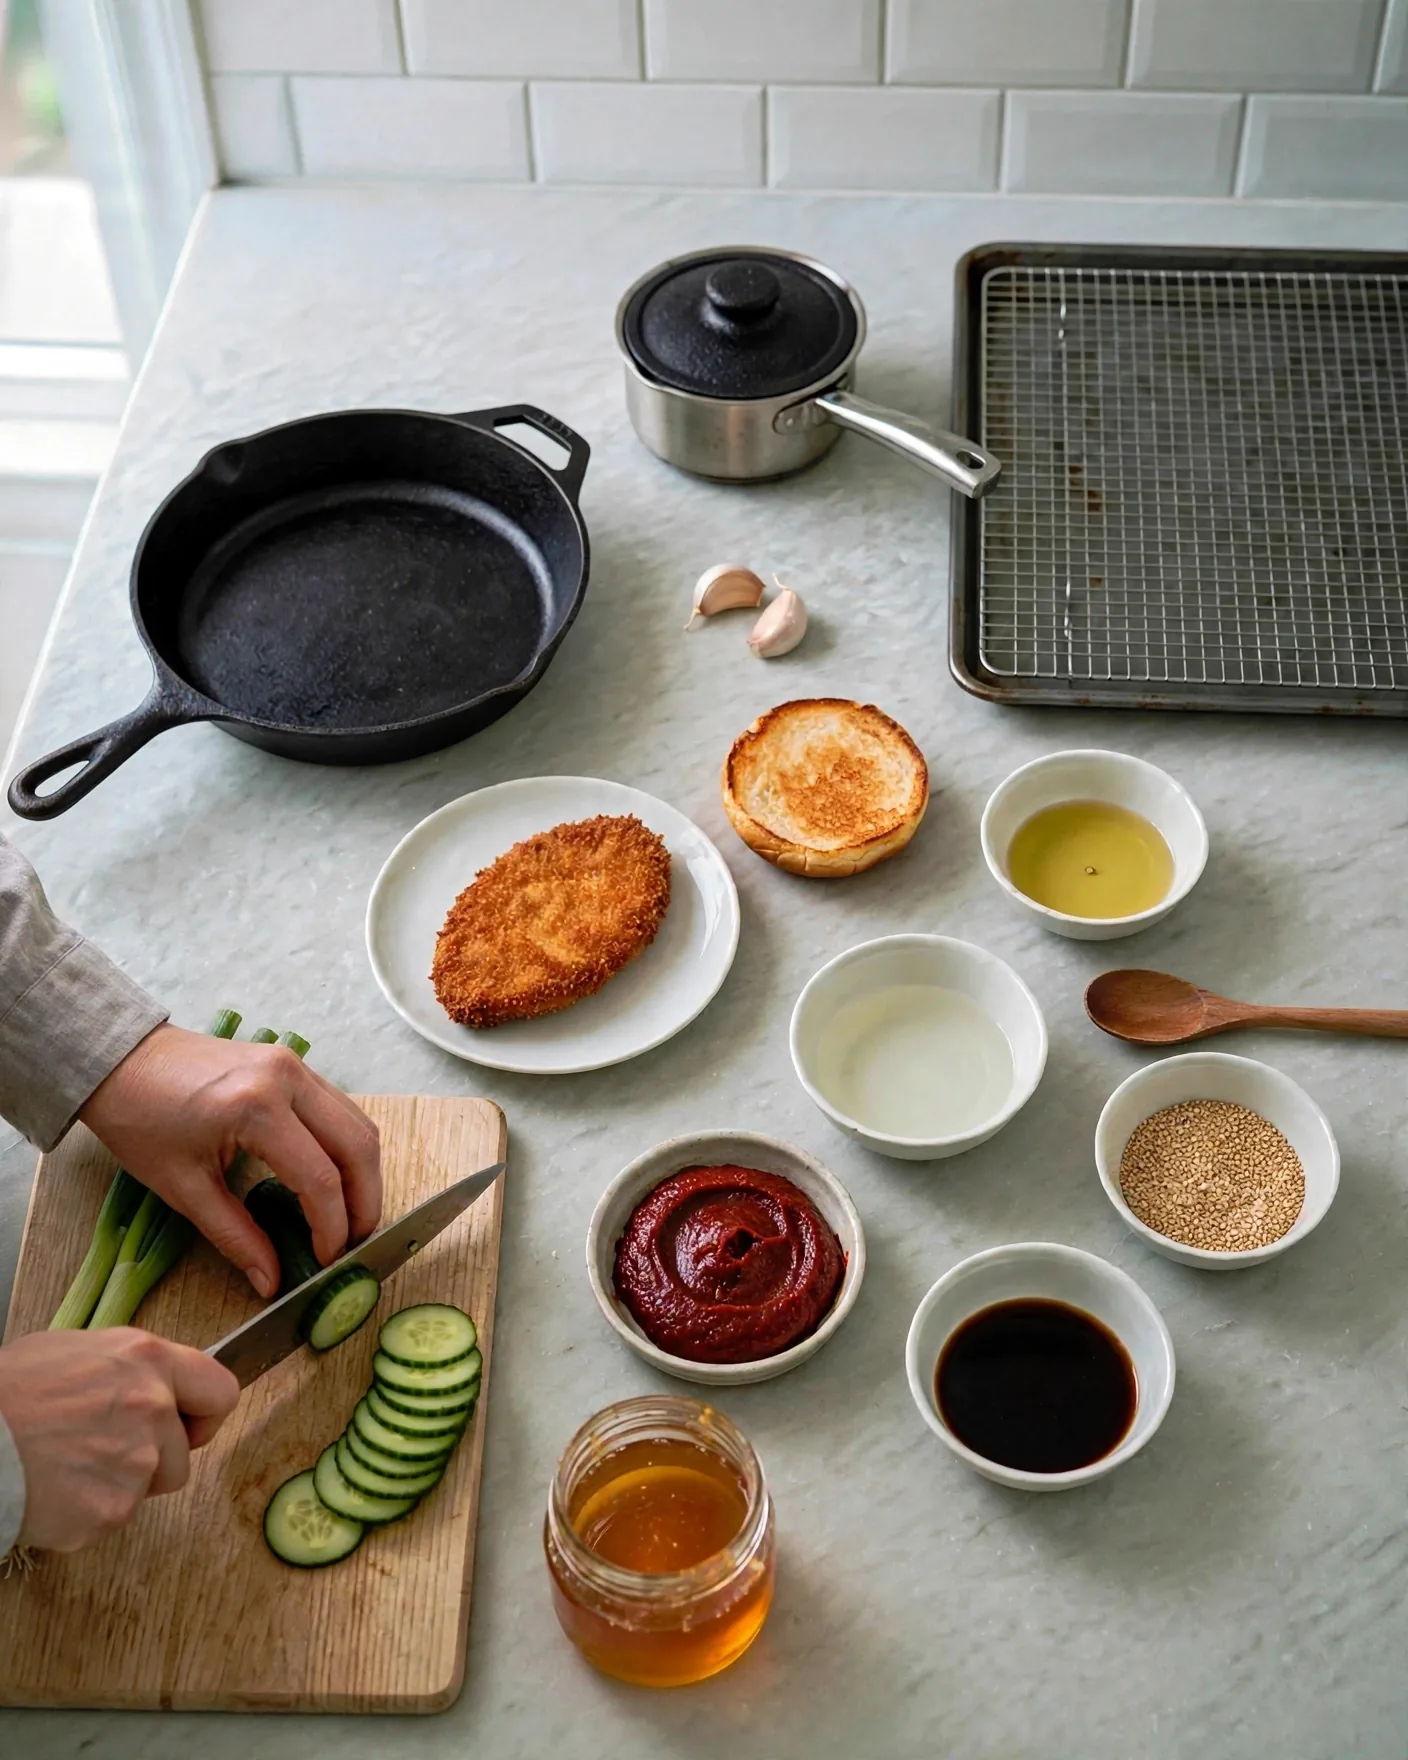
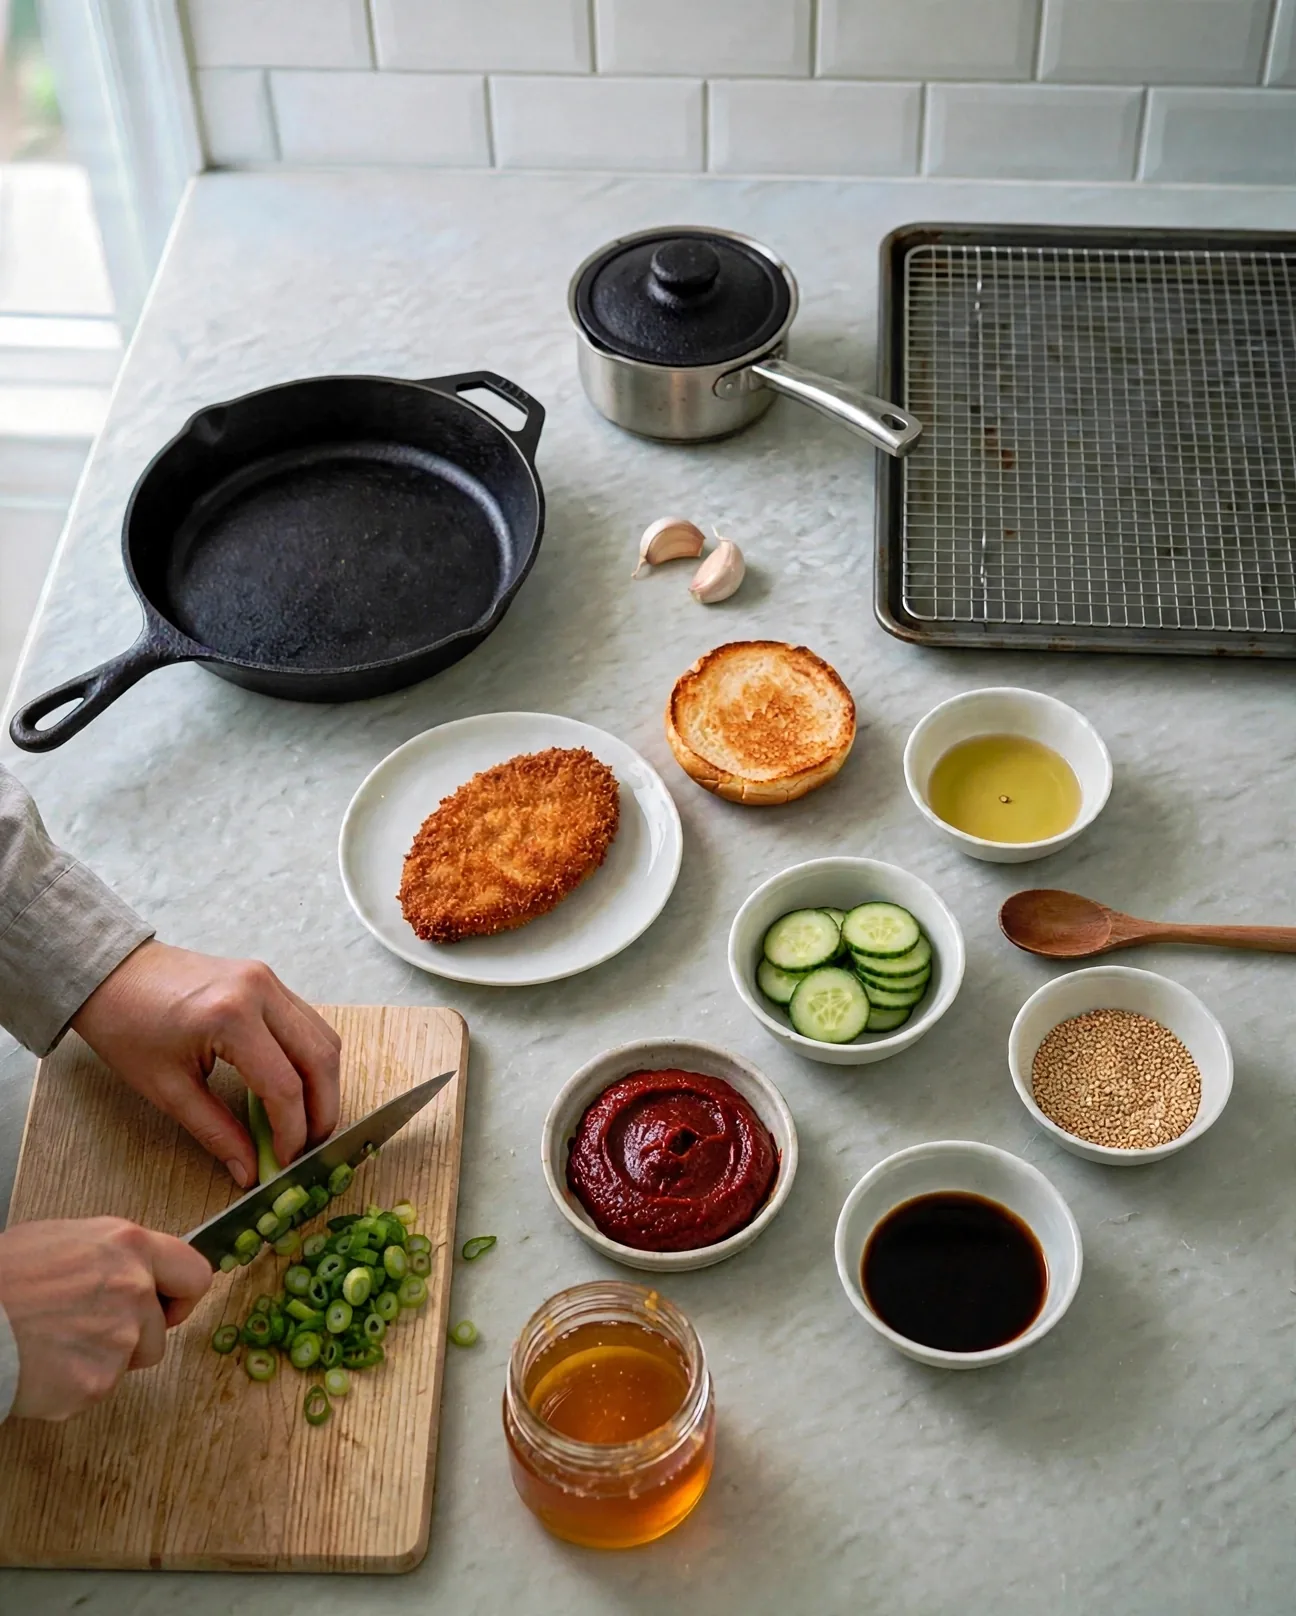
Slice the green onion into thin rings, keeping the green tops — that is where the fresh bite is.
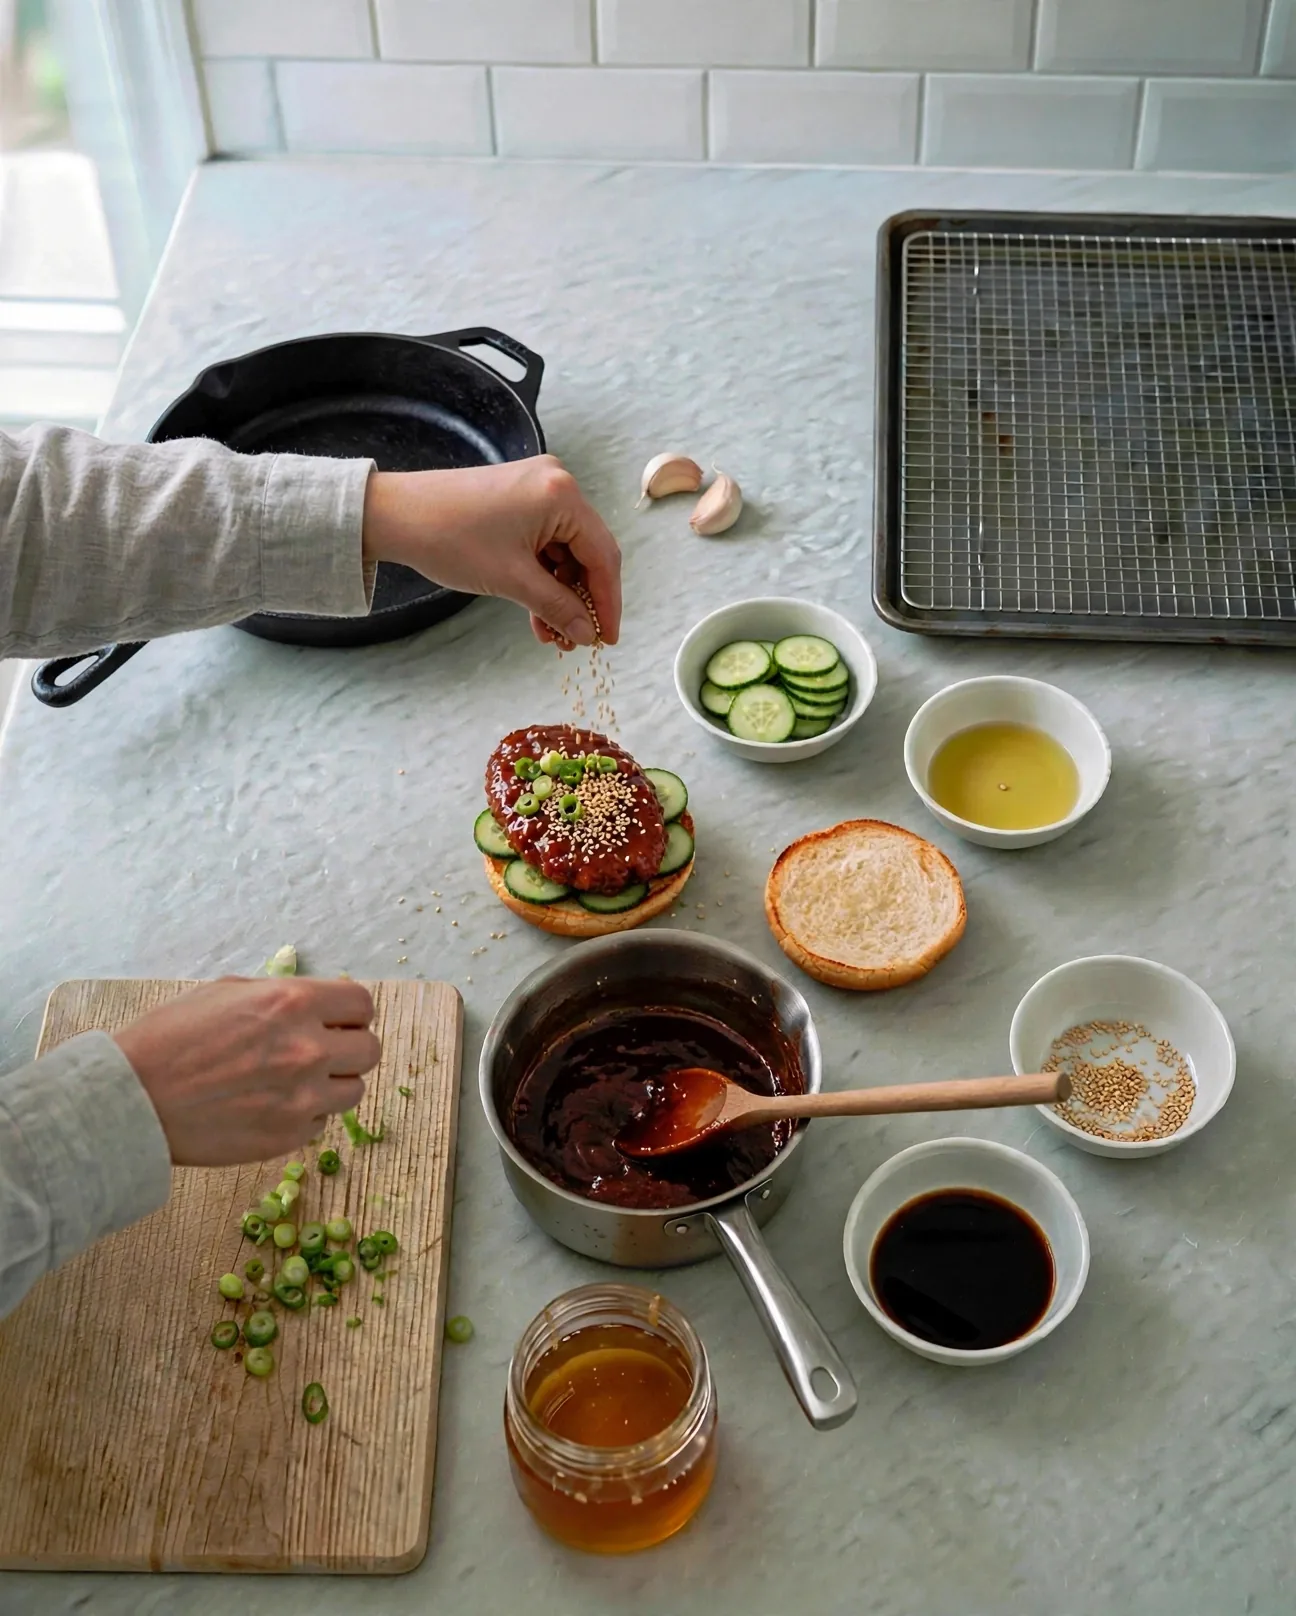
Whisk the gochujang, honey, soy sauce, garlic, rice vinegar, and sesame oil together in the small saucepan off the heat. It will look like a deep red paste with swirls — that is fine, the heat finishes the blending.

Set the pan over low heat and simmer 3 to 4 minutes, stirring, until the sauce is thick and glossy and the spoon leaves a brief trail across the bottom of the pan. Under-simmered sauce slides right off the crust; properly thickened sauce clings.
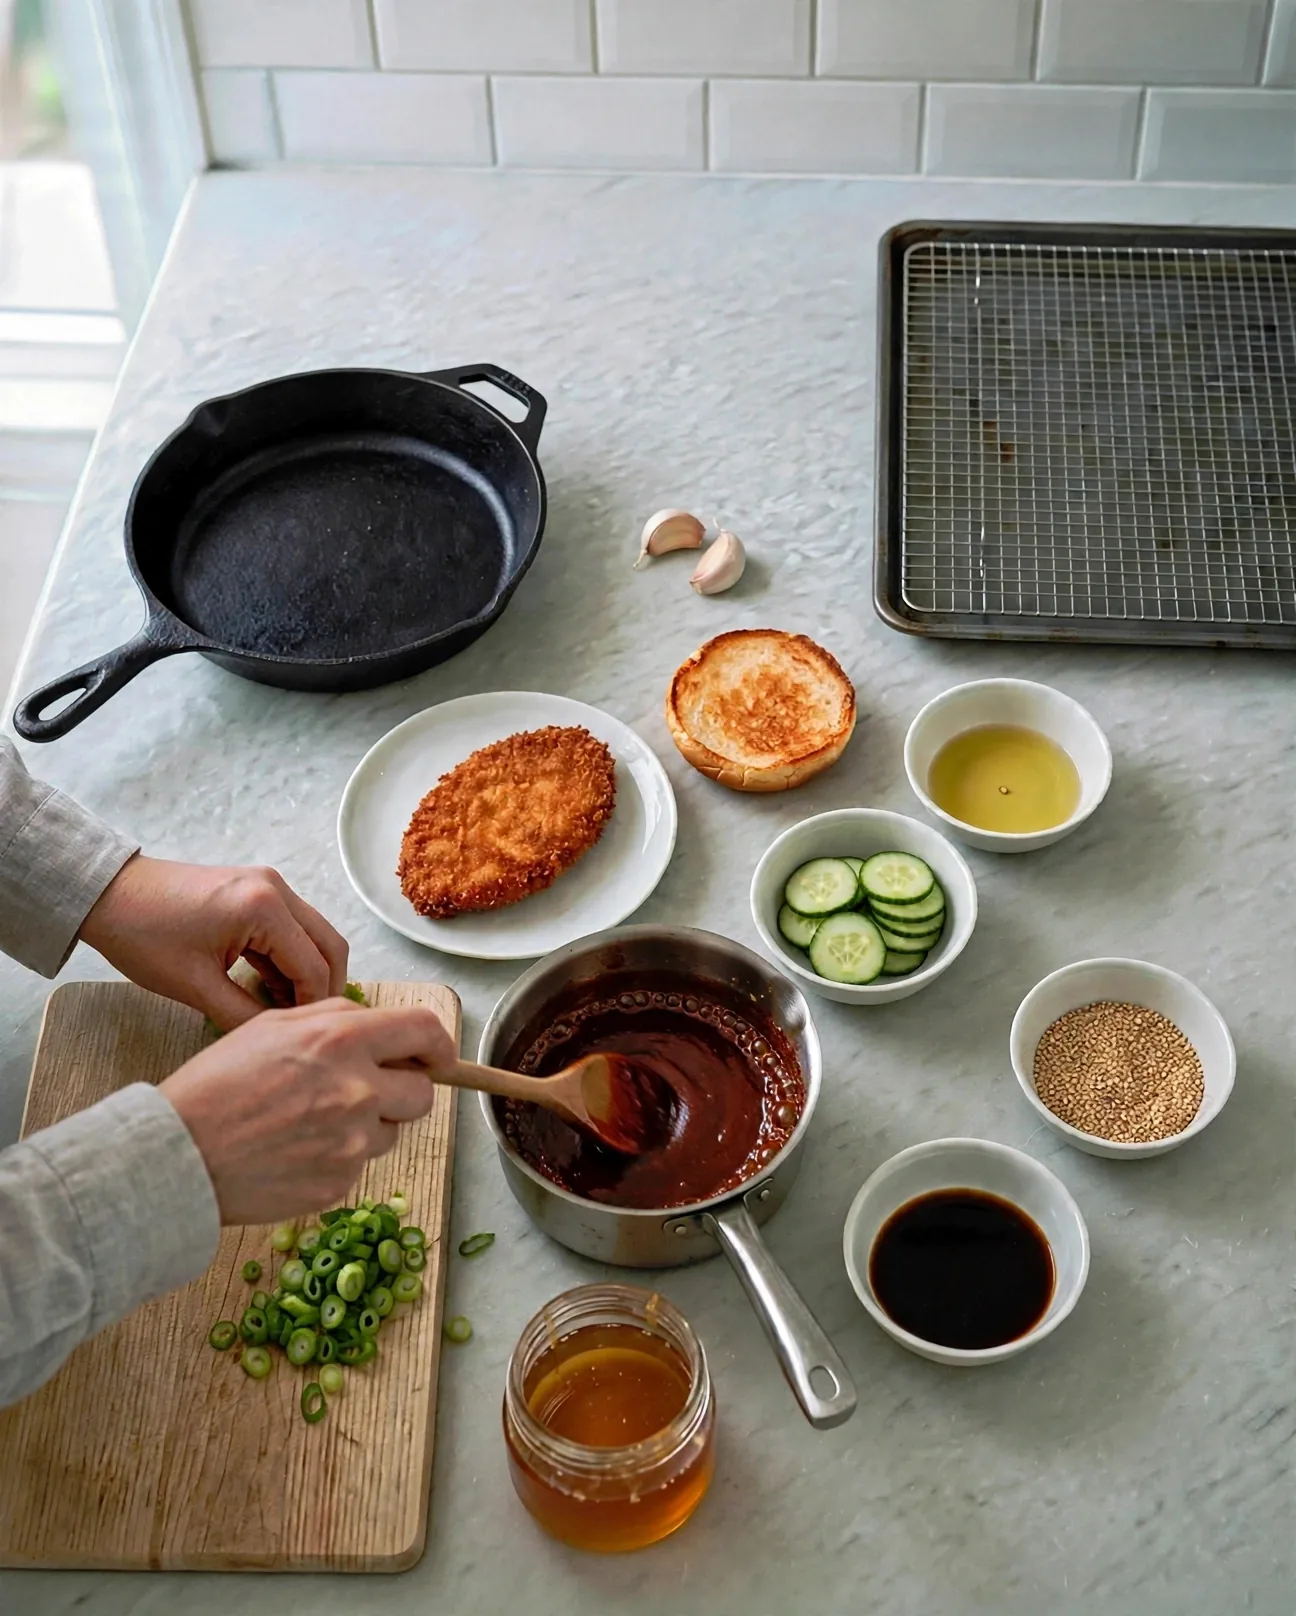
Doneness check: drag the spoon across the pan bottom. If the trail holds for a second before the sauce flows back, it is ready.
Add the fried cutlet and turn it with tongs until every crag is coated in the red-orange glaze. Work quickly — the longer the sauced cutlet sits, the softer the crust gets.

Lay cucumber slices on the bottom bun, set the glazed cutlet on top, and shower over the sesame seeds and green onion. Close and serve immediately, while the crust still has crunch under the glaze.
Crispy Korean Chicken Sandwich with Gochujang Sauce
Ingredients
Method
- Whisk the gochujang, honey, soy sauce, garlic, rice vinegar, and sesame oil in a small saucepan off the heat.
- Simmer over low heat 3–4 minutes, stirring, until thick and glossy — the spoon should leave a brief trail on the pan bottom.
- Toss the fried cutlet in the glaze until fully coated.
- Layer cucumber on the bottom bun, add the glazed cutlet, top with sesame seeds and green onion, and close. Serve right away.
Notes
Sandwich 3: Jalapeño Popper Chicken Sandwich
Everything a jalapeño popper is — cream cheese, sharp cheddar, fresh jalapeño heat — piled onto a crispy cutlet and finished under heat until the cheese bubbles. Soften the cream cheese fully before mixing, or the spread turns lumpy.

Ingredients — Sandwich 3 (makes 1 sandwich)
- 1 crispy fried cutlet and 1 toasted brioche bun, from the shared base
- 2 to 3 fresh jalapeños
- 4 oz (115 g) cream cheese, softened to room temperature
- ½ cup grated sharp cheddar, divided
Slice the jalapeños into thin rings. Mince one jalapeño finely for the spread and keep the rings for the top. If you want less heat, scrape out the seeds and white membranes — that is where most of the fire lives.
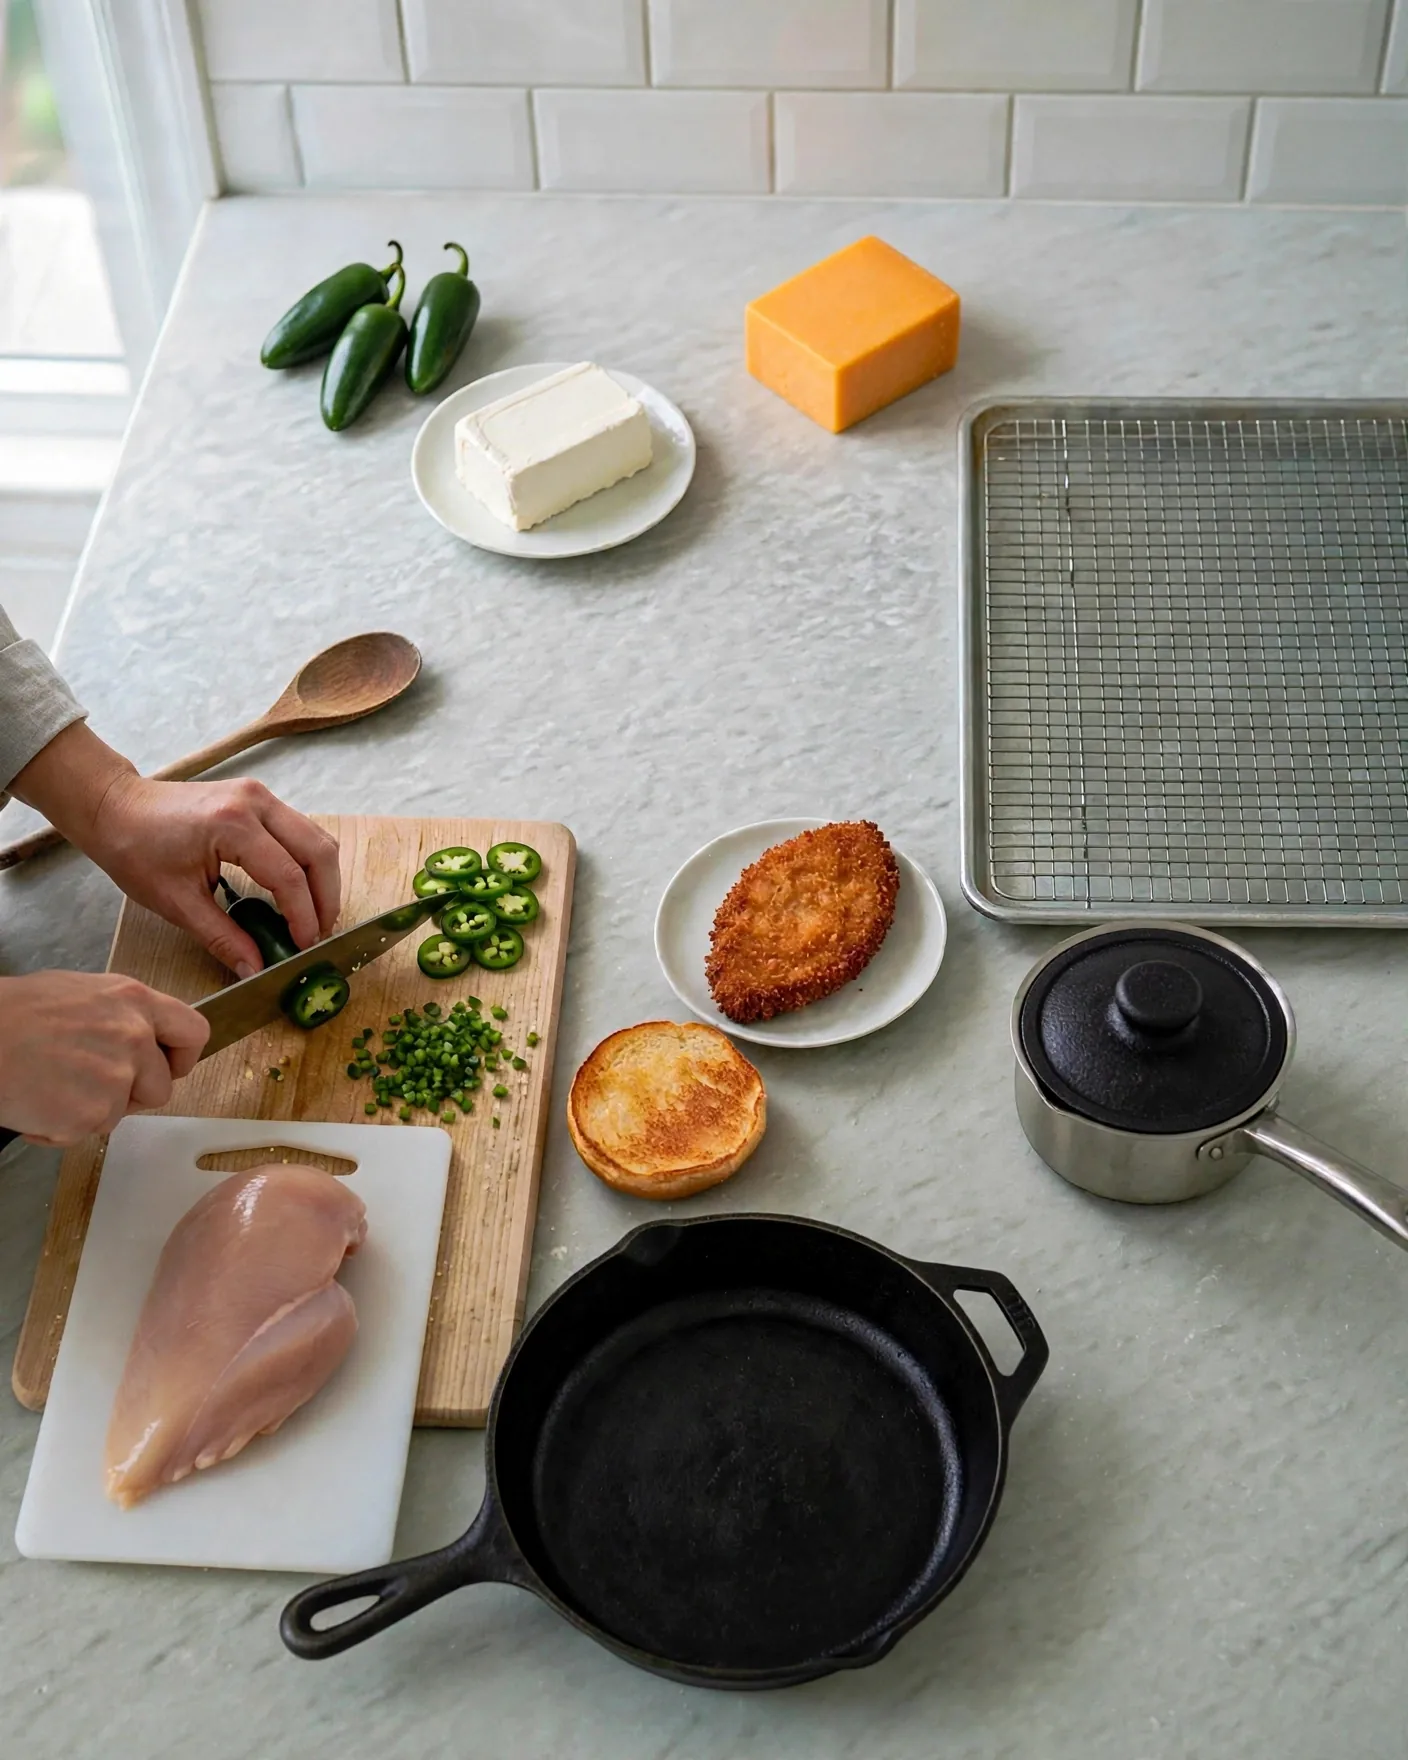
Safety note: wash your hands after handling jalapeños, and keep your fingers away from your eyes. The oil stays on skin longer than you expect.
Grate the cheddar on the large holes of a box grater. Freshly grated cheese melts smoother than the pre-shredded kind, which is coated to resist clumping — and resisting clumping means resisting melting.
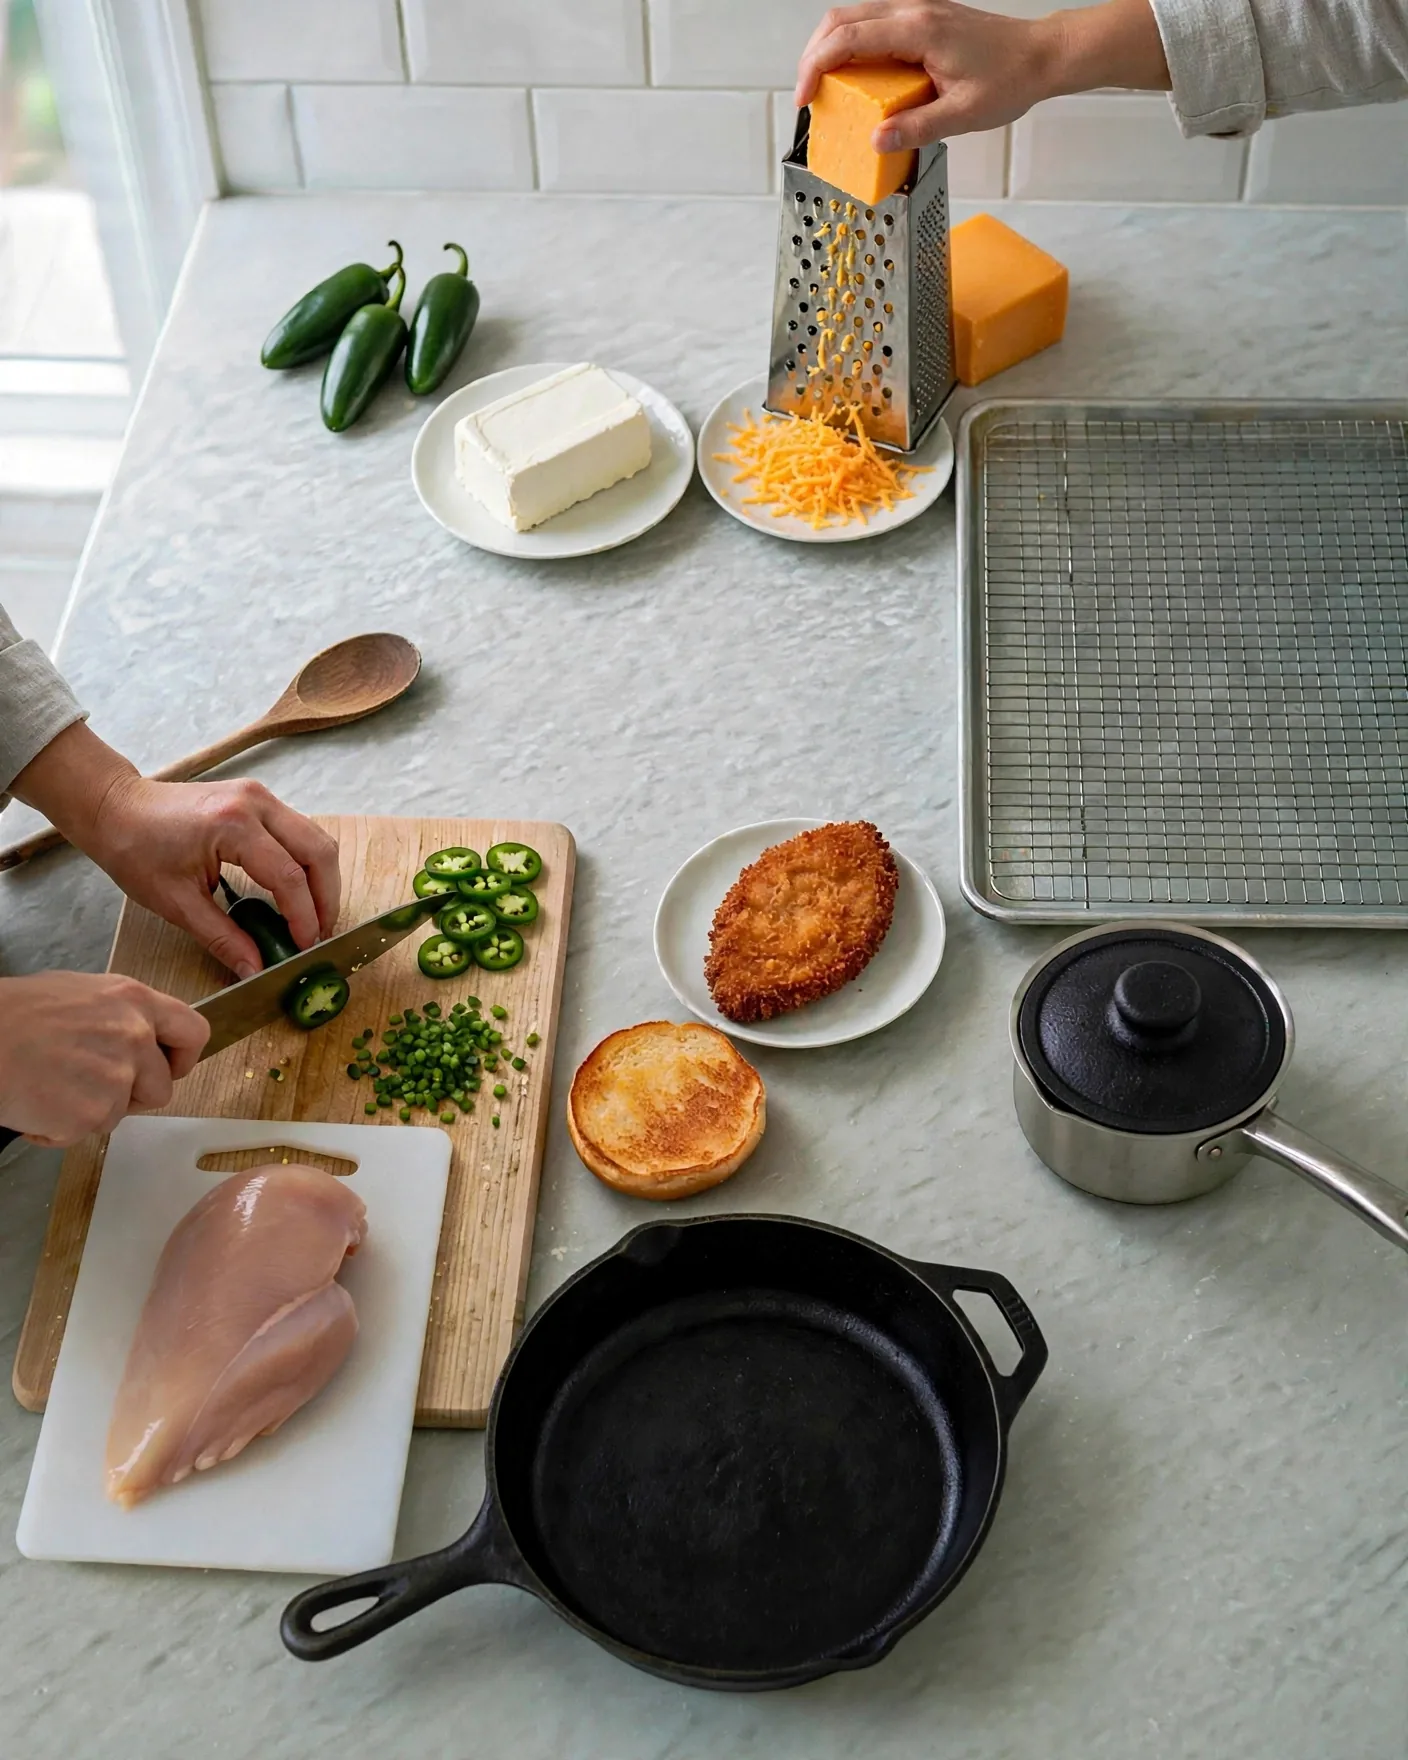
Mash the softened cream cheese with half the grated cheddar and the minced jalapeño until it is a thick, pale spread flecked with green. If the cream cheese was still cold, you will feel lumps — let it sit 10 more minutes and stir again.
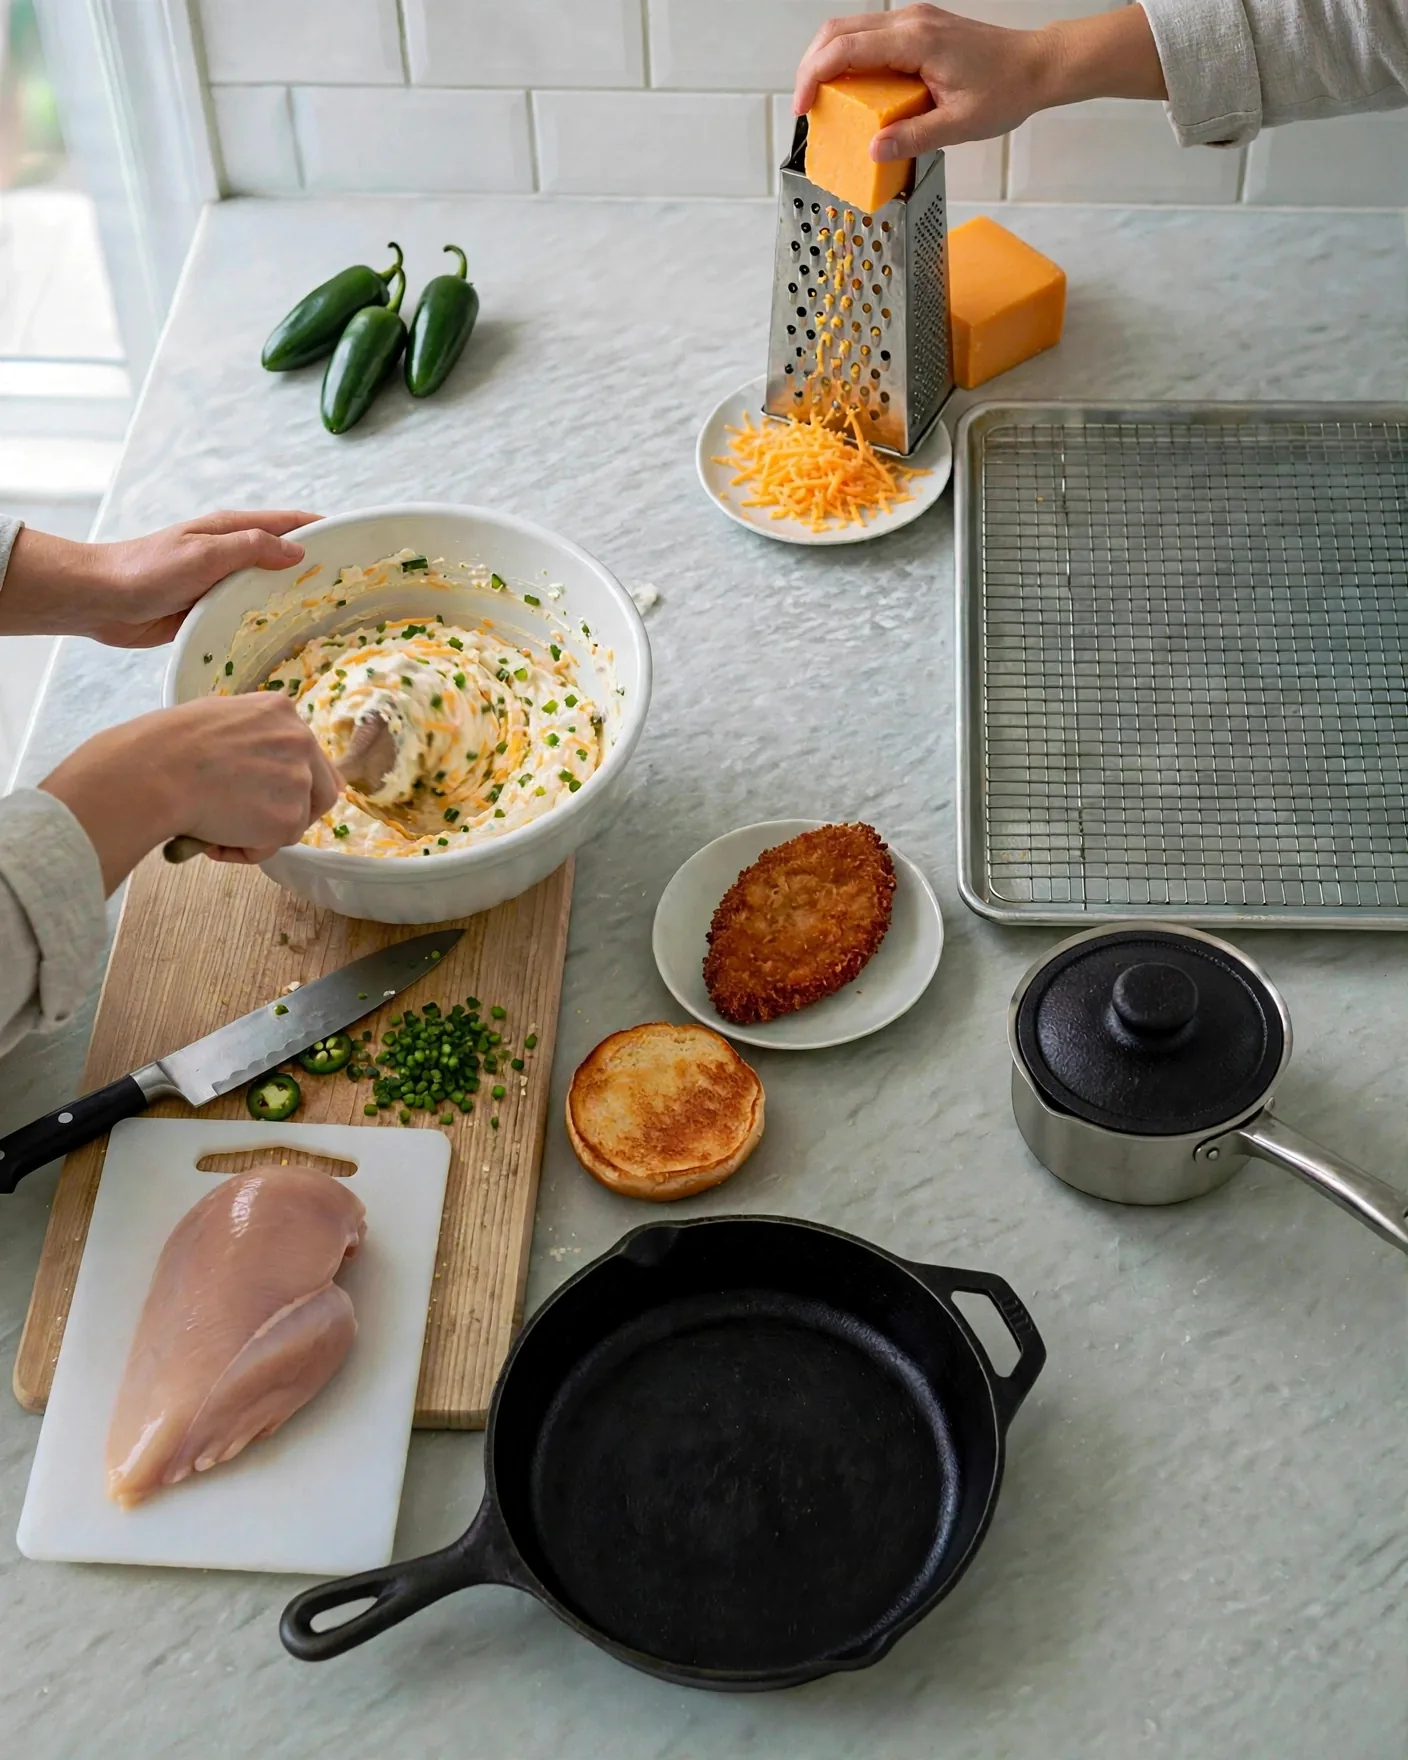
Spread the mixture thickly and evenly over the fried cutlet, edge to edge. A thin layer disappears under the cheese; a generous one stays creamy after melting.

Scatter the remaining cheddar over the spread and arrange the jalapeño rings on top.
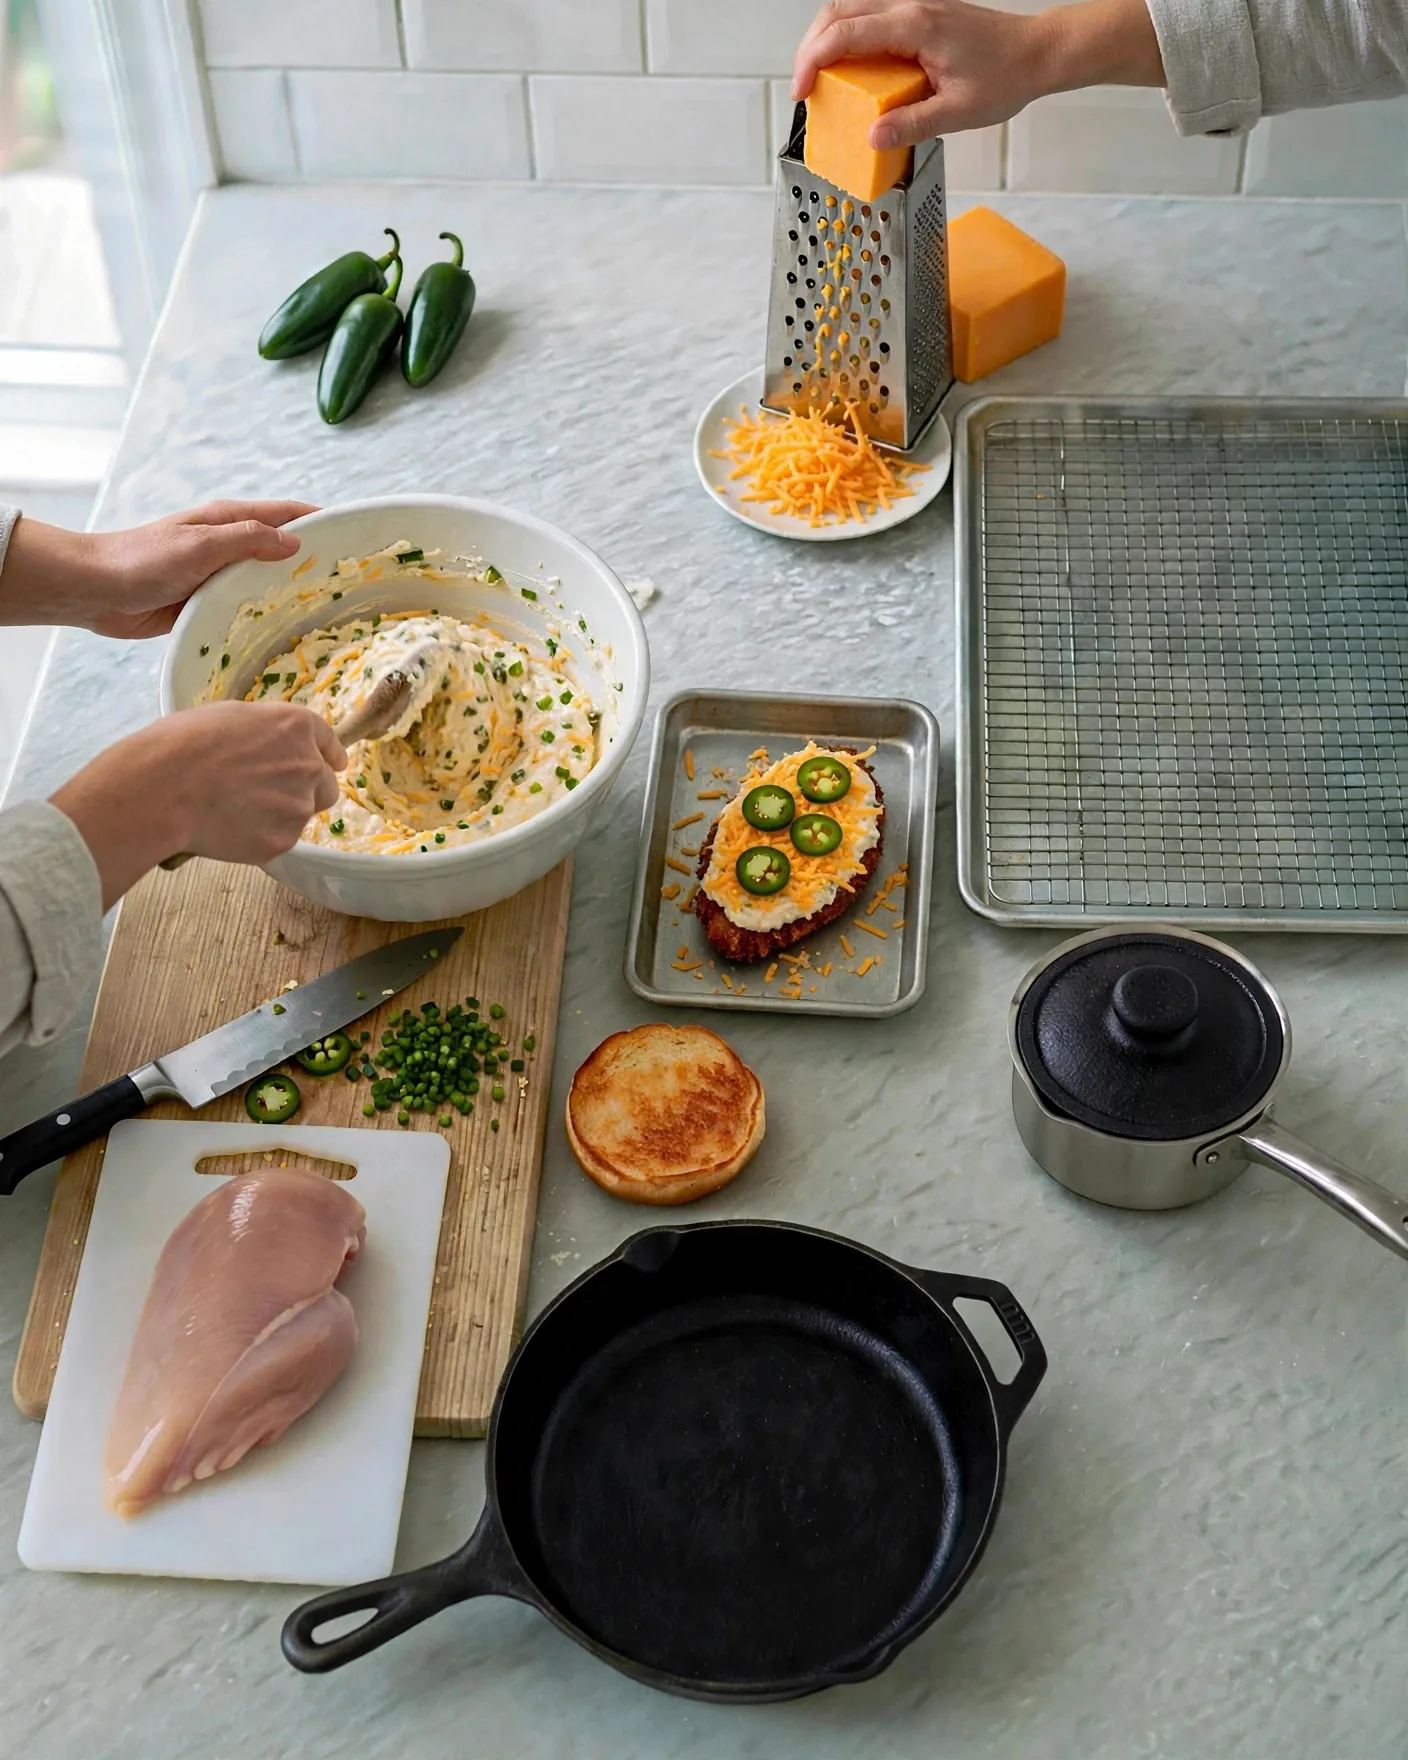
Slide the cutlet on its small baking sheet under a hot broiler (or into a 450°F / 230°C oven) for 2 to 3 minutes, until the cheddar is fully melted with golden-brown bubbled spots. Stand by and watch — the line between bubbled and burnt is about thirty seconds.
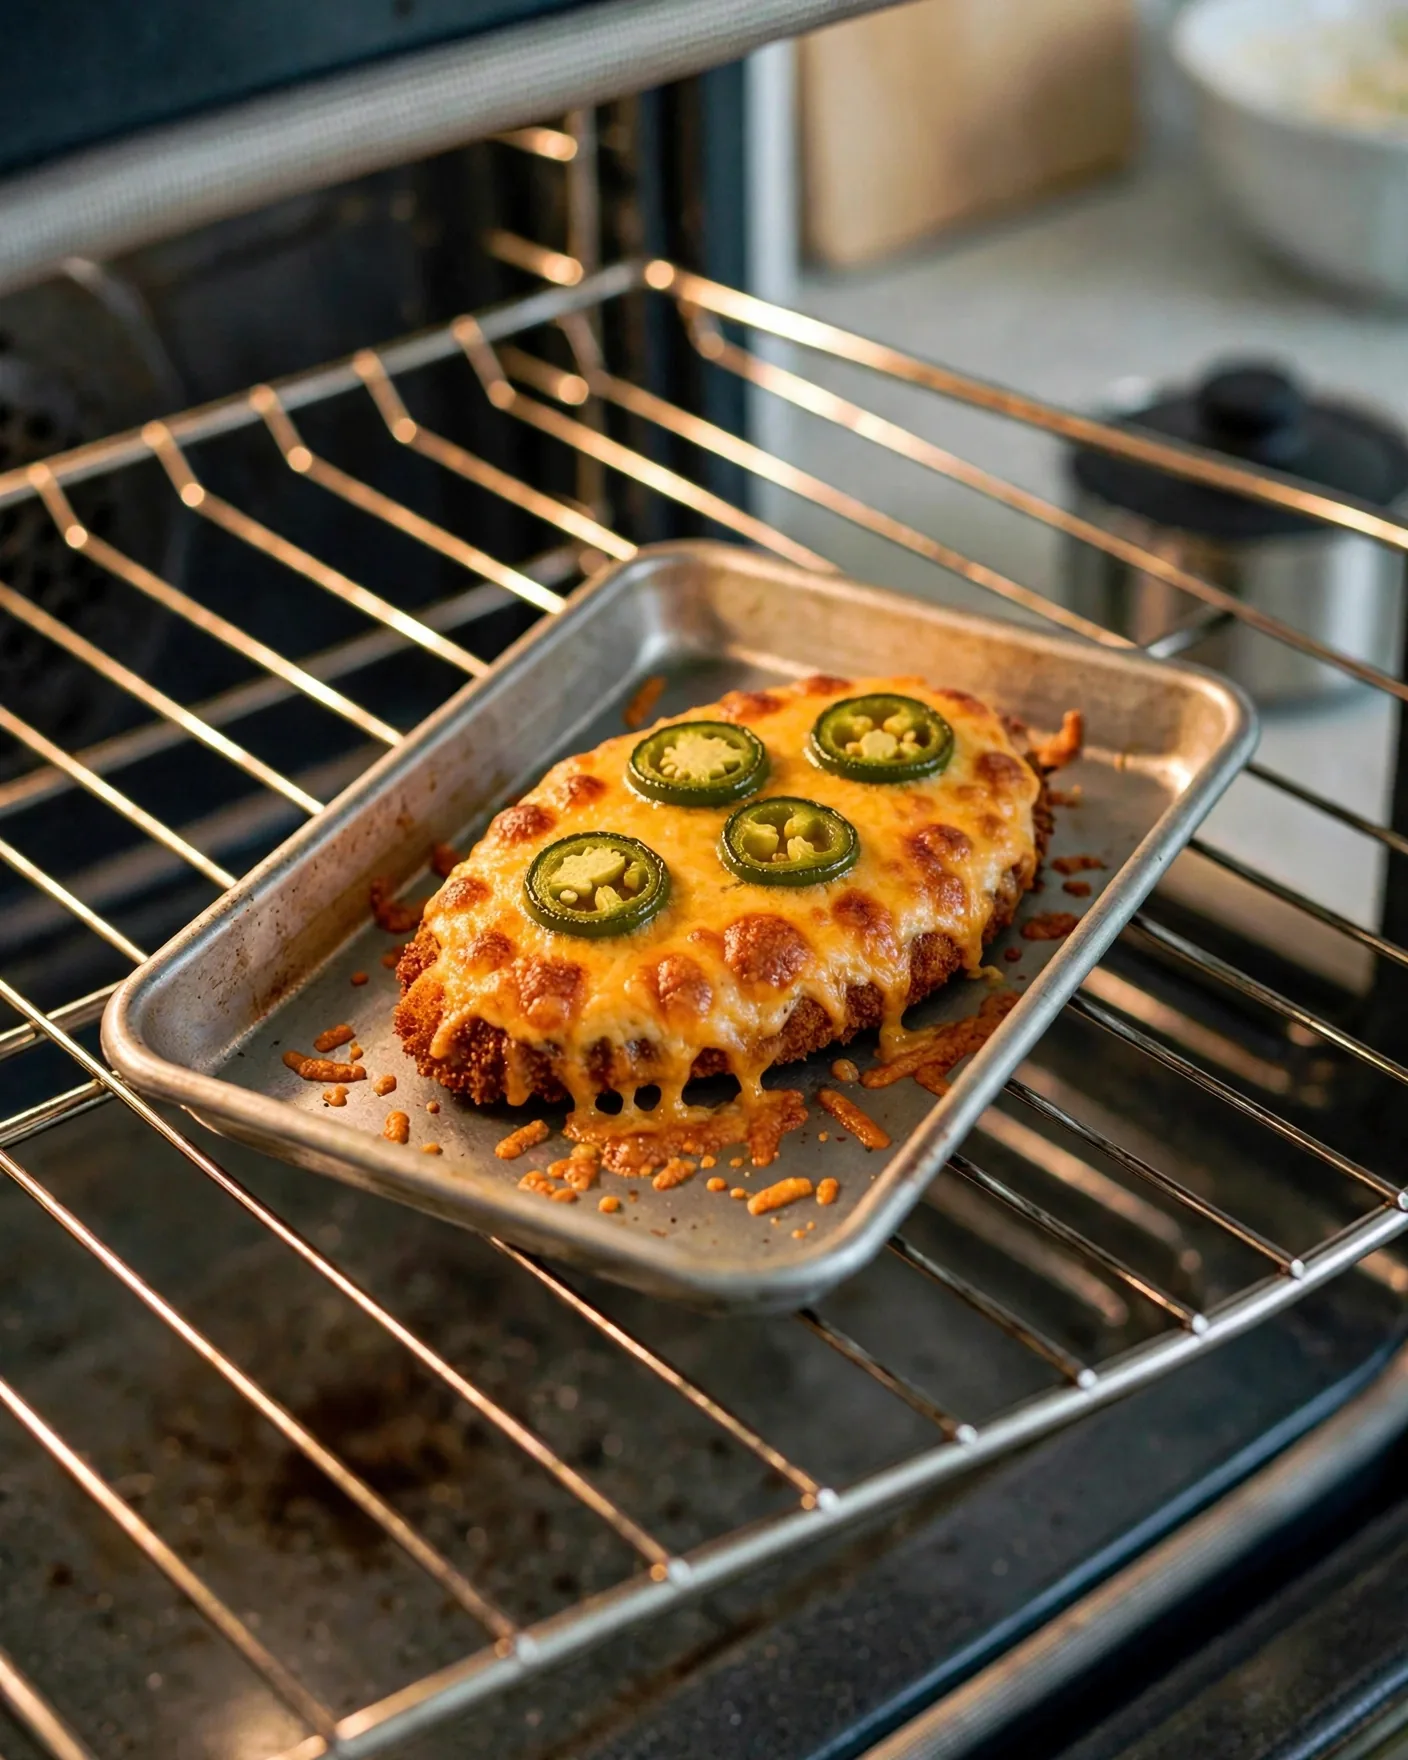
Lift the cheesy cutlet onto the bottom bun with a spatula — the cheese will stretch a little, which is exactly right — and close with the top bun.

Jalapeño Popper Chicken Sandwich
Ingredients
Method
- Mash the softened cream cheese with half the cheddar and the minced jalapeño into a thick spread.
- Spread generously over the fried cutlet; top with the remaining cheddar and jalapeño rings.
- Broil (or bake at 450°F / 230°C) 2–3 minutes until the cheese melts with golden-brown spots. Watch closely.
- Transfer to the bottom bun with a spatula, close, and serve hot.
Notes

Sandwich 4: Spicy Fried Chicken Sandwich
Nashville-style heat without the deep fryer drama. Hot oil gets spooned over cayenne and spices to bloom them into a brick-red oil, which gets brushed over the crust — plus a spicy mayo for the bun. The same spice mix flavors both, so nothing goes to waste.

Ingredients — Sandwich 4 (makes 1 sandwich)
- 1 crispy fried cutlet and 1 toasted brioche bun, from the shared base
- 1 tablespoon cayenne pepper
- 1 teaspoon paprika
- 1 teaspoon garlic powder
- ½ teaspoon kosher salt
- 3 tablespoons hot frying oil, spooned from the skillet
- ⅓ cup mayonnaise
- 2 crisp lettuce leaves
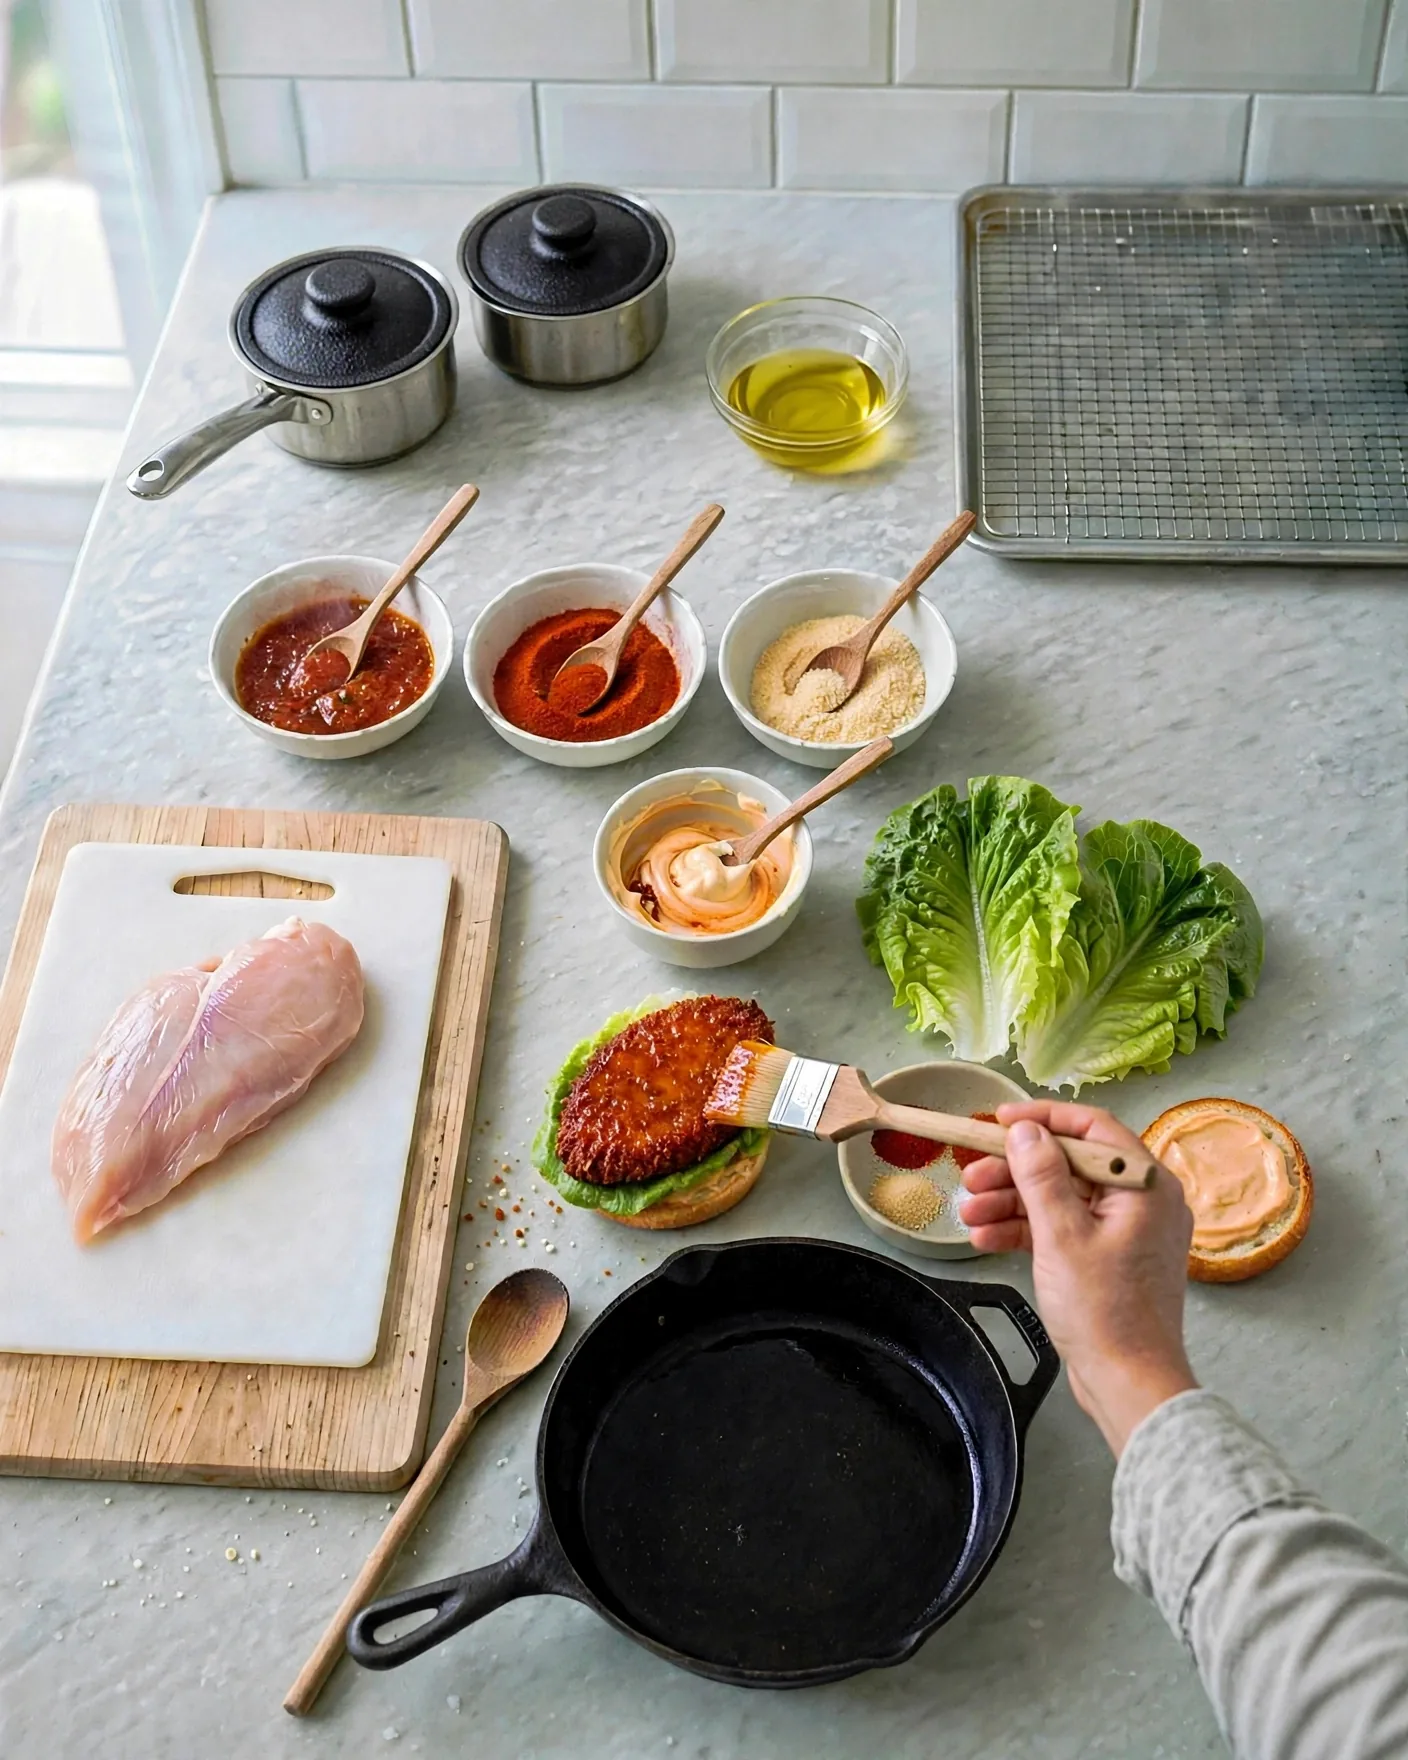
Combine the cayenne, paprika, garlic powder, and salt in a small heatproof bowl, keeping them in separate mounds for now so you can see the proportions.

Carefully spoon 3 tablespoons of the hot frying oil over the spices. It will bubble and sizzle as the heat blooms the spices into a deep red-orange paste. Stir to combine. This blooming step is what turns raw, harsh cayenne into rounded, toasty heat.
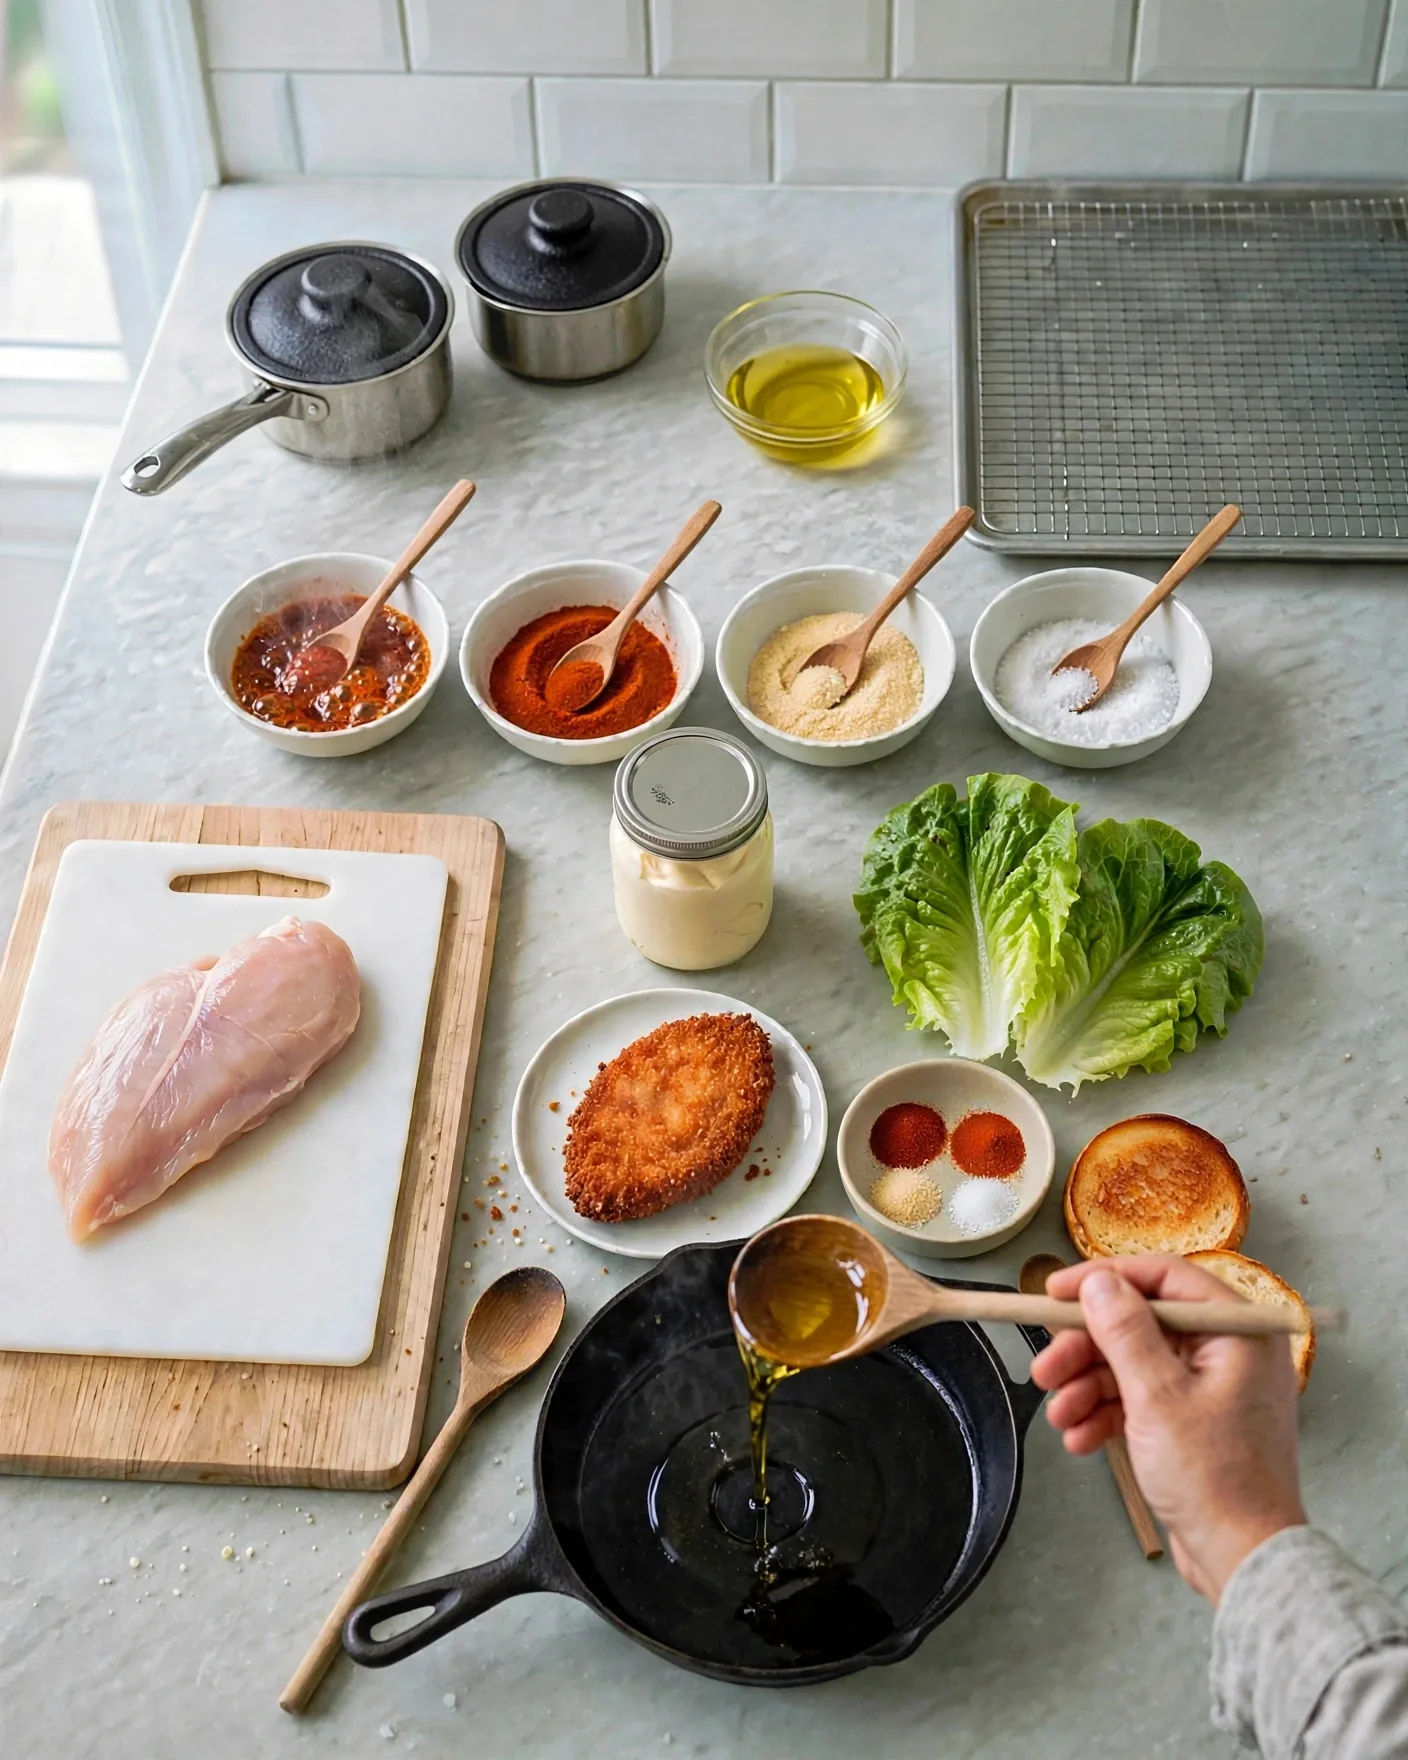
Safety note: the oil is genuinely hot — spoon it, do not pour from the heavy skillet, and keep the bowl steady on the counter.
Brush the spice oil all over the fried cutlet with a pastry brush until the crust glistens red-orange. Get into the crags; that is where the flavor hides.

Stir a spoonful of the spice paste into the mayonnaise until it turns pale orange. Taste it — this is your heat control. Want it milder, use less paste; want it fiercer, add more.

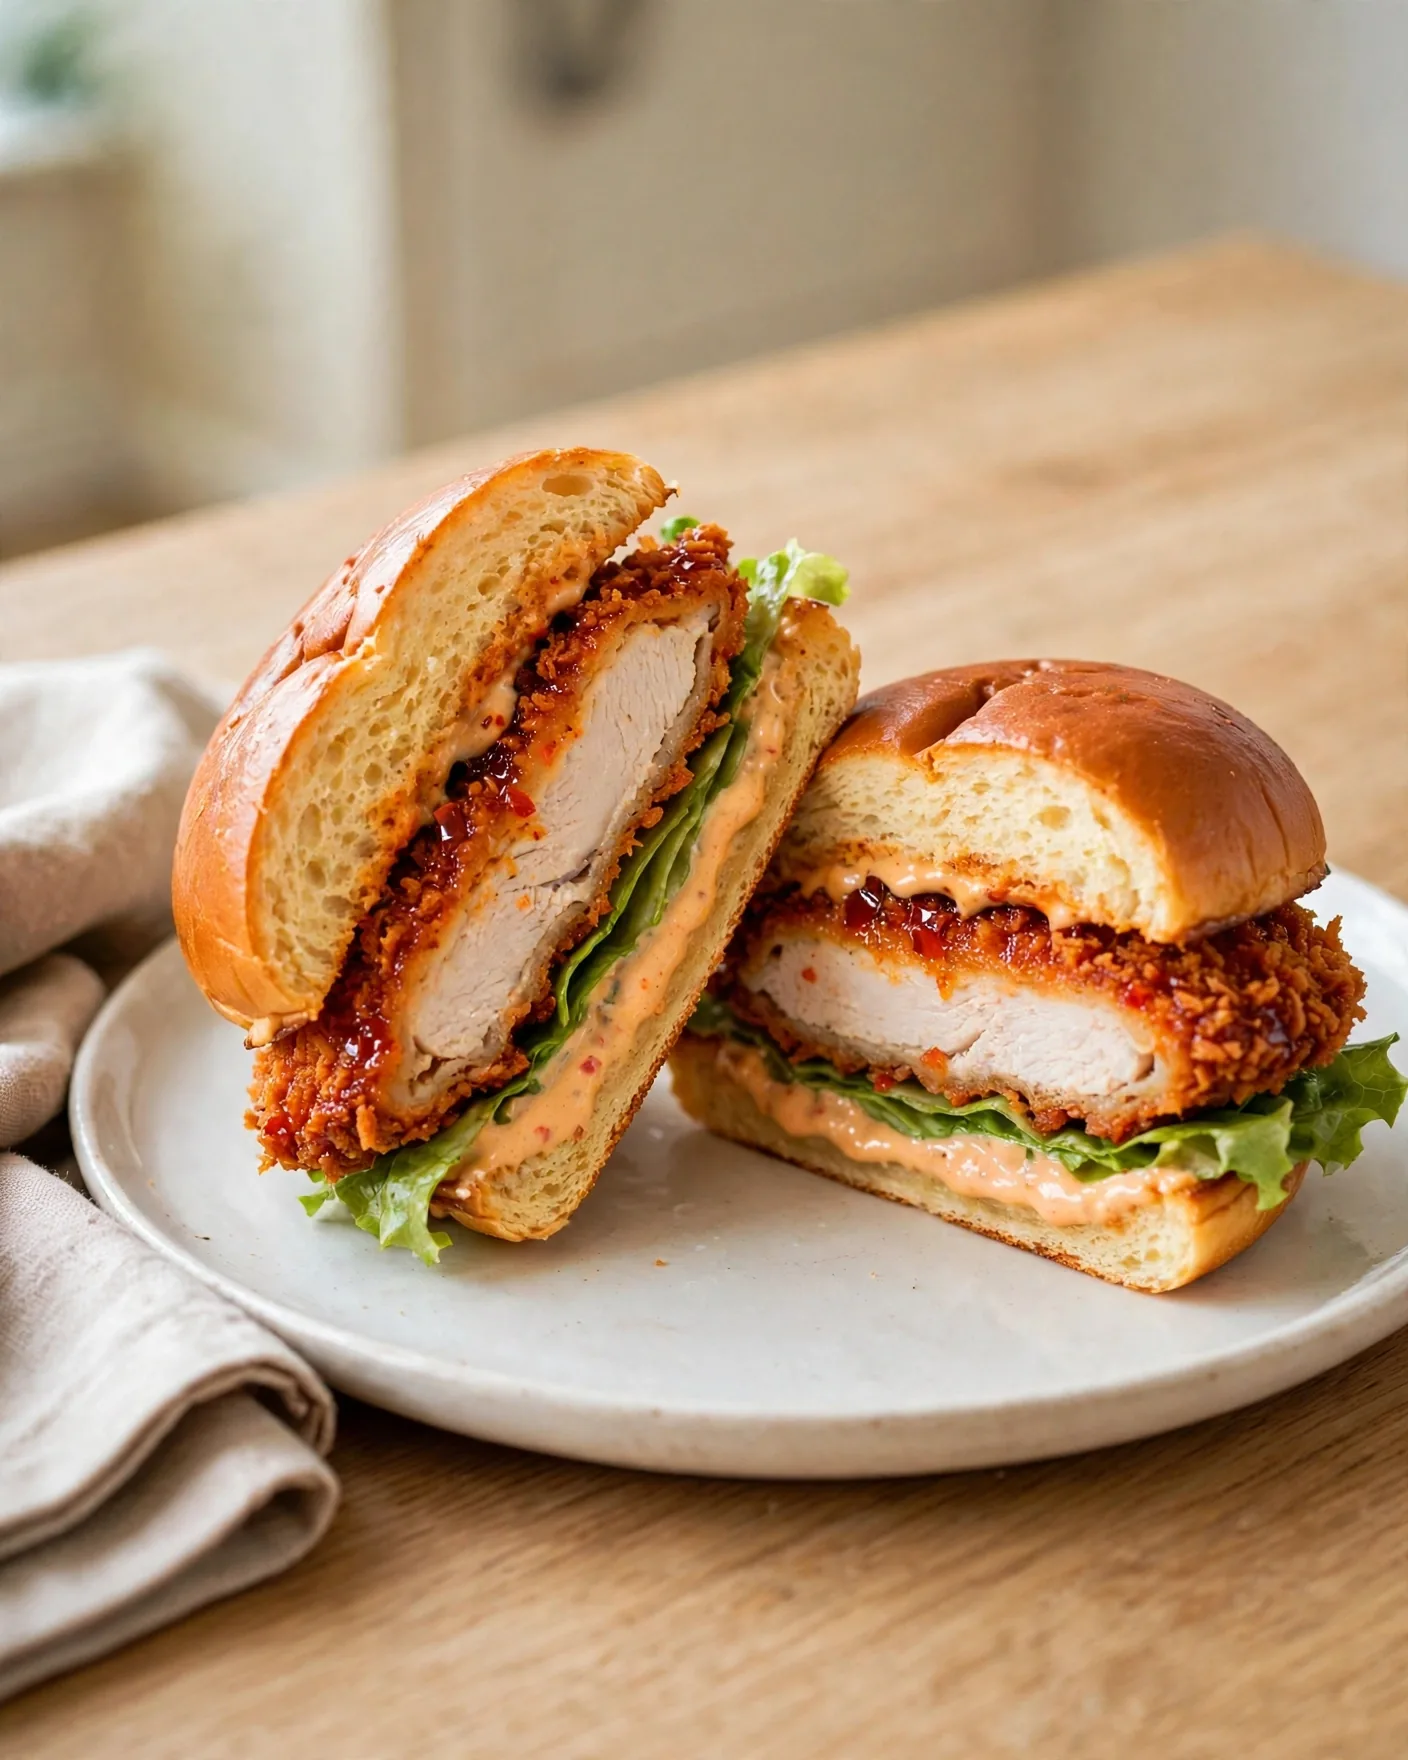
Spread the spicy mayo on the bottom bun, lay down the lettuce, and set the red-brushed cutlet on top. Close and serve. The cool lettuce and creamy mayo are doing important work against all that chile heat.
Spicy Fried Chicken Sandwich
Ingredients
Method
- Combine the cayenne, paprika, garlic powder, and salt in a small heatproof bowl.
- Carefully spoon the hot oil over the spices and stir into a red-orange paste.
- Brush the spice oil over the fried cutlet.
- Stir a spoonful of the spice paste into the mayonnaise; spread on the bottom bun.
- Add lettuce and the brushed cutlet, close, and serve.
Notes
Sandwich 5: Bacon Ranch Chicken Sandwich
The outlier — and the reason it belongs here. Instead of a fried cutlet, this one uses the plain fifth cutlet, grilled on a ridged pan for char marks, topped with melted cheddar and bacon, and finished with a homemade ranch. If someone at the table does not want fried food, this is their sandwich.
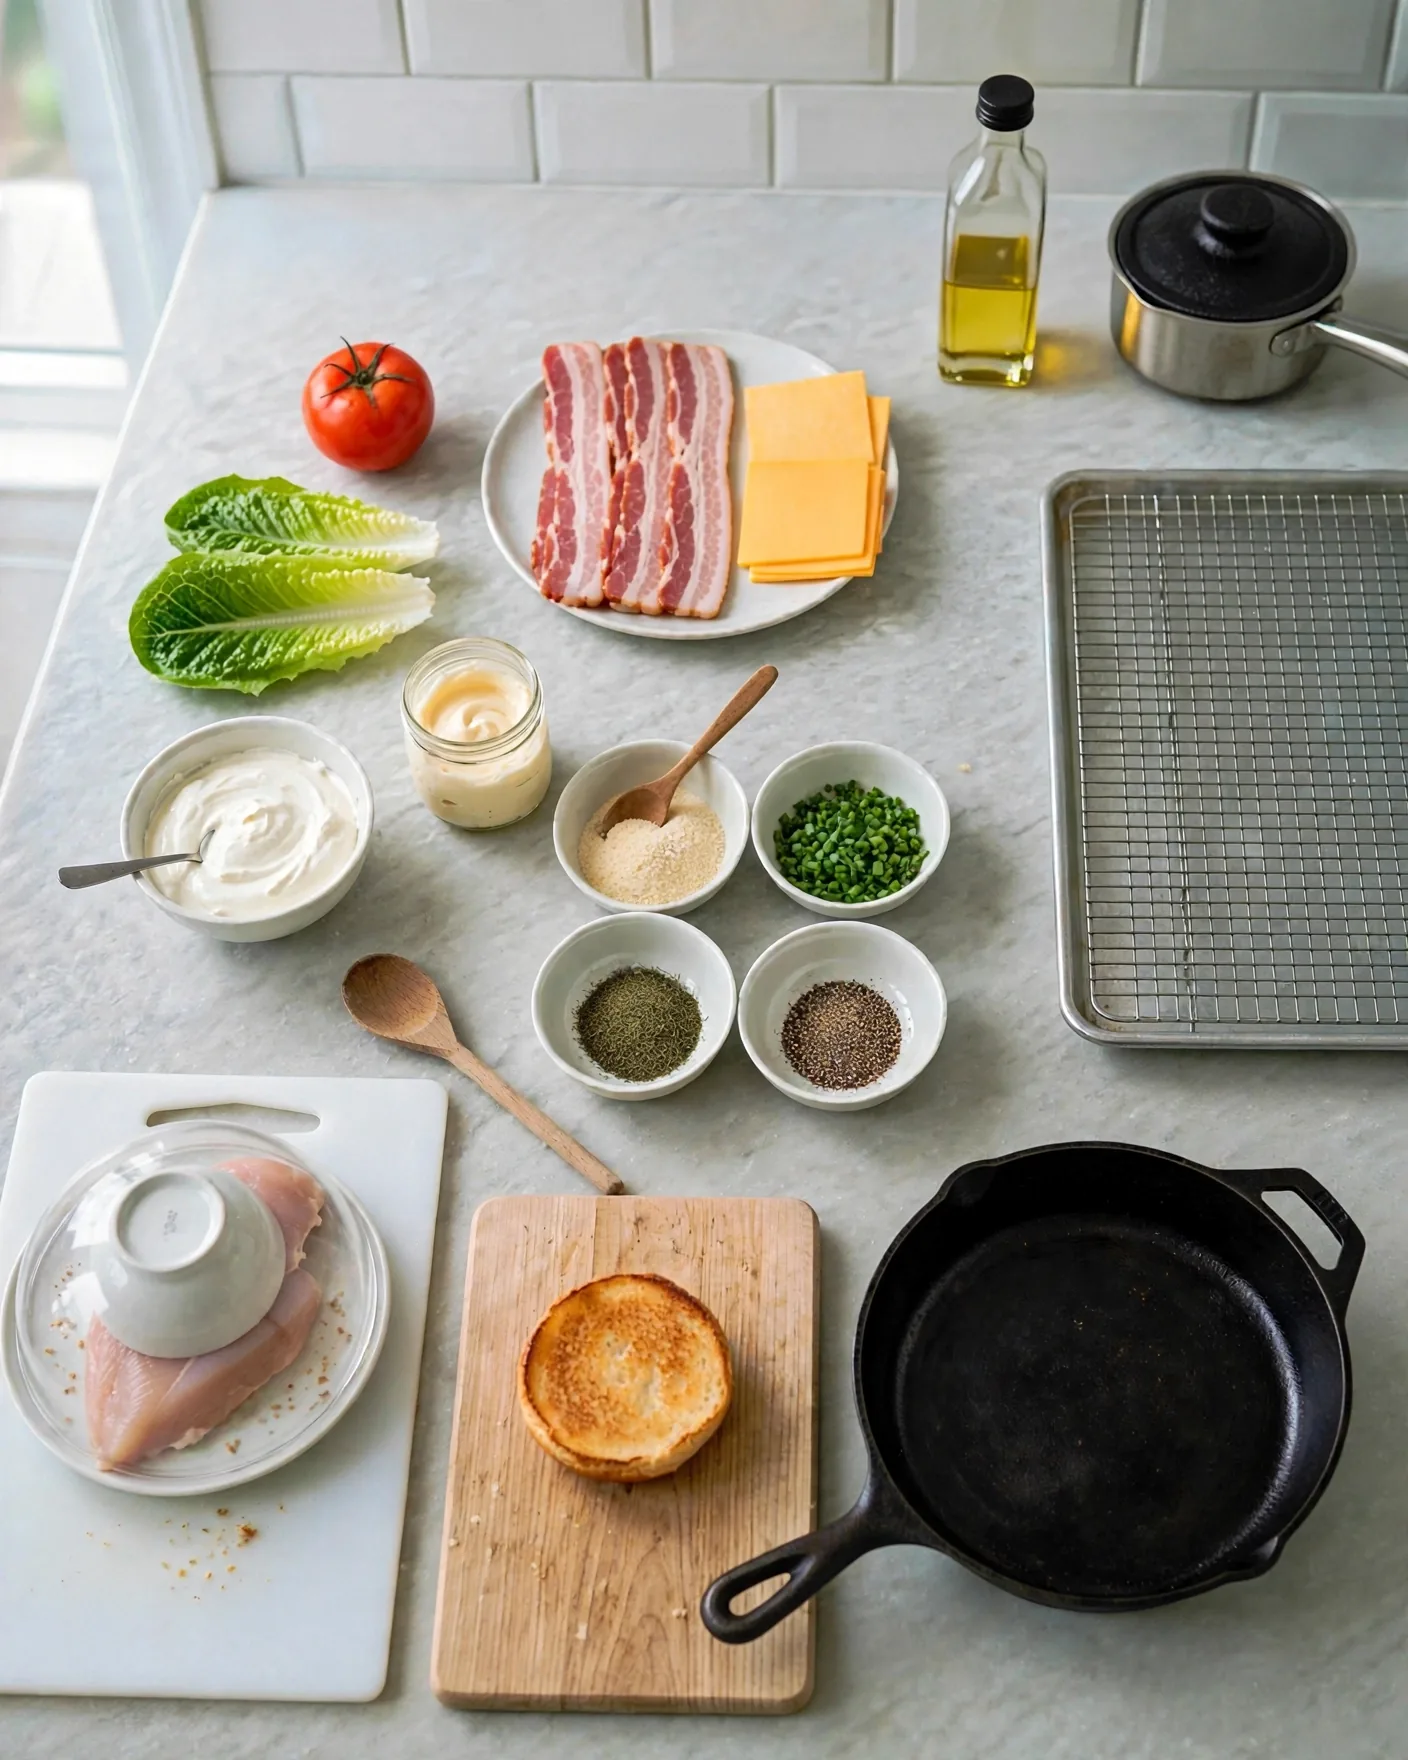
Ingredients — Sandwich 5 (makes 1 sandwich)
- 1 plain unbreaded cutlet (reserved from the shared base)
- For the chicken: 1 teaspoon garlic powder, 1 teaspoon paprika, ½ teaspoon kosher salt, ¼ teaspoon black pepper
- 4 strips bacon (2 for the sandwich)
- 1 slice cheddar cheese
- For the ranch: ¼ cup sour cream, ¼ cup mayonnaise, ½ teaspoon garlic powder, 1 teaspoon dried dill, 1 tablespoon chopped fresh chives, black pepper to taste
- 1 ripe tomato, sliced
- 1 lettuce leaf
- 1 toasted brioche bun, from the shared base
Season the plain cutlet on both sides with the garlic powder, paprika, salt, and pepper, pressing the spices lightly into the meat so they stay put in the pan.

Lay the bacon strips in a cold skillet, then set it over medium heat. Starting cold lets the fat render slowly, which is what makes bacon crisp instead of chewy-burnt.
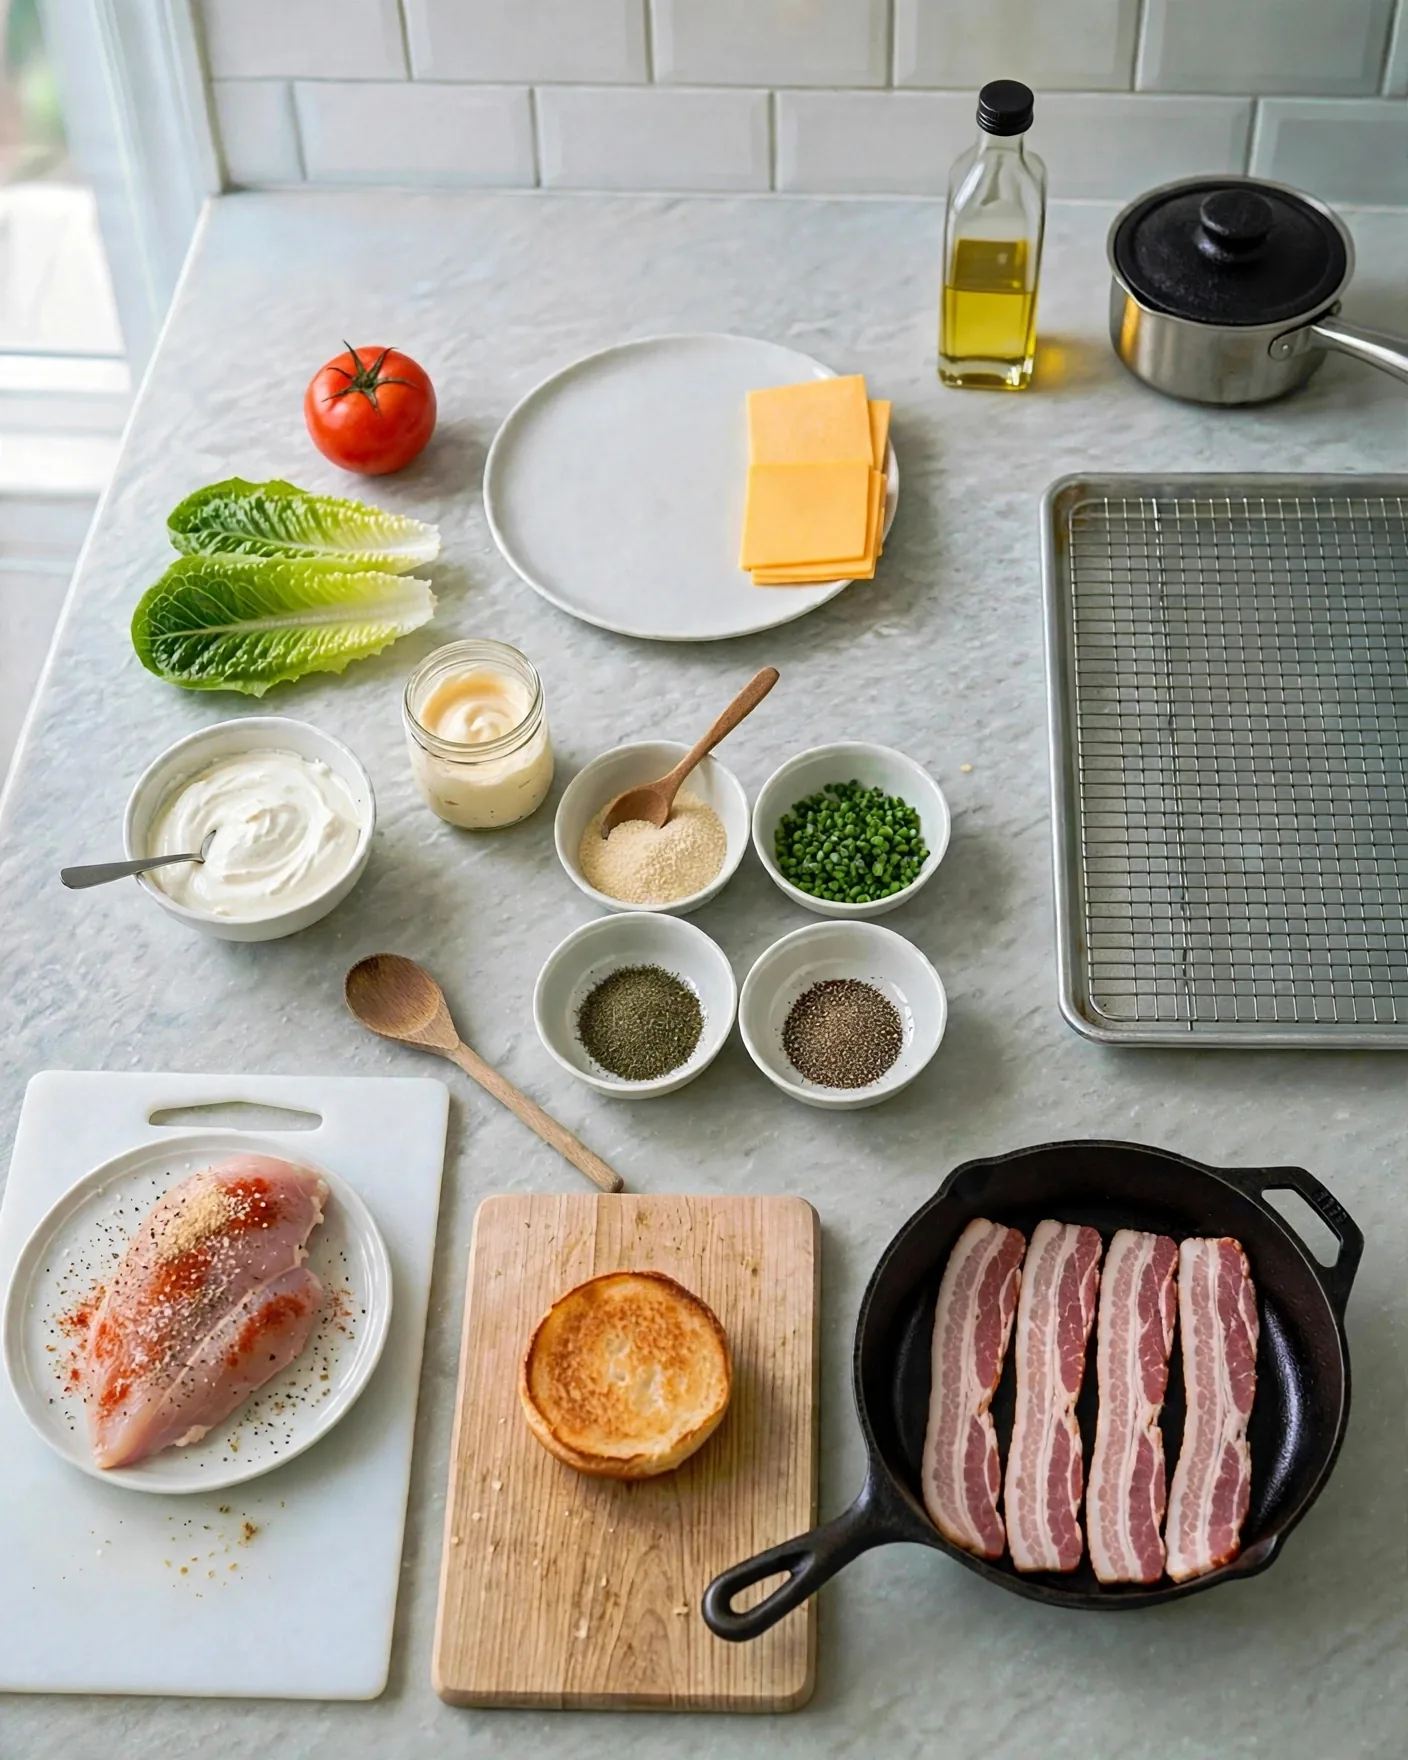
Cook, turning once, until deeply golden and crisp, 8 to 10 minutes total. Drain on a paper-towel-lined plate. Pour off all but a thin film of the rendered fat — you will grill the chicken in the ridged grill pan, not this one.
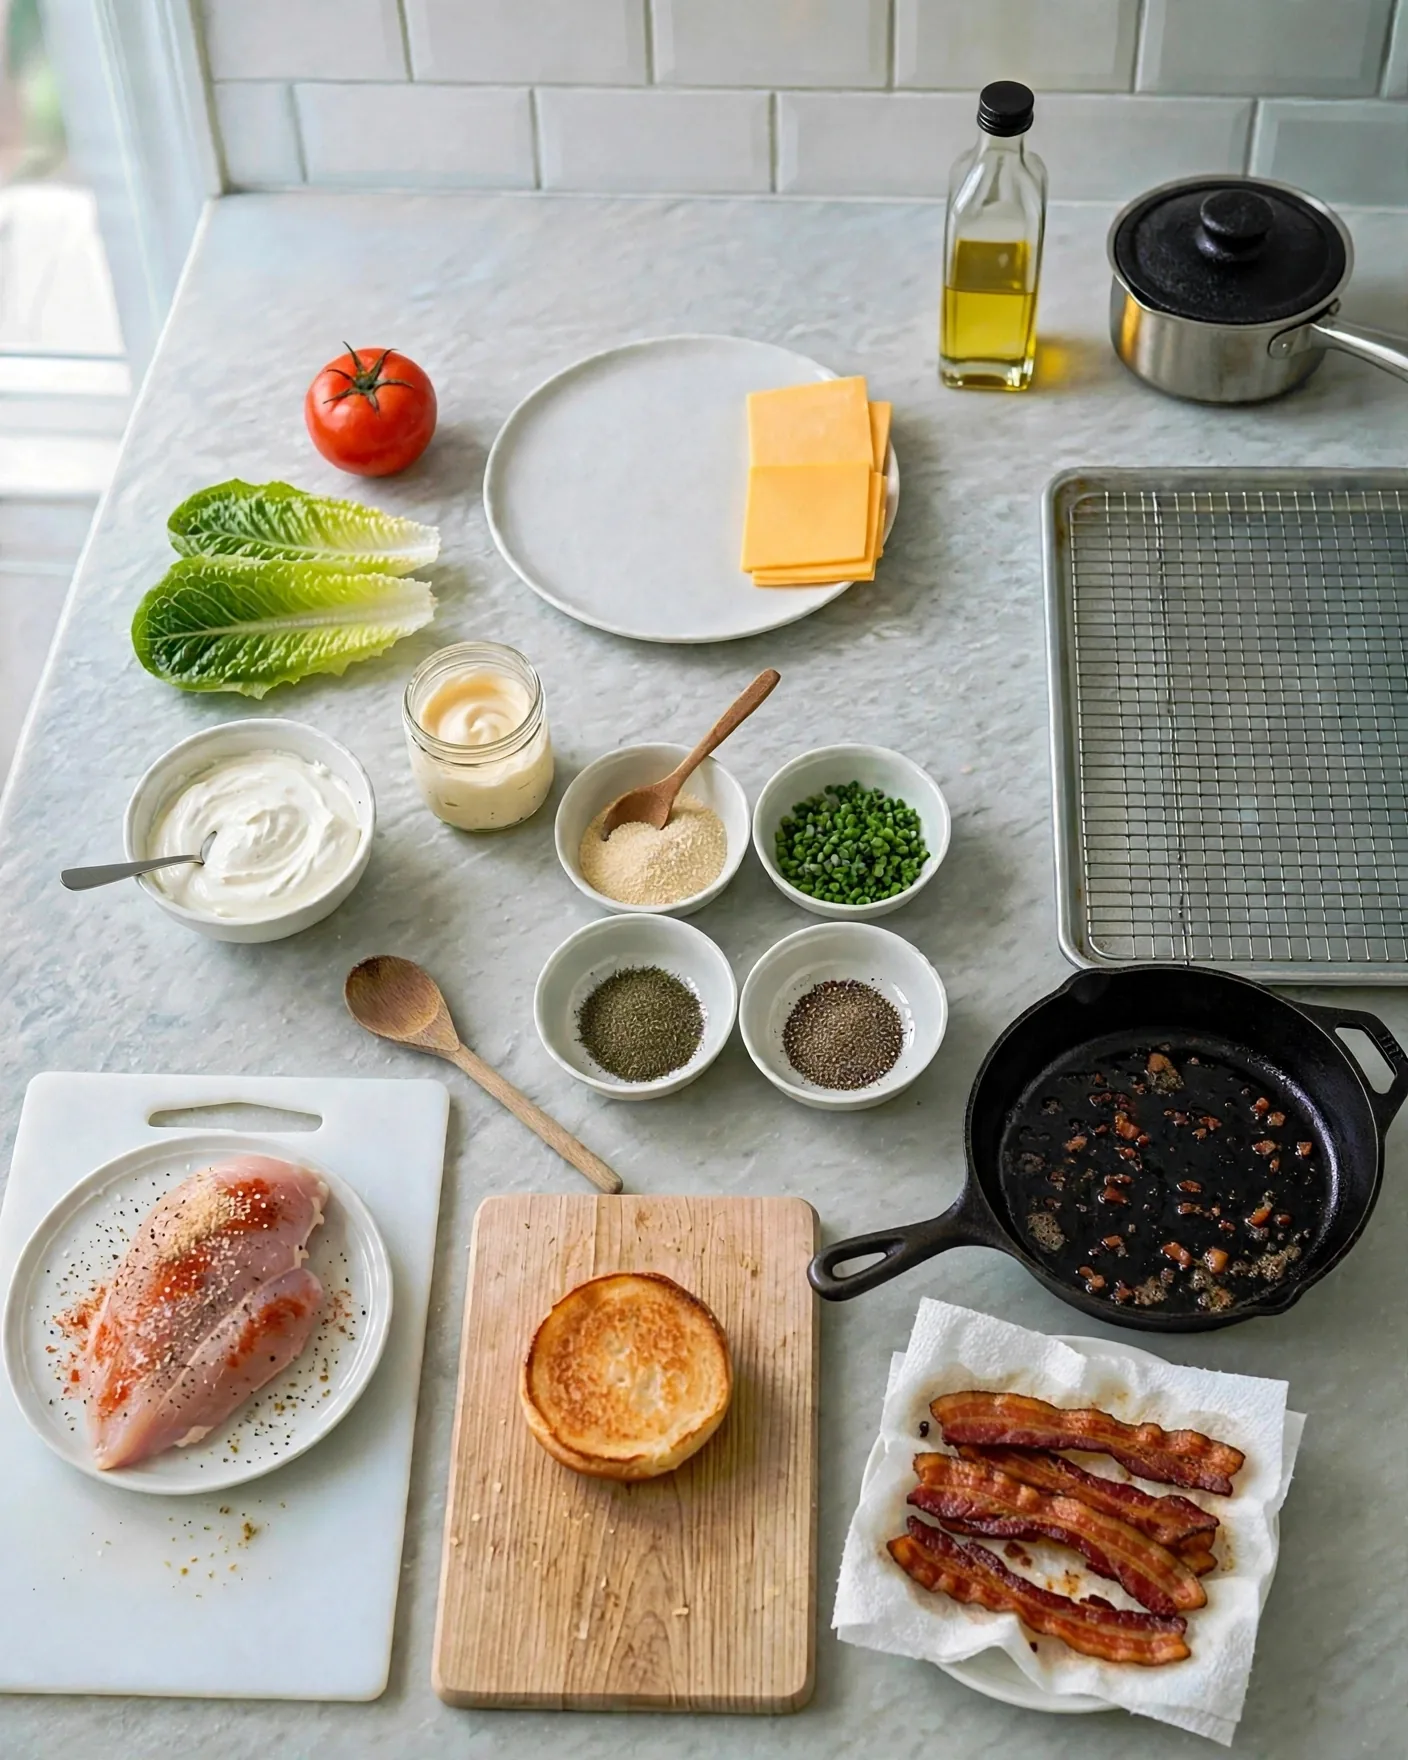
Heat the ridged grill pan over medium-high until a drop of water sizzles hard. Brush lightly with oil and lay in the seasoned cutlet. You should hear a confident sizzle — a weak one means the pan was not hot enough for marks.
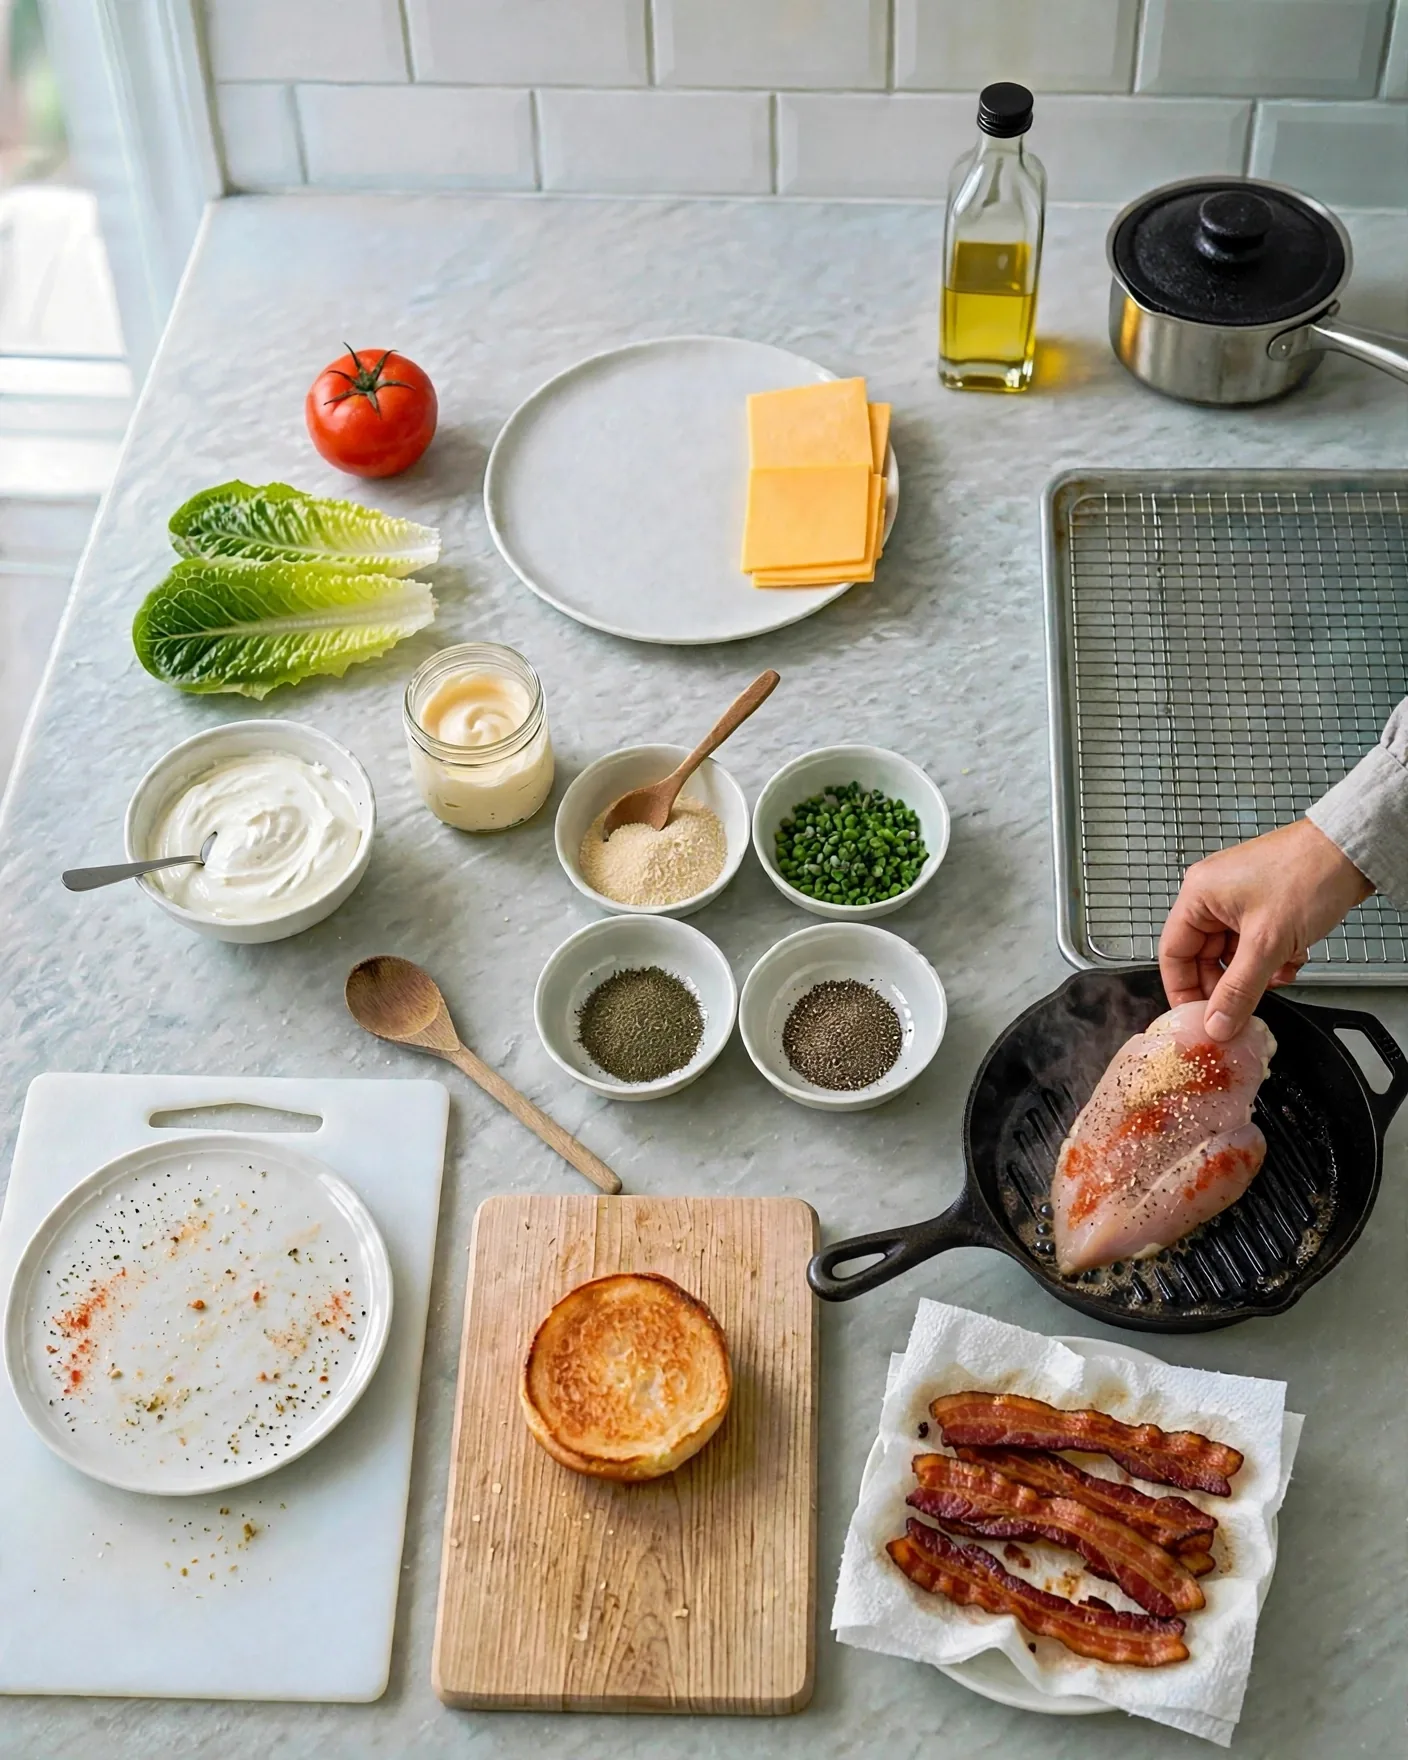
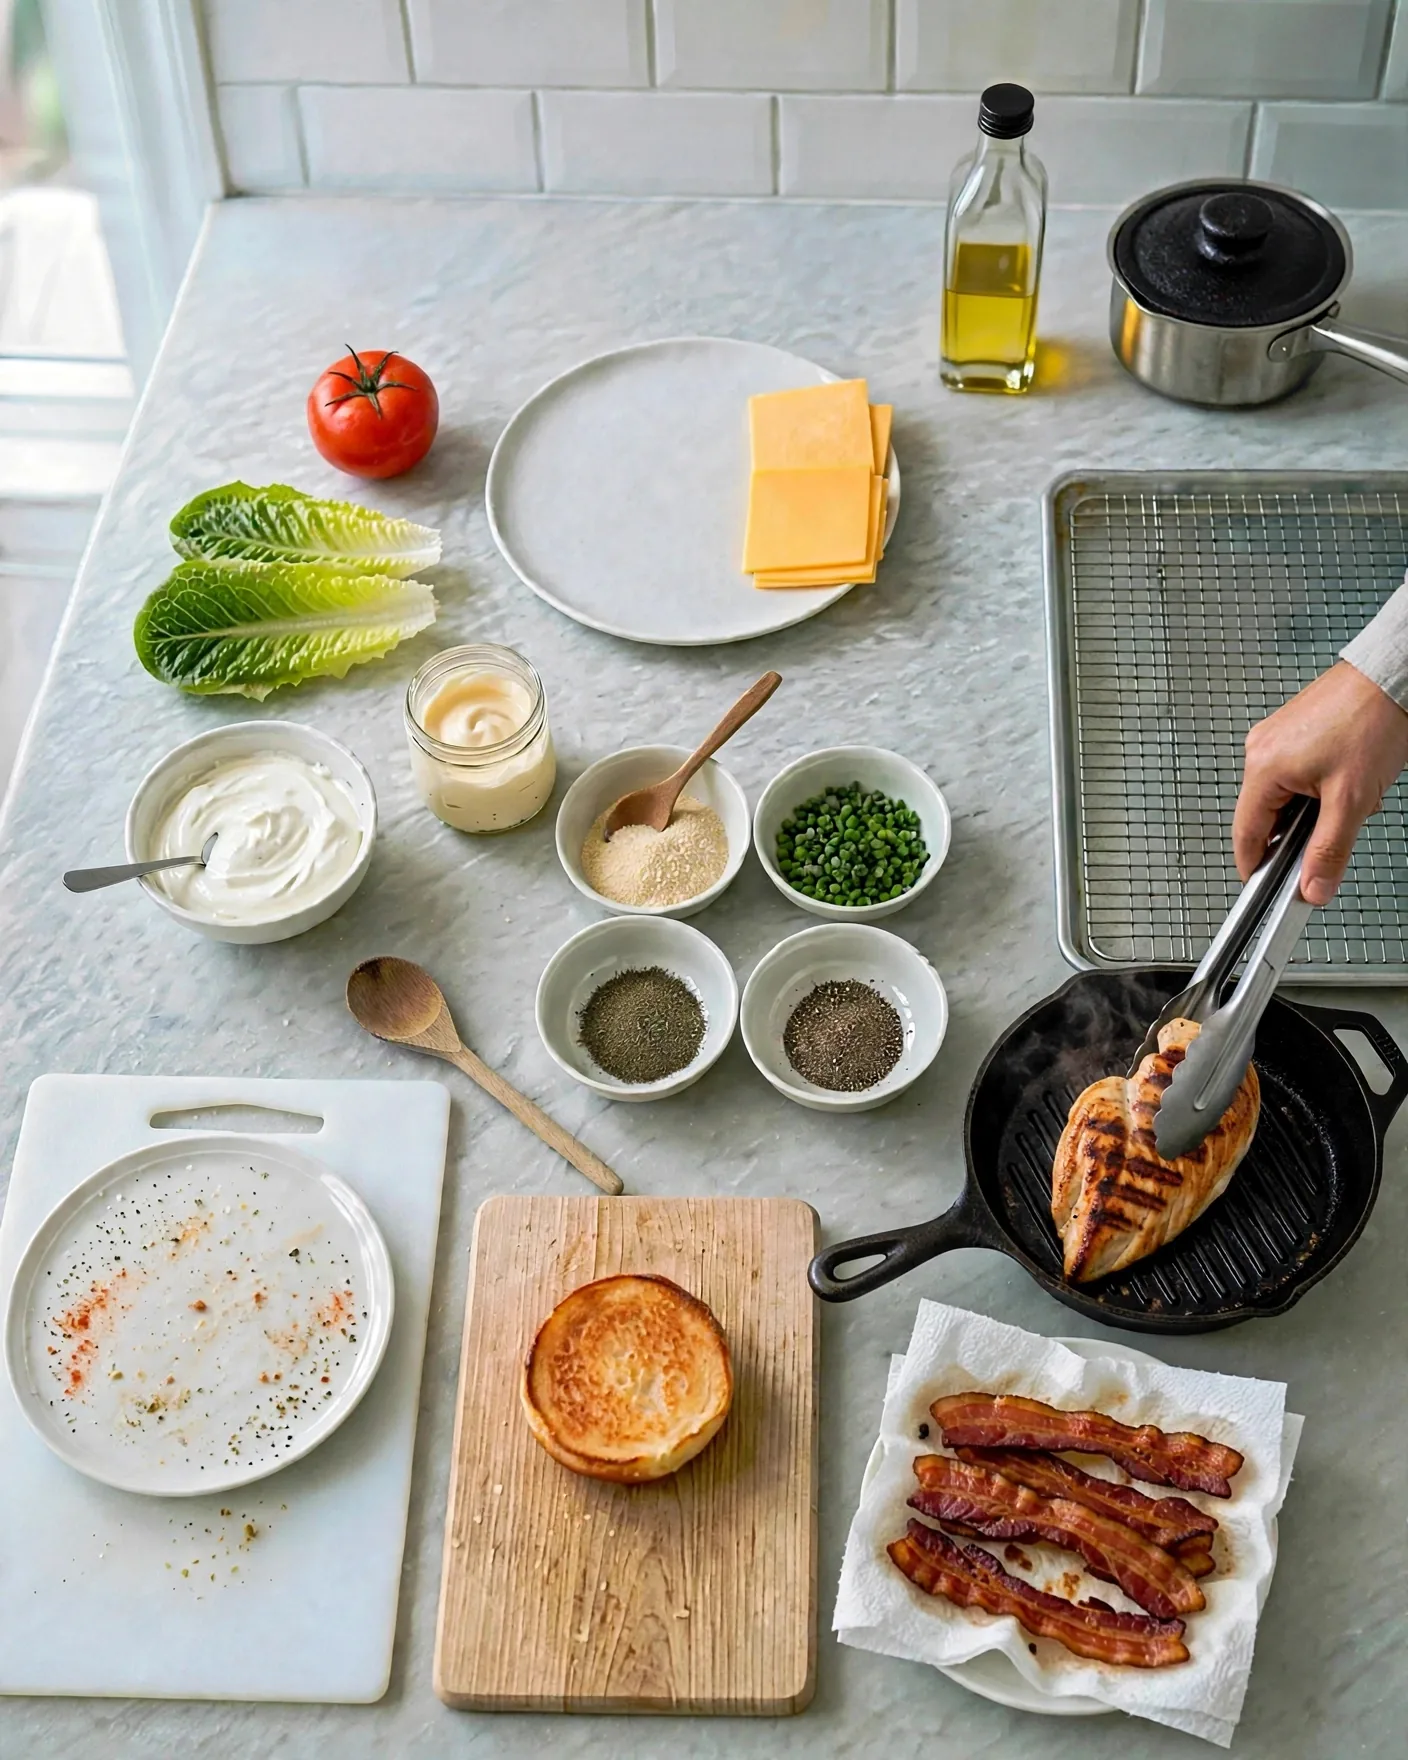
Grill 5 to 6 minutes without moving it — moving it smears the marks. Turn with tongs to reveal dark char lines, then grill 5 to 6 minutes more, until the thickest part reads 165°F (74°C).
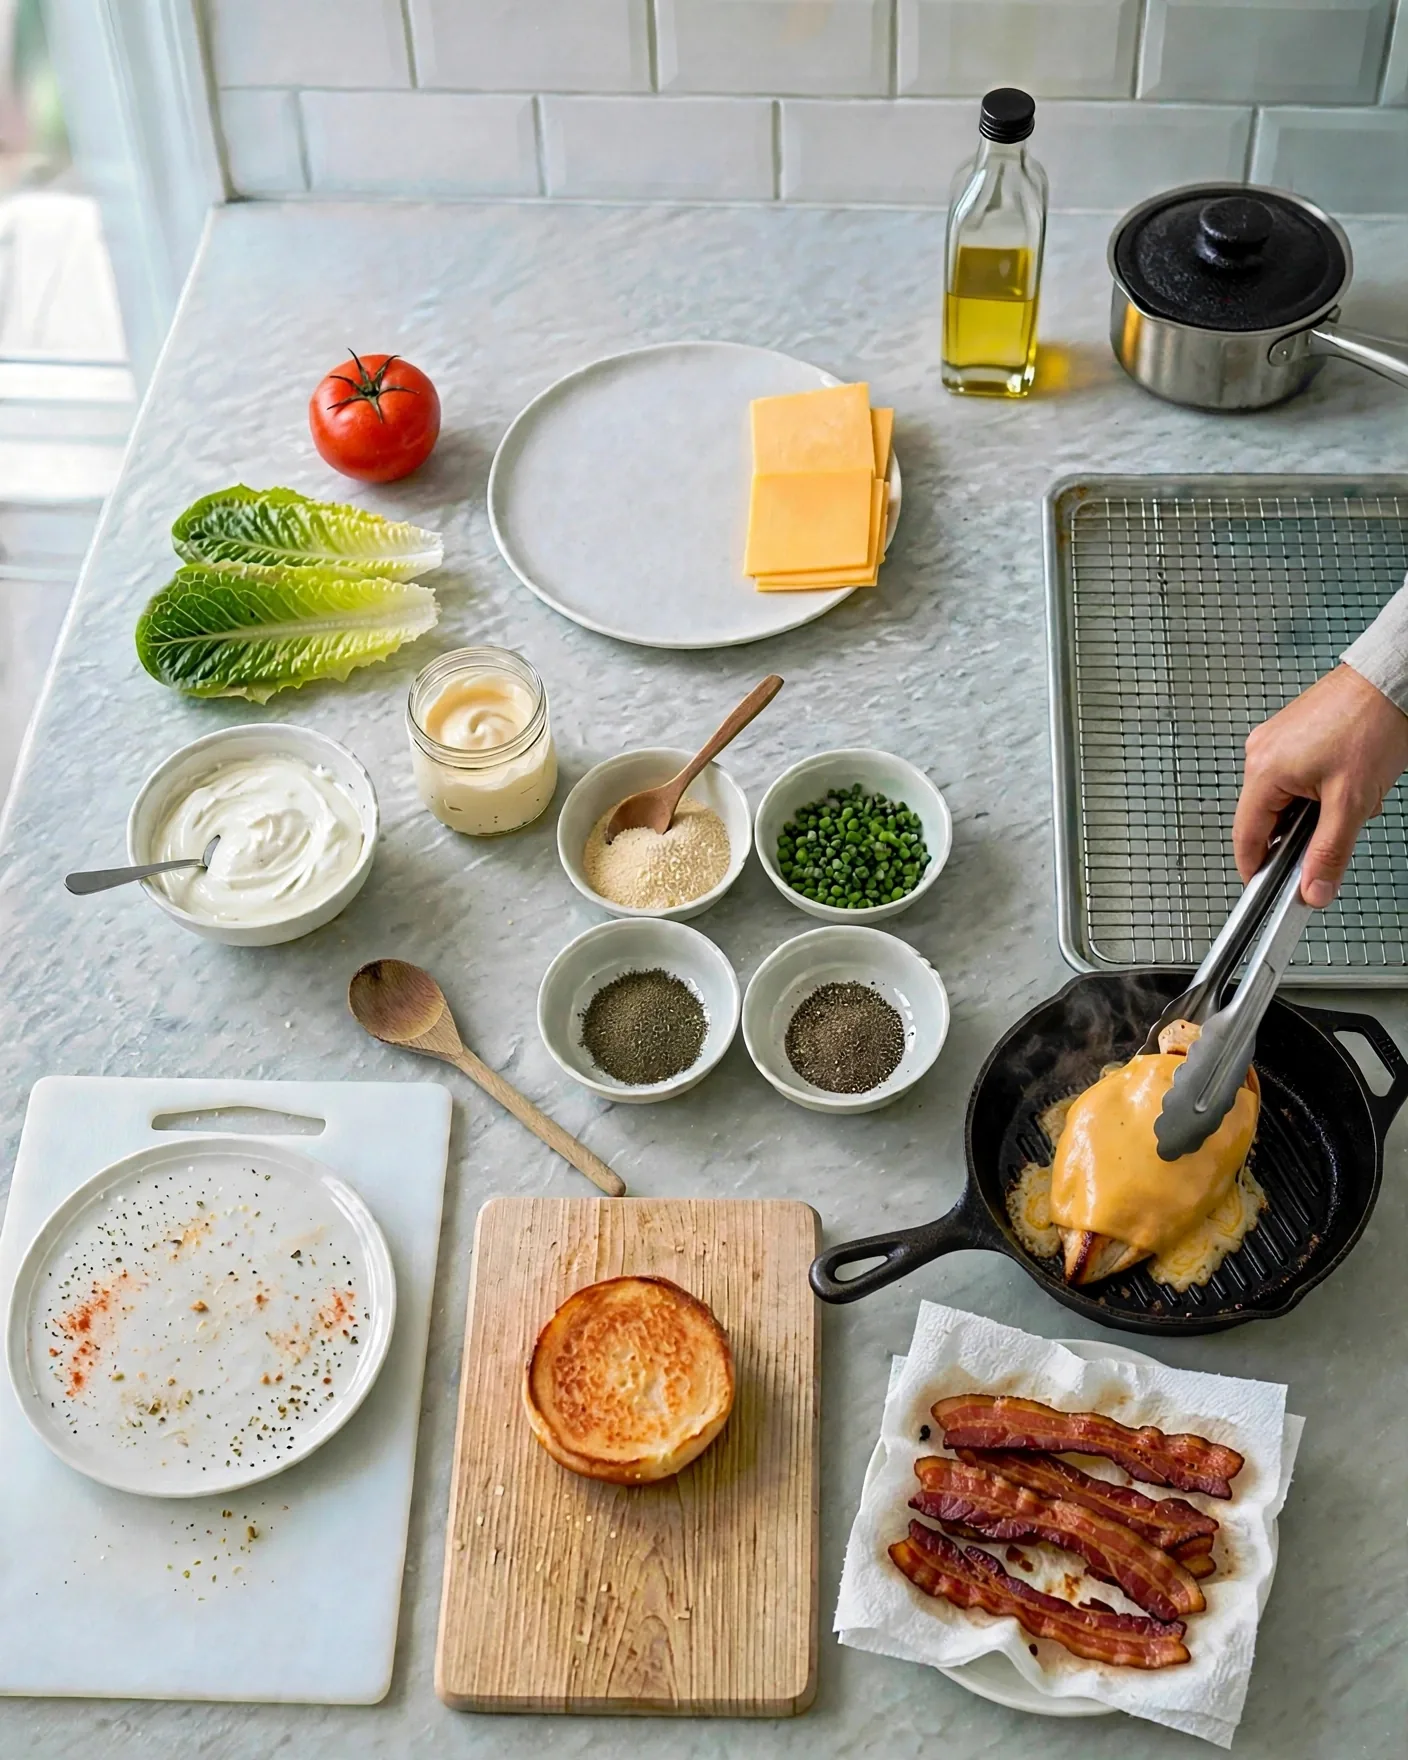
Lay the cheddar slice over the cutlet in the last minute of cooking and cover the pan loosely so the cheese melts and drapes over the edges.
While the chicken rests, build the ranch: sour cream, mayonnaise, garlic powder, dried dill, chives, and black pepper in a bowl, unmixed.

Stir until smooth, then lift the spoon to check — the ranch should fall in a thick but pourable ribbon, flecked with herbs. Too thick to drizzle? A teaspoon of milk loosens it.
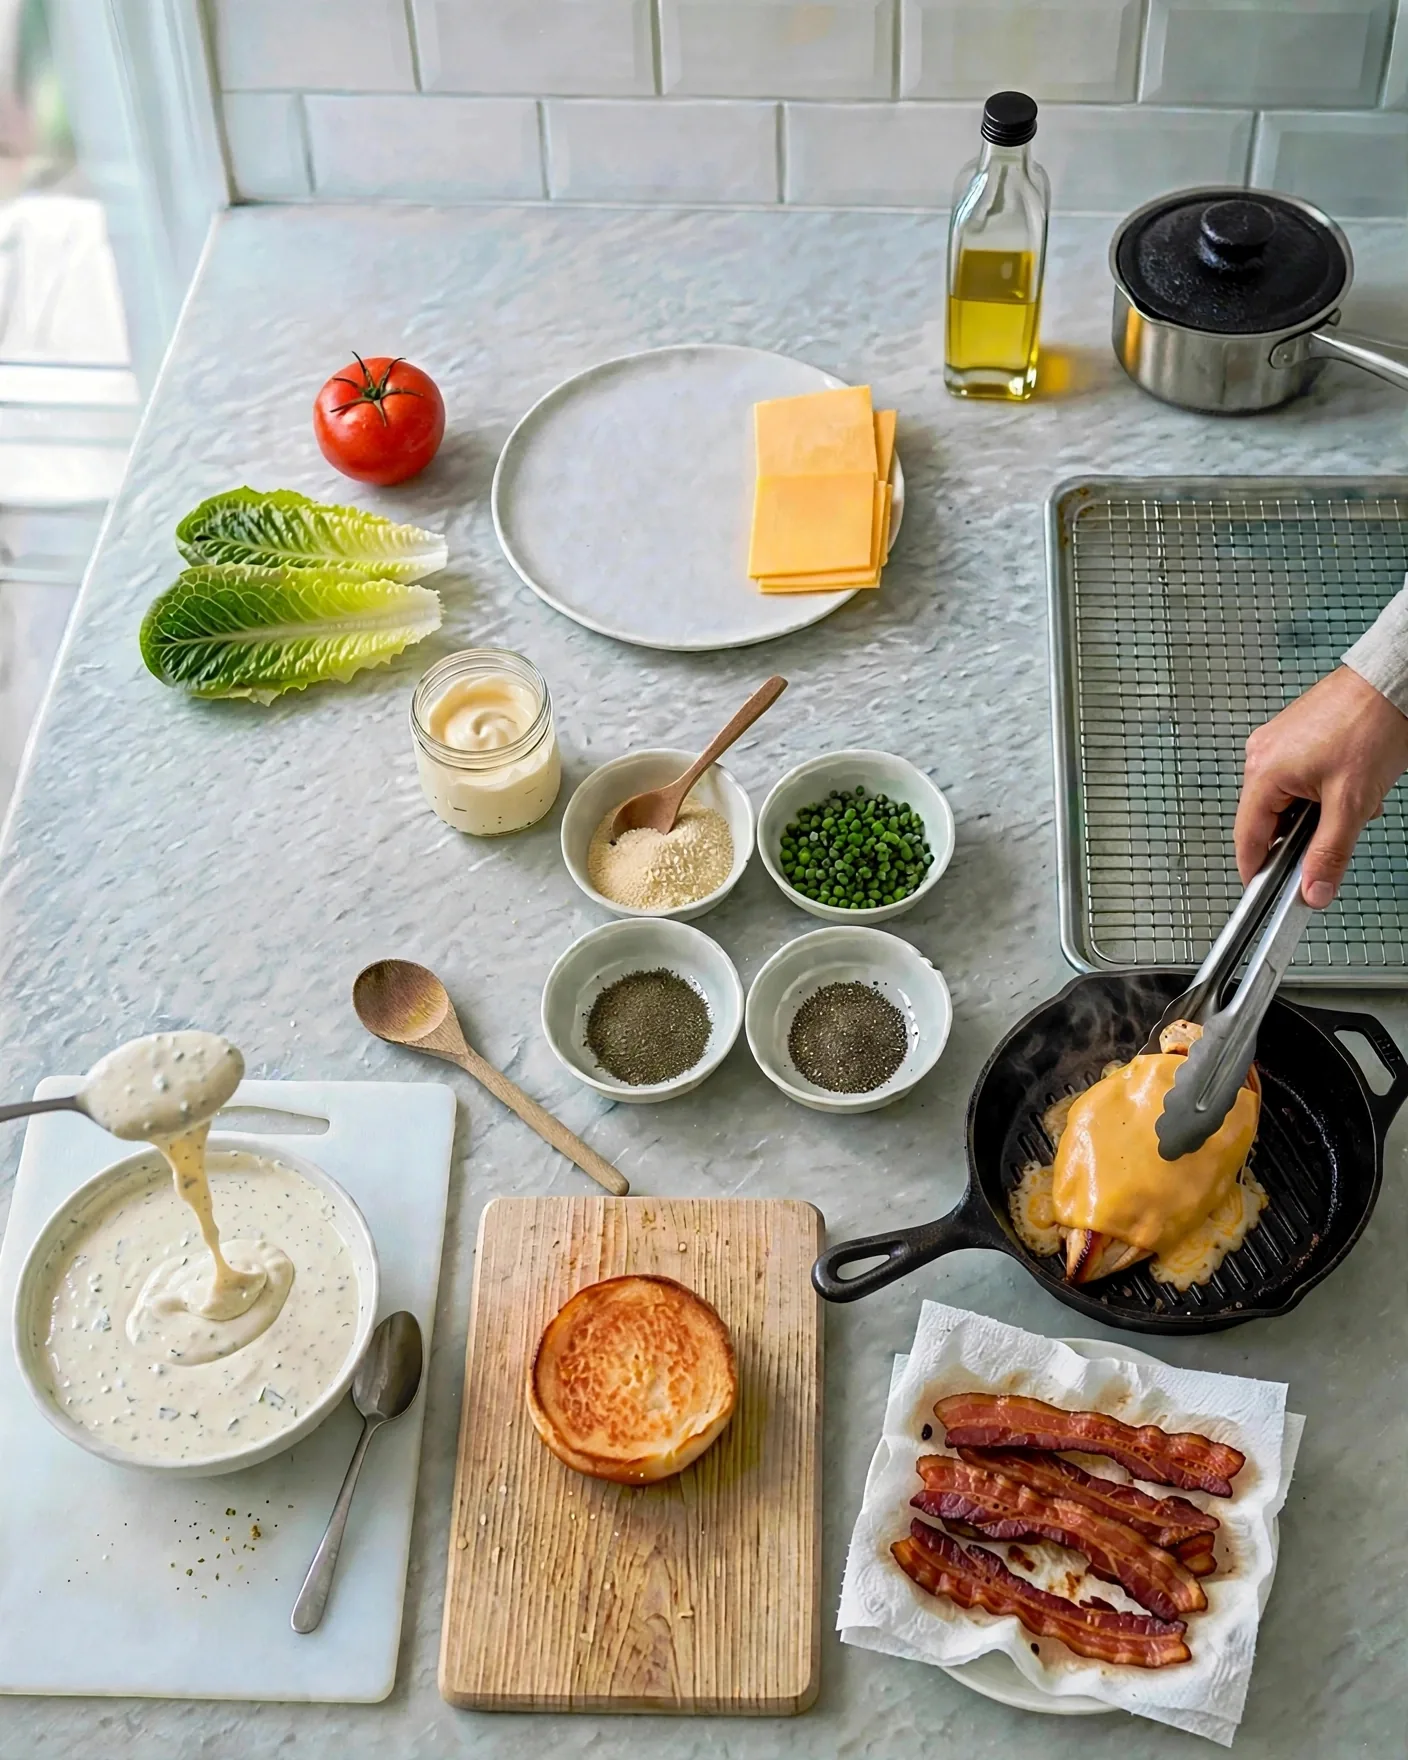
Slice the tomato into thick, even rounds. A dull knife crushes tomatoes instead of slicing them — use your sharpest one.
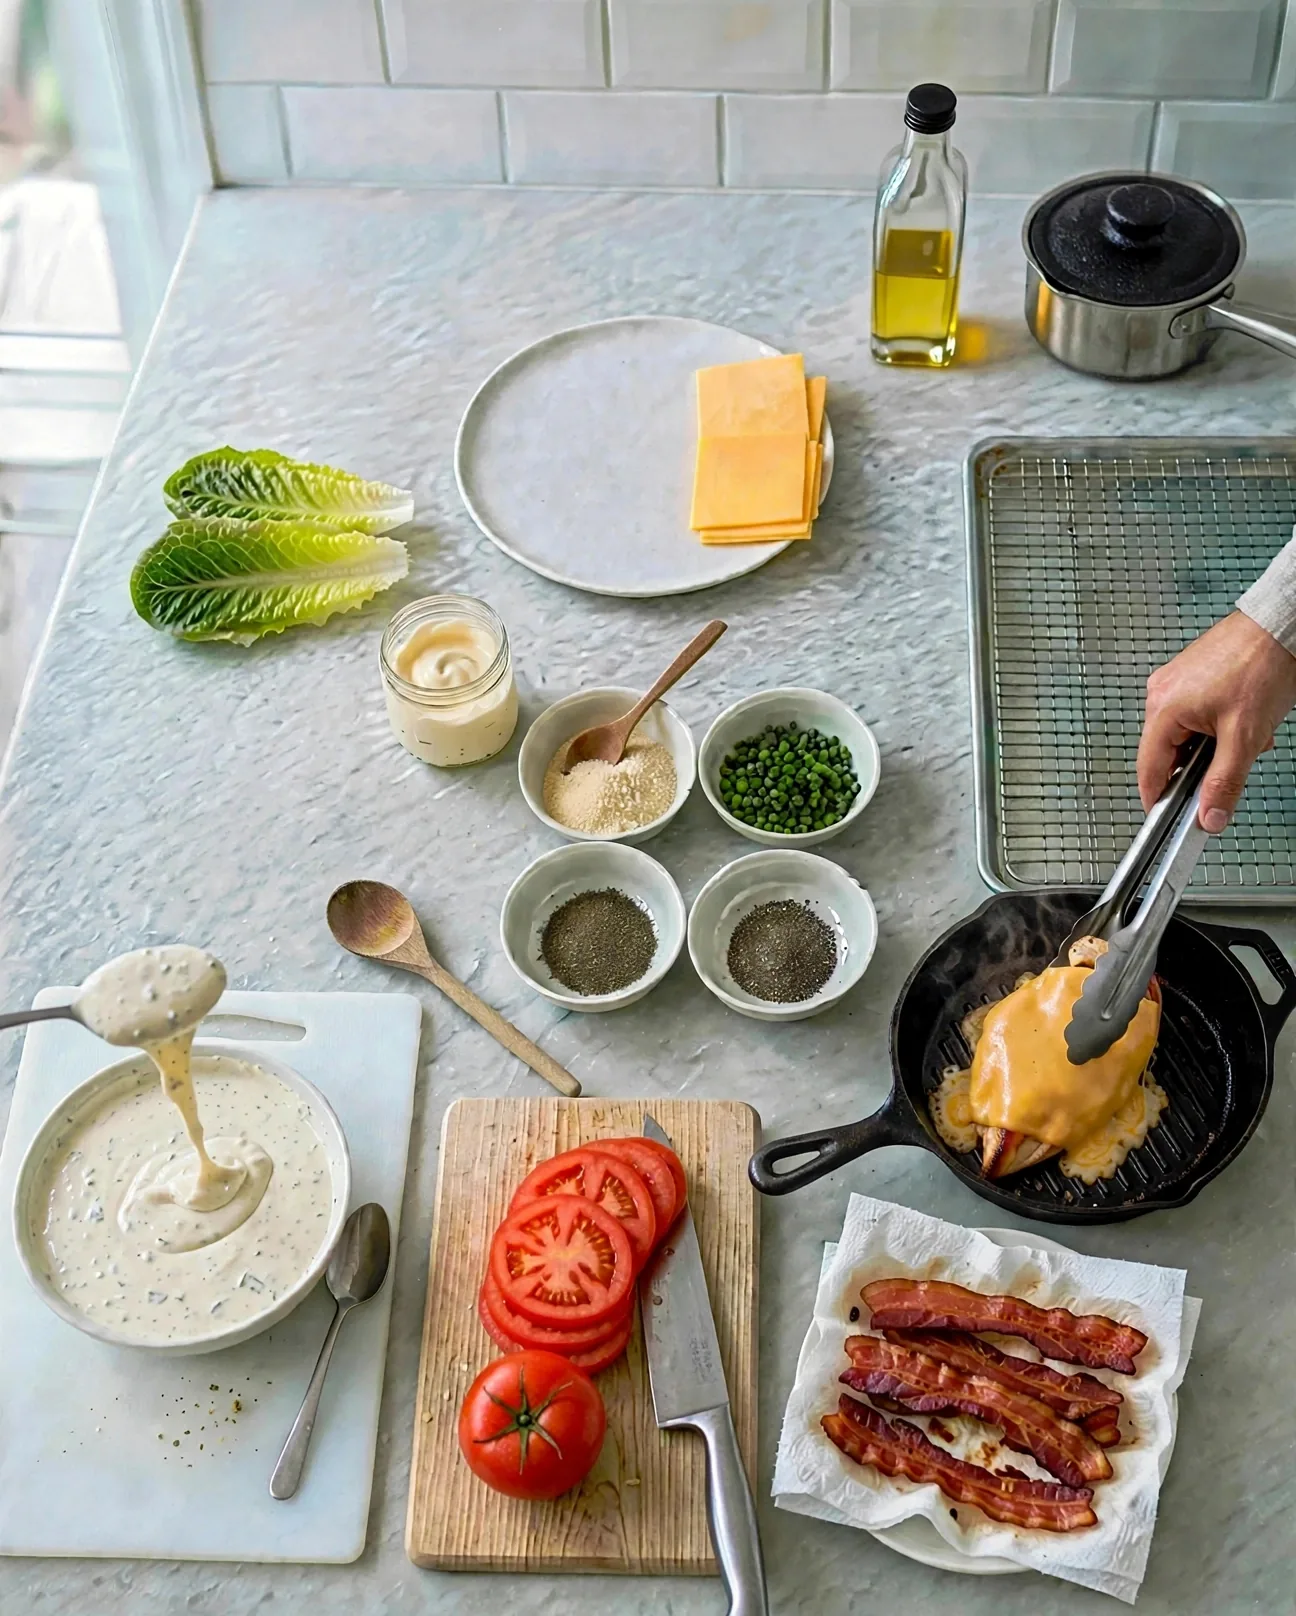
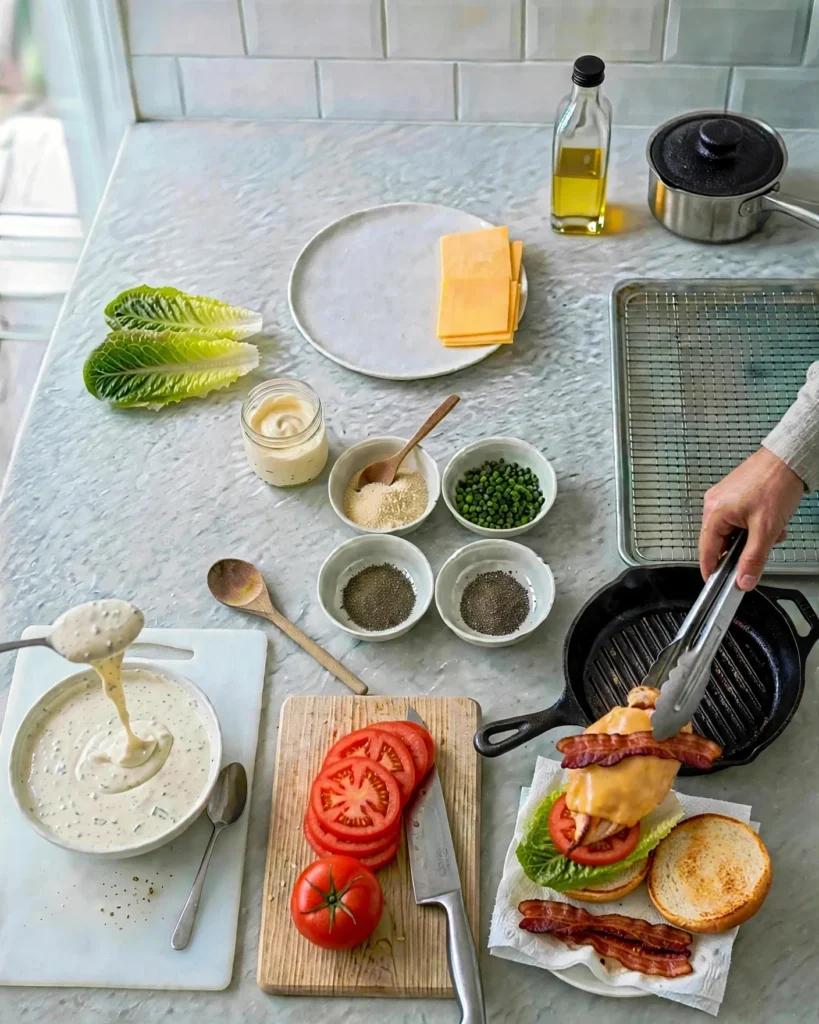
Build it: lettuce and tomato on the bottom bun, the cheesy grilled cutlet on top, then the two bacon strips laid across the cheese.
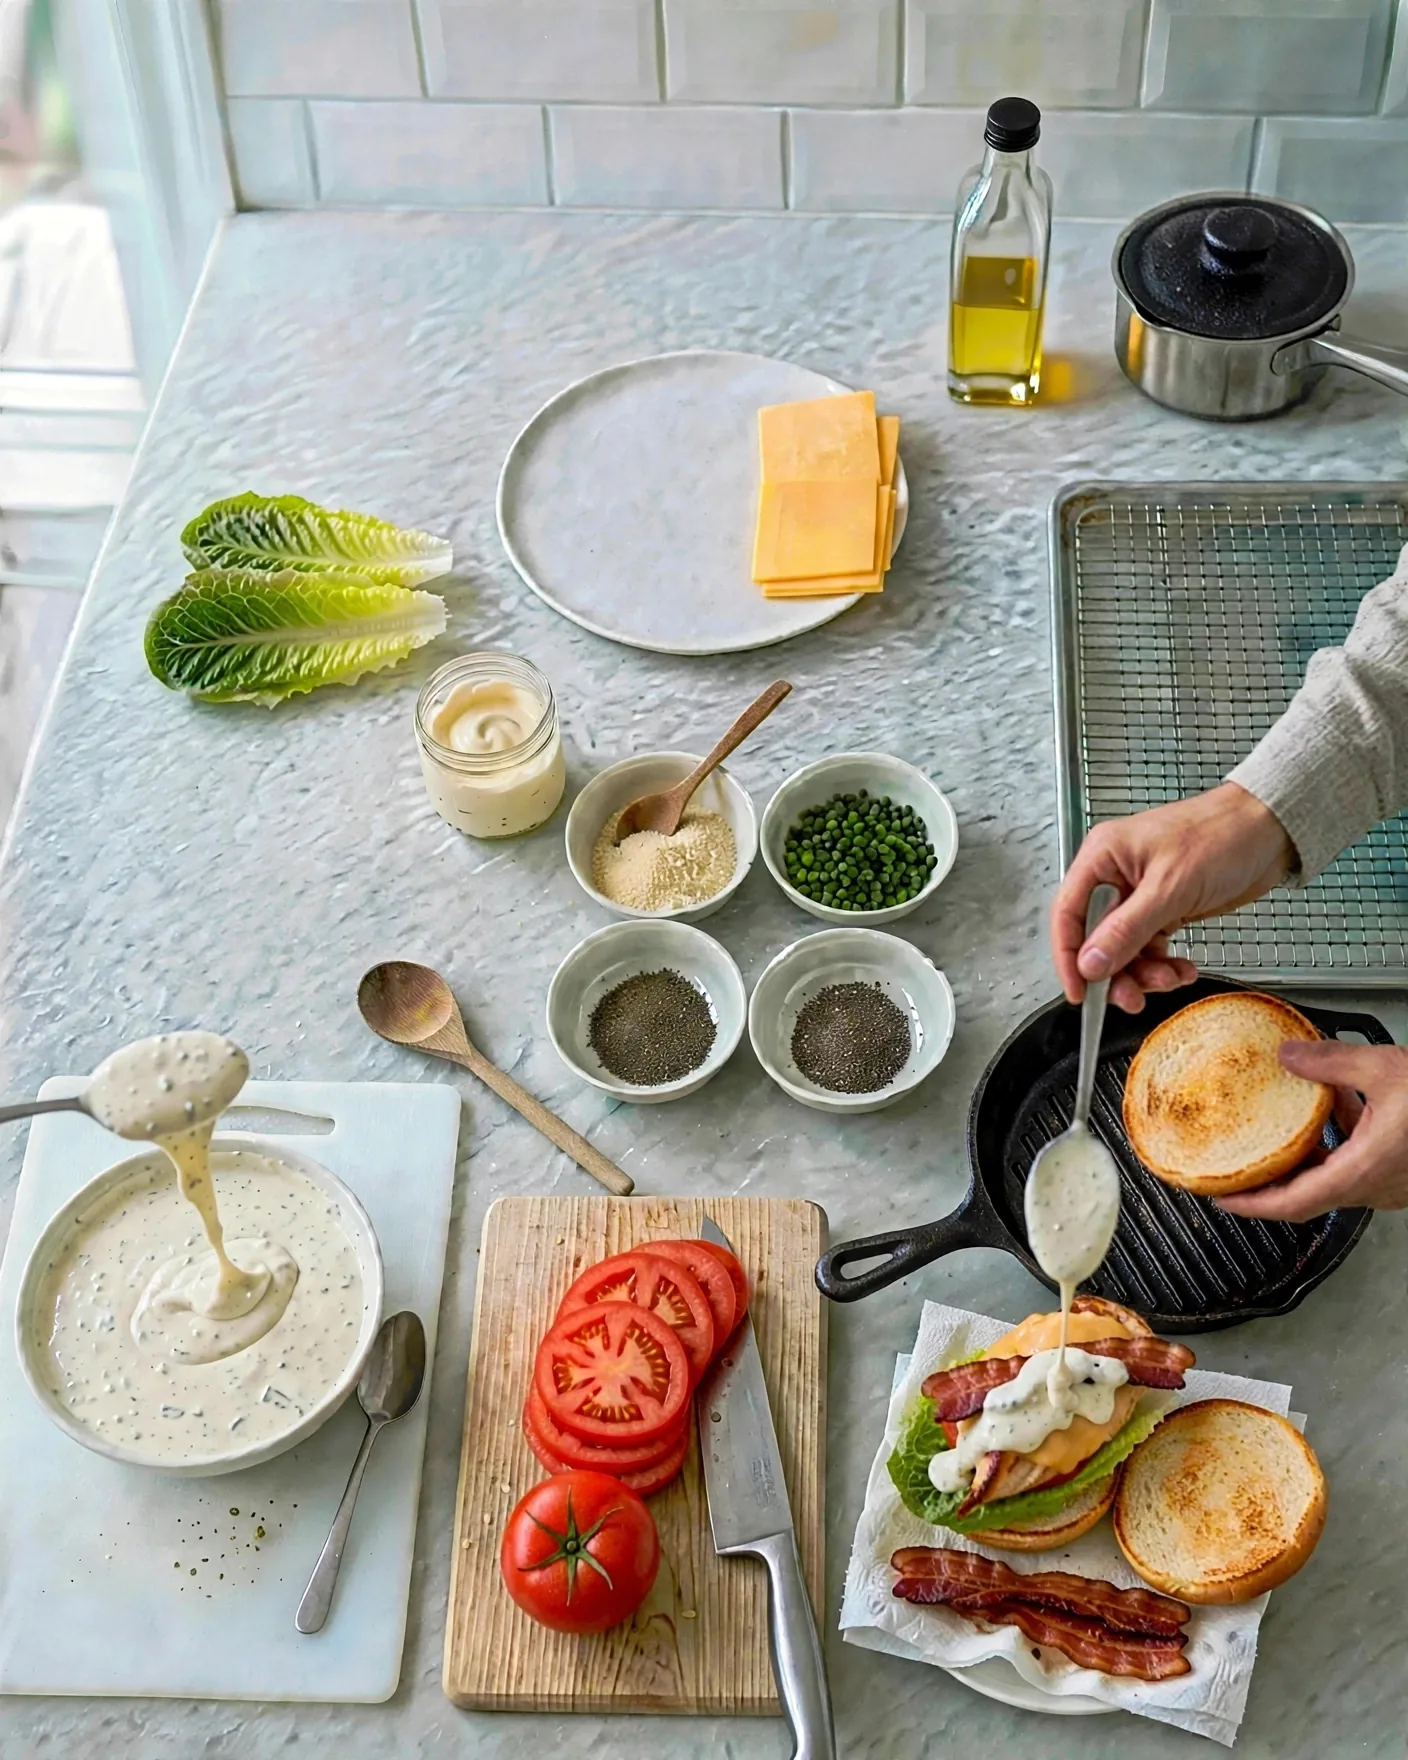
 Drizzle the ranch generously over the bacon and cheese, then set the top bun in place.
Bacon Ranch Chicken Sandwich
Ingredients
Method
- Season the plain cutlet with garlic powder, paprika, salt, and pepper.
- Start the bacon in a cold skillet over medium heat; cook 8–10 minutes, turning once, until crisp. Drain on paper towels.
- Grill the cutlet in a hot, lightly oiled ridged grill pan 5–6 minutes per side without moving, until it reads 165°F (74°C). Melt the cheddar over it in the last minute.
- Stir the sour cream, mayonnaise, garlic powder, dill, chives, and pepper into a ranch; adjust thickness with a teaspoon of milk if needed.
- Layer lettuce and tomato on the bottom bun, add the cheesy cutlet and 2 bacon strips, drizzle with ranch, and close. Serve right away.
Notes

What Keeps the Crust Crispy
- Dry chicken, hot oil, no crowding. Those three decide the crust more than any ingredient. If you remember nothing else, remember the order you did them in: pat dry, heat the oil until panko sizzles, fry two at a time.
- The rack is not optional. Cutlets drained on paper towels steam underneath and go soft on the bottom. The wire rack keeps air moving all around.
- Sauce at the last minute. Every glazed sandwich in this post — hot honey, gochujang, spice oil — gets its sauce right before assembly. A sauced cutlet waits for no one; ten minutes of sitting turns crunch to chew.
- Season the flour too. Salt on the meat seasons the meat. Salt in the flour seasons the crust, which is half of every bite.
- Rest the breaded cutlets. Those 10 minutes on the rack before frying hydrate the flour layer so it fries into crust instead of flaking off into the oil.
Storing and Reheating (Read Before You Refrigerate)
Fried chicken sandwiches are at their best the day they are made — that is the honest truth. If you have leftovers, store the components separately: cutlets in one container, buns in a bag, sauces and cold toppings apart. Refrigerate up to 3 days.
Reheat cutlets in a 400°F (200°C) oven or air fryer for 8 to 10 minutes, straight from the fridge, until the crust crisps again and the center is hot. Do not microwave them — the microwave turns a panko crust to rubber. Re-toast buns briefly, then assemble fresh with cold toppings. Do not freeze assembled sandwiches; the buns go soggy and the lettuce does not survive. Plain uncooked cutlets can be frozen for up to 3 months, thawed overnight in the fridge before breading.
Facts
- Chicken is safe to eat when the thickest part reaches 165°F (74°C), the USDA-recommended internal temperature for poultry. With fried cutlets, color is an unreliable guide — a thermometer reading is the only sure check.
- Panko breadcrumbs are made from crustless bread baked with an electric current, which gives them their airy, shard-like structure. That structure is why panko fries up crunchier and absorbs less oil than standard breadcrumbs.
- Gochujang, the Korean chili paste in Sandwich 2, is fermented from chili powder, glutinous rice, and soybeans. That fermentation builds a deep savory-sweet flavor underneath the heat.
- Blooming spices in hot oil, as in Sandwich 4’s Nashville-style spice oil, dissolves the fat-soluble flavor compounds in chile peppers. That is why the same cayenne tastes harsher raw and rounder once it hits hot fat.
- Sandwiches 1 through 4 all start from the same four fried cutlets, which is why this post works as one cooking session: about an hour of work produces five completely different dinners across the week.
FAQ
Can I use chicken thighs instead of breasts?
Yes. Boneless, skinless thighs make juicier cutlets and are harder to overcook. They are thicker, so pound them evenly and add a minute or two per side in the fryer, still checking for 165°F inside.
Can I bake or air-fry the cutlets instead of shallow-frying?
You can, with a texture trade. For the oven: 425°F (220°C) on the wire rack, spray the breaded cutlets lightly with oil, bake 18–22 minutes, flipping once. For the air fryer: 400°F (200°C), 10–12 minutes, flipping halfway. Both come out crisp but less deeply crunchy than the fried version, and they still need to hit 165°F.
How spicy is the Korean sandwich, really?
Gochujang brings a warm, building heat rather than a sharp burn — most people find it milder than the cayenne-based Sandwich 4. If you are sensitive to heat, start with 2 tablespoons of gochujang and add honey to taste.
My breading fell off in the pan. What went wrong?
Usually one of three things: the chicken was wet when breaded, the cutlets skipped the 10-minute rest, or the oil was not hot enough when they went in. Dry, rested cutlets hitting properly heated oil hold their crust.
Can I make the sauces ahead?
The hot honey keeps 2 weeks in a jar at room temperature. The gochujang sauce keeps 1 week refrigerated. The ranch keeps 4–5 days refrigerated. The spicy mayo keeps 1 week refrigerated. Make them ahead and the sandwich assembly takes minutes.
Are any of these gluten-free?
Not as written — the flour, panko, and brioche buns all contain gluten. You could swap in a gluten-free flour blend, gluten-free panko, and gluten-free buns, but the crust texture will differ and I have not verified those swaps.
What should I serve with these?
They are rich sandwiches, so something fresh and simple alongside works best: coleslaw, a green salad, or pickle spears. For a full diner-style spread, a bowl of roasted tomato soup next to any of these is a classic pairing.
Conclusion
Five sandwiches, one frying session. If you only make one, make the hot honey pickle — it is the simplest and the contrast of sticky heat against cold pickles is hard to beat. If you are cooking for a crowd, fry the full base and let everyone build their own; the gochujang and jalapeño popper versions tend to disappear first. And keep that fifth cutlet in mind for the bacon ranch — sometimes the grilled one ends up being the favorite.