5 Hot Honey Chicken Recipes
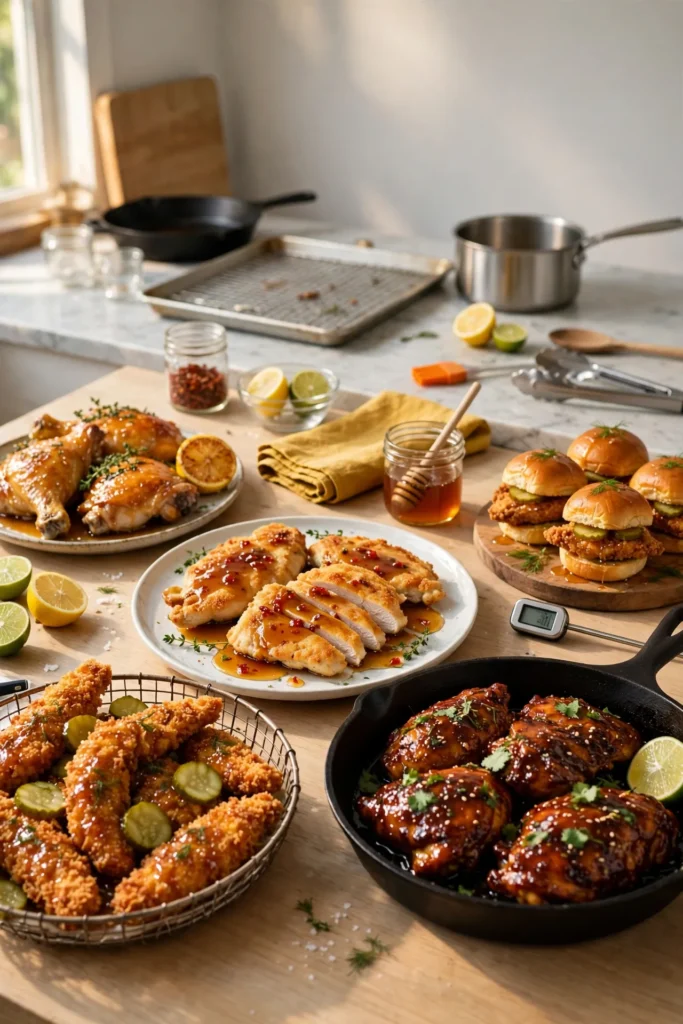
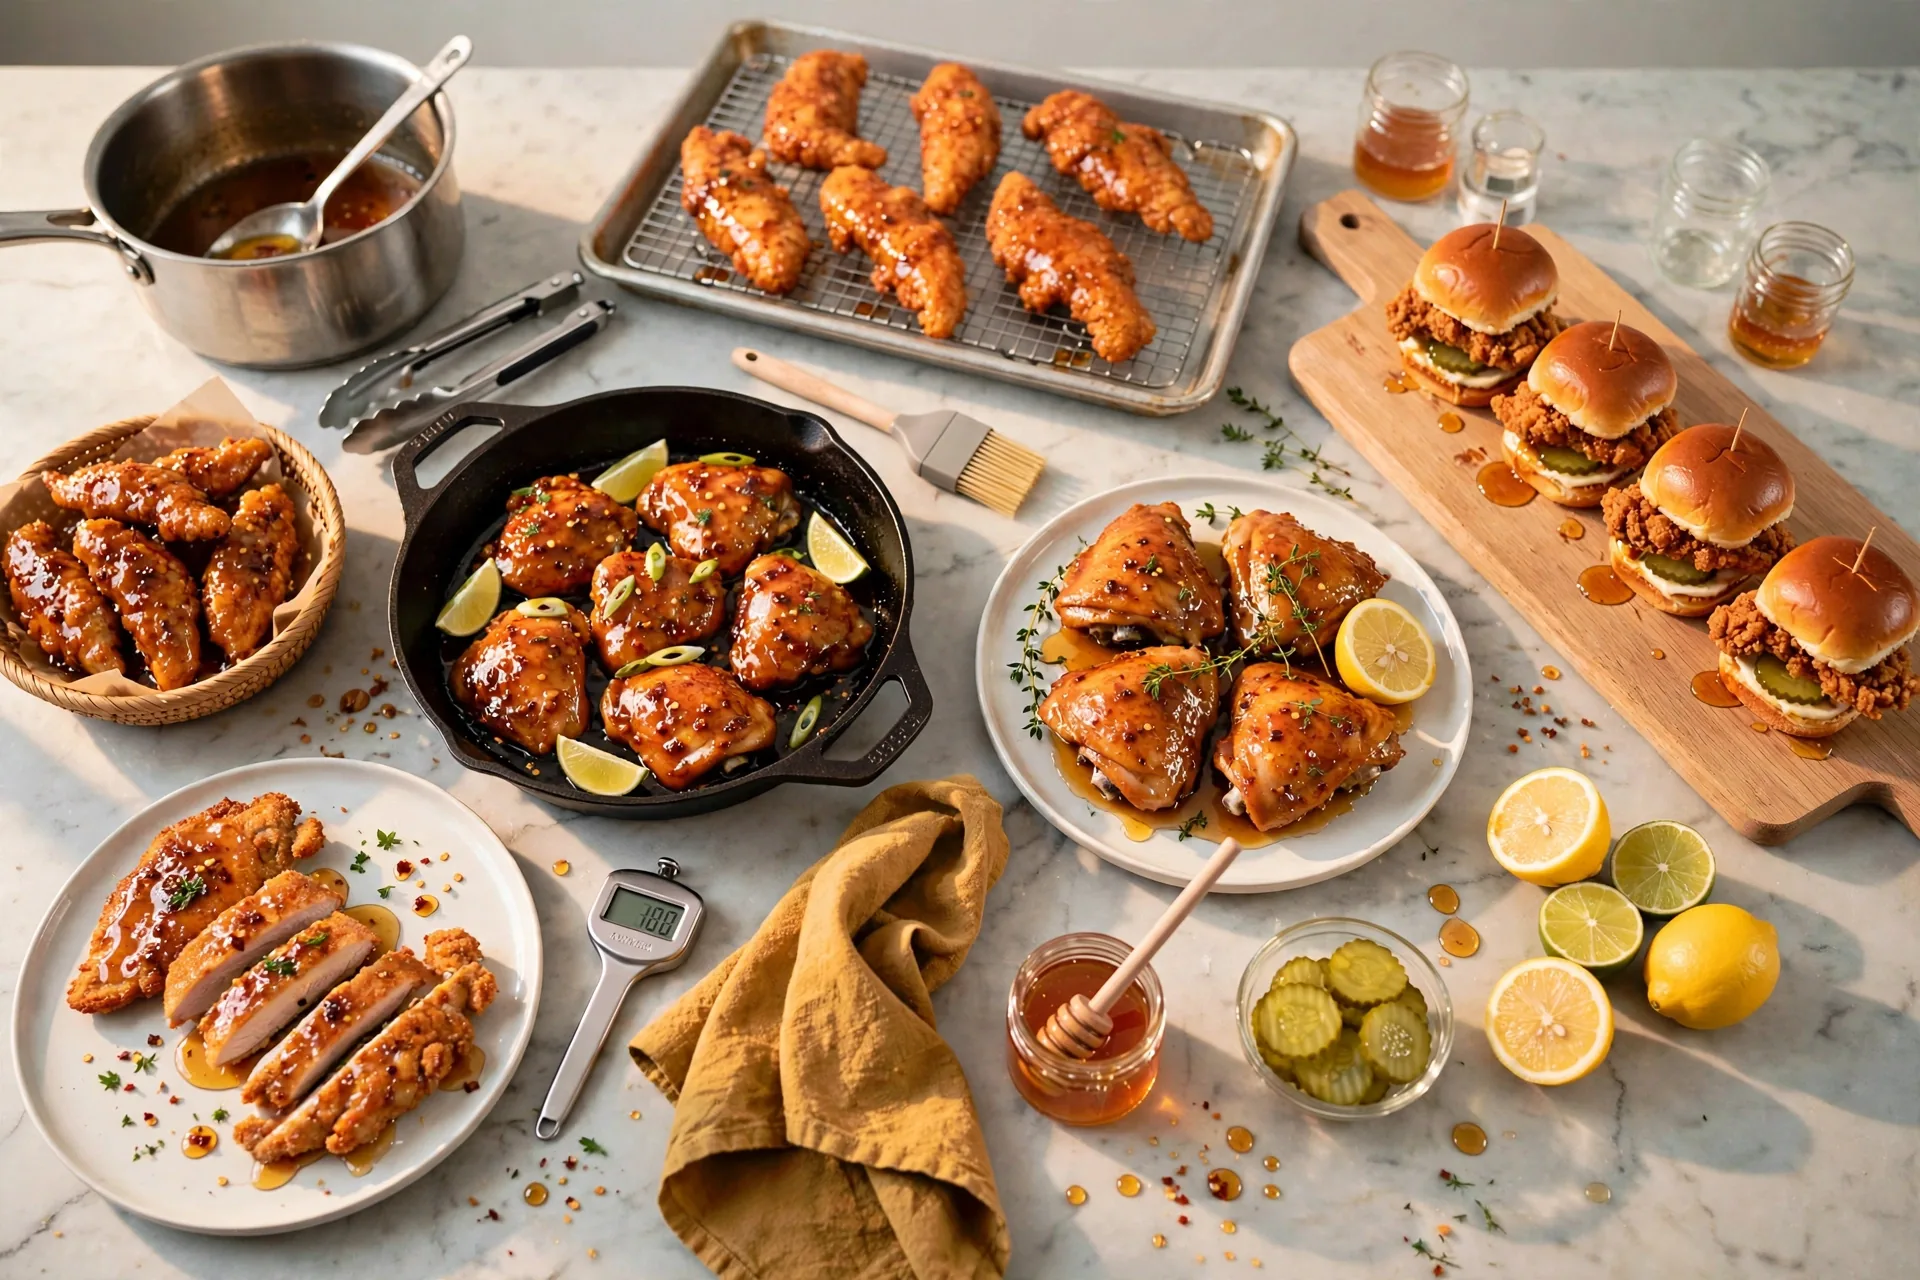
One pot of hot honey, one tray of tenders, and five chicken dinners: cutlets, tenders, chipotle thighs, glazed thighs, and sliders.
 Pin it
In this post
Start with the shared hot honey. One pot of it seasons three of the five dishes below, and the tenders from Recipe 2 do double duty in Recipe 5, so read the shared section first and the rest falls into place.
- Shared Hot Honey
- Hot Honey Chicken
- Hot Honey Chicken Tenders
- Chipotle Honey Chicken
- Honey Chicken Thighs
- Hot Honey Chicken Sliders
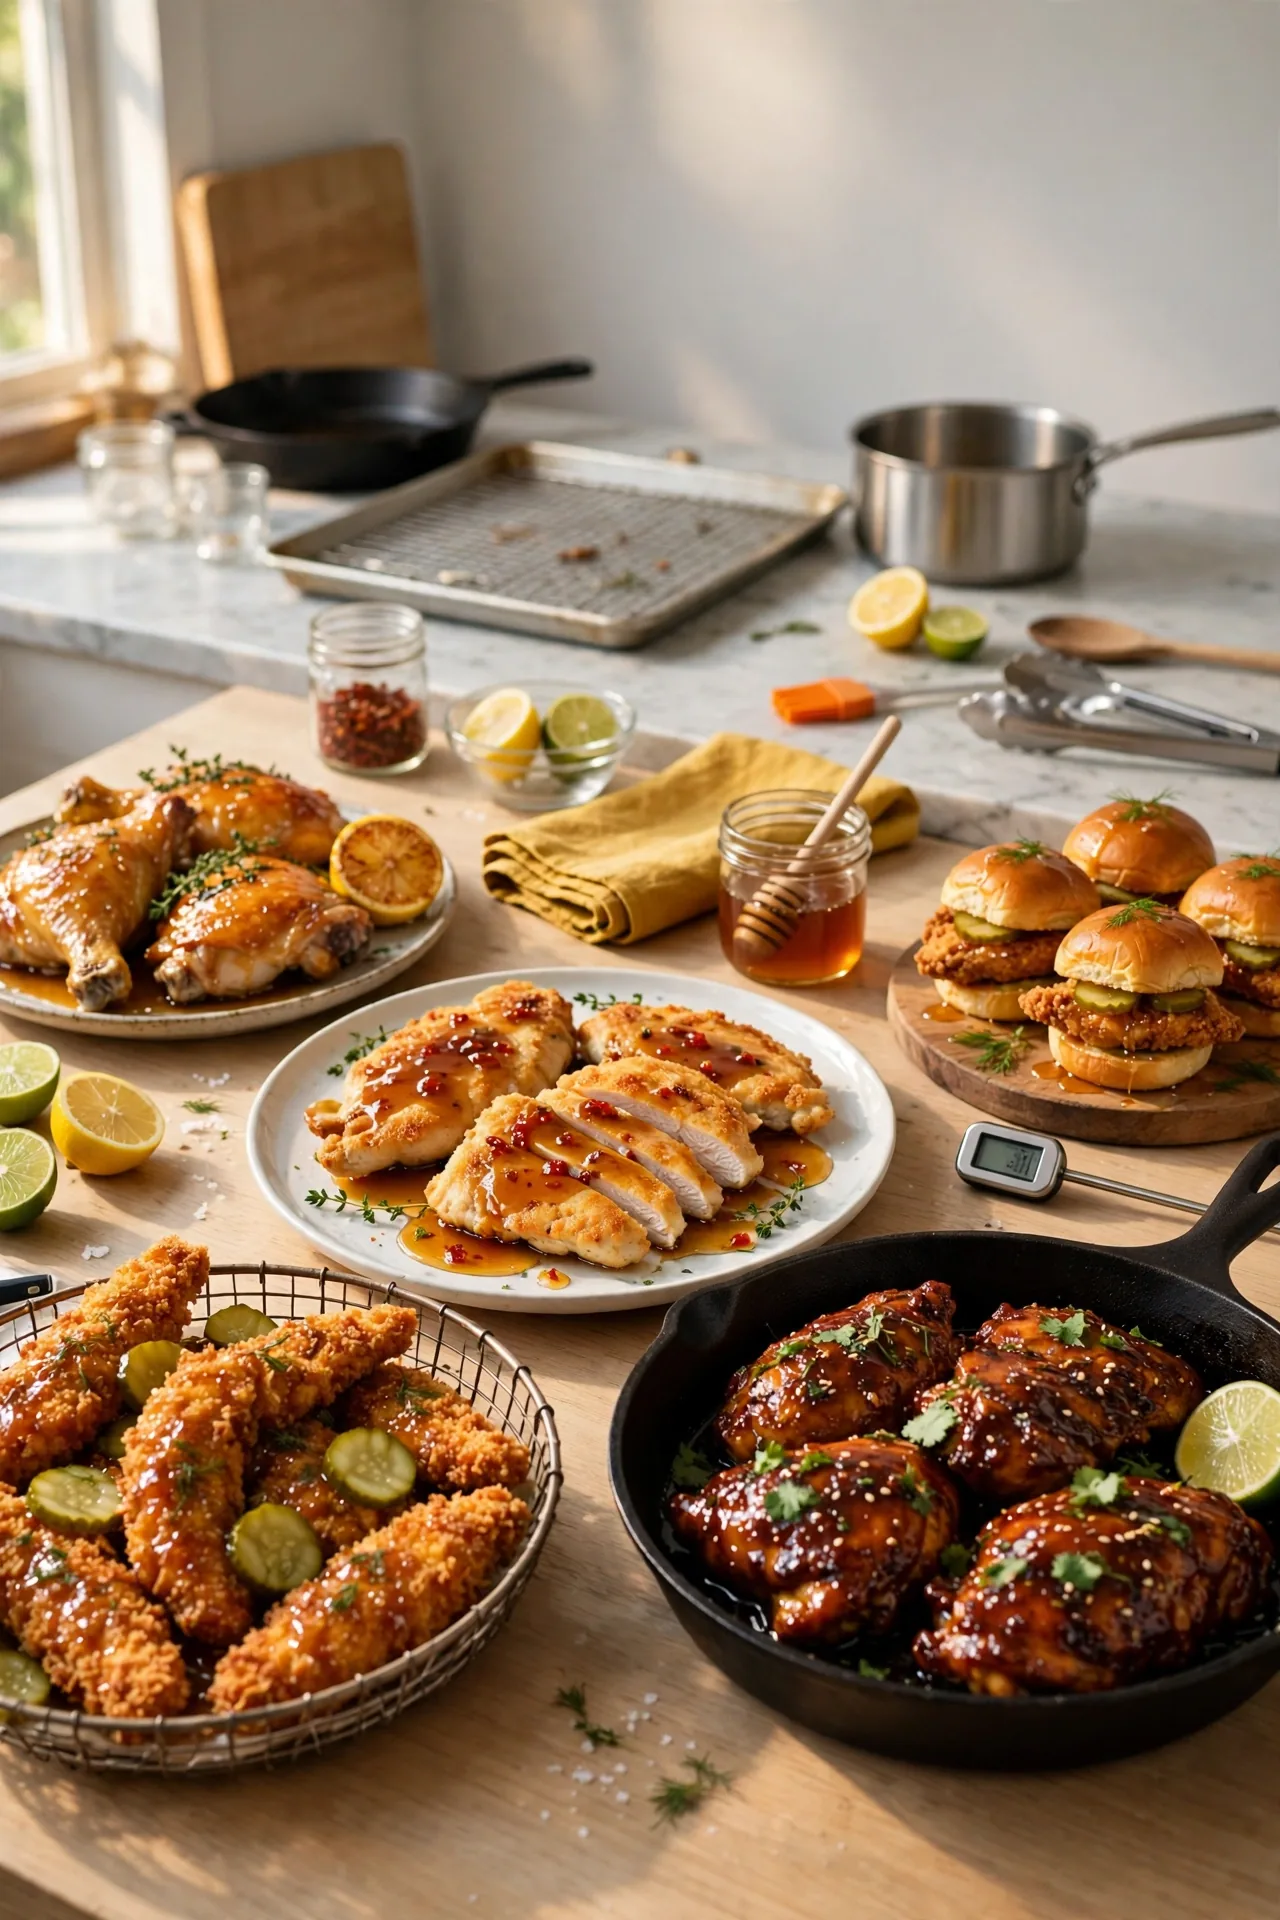
One pot of hot honey, five chicken dinners
Hot honey earns its place on chicken because it does two jobs at once. The honey clings to crisp crusts and browned skin, and the chili heat plus a sharp splash of vinegar keeps the sweetness from sitting flat. This post builds five chicken dishes around that one idea, and it does the smart part first: you make the hot honey once, divide it into three jars, and draw on it for the cutlets, the tenders, and the sliders. The tenders pull the same trick. Bake one tray, toss half in hot honey for dinner, and keep the other half plain for sliders later.
The five dishes cover different moods. Pan-seared cutlets come together fast in a cast-iron skillet. Tenders take a little more patience at the breading station and pay it back with crunch. Chipotle honey thighs go dark and sticky in the same pan they sear in. Bone-in thighs bake slowly and get their glaze late, when the skin can take it without burning. Sliders use up the set-aside tenders and turn them into something that reads as a second meal rather than leftovers.
Every chicken piece in this post cooks to 165°F on an instant-read thermometer. That number shows up at each doneness check, and it is the check that matters most. Color and crunch tell you a lot, and the thermometer settles the rest.
Ingredients
Everything laid out before cooking starts, grouped by recipe so nothing gets mixed up mid-step.
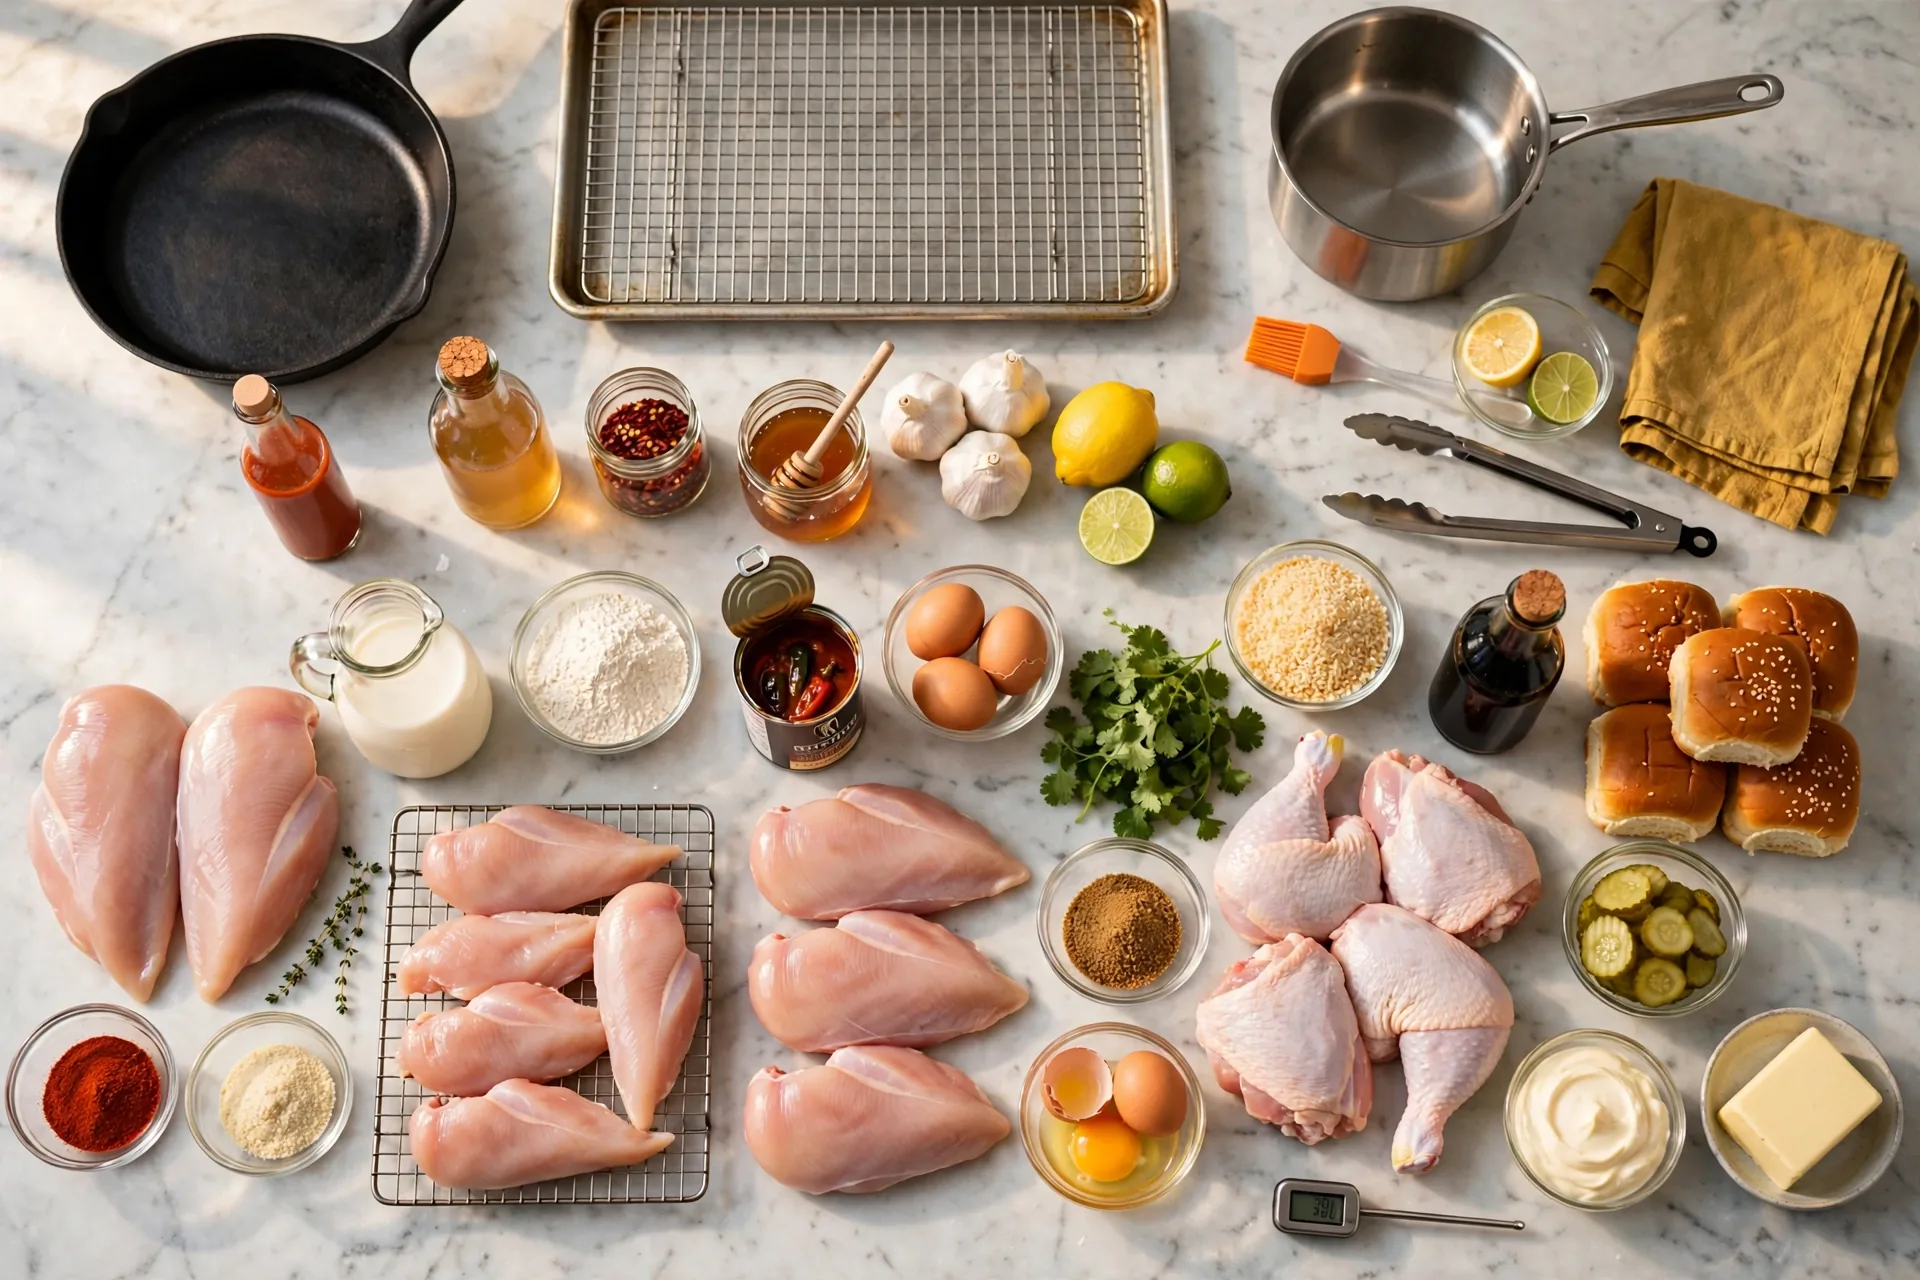
For the shared hot honey
- Honey
- Red chili flakes
- Hot sauce, unlabelled bottle
- Apple cider vinegar
For the hot honey chicken (Recipe 1)
- Boneless skinless chicken breasts, two
- Smoked paprika
- Garlic powder
- Salt
- Black pepper
- Oil, for searing
- Shared hot honey
- Lemon wedges, for serving
For the hot honey chicken tenders (Recipe 2)
- Raw chicken tenders, one tray
- Buttermilk
- Flour, seasoned
- Eggs, beaten
- Panko, mixed with spices
- Oil spray, for the rack
- Shared hot honey
- Dill pickle chips, for serving
For the chipotle honey chicken (Recipe 3)
- Boneless skinless chicken thighs
- Chipotle peppers in adobo, one can
- Adobo sauce, a spoonful from the can
- Honey
- Lime juice, plus lime halves
- Garlic, minced
- Smoked paprika
- Cumin
- Garlic powder
- Brown sugar
- Salt
- Fresh cilantro, chopped
- White rice, cooked, for serving
For the honey chicken thighs (Recipe 4)
- Bone-in, skin-on chicken thighs
- Salt
- Black pepper
- Garlic powder
- Smoked paprika
- Honey
- Soy sauce
- Garlic, minced
- Lemon, for squeezing
- Fresh parsley, chopped, for serving
For the hot honey chicken sliders (Recipe 5)
- Set-aside plain tenders from Recipe 2
- Slider buns
- Butter, for toasting
- Mayonnaise
- Shared hot honey
- Dill pickle chips
A note on amounts: this post teaches method, order, and doneness, and it gives a measured amount only where the recipe itself states one. The hot honey works by balance rather than by strict ratio. Start with the honey, add chili flakes a pinch at a time, then hot sauce a few drops at a time and vinegar a splash at a time. Taste as you go. Sweetness should lead, vinegar should sharpen it, and heat should sit in the background rather than taking over.
Food safety note: raw chicken stays on its own board and its own plates through this whole post. Wash hands, boards, and tools after they touch raw chicken and before they touch anything cooked or ready to eat.
Shared Hot Honey
Make the hot honey once
This pot takes a few minutes and covers Recipes 1, 2, and 5. Make it first, while the chicken is still raw and the stove is free, and the rest of the cooking runs smoother.
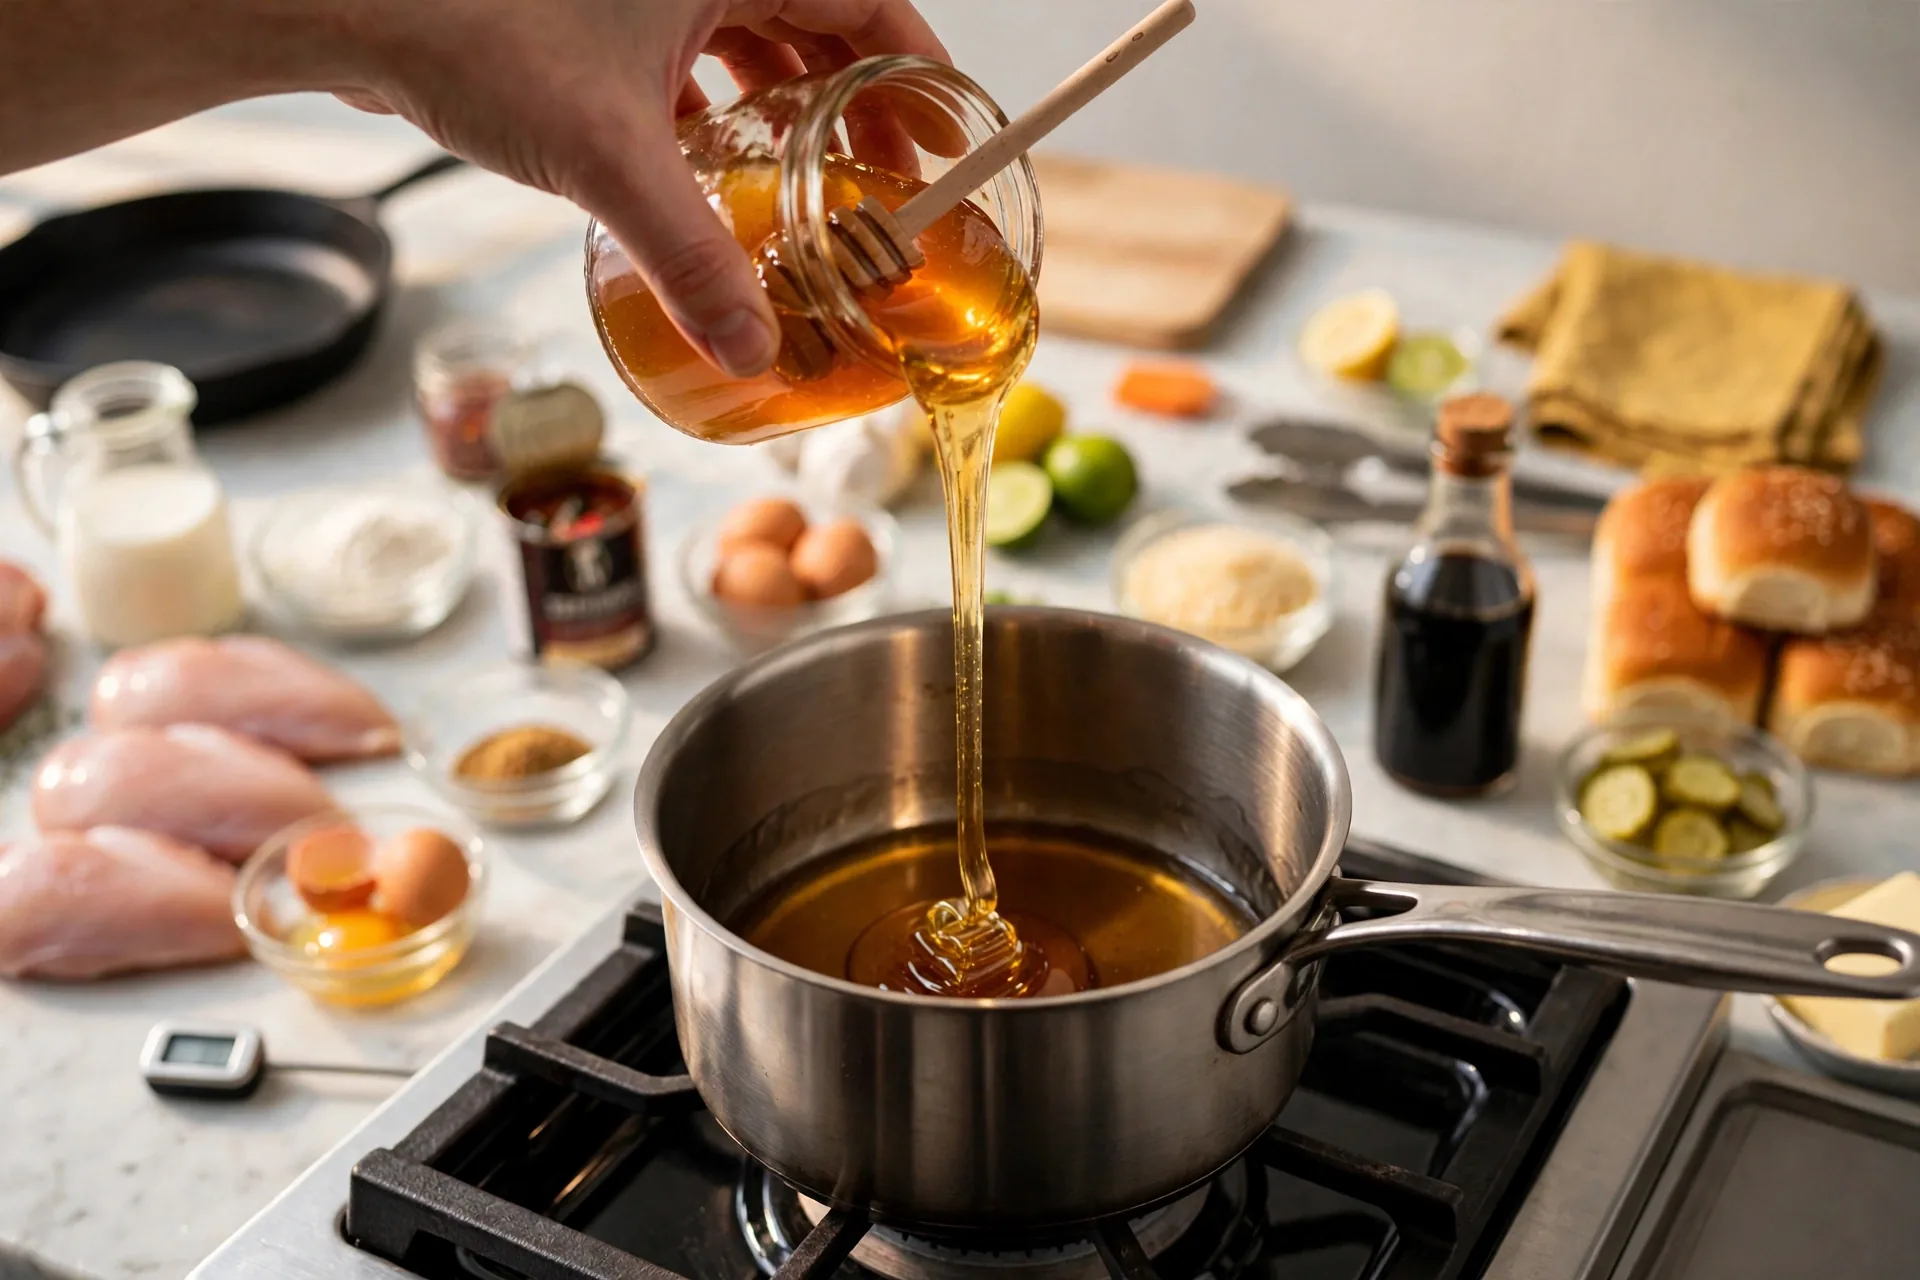
Pour the honey into the stainless steel saucepan. Keep the burner off for this step. A thick stream from the jar pools into a shiny amber puddle, and the dipper stays beside the pan for later.
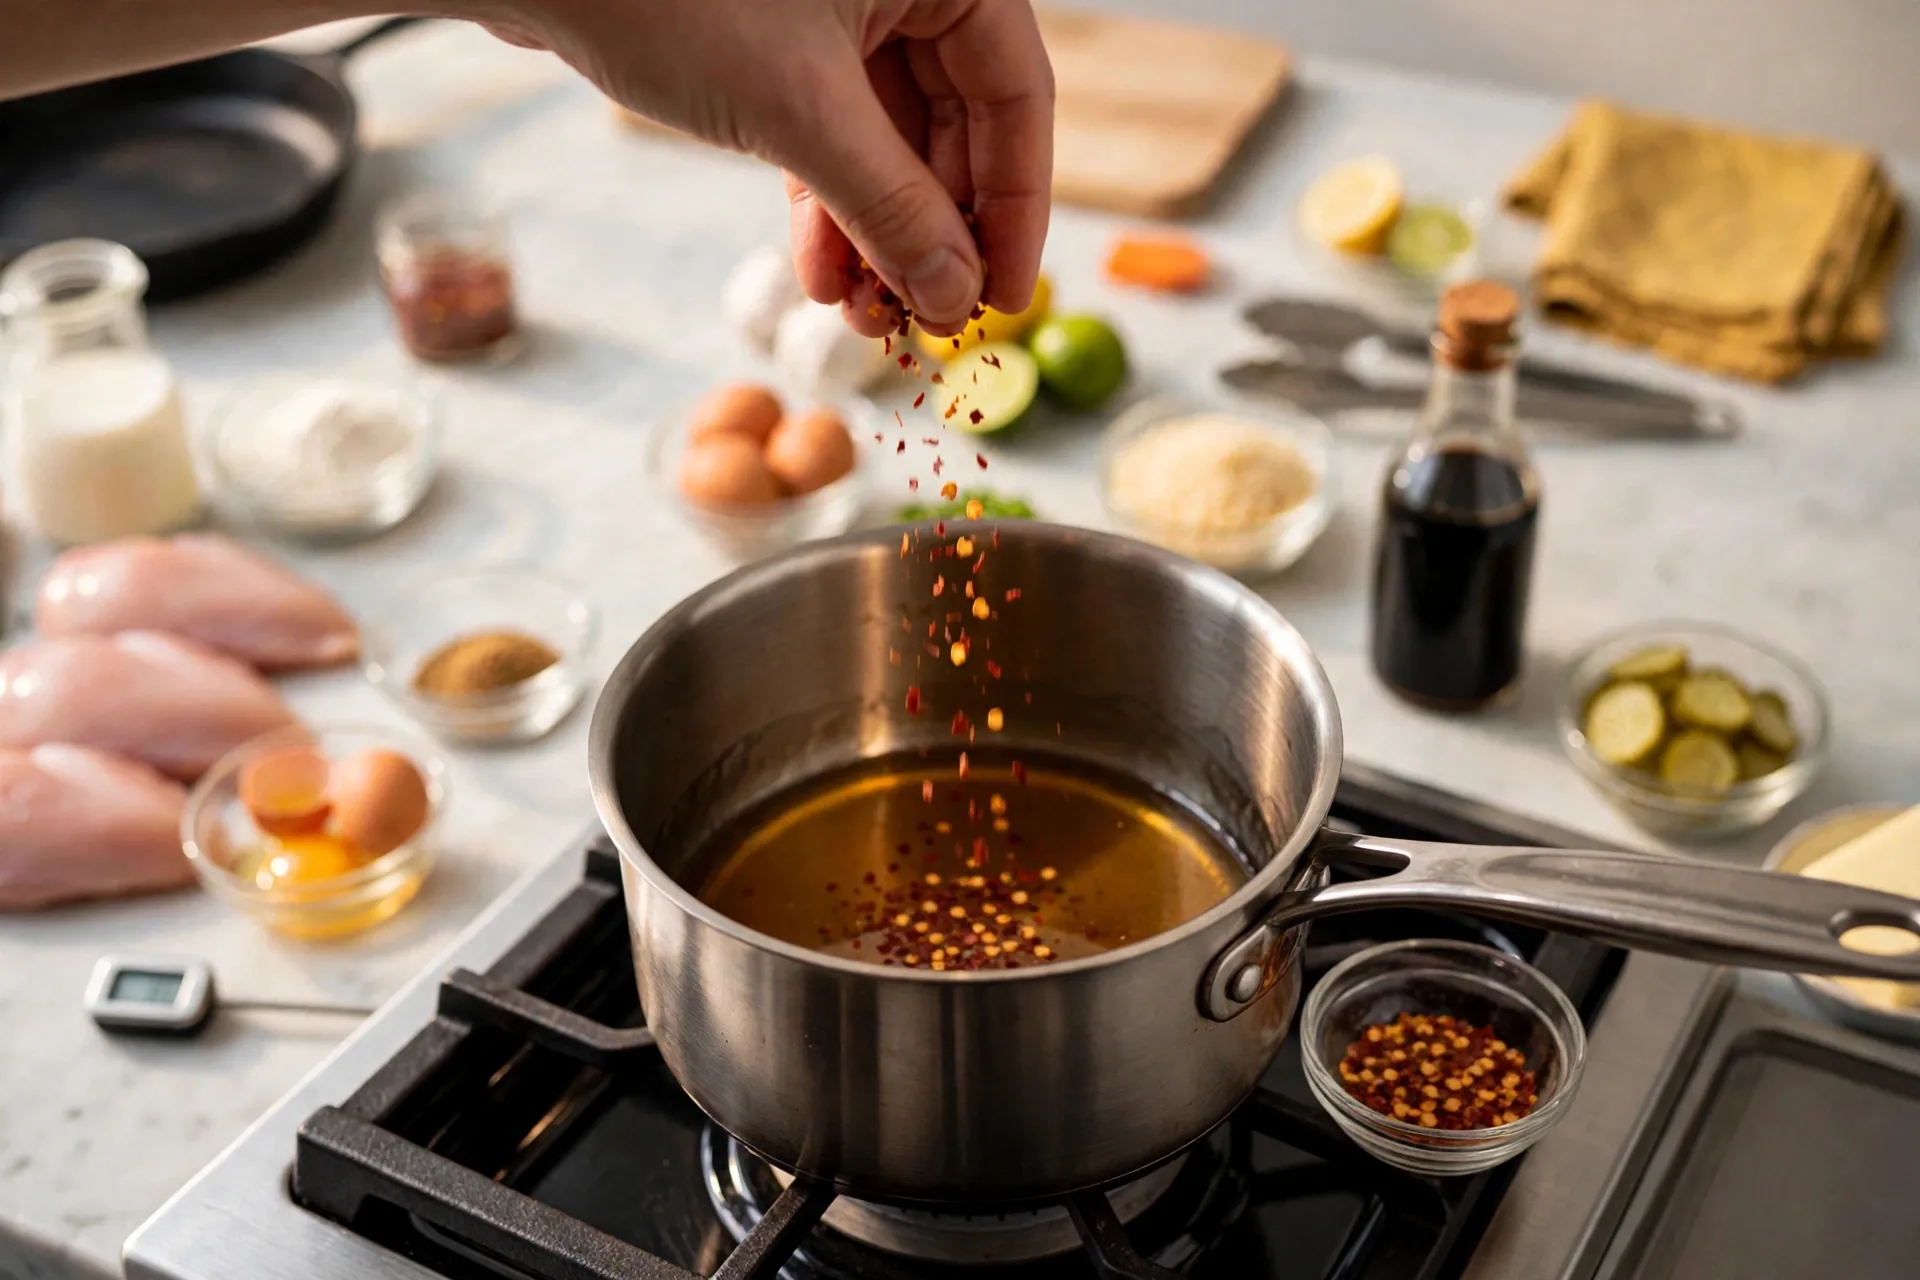
Sprinkle red chili flakes over the honey from your fingertips. They float on the surface at first, and a small dish of flakes beside the pan keeps the rest close at hand.
Set the pan over low-medium heat and warm the honey gently. Stir slowly with a whisk. Small bubbles form around the edge, the honey loosens and turns glossy, and red flakes swirl through it. Light steam is fine. A hard boil is not what you want here. Honey scorches fast once it boils, and scorched honey turns bitter in a way no amount of vinegar fixes later.
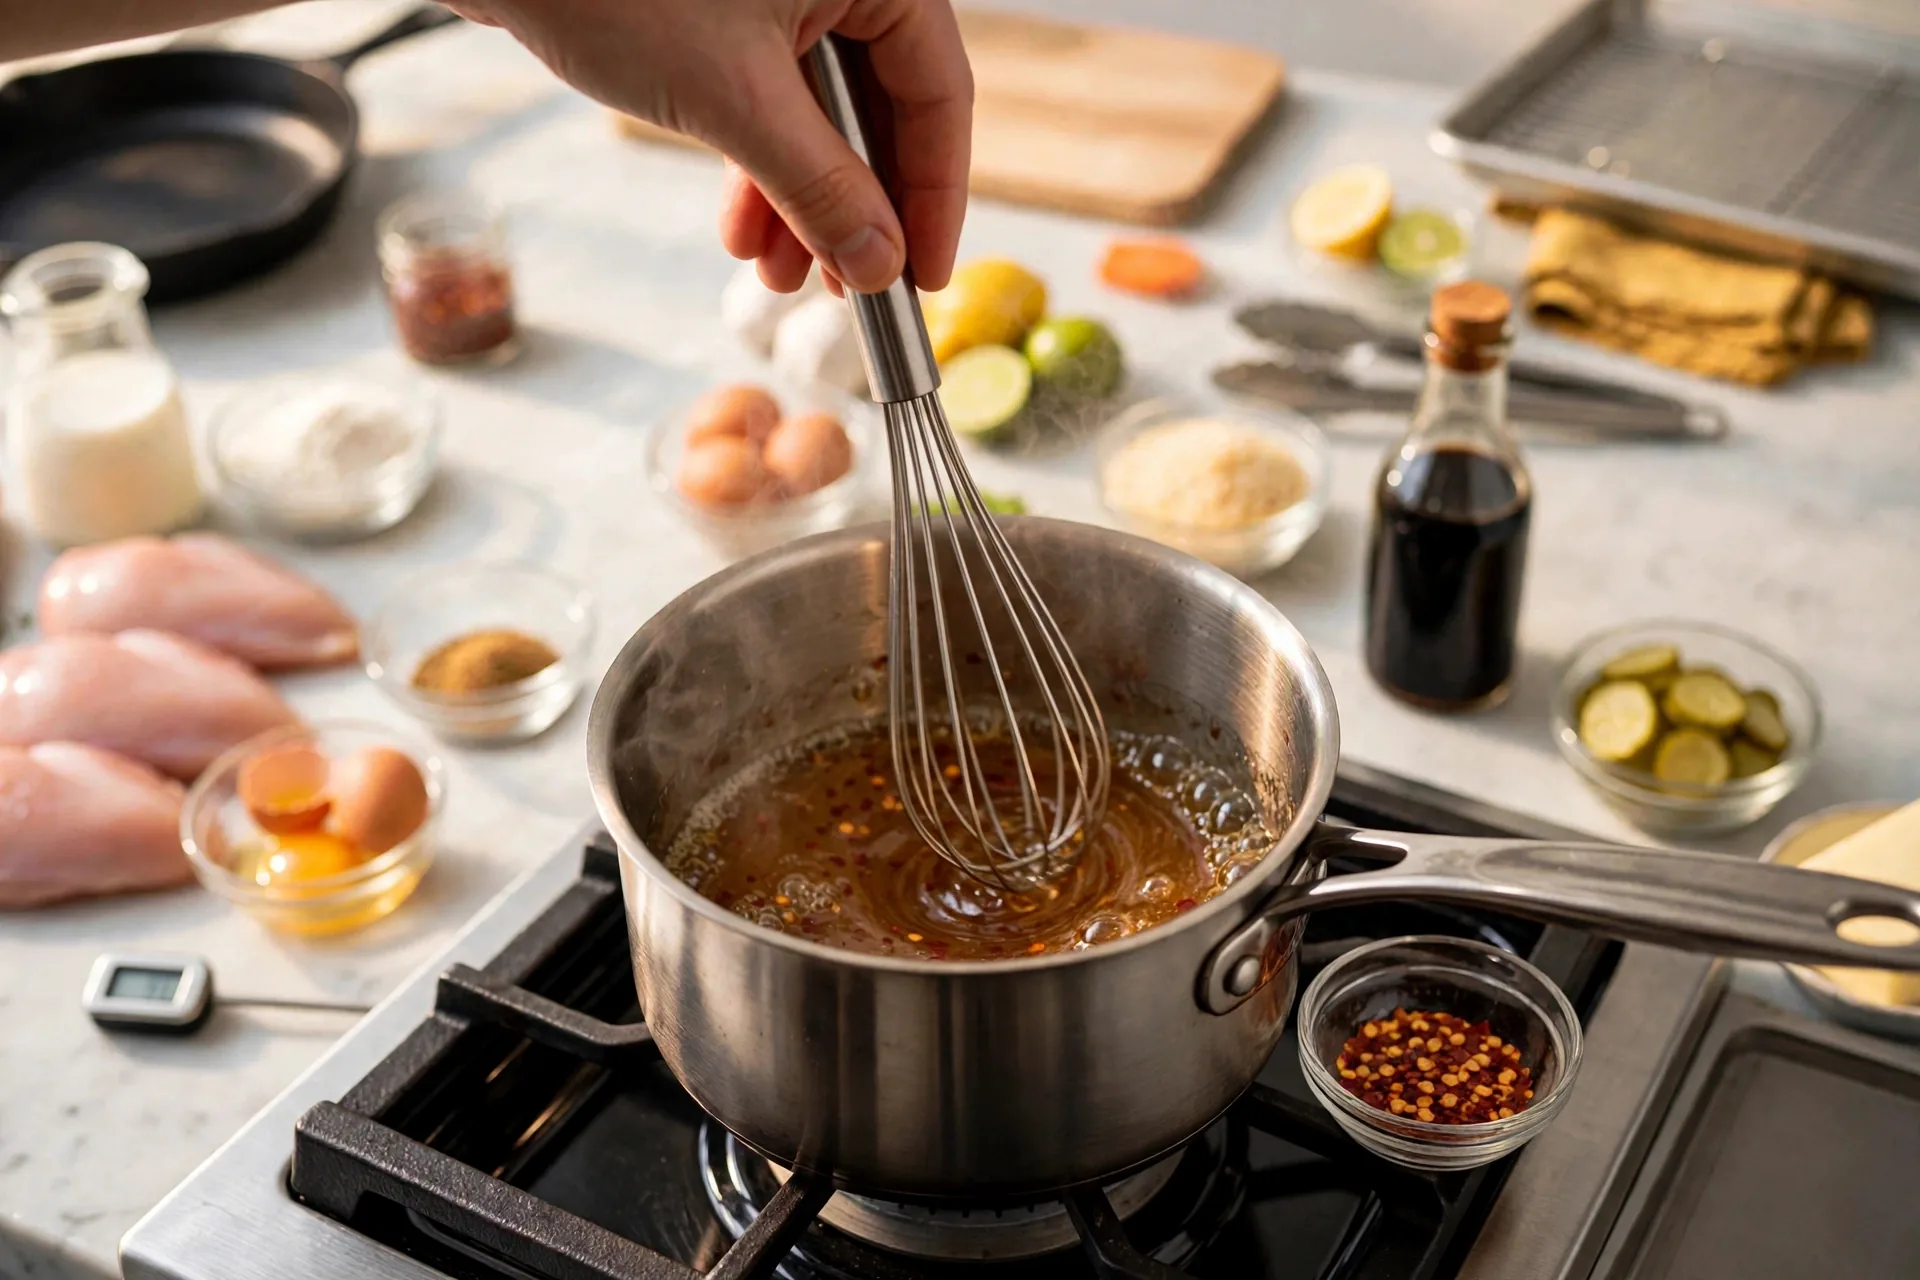
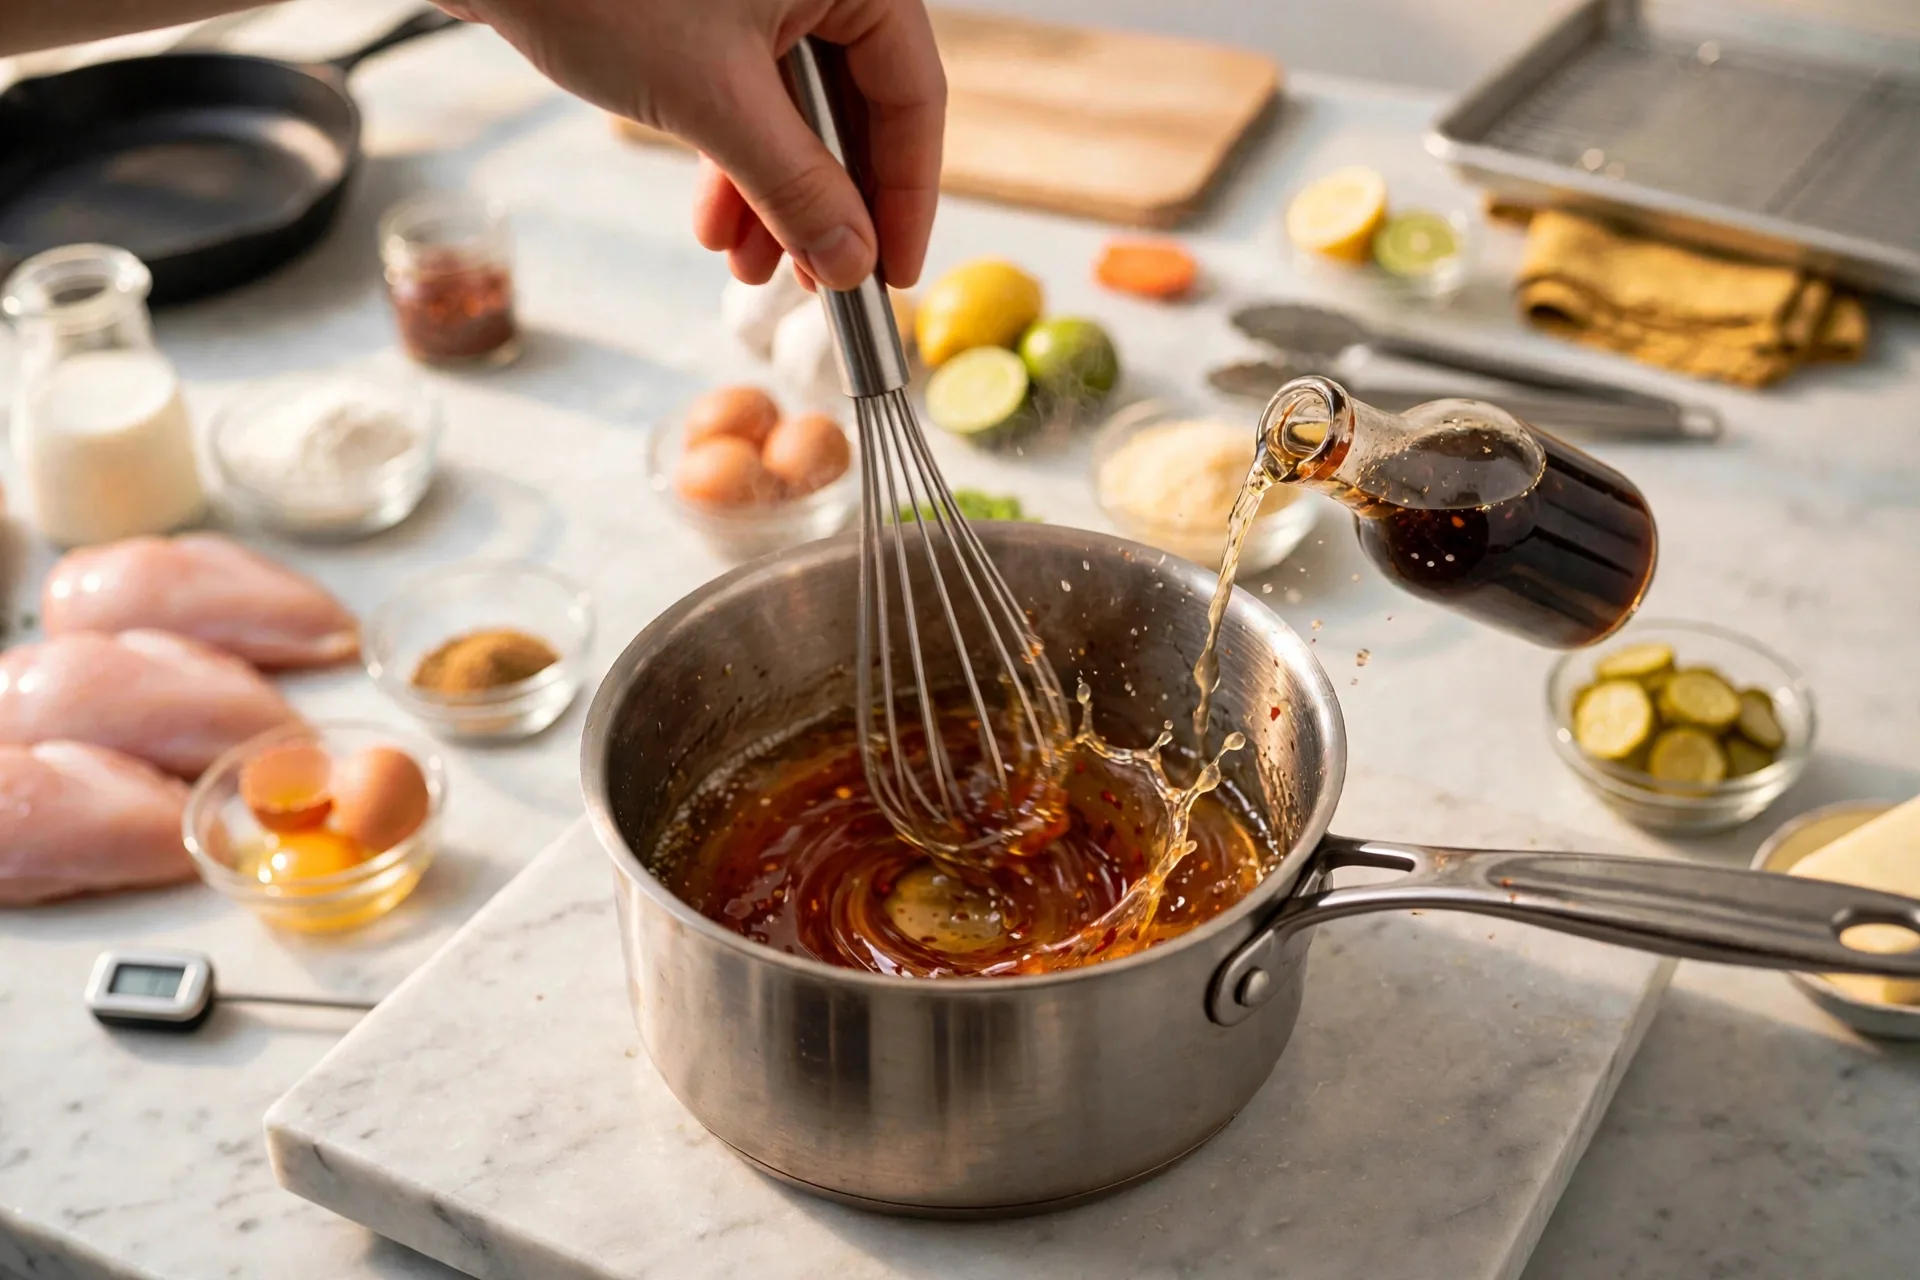
Take the pan off the burner before the hot sauce and vinegar go in. Stir in the hot sauce and a splash of apple cider vinegar. A dark red streak swirls through the amber honey as the whisk moves. Off-heat matters for two reasons: the vinegar keeps its sharp edge instead of cooking off, and the hot sauce blends in without spattering.
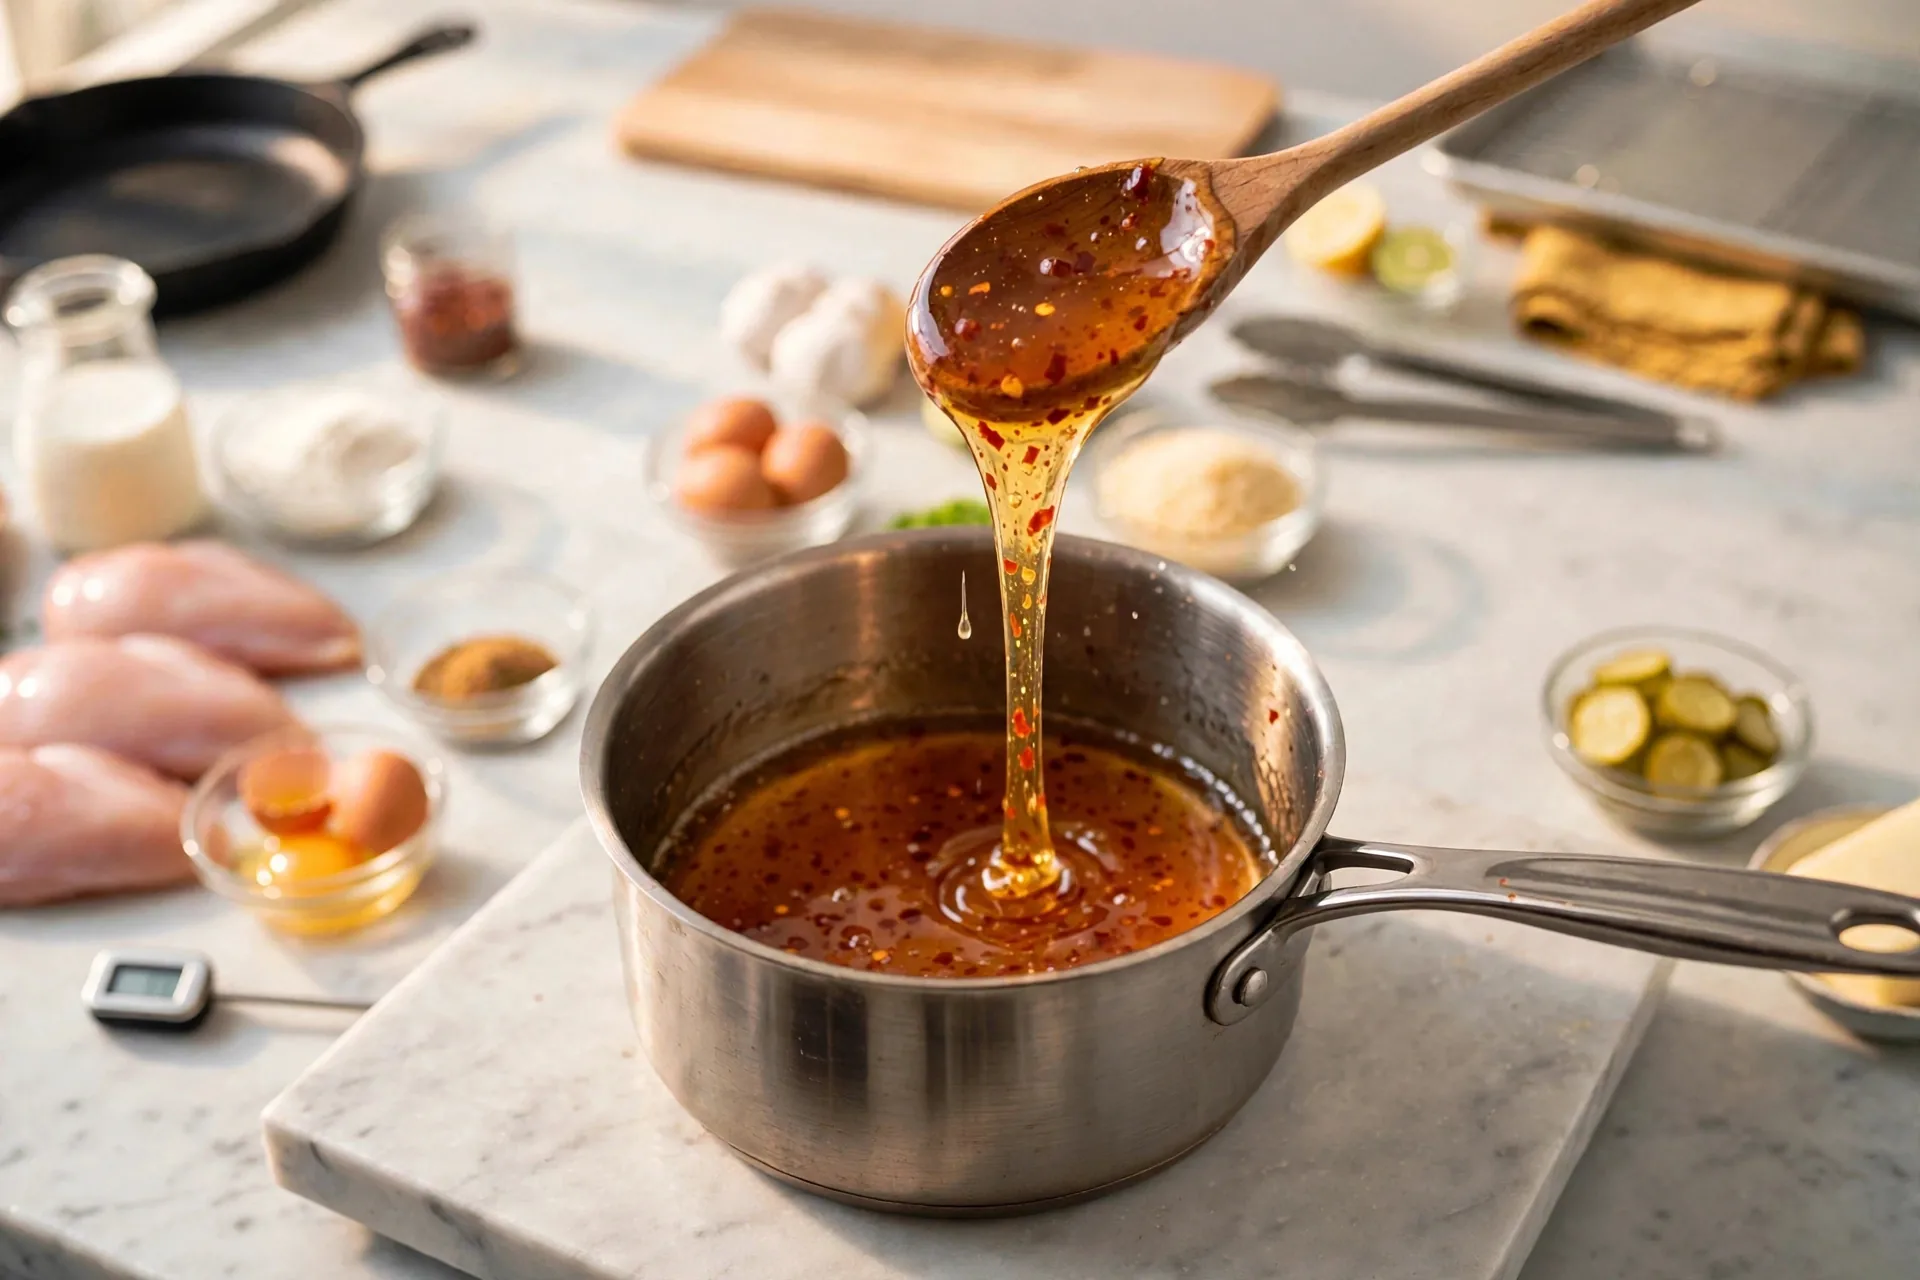
Lift a spoon from the pan and watch the honey fall. It should drop in a glossy, thick amber ribbon with red chili flakes suspended in it, and a thin coat should cling to the back of the spoon. Thin and watery means it needs another minute of gentle warmth. Thick enough to coat the spoon means it will cling to chicken instead of sliding off.
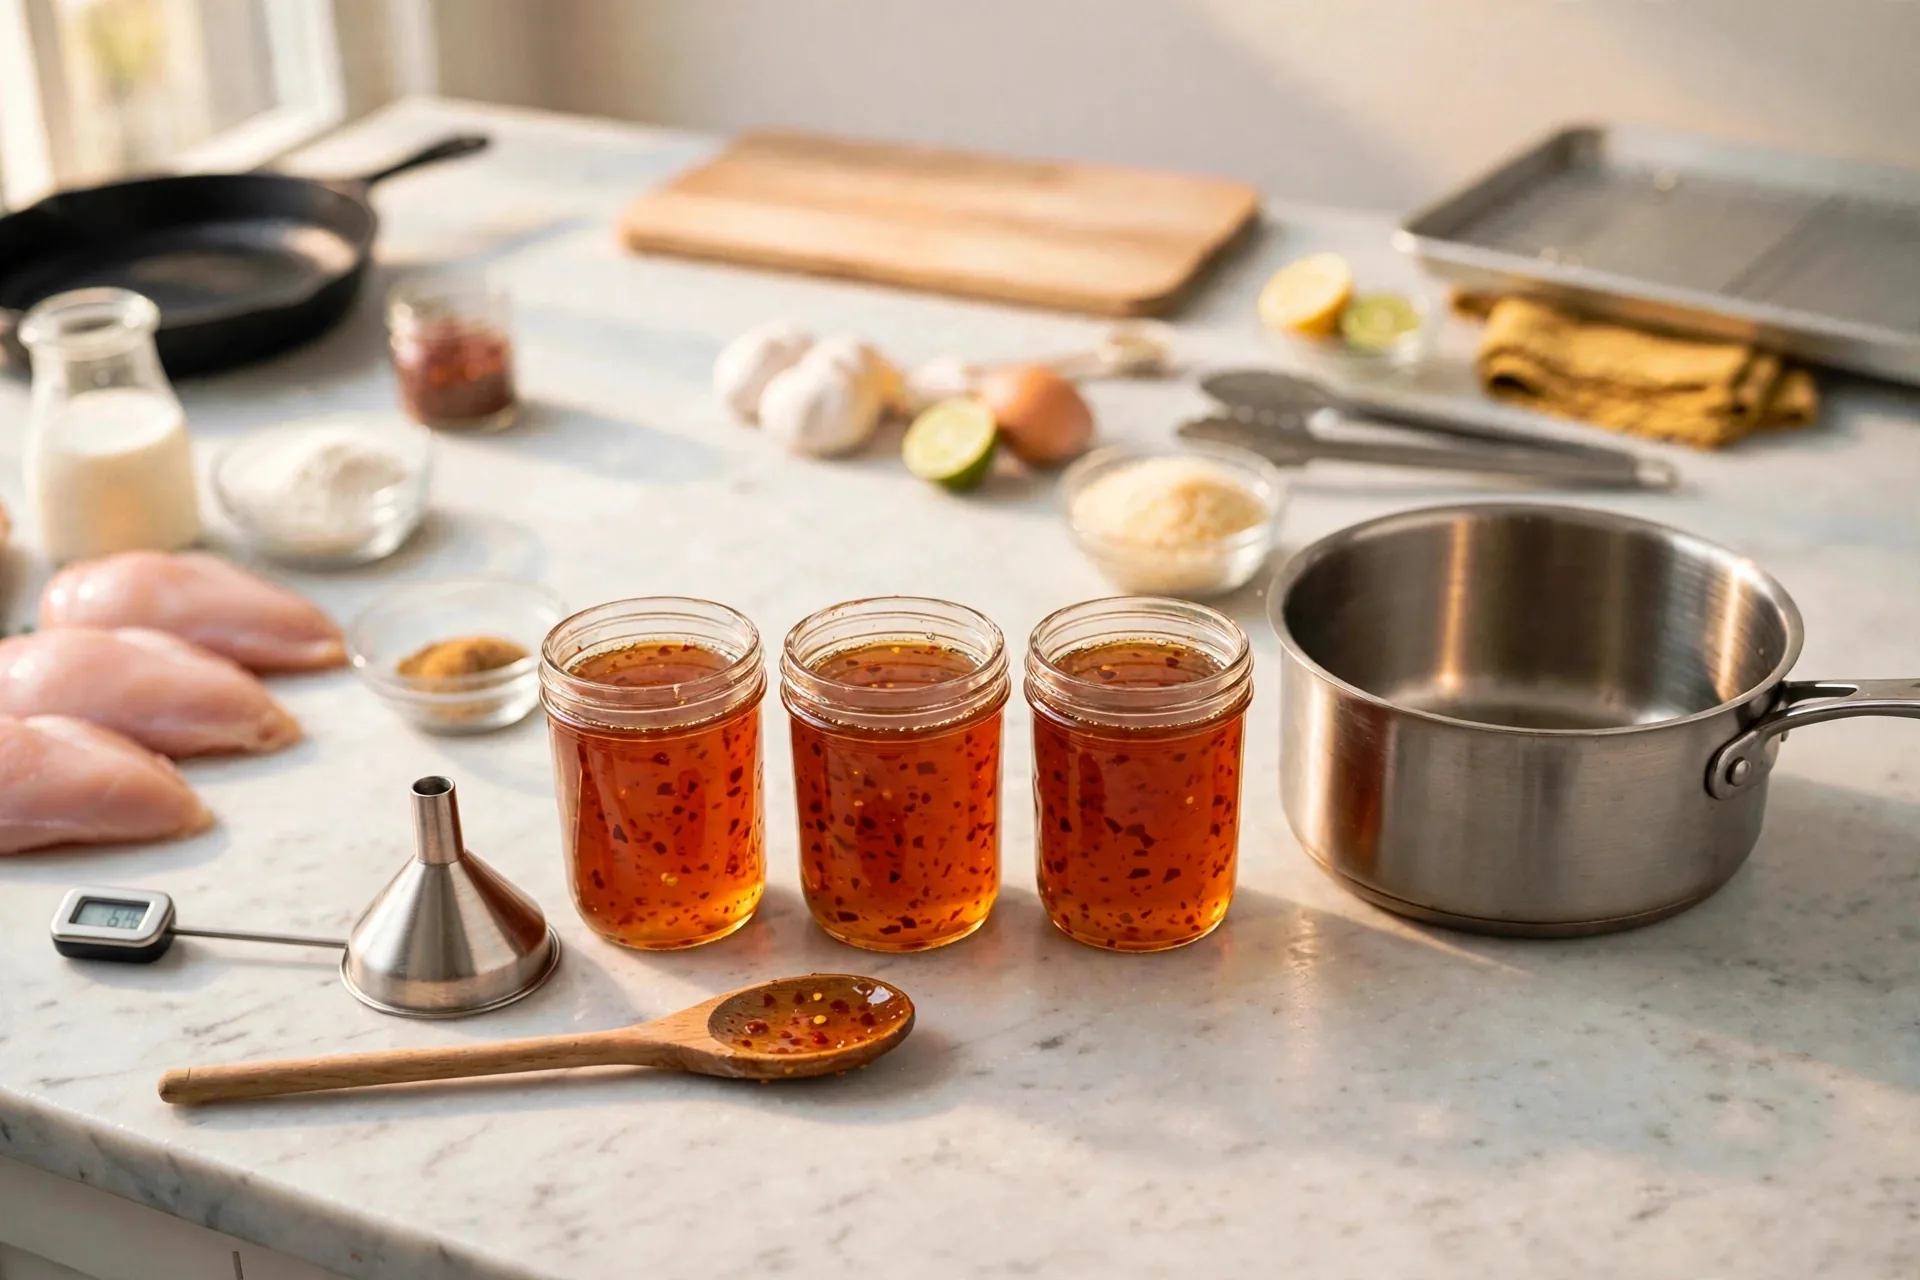
Divide the finished hot honey into three small glass jars, one for each recipe that uses it. A funnel keeps the pour clean, and the saucepan should end up empty beside the jars. Jars also make storage simple. Sealed jars keep in the fridge for several days, and the honey thickens as it cools, so a short warm-up brings it back to pouring consistency.
Set up the prep station before any chicken gets cut. Three jars of hot honey, a tray of raw breasts, a tray of raw tenders, a plate of boneless skinless thighs, a plate of bone-in skin-on thighs, a can of chipotle in adobo, a jar of plain honey, and a soy sauce bottle, all on the counter with raw chicken kept on separate plates. This station is the starting point for Recipes 1, 2, 3, and 4, and it saves a lot of mid-cook searching.
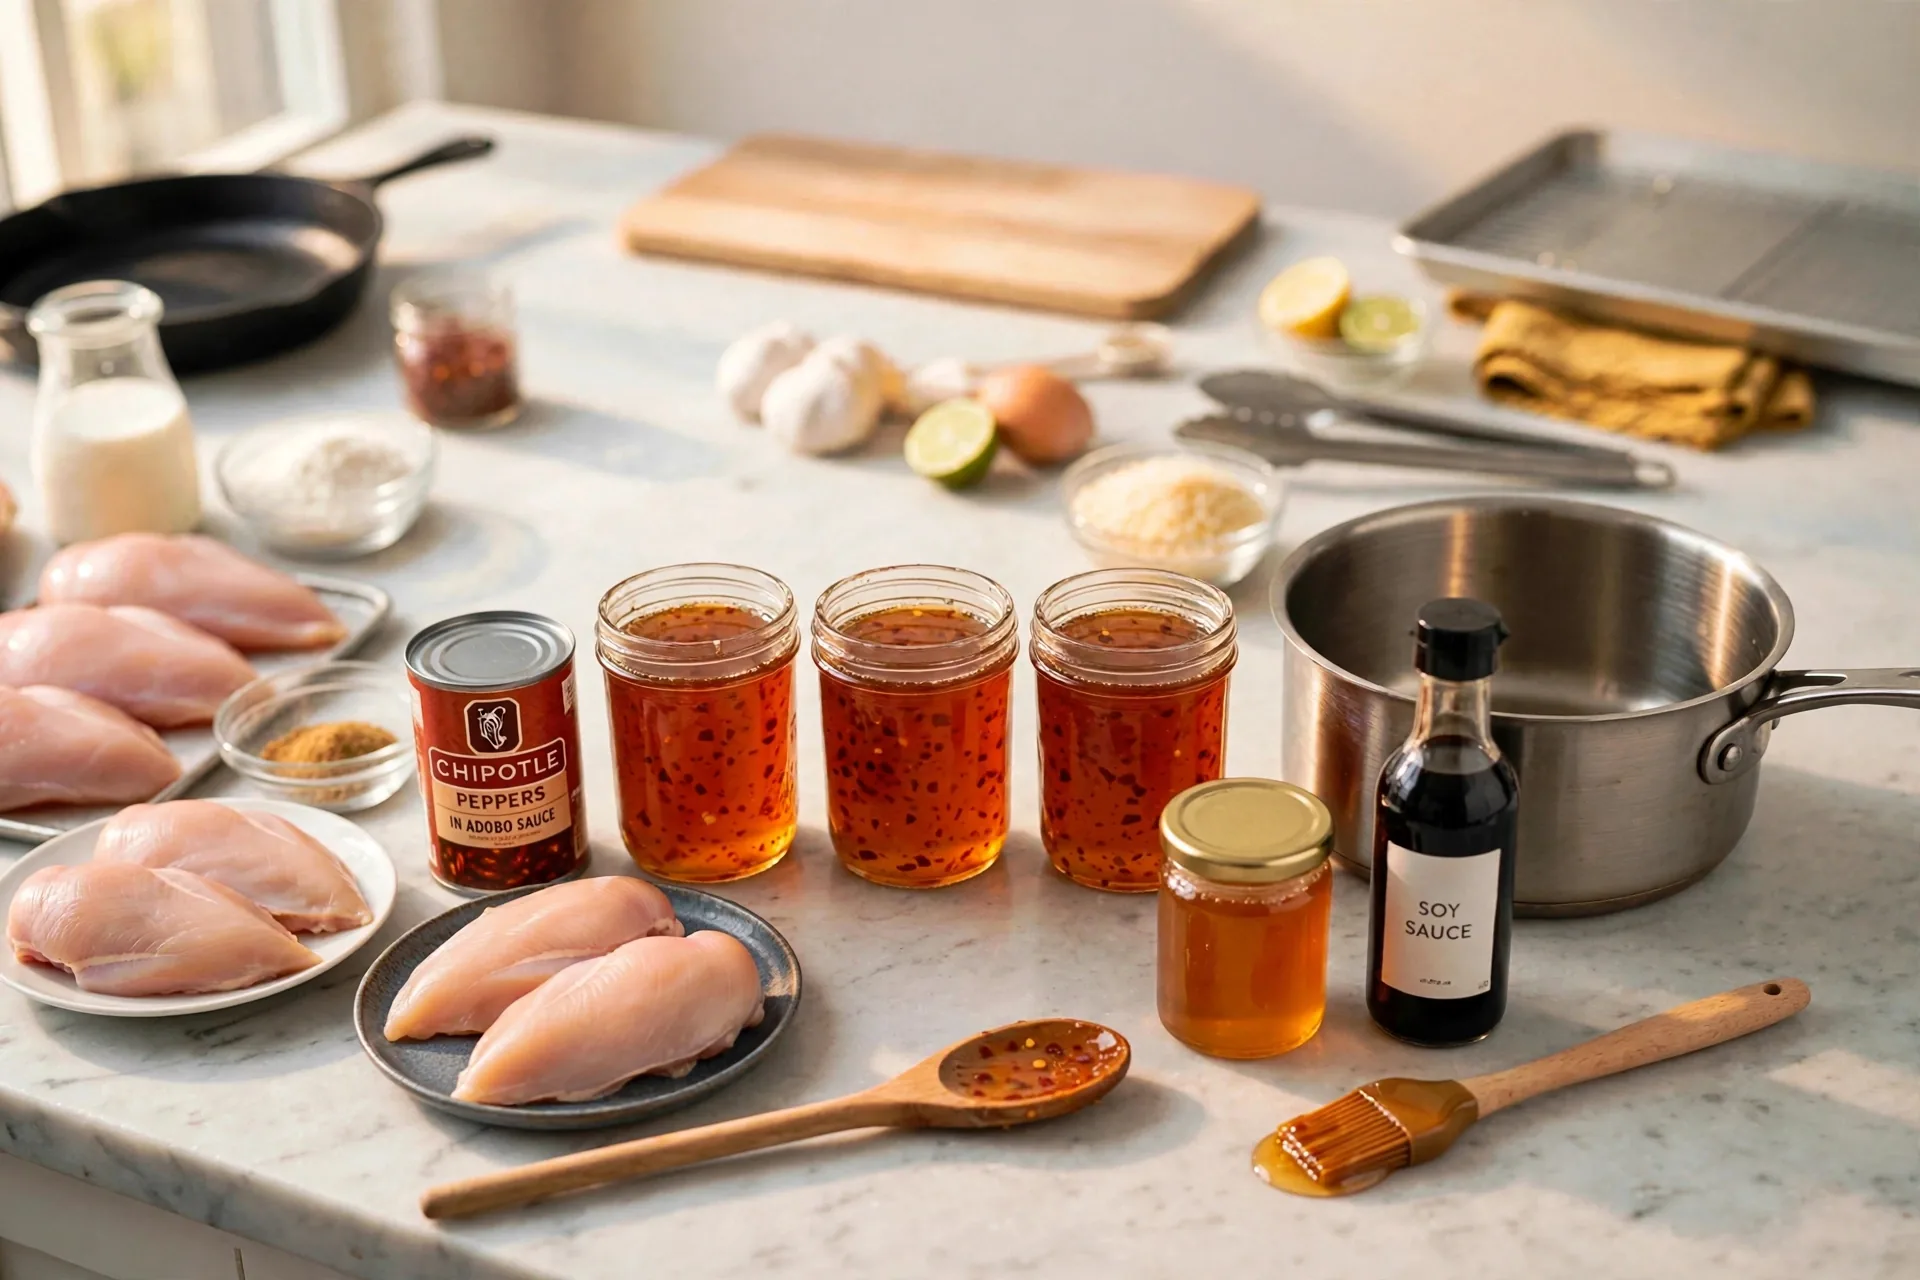
Why the vinegar goes in last: vinegar sharpens the honey and balances the sweetness, and that sharp edge is exactly what keeps hot honey from tasting like plain sweet sauce. Stirred in off the heat, it stays bright. Boiled in, it dulls.
Recipe 1
Hot Honey Chicken
Pan-seared cutlets, finished with a drizzle of the shared hot honey. This is the fastest dish in the post, and it leans on two moves: even thickness so the chicken cooks evenly, and a hot skillet so the crust browns before the inside dries out.
Slice the breasts into cutlets
Hold a raw breast flat on the wooden board and slice it horizontally into two thinner cutlets with a chef’s knife. One cutlet already sliced and set aside shows the target: two even pieces from one breast, raw and pale pink, with clean cuts. Even thickness is the whole point. A thick end and a thin end on the same piece means one end dries out while the other catches up.
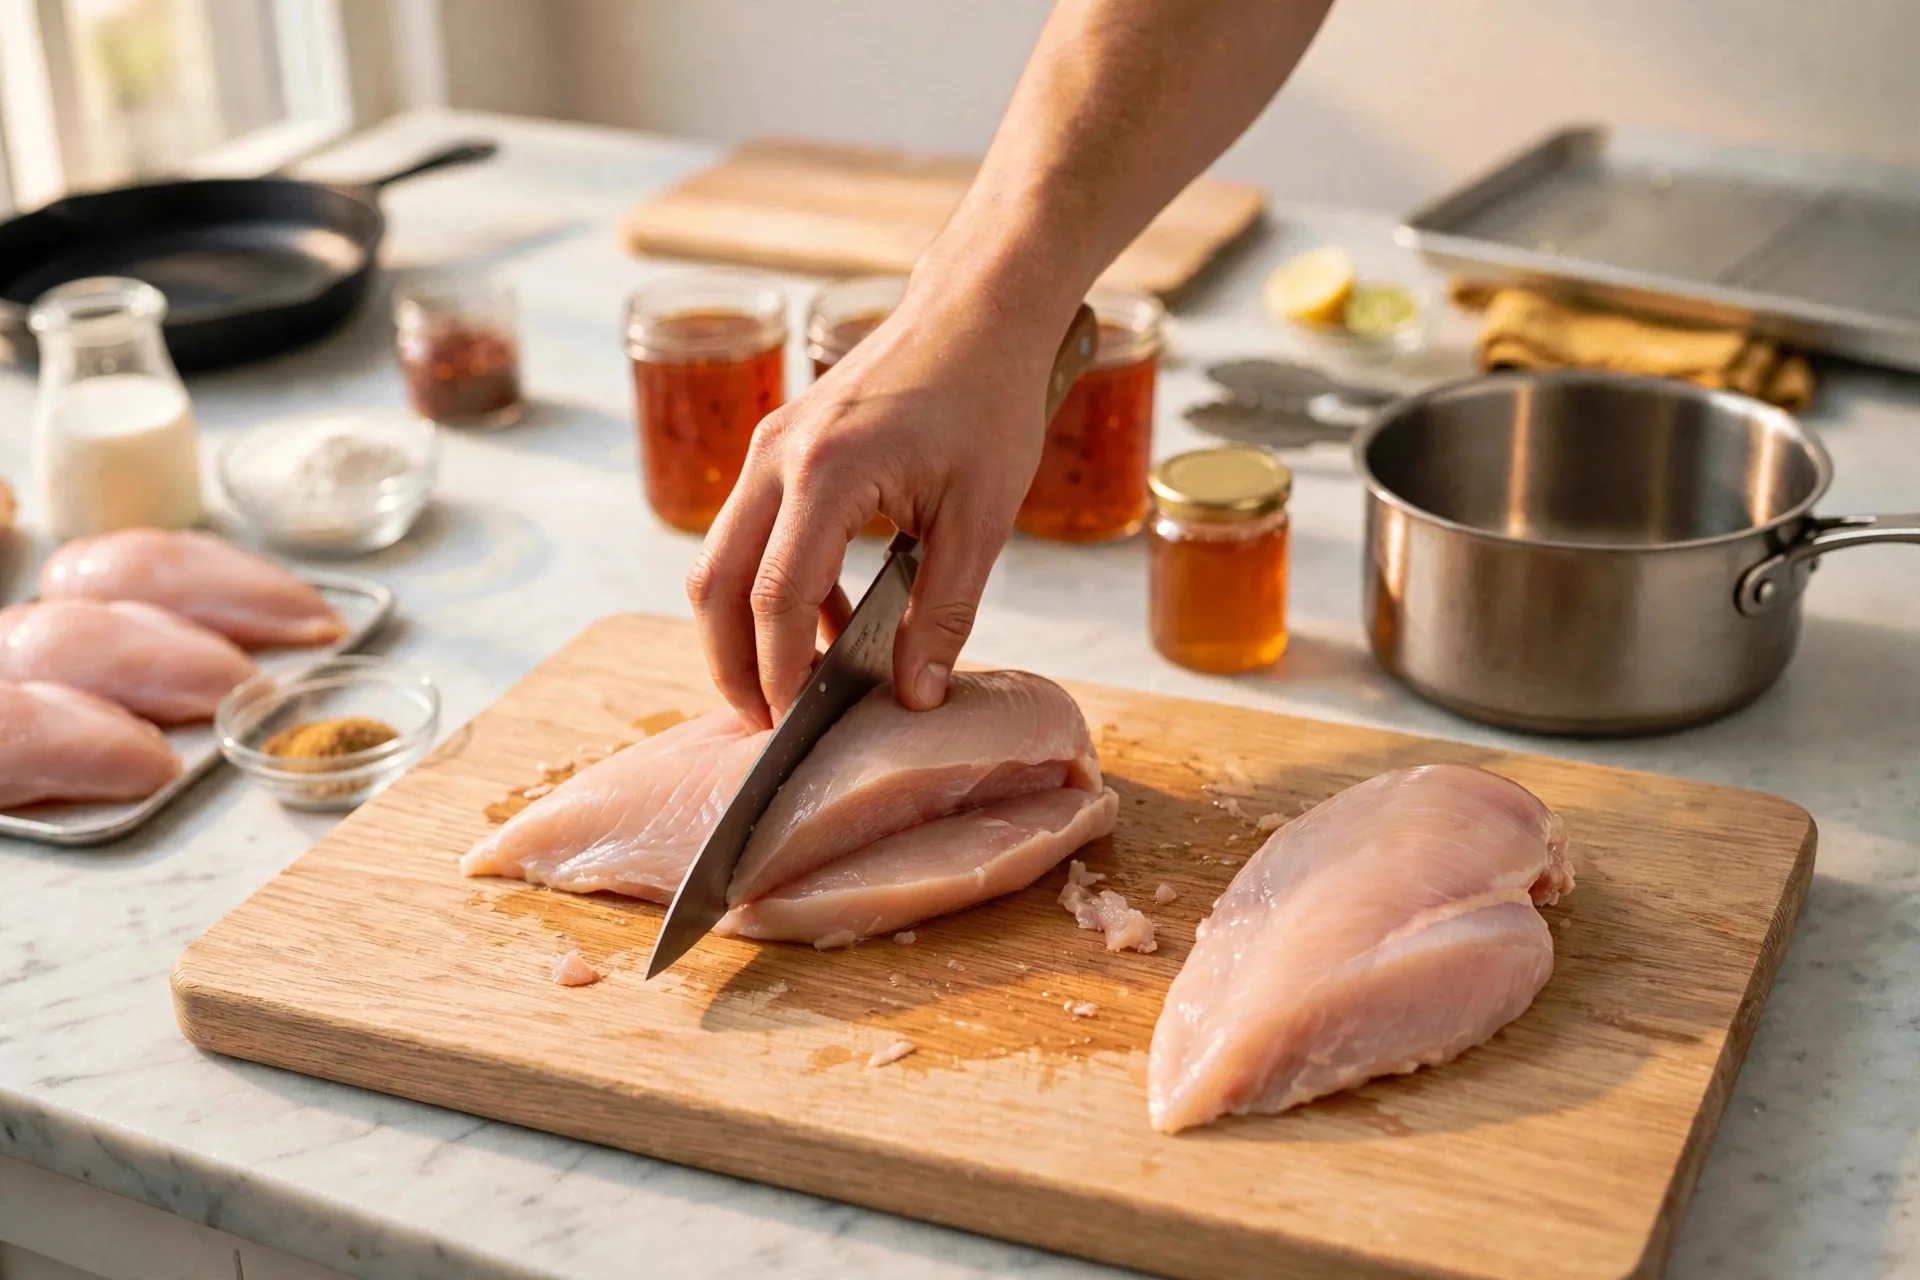
Pound to even thickness
Lay the cutlets between two sheets of parchment on the board and pound them flat with a meat mallet. They spread out and settle at one even thickness, and a second cutlet waits its turn beside them. Pound from the center outward with firm, even strokes. The mallet also breaks down the fibers a little, which helps the cutlets stay tender in a fast sear.
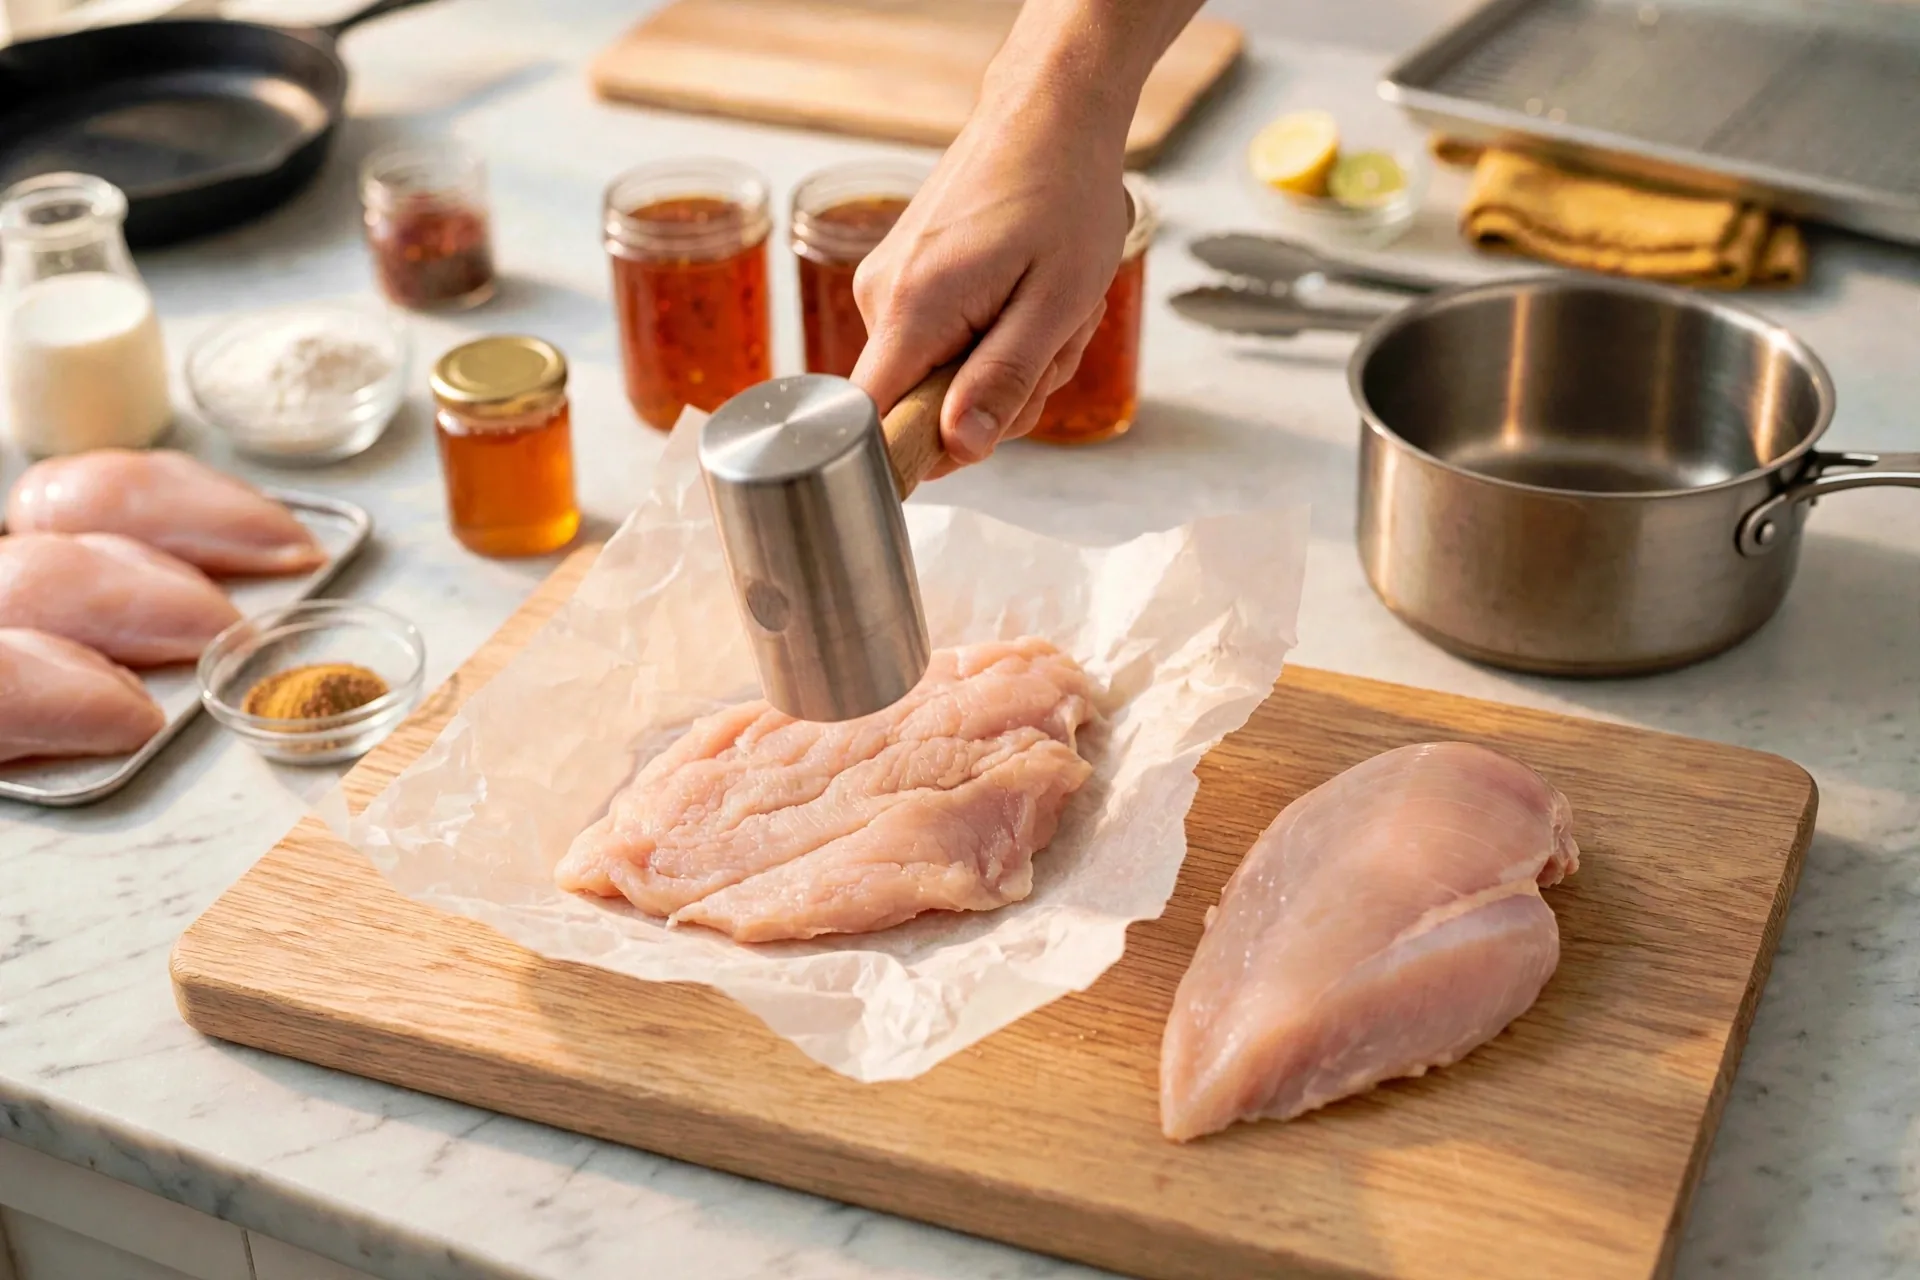
Season the cutlets
Season the flat cutlets with salt, pepper, garlic powder, and smoked paprika. The surface turns speckled red-orange, and a small bowl of the spice mix sits beside the board. Season both sides, and press the spices in lightly so they stay put when the cutlets hit the pan.
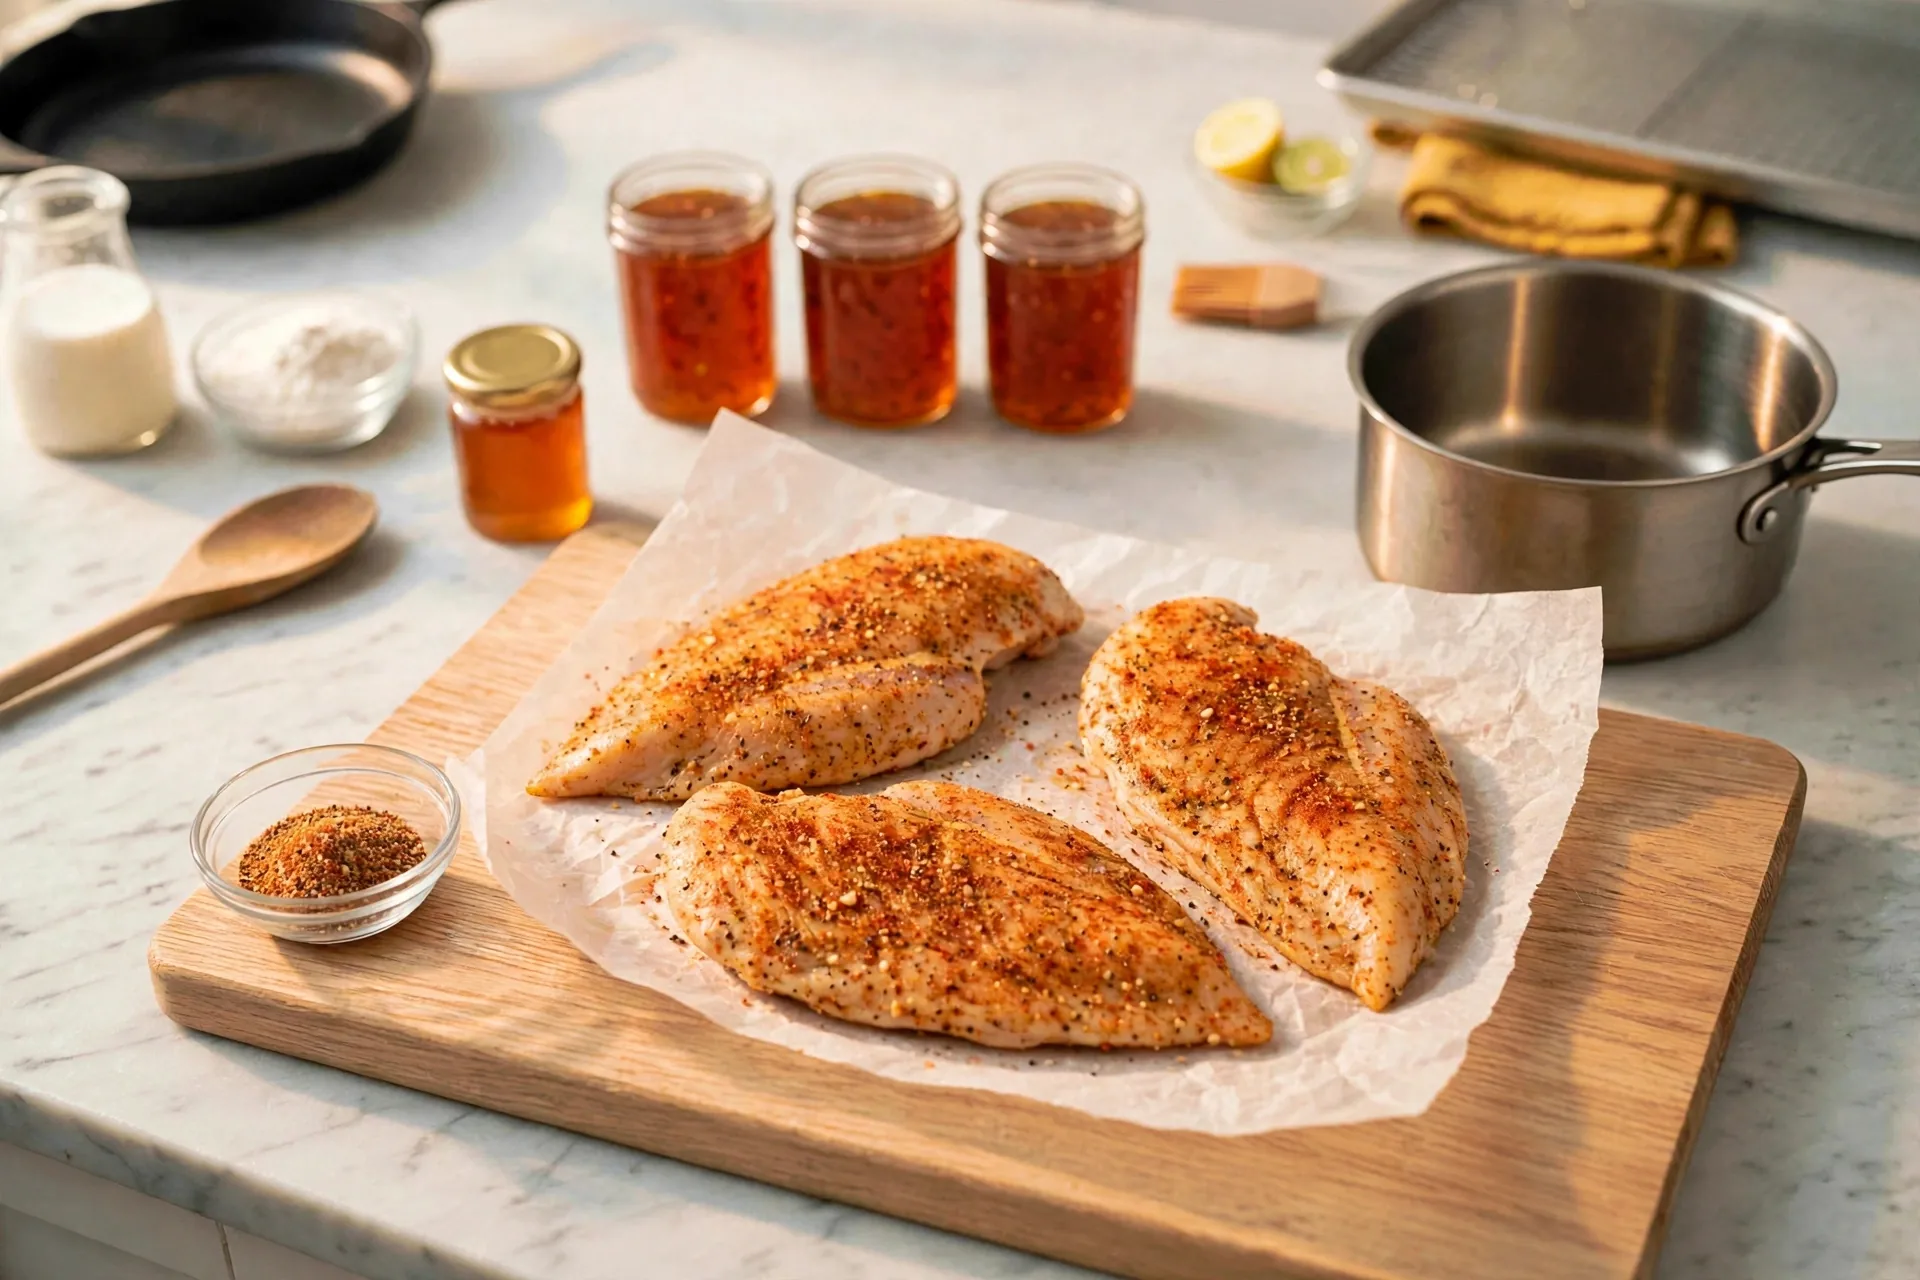
Heat the oil
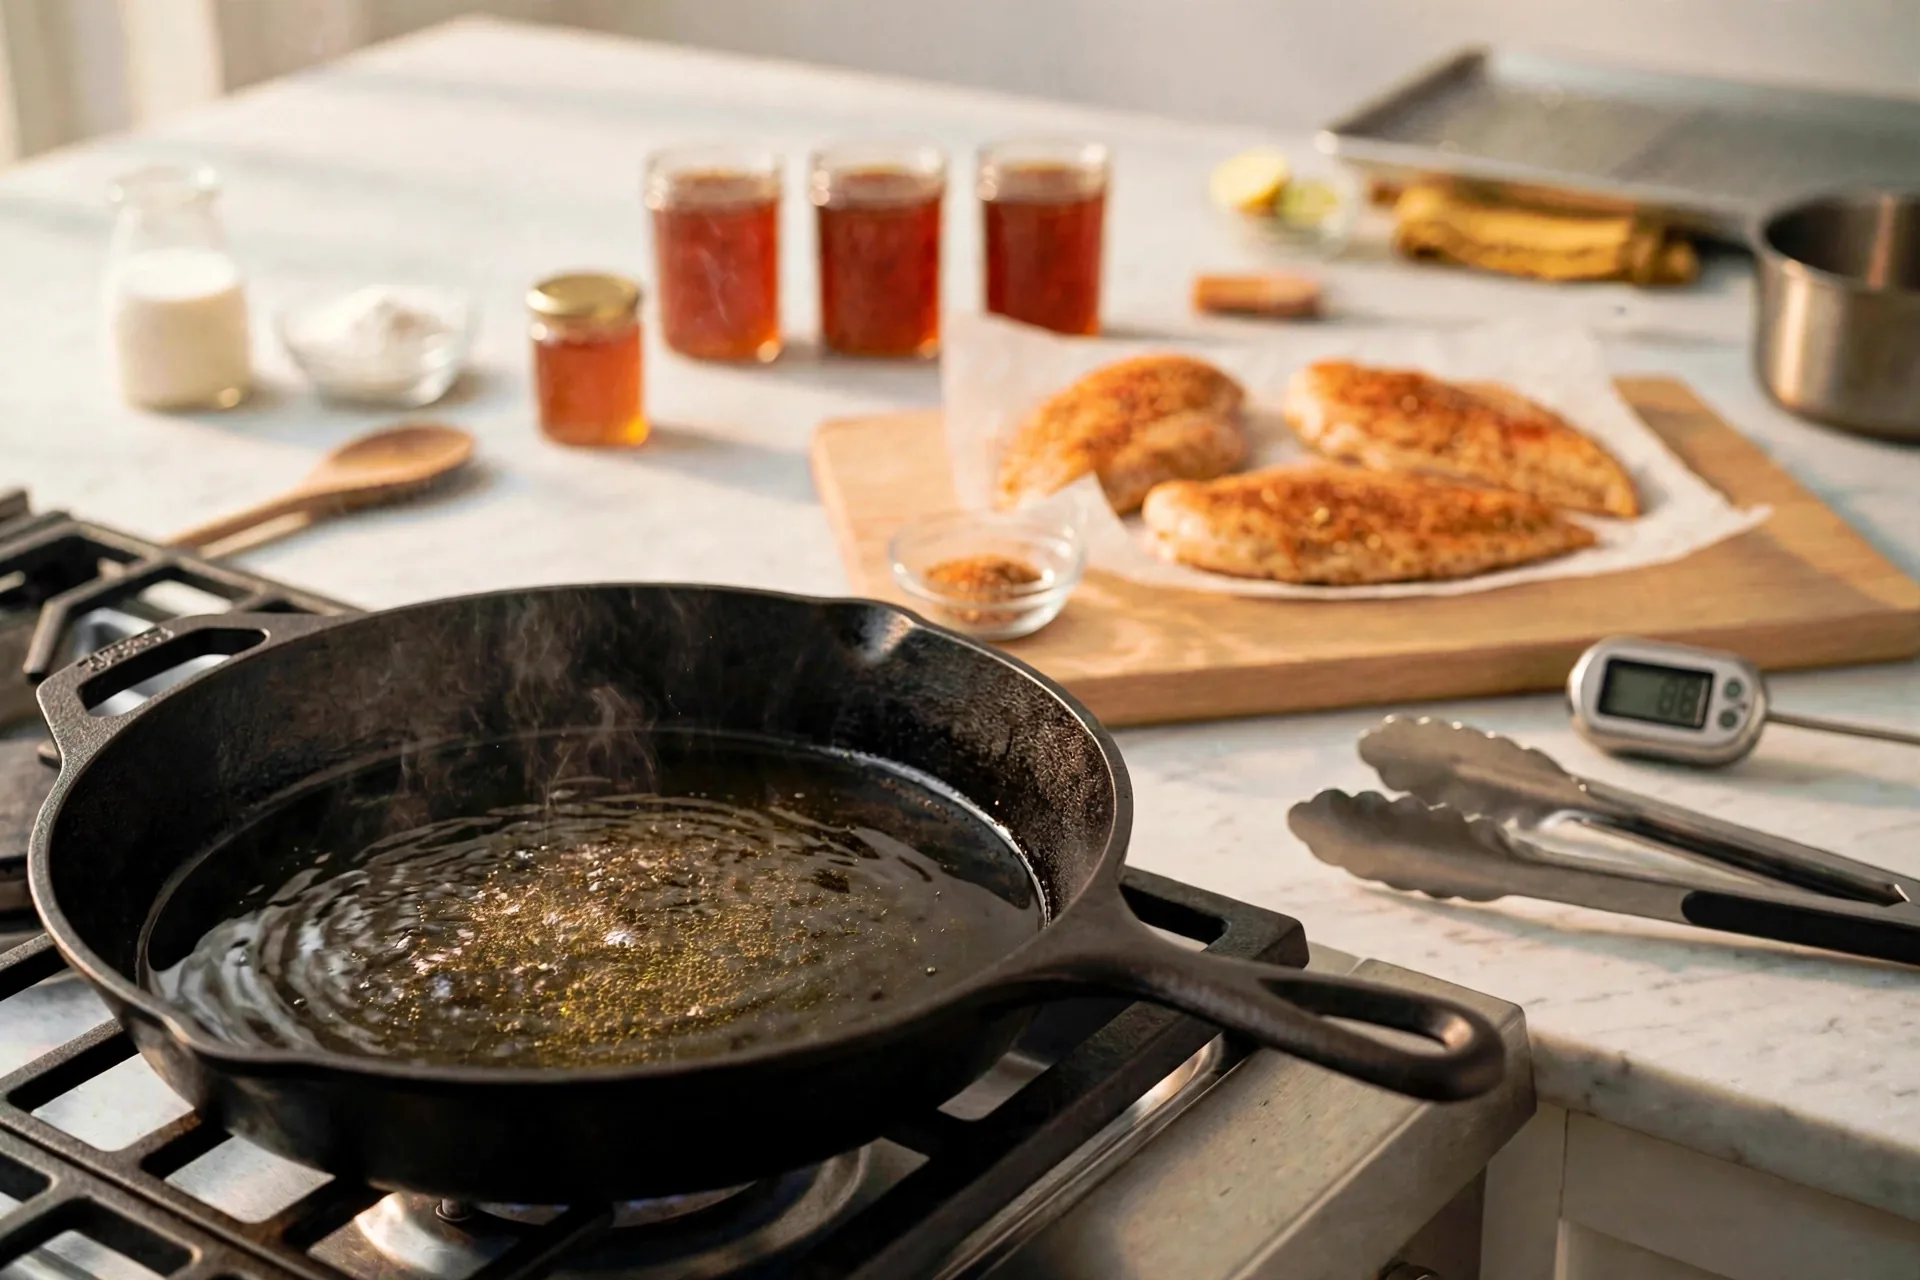
Set the black cast-iron skillet on the stove with a thin film of oil across the bottom. Wait for faint heat ripples on the surface. The seasoned cutlets wait on the board in the background, and no chicken goes in yet. A skillet that is not hot enough steams the cutlets instead of searing them, and the spice coating turns pasty rather than crisp.
Sear the cutlets
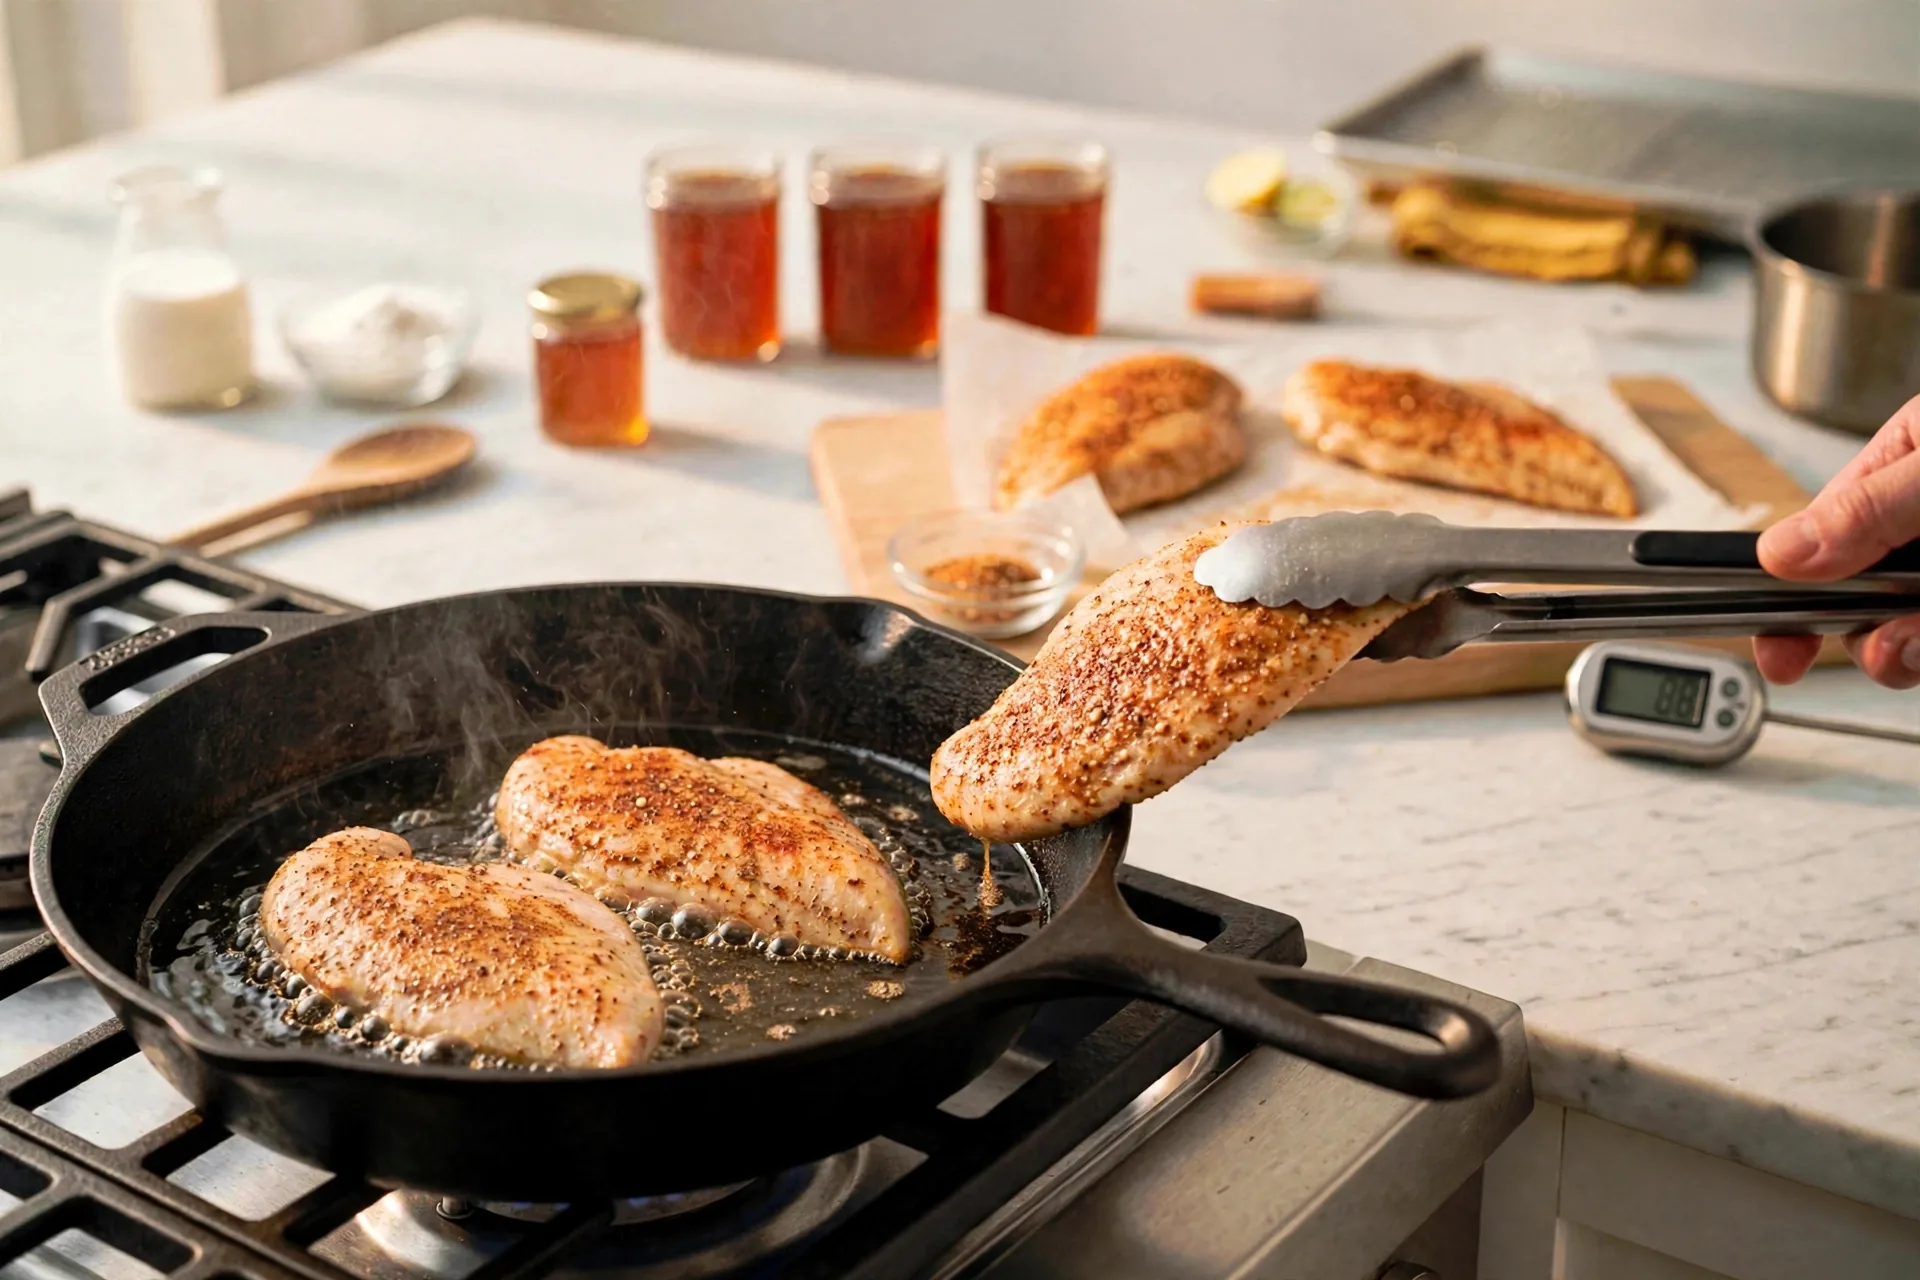
Lay the seasoned cutlets into the hot skillet in a single layer with a gap between them. Use tongs for this. A light sizzle and a little steam rise at once, and the underside starts turning pale gold. Crowding the pan drops the temperature and costs you the crust, so cook in batches if the skillet fills up.
Flip once the crust sets
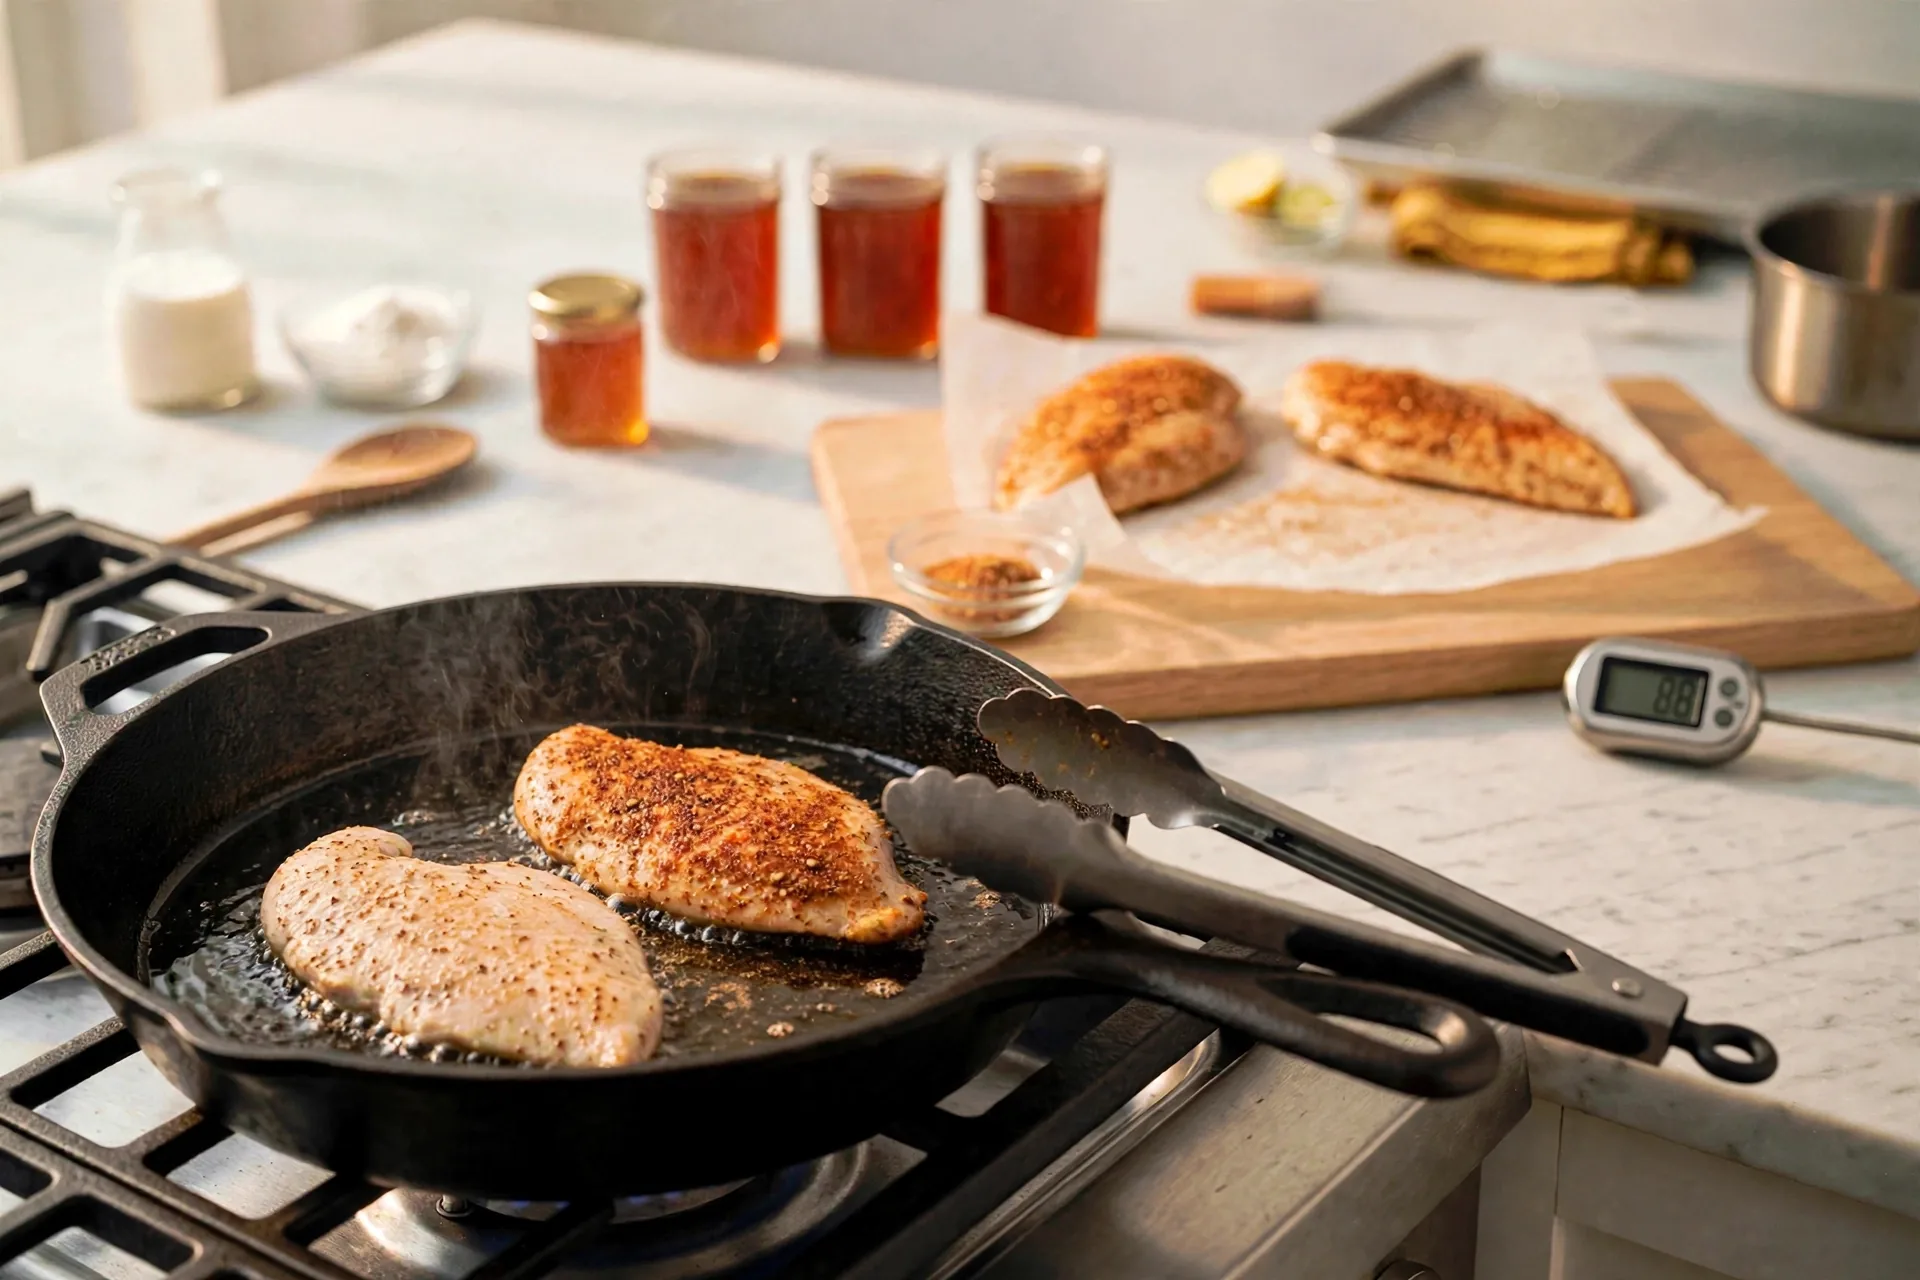
Turn the cutlets over to show a deep golden-brown crust with spice flecks. The second side is still pale in the pan, and tongs rest on the skillet edge. Flip when the crust releases on its own. A cutlet that sticks hard is usually a cutlet that needs another minute.
Check the temperature
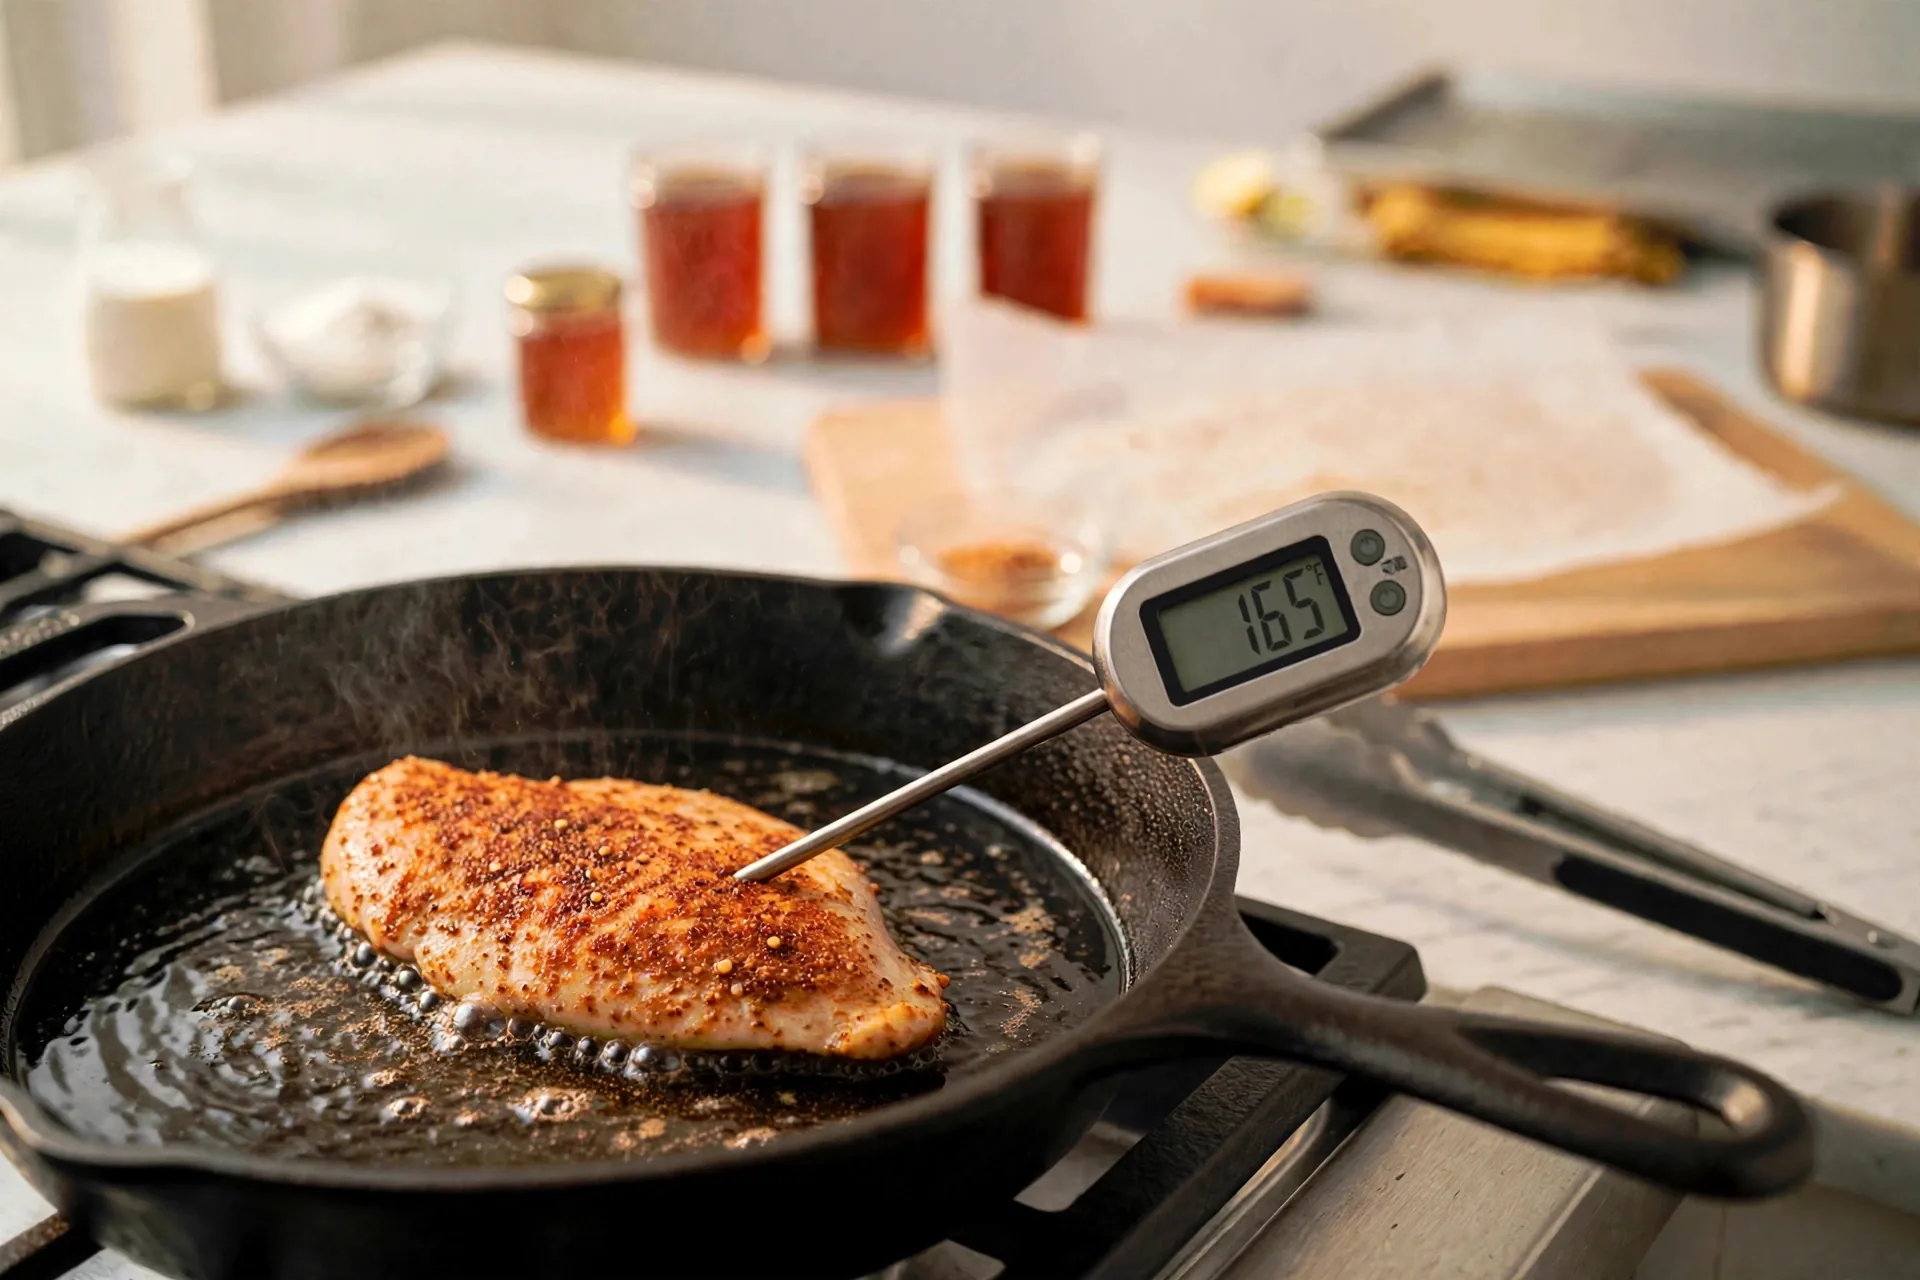
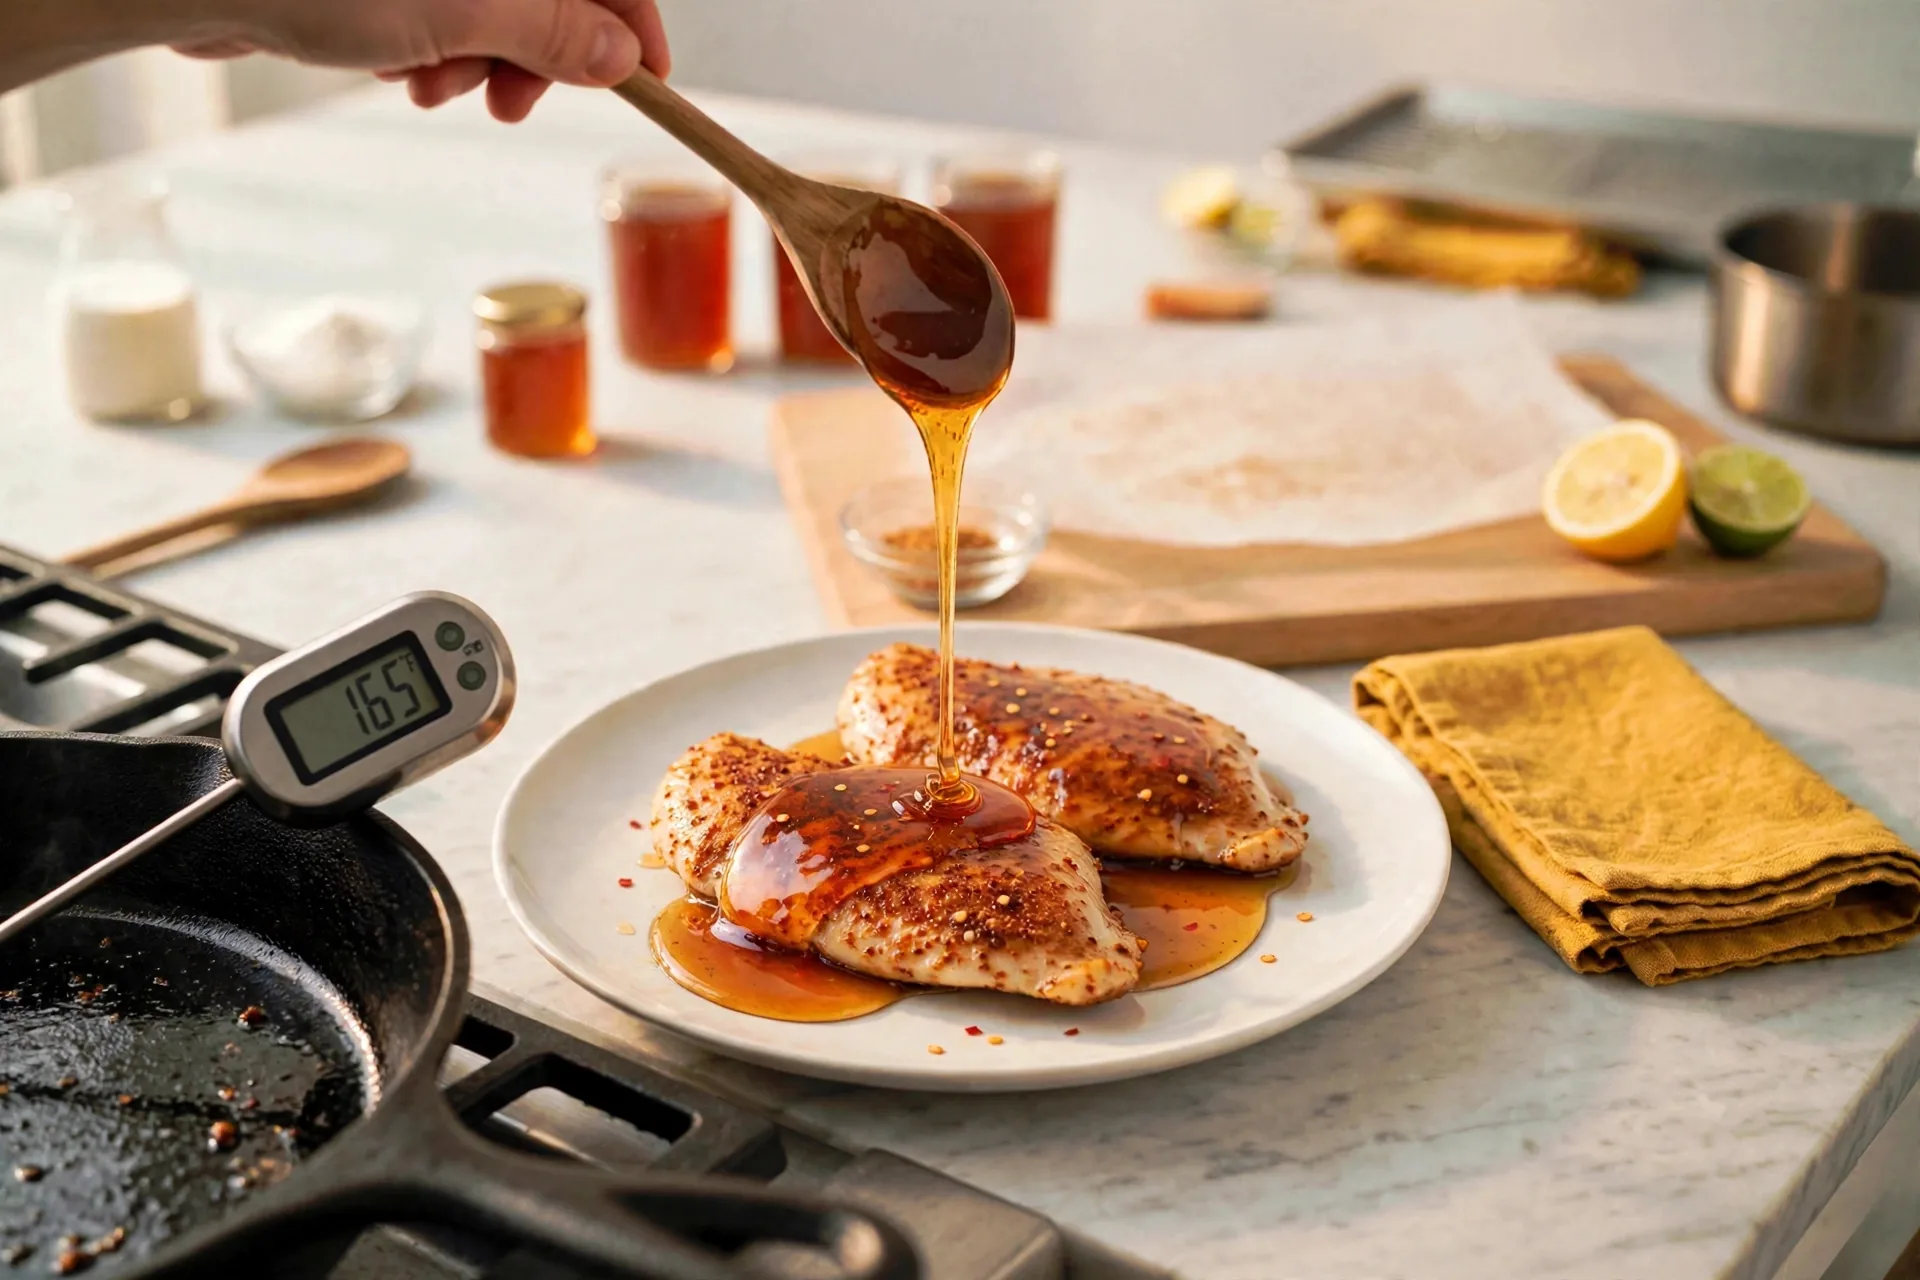
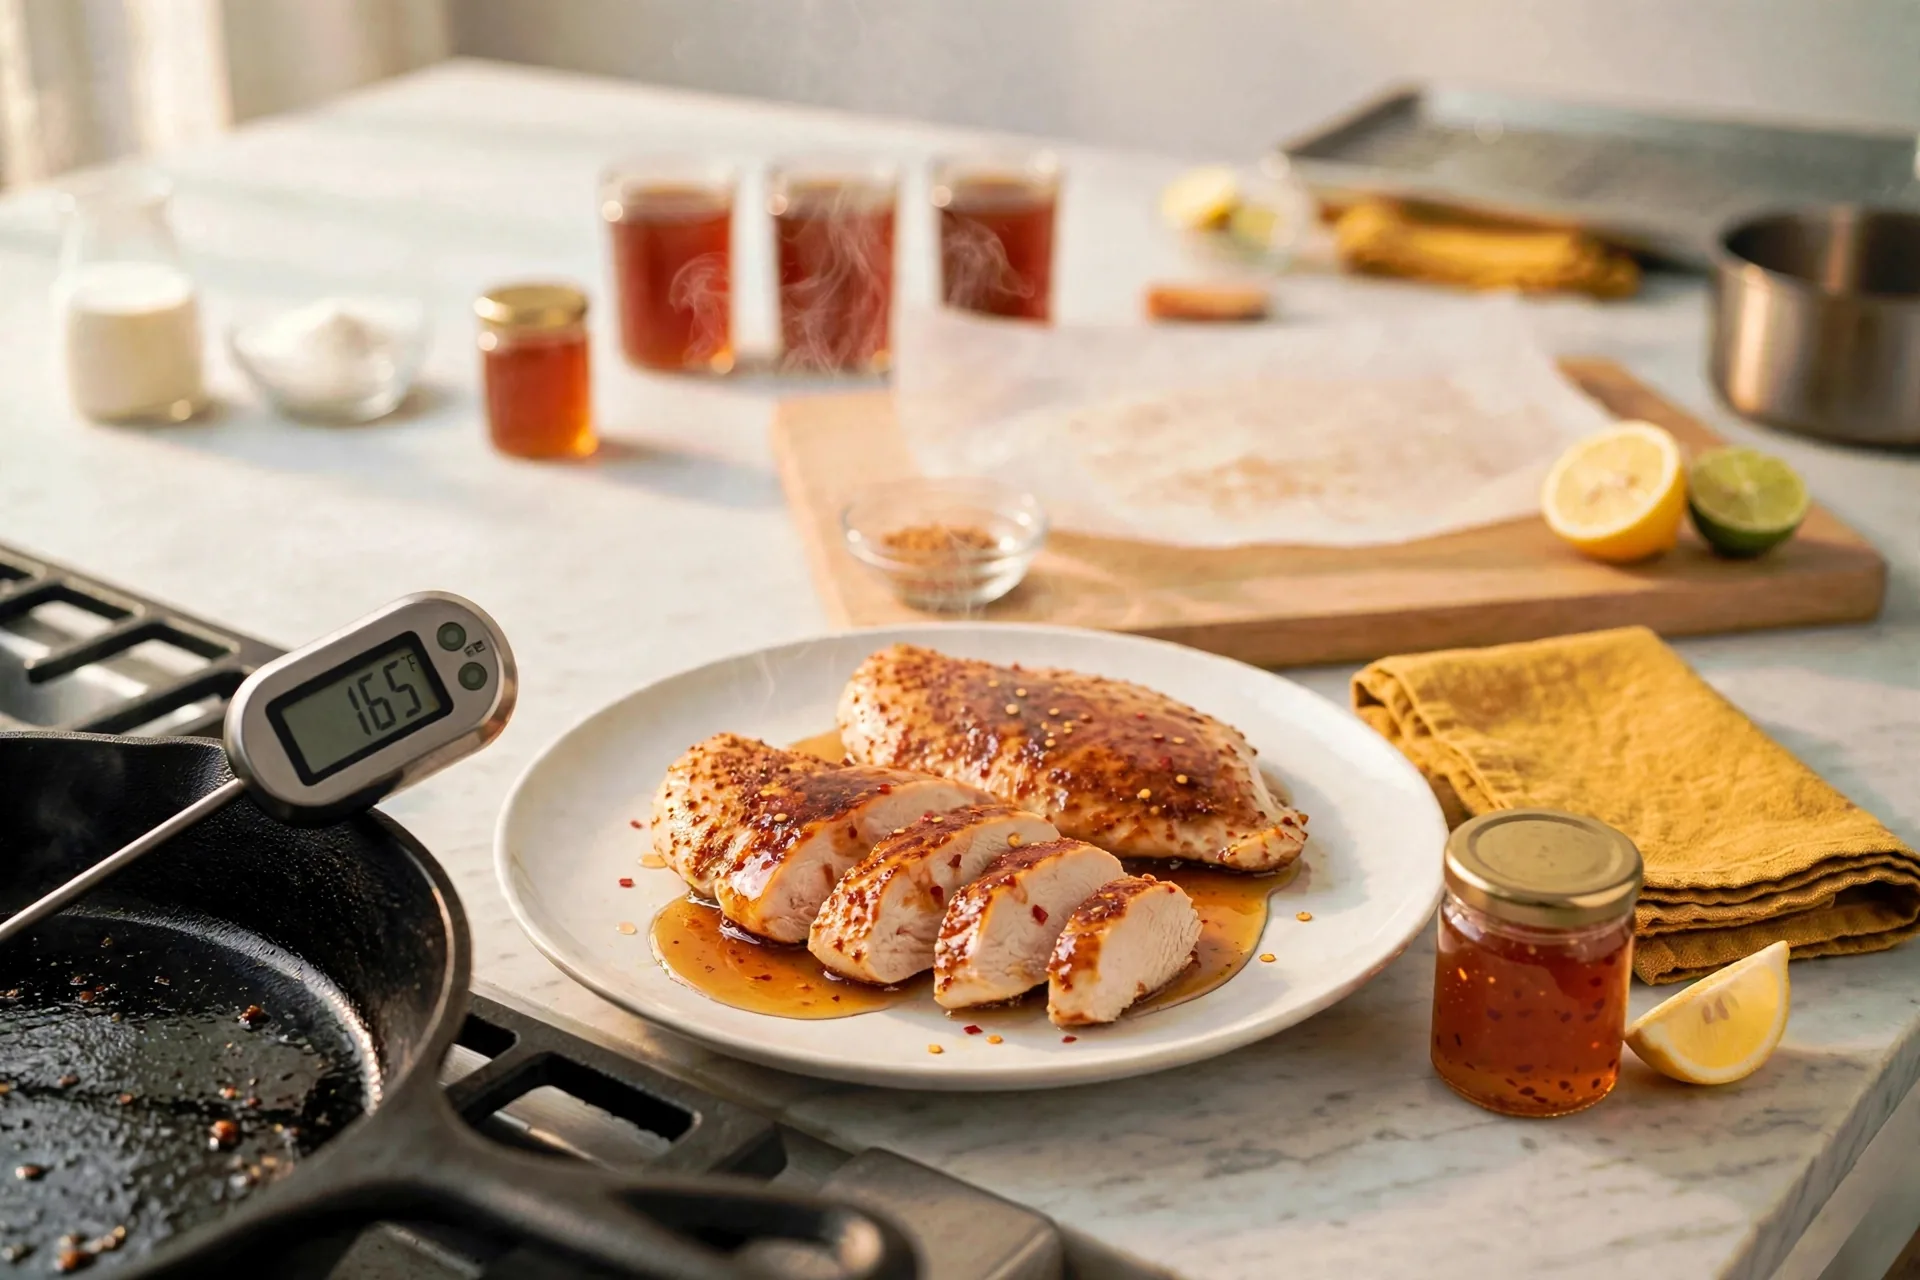
Push an instant-read thermometer into the thickest part of a cutlet. The display should read 165°F (74°C). The cutlet is golden with a browned crust at this point, and the thermometer reading is what confirms it is done. Color alone can mislead, especially with paprika in the seasoning, so trust the number.
Drizzle and serve
Spoon deep-amber hot honey over the golden cutlets on a plate. The honey falls in a glossy stream and pools around the chicken, with red chili flakes sitting on the surface. Slice one cutlet to show a juicy interior, and set a lemon wedge and a jar of hot honey beside the plate. The lemon is not decoration. A squeeze over the top cuts the richness and wakes up the heat.
Hot Honey Chicken
Ingredients
Method
- Slice breasts horizontally into cutlets.
- Pound between parchment to even thickness.
- Season with salt, pepper, garlic powder, smoked paprika.
- Heat oil in cast-iron skillet until shimmering.
- Sear cutlets in a single layer.
- Flip once crust sets and browns.
- Check thickest part reads 165°F (74°C).
- Drizzle with shared hot honey, serve with lemon wedges.
Notes
Recipe 2
Hot Honey Chicken Tenders
Buttermilk-brined tenders, breaded in flour, egg, and panko, baked on a rack, and tossed in hot honey while still hot. This recipe feeds two dishes, and one step decides whether the second dish happens at all.
Brine in buttermilk
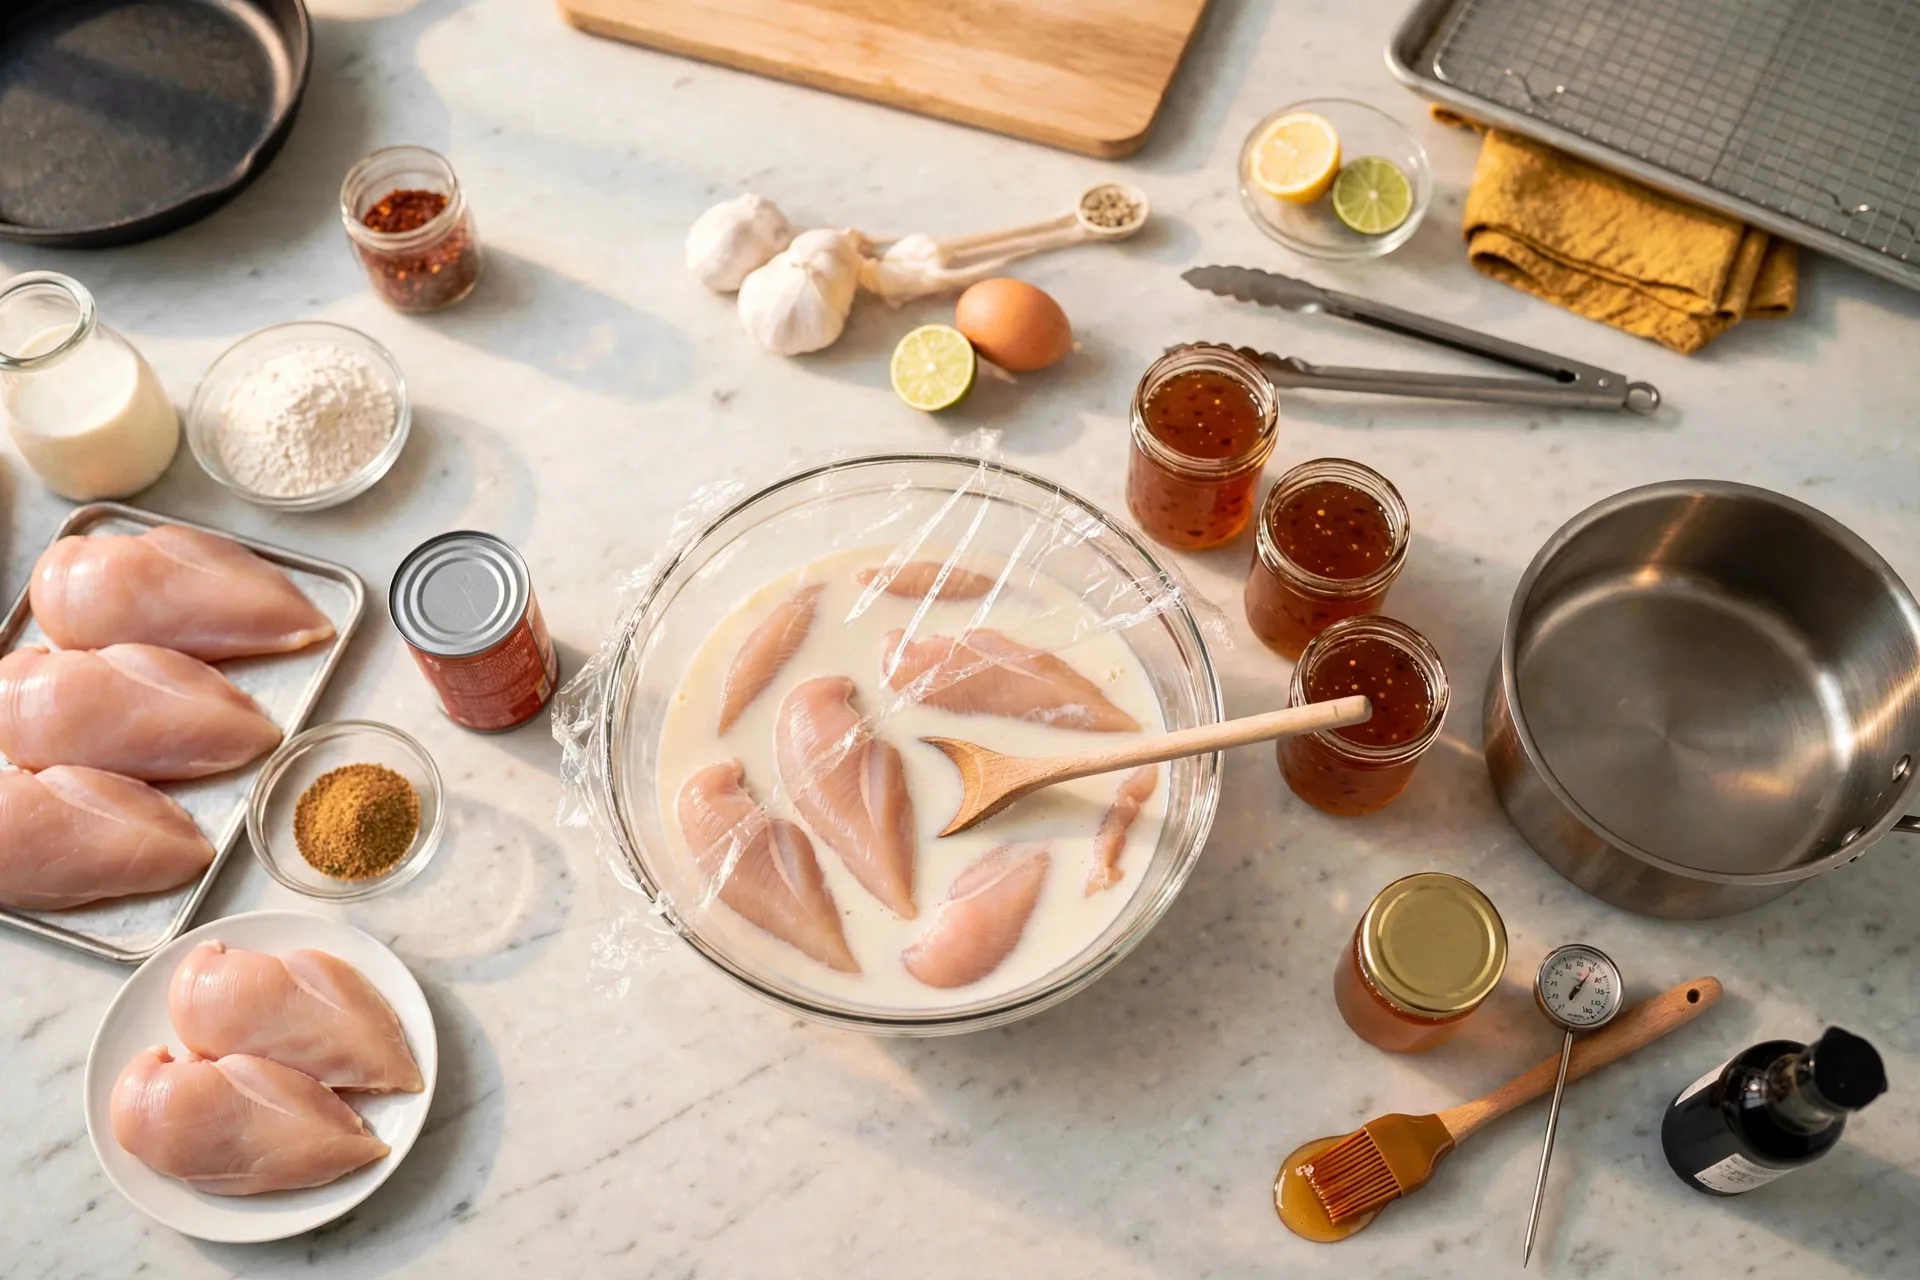
Submerge the raw tenders in a glass bowl of pale buttermilk. Push them under with a spoon, and cover the bowl partly with plastic wrap. The tenders stay pale pink and raw at this stage. Buttermilk does quiet work here. Its acidity loosens the surface fibers a little, which helps the breading grip and helps the cooked tender stay juicy. While the tenders soak, set up the breading station so no wet hand has to hunt for a dish later.
Set up the breading station
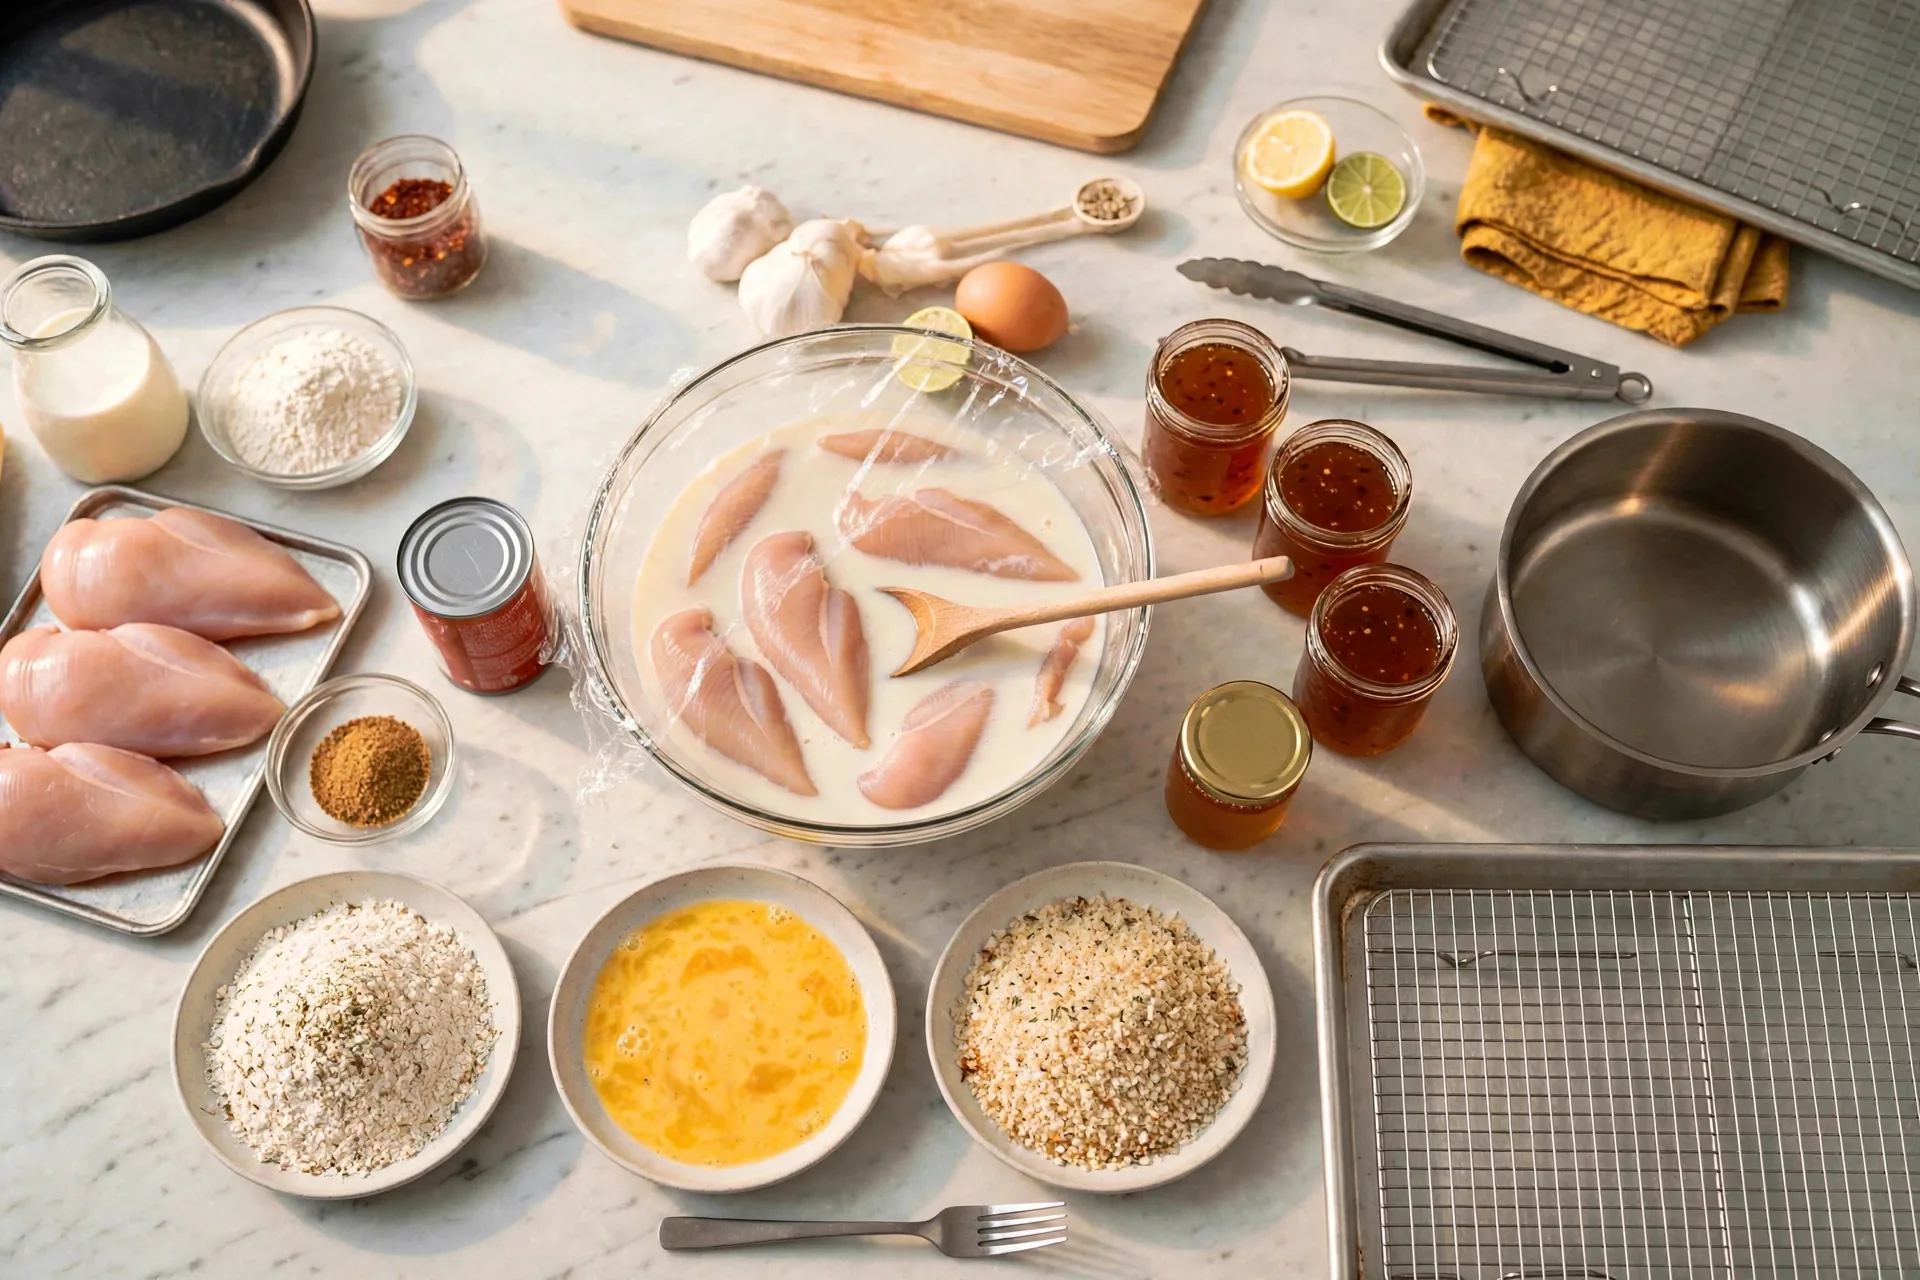
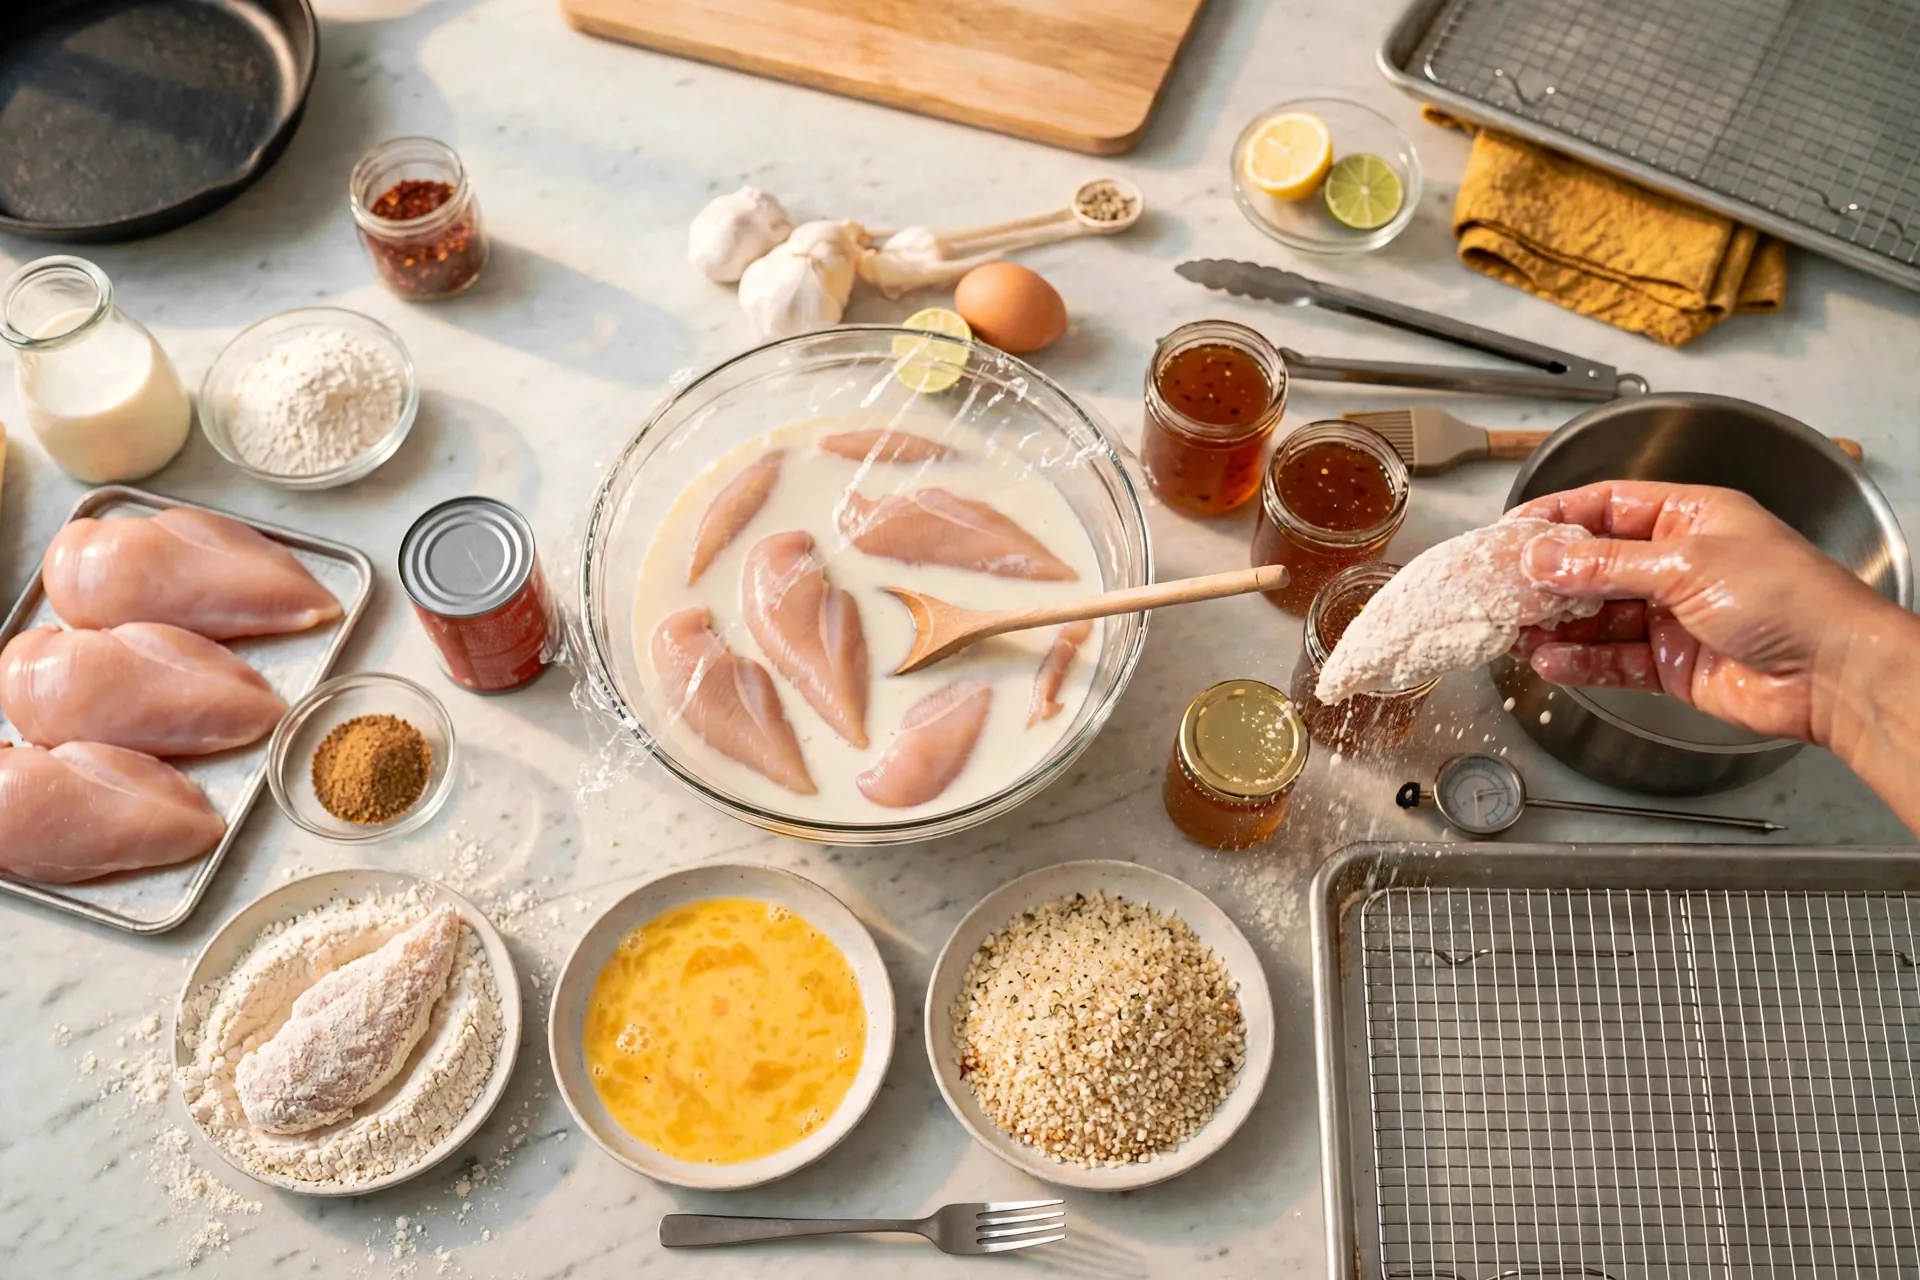
Line up three shallow dishes on the marble counter: seasoned flour, pale beige with spices; beaten eggs, golden; and panko mixed with spices, light tan. A wire rack over a baking sheet waits at the end of the row, a fork sits beside the dishes, and the buttermilk bowl of tenders stands behind. Order matters. Flour first, egg second, panko last, with the rack at the end so coated tenders never sit in a wet dish.
Dredge, dip, and press
Lift a damp tender from the buttermilk and dredge it in the seasoned flour. Shake off the excess so a light white coating forms. Keep one hand dry and one wet through this whole sequence, or the breading ends up on your fingers instead of the chicken.
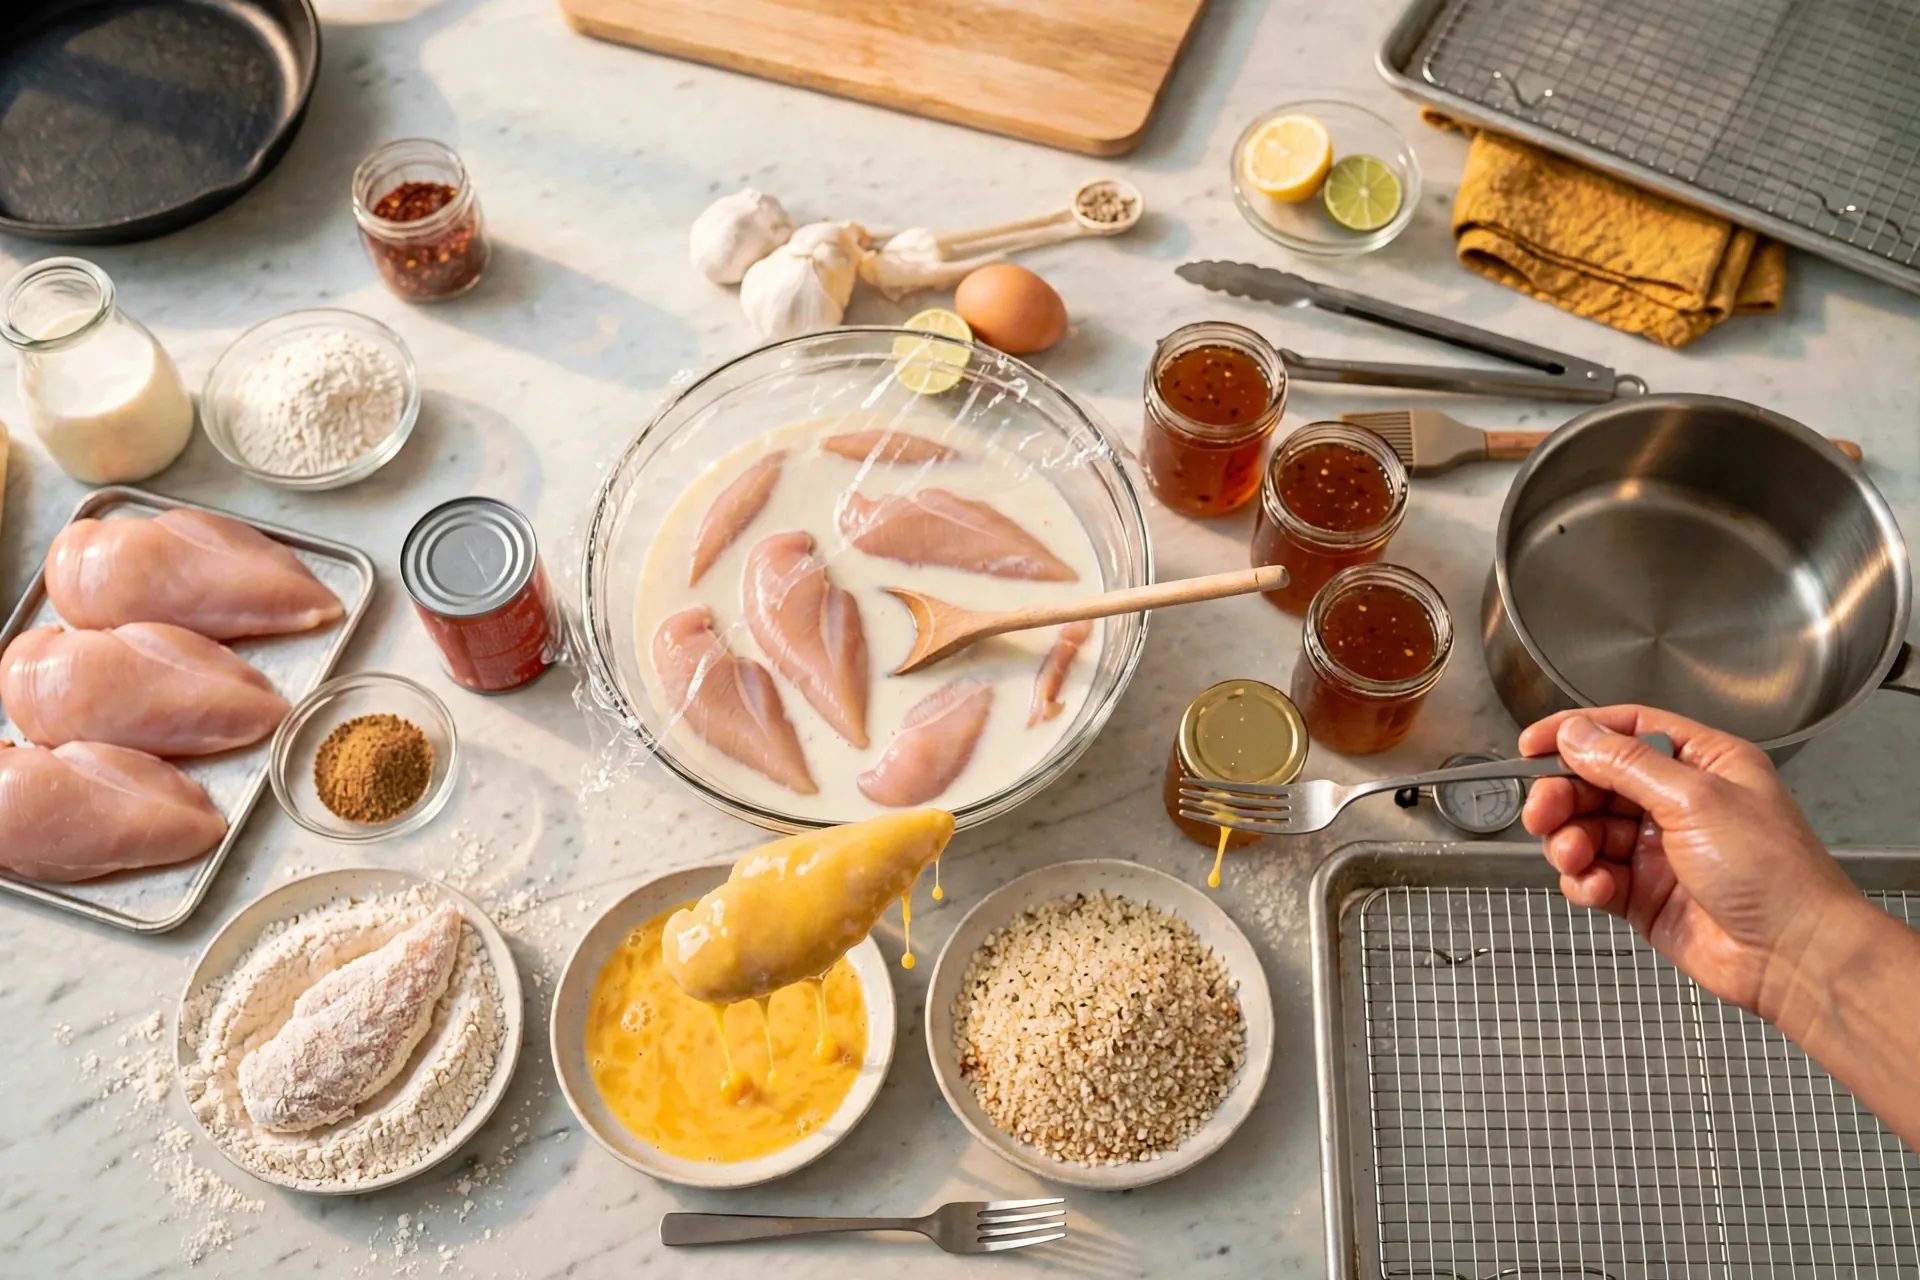
Dip the floured tender into the beaten egg. The glossy yellow egg coats it fully, and a fork lifts it out while the excess drips off. Egg is the glue layer. A thin, even coat holds the panko on, and a thick dripping coat turns gummy in the oven.
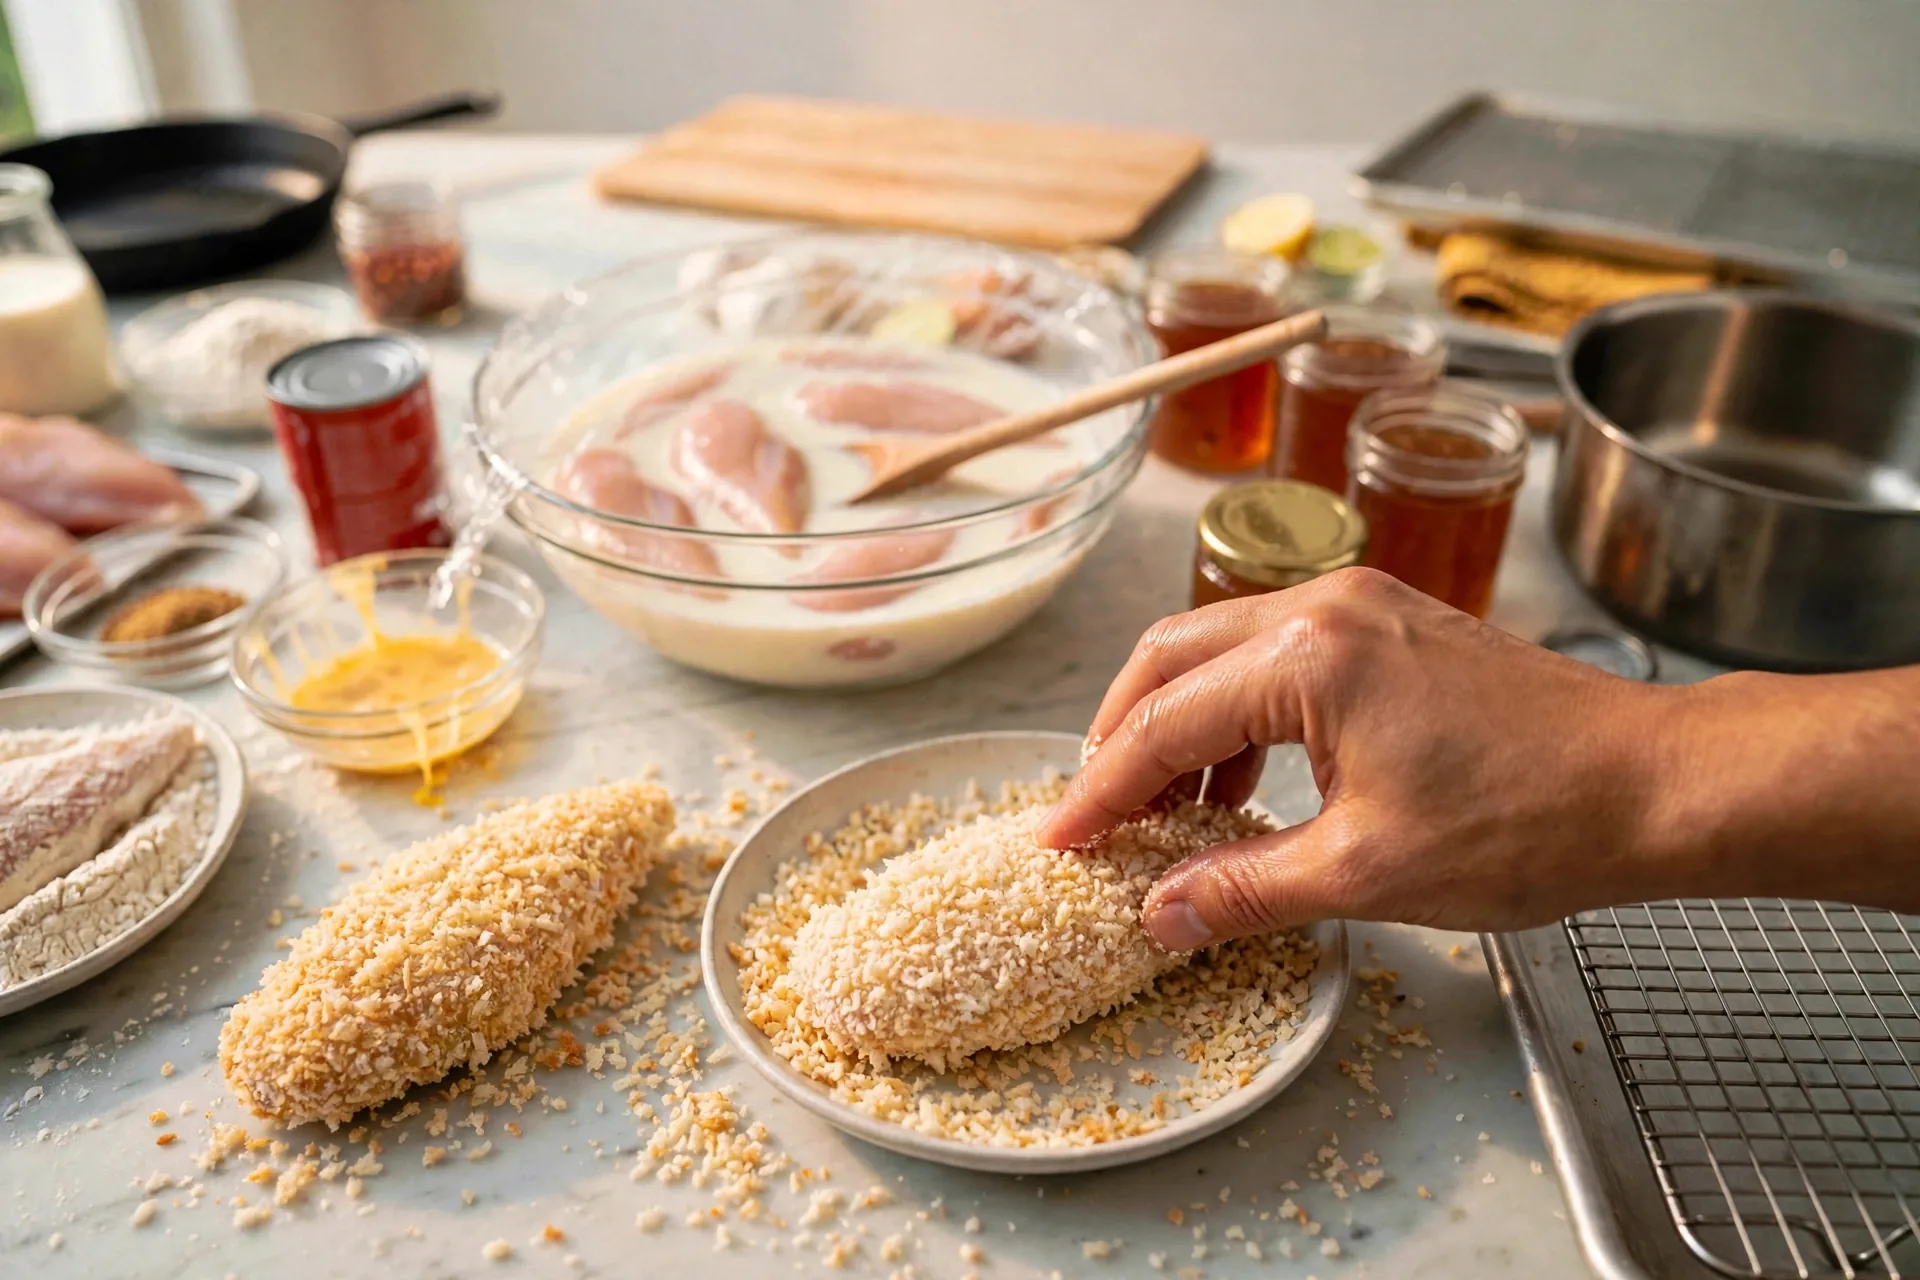
Press the tender firmly into the panko and push down so the golden crumbs stick thickly all over. A coated tender already rests beside the dish. That is the target coverage. Pressing beats sprinkling here. Loose crumbs fall off in the oven and leave pale patches.
Rack, oil, and oven
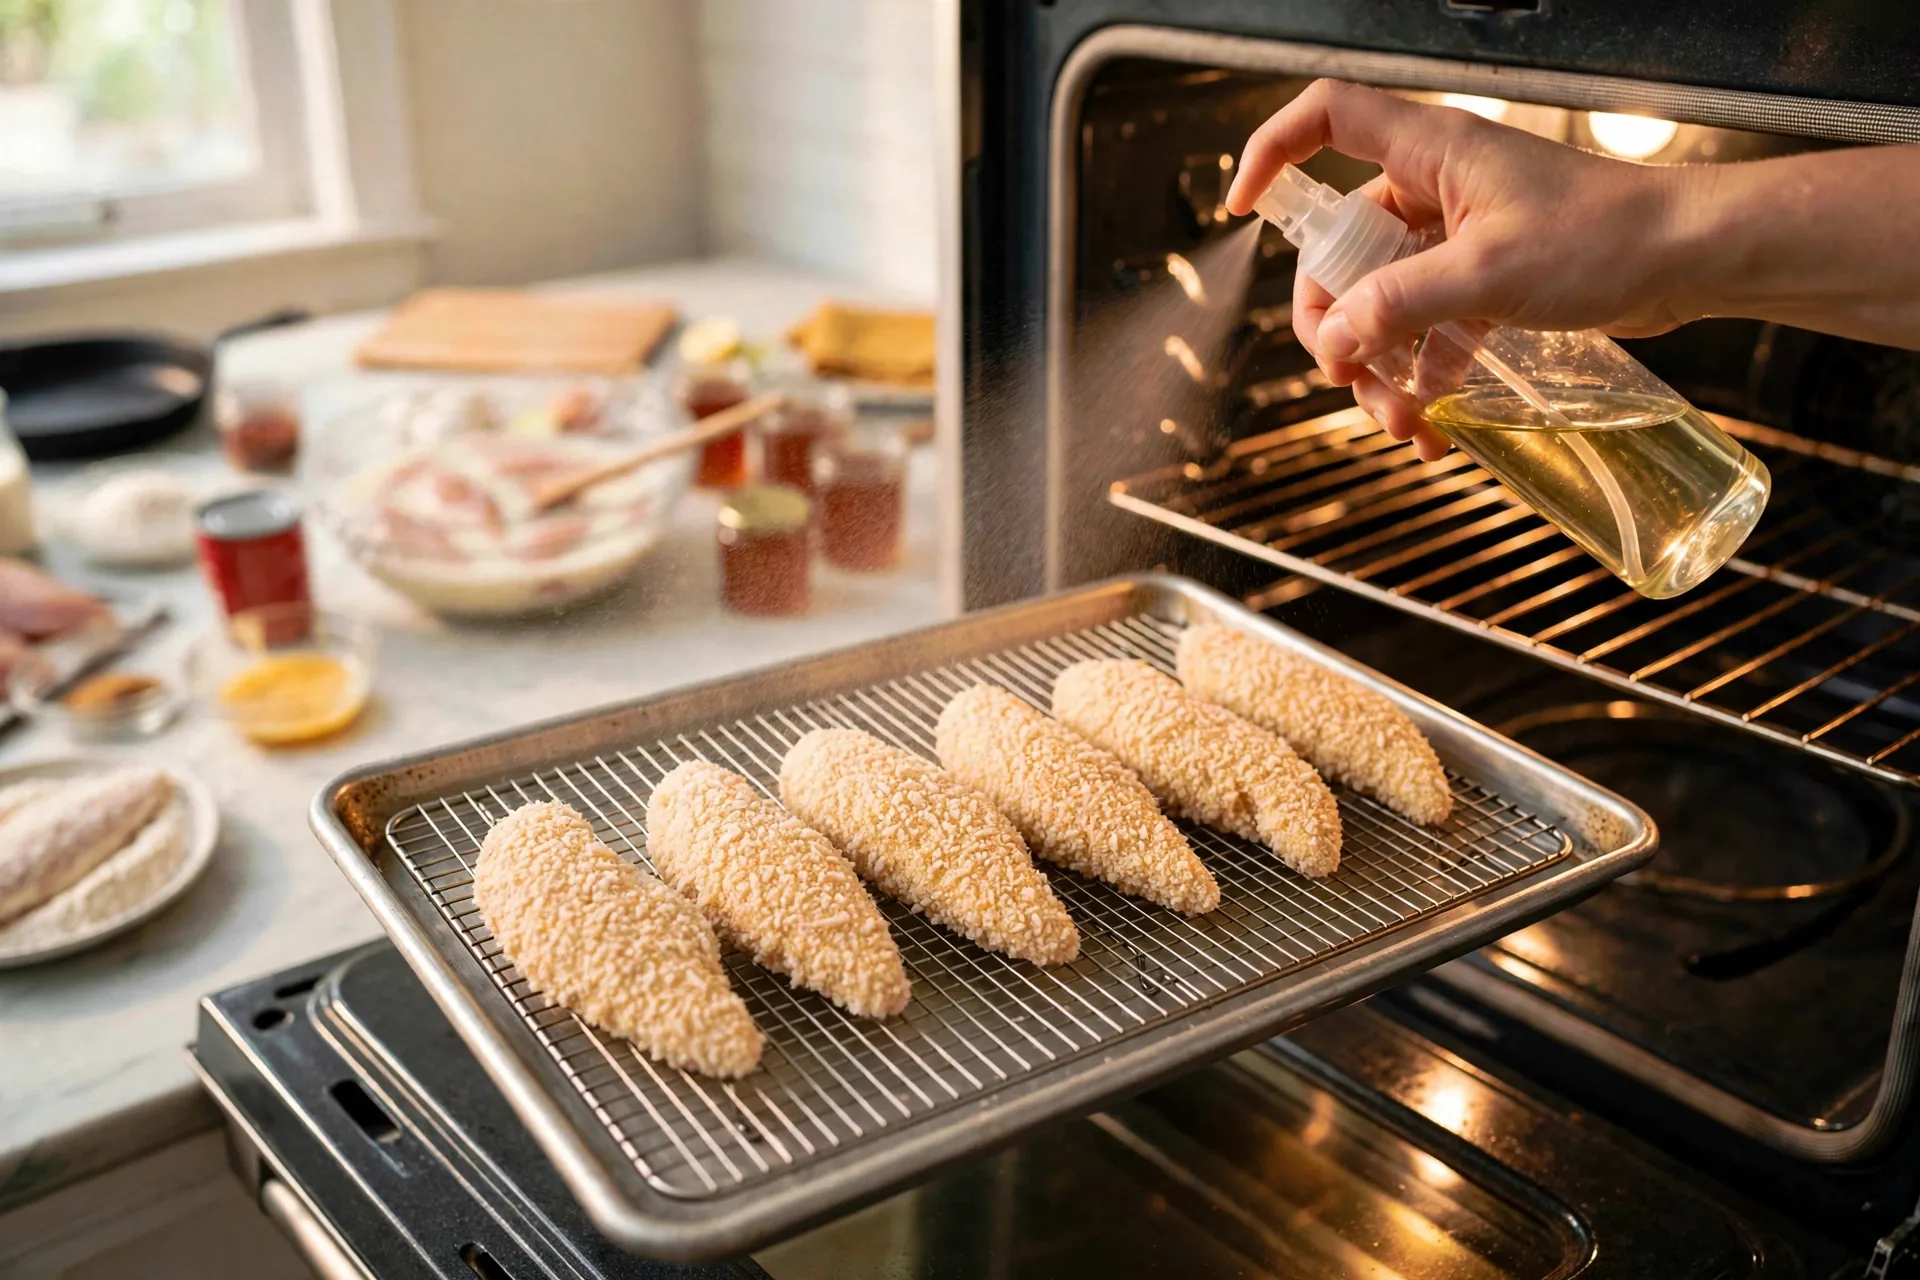
Line the breaded tenders up on the wire rack over the baking sheet, evenly spaced, fully covered in a thick pale panko coating. Raw but crumb-coated is the correct state at this point. Space gives hot air room to move around each tender, and the rack keeps the underside crisp instead of sitting in its own moisture.
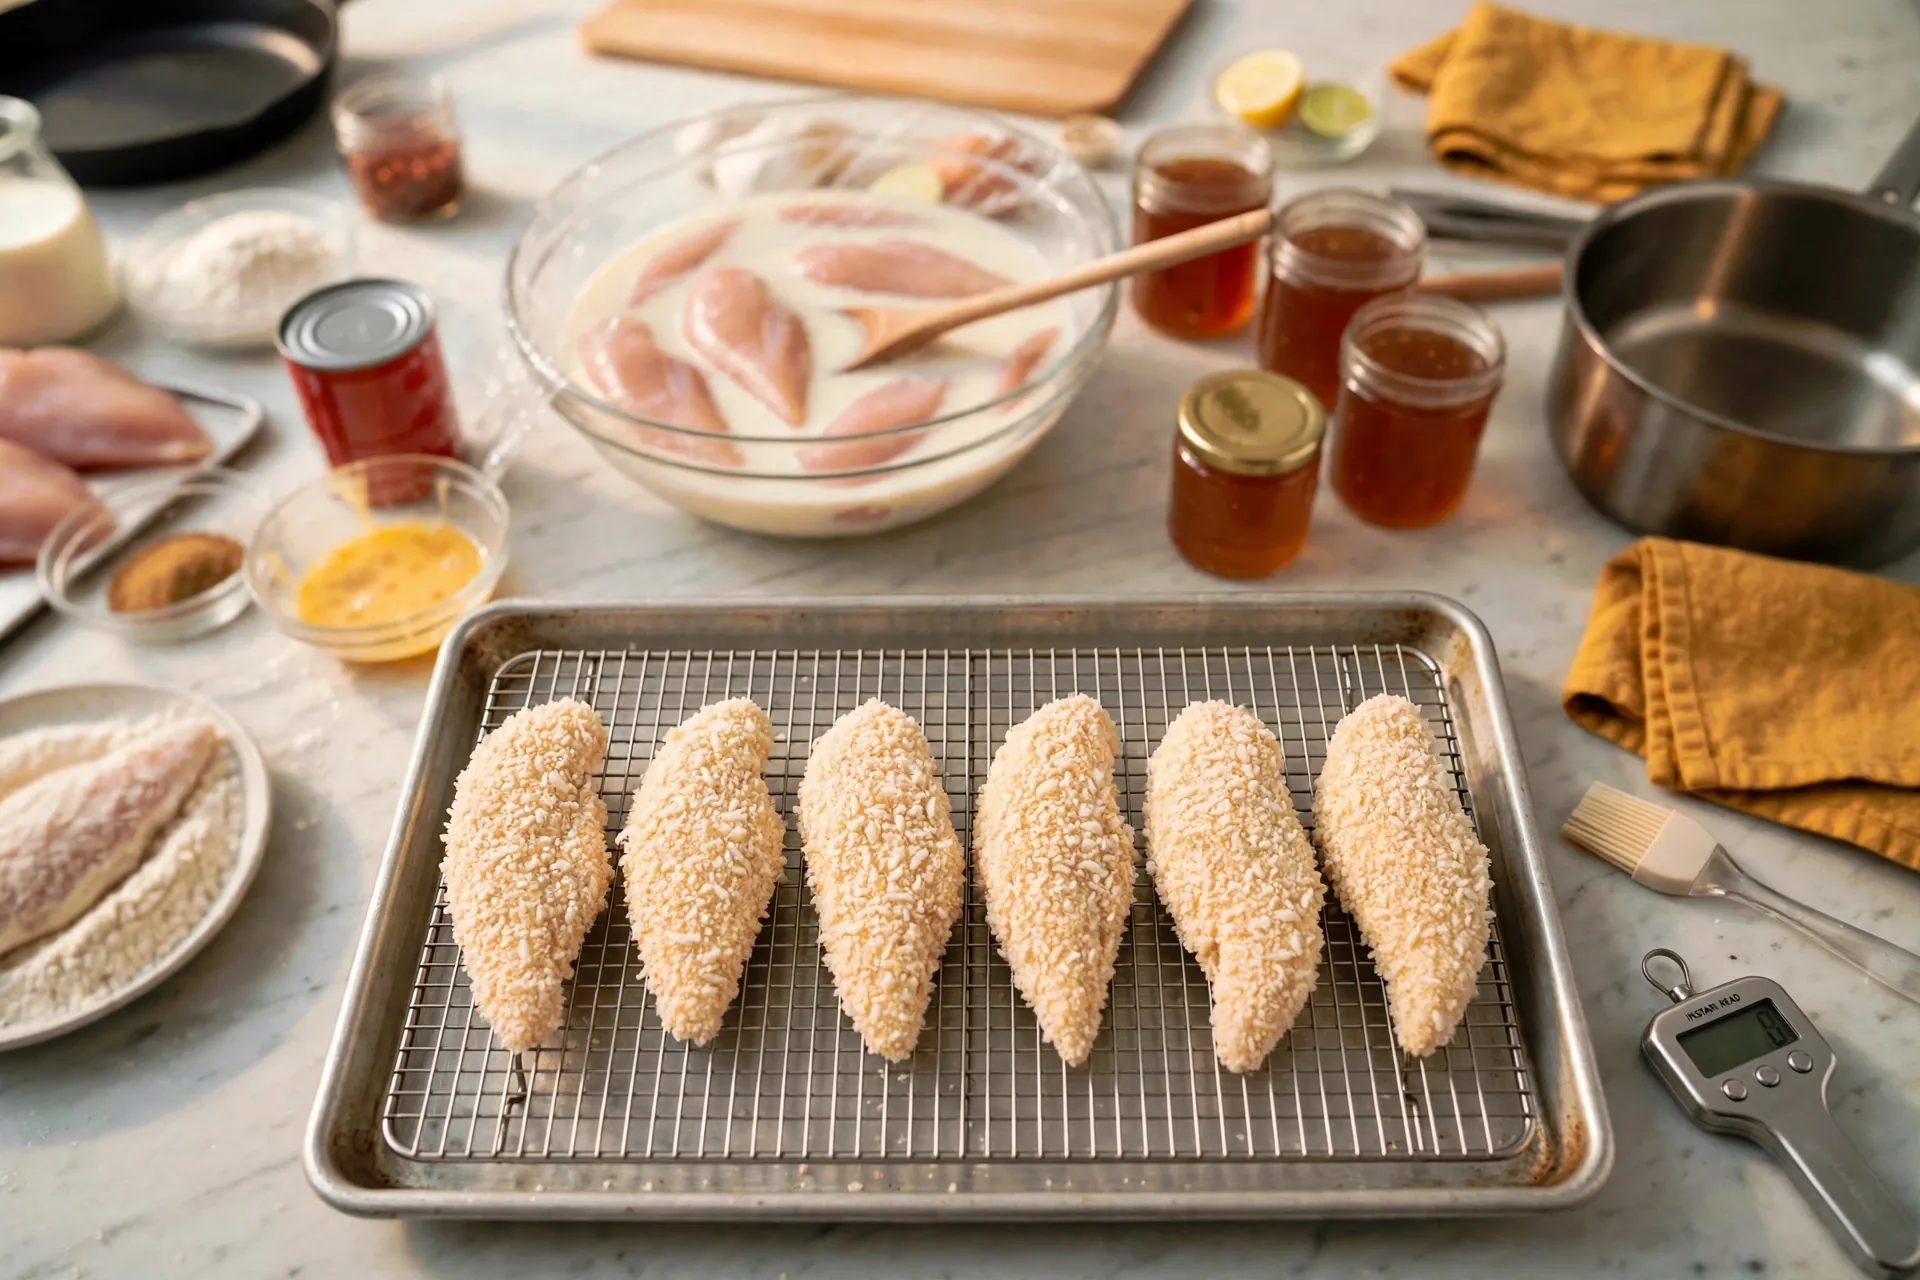
Spray a light mist of oil over the breaded tenders, then slide the tray into a hot oven at 425°F. The oven light is on, and the tray goes in promptly so the coating does not sit and dampen. Oil mist is what turns pale panko golden in a baked tender. Skip it and the crust stays pale and dry no matter how long it bakes.
Bake until golden and check the temperature
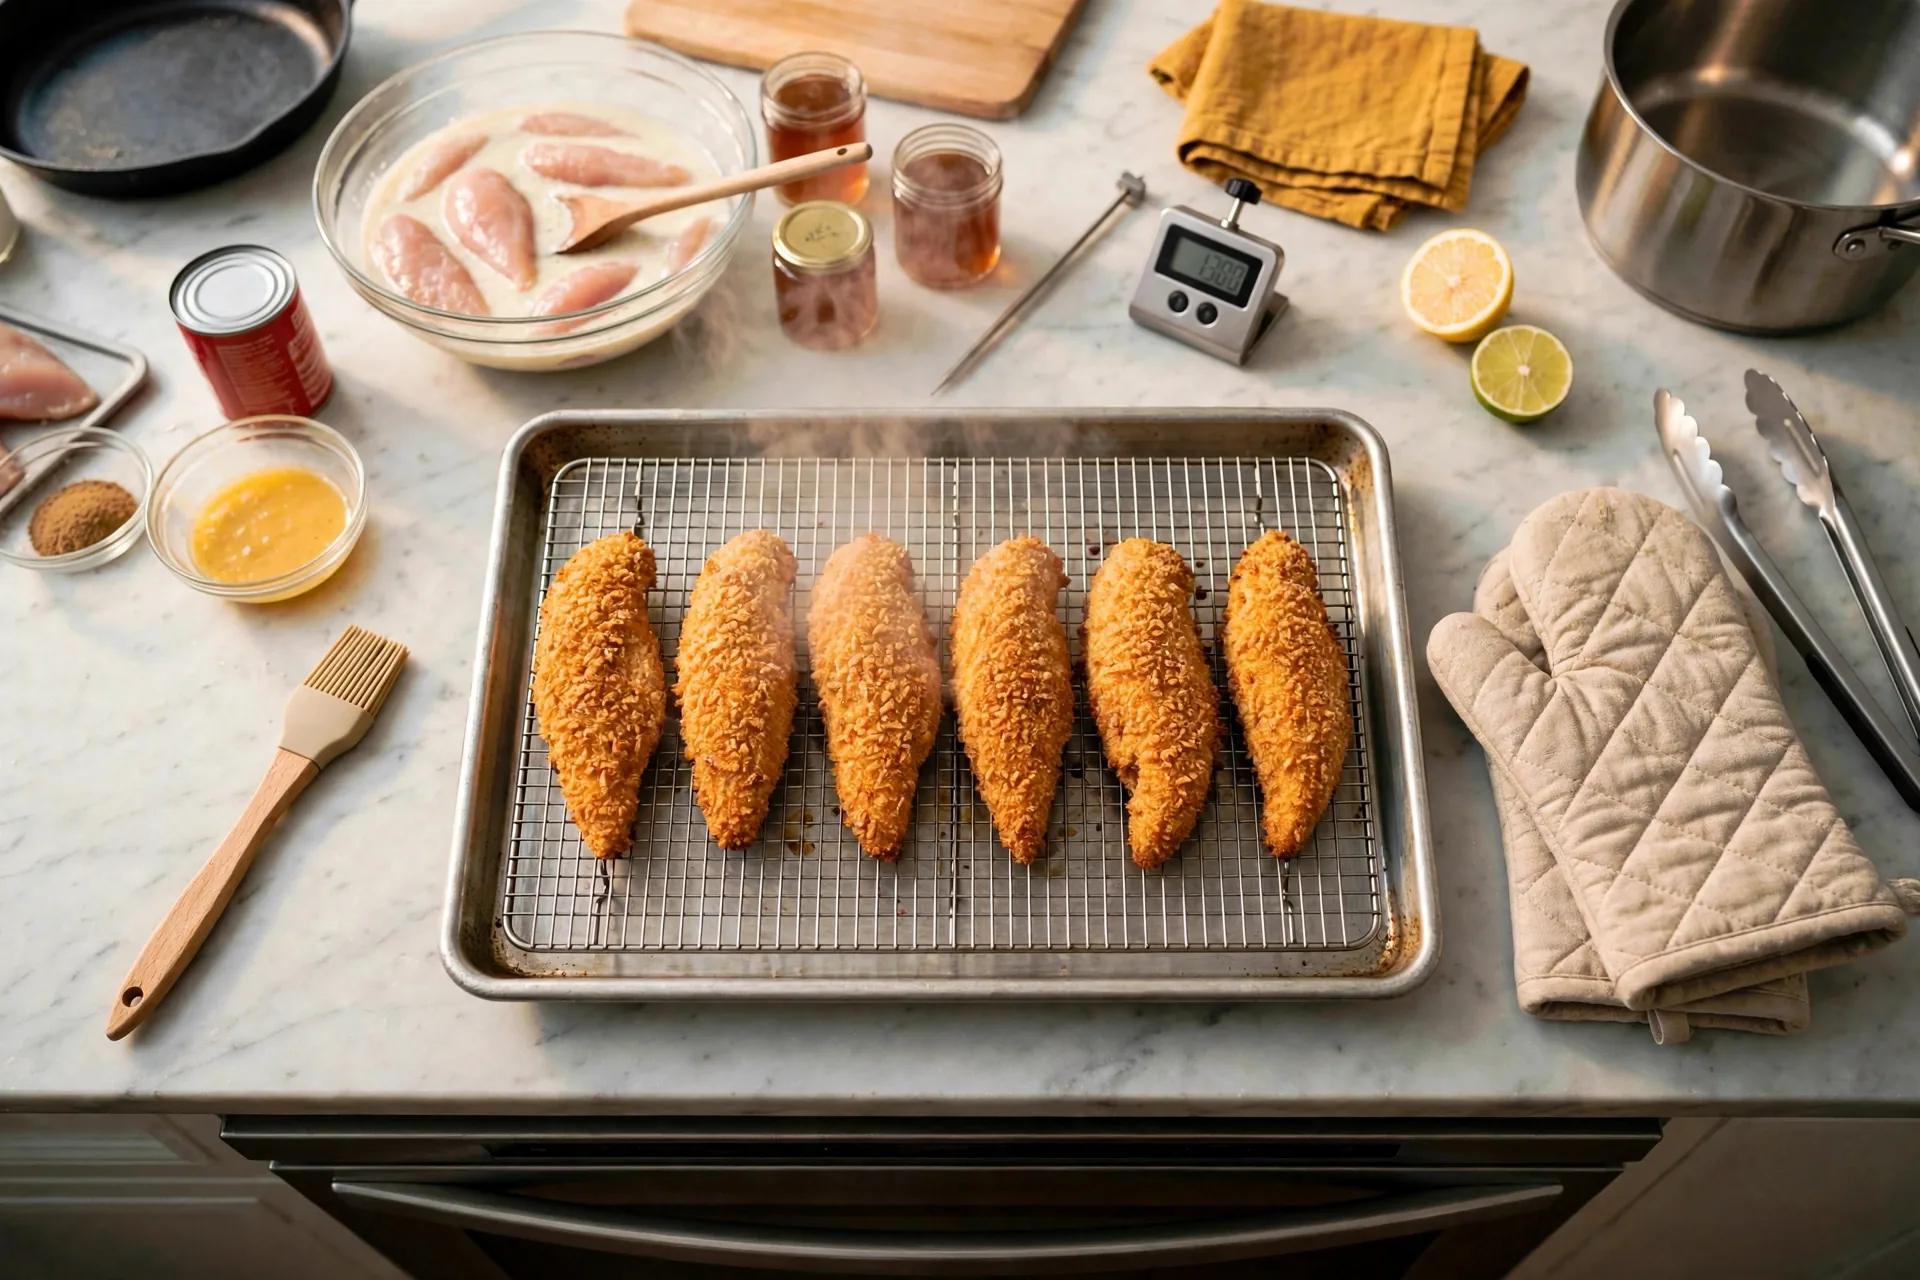
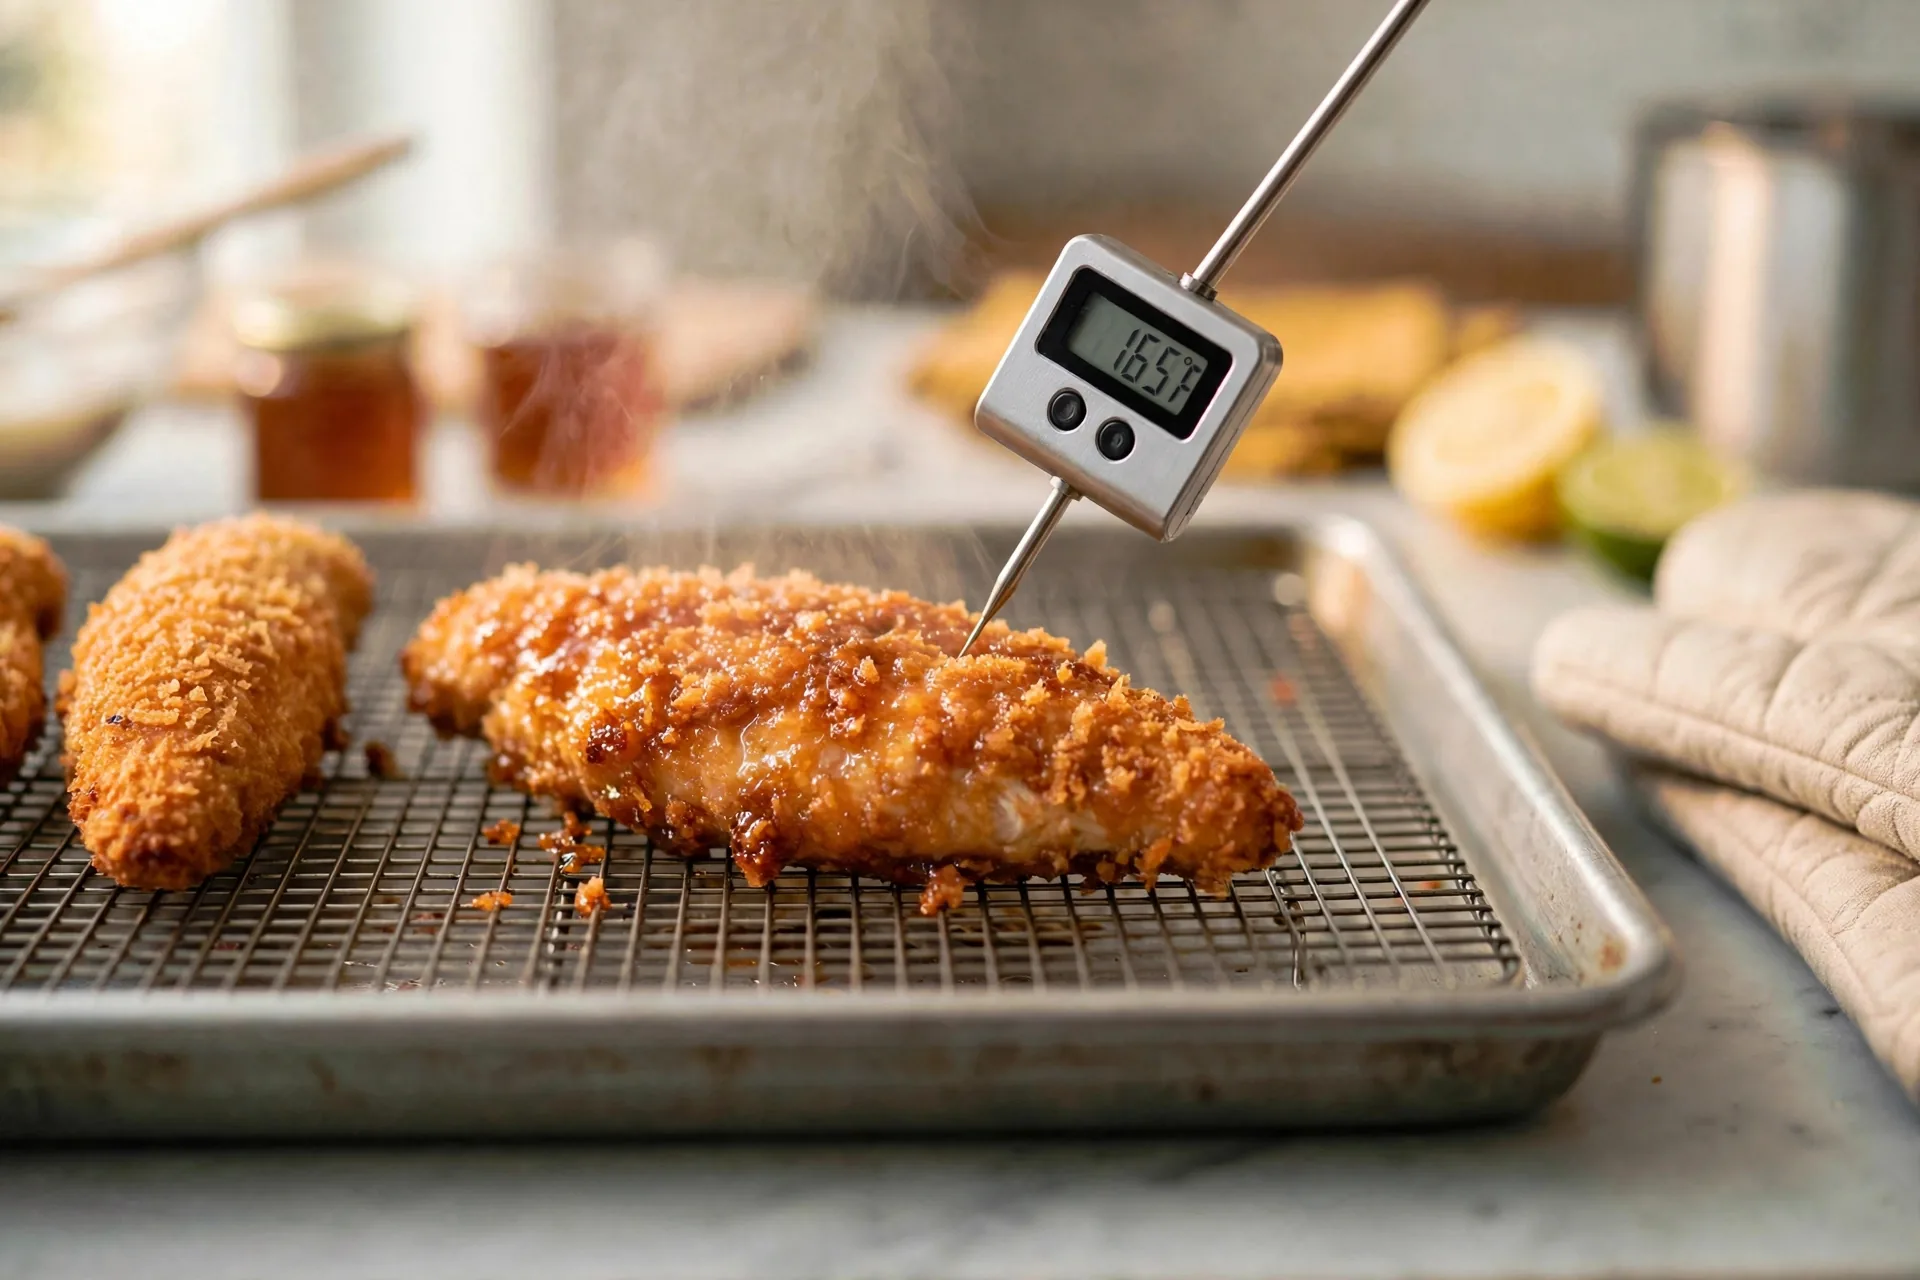
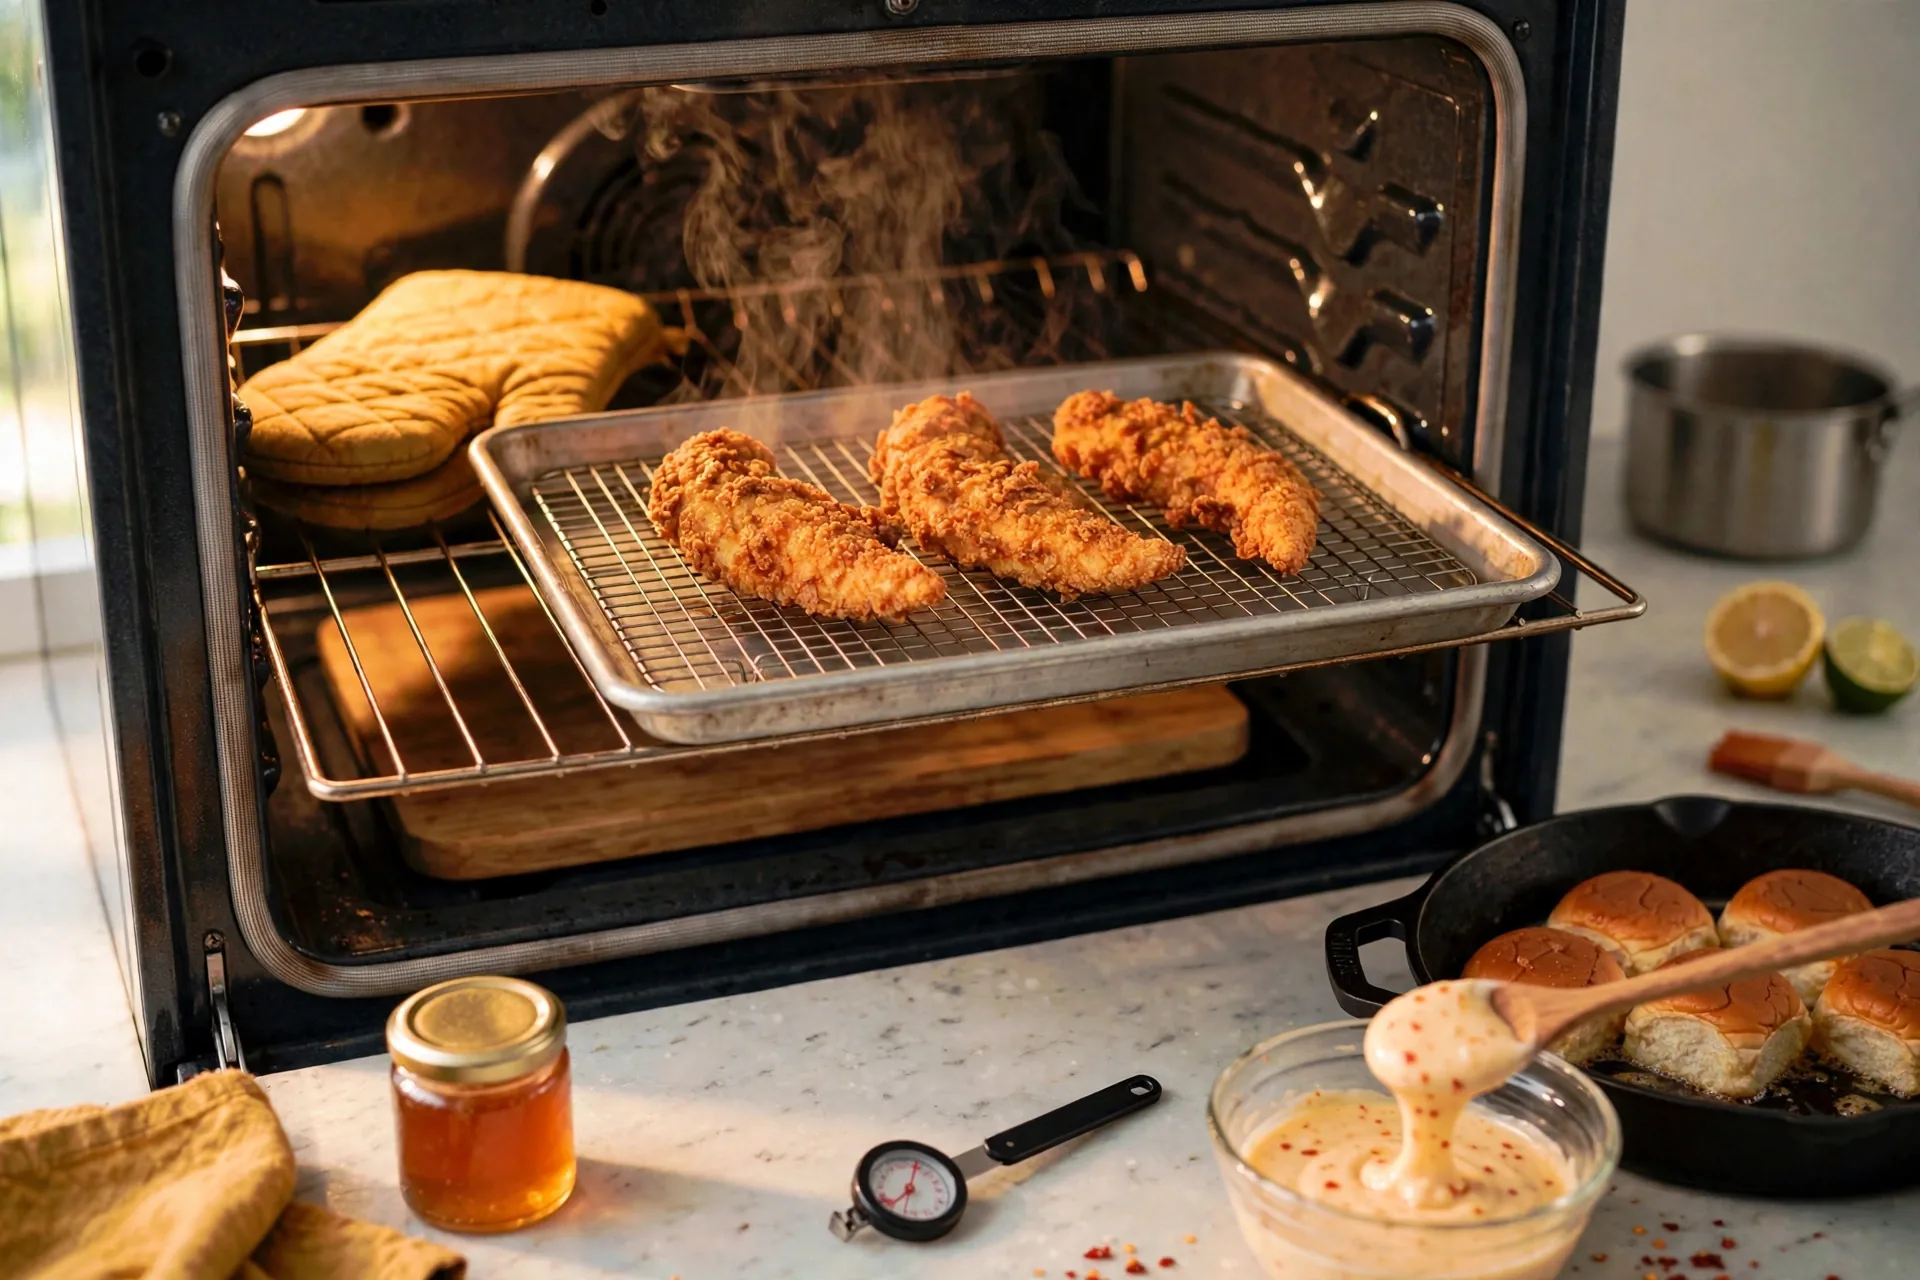
The tray comes out with tenders golden-brown and crisp, crunchy crumbs and no pale spots, steam rising, oven mitts on the counter. Color is your first cue and the thermometer is your second. Push an instant-read thermometer into the thickest tender and look for 165°F (74°C). Panko browns fast and can look done before the chicken inside is done, so this check is not optional.
Set aside half for the sliders
Do not skip this step. Divide the tray of golden tenders into two groups with a clear gap between them. Half stays plain on the wire rack, no honey, for the sliders in Recipe 5. The other half waits on the side for tossing. Both halves look plain, dry, and golden right now, and that is correct. If every tender gets tossed in honey at the next step, the sliders lose their chicken, and there is no clean way back. Plain tenders re-crisp well later. Honey-glazed tenders do not un-glaze.
Toss in hot honey and serve
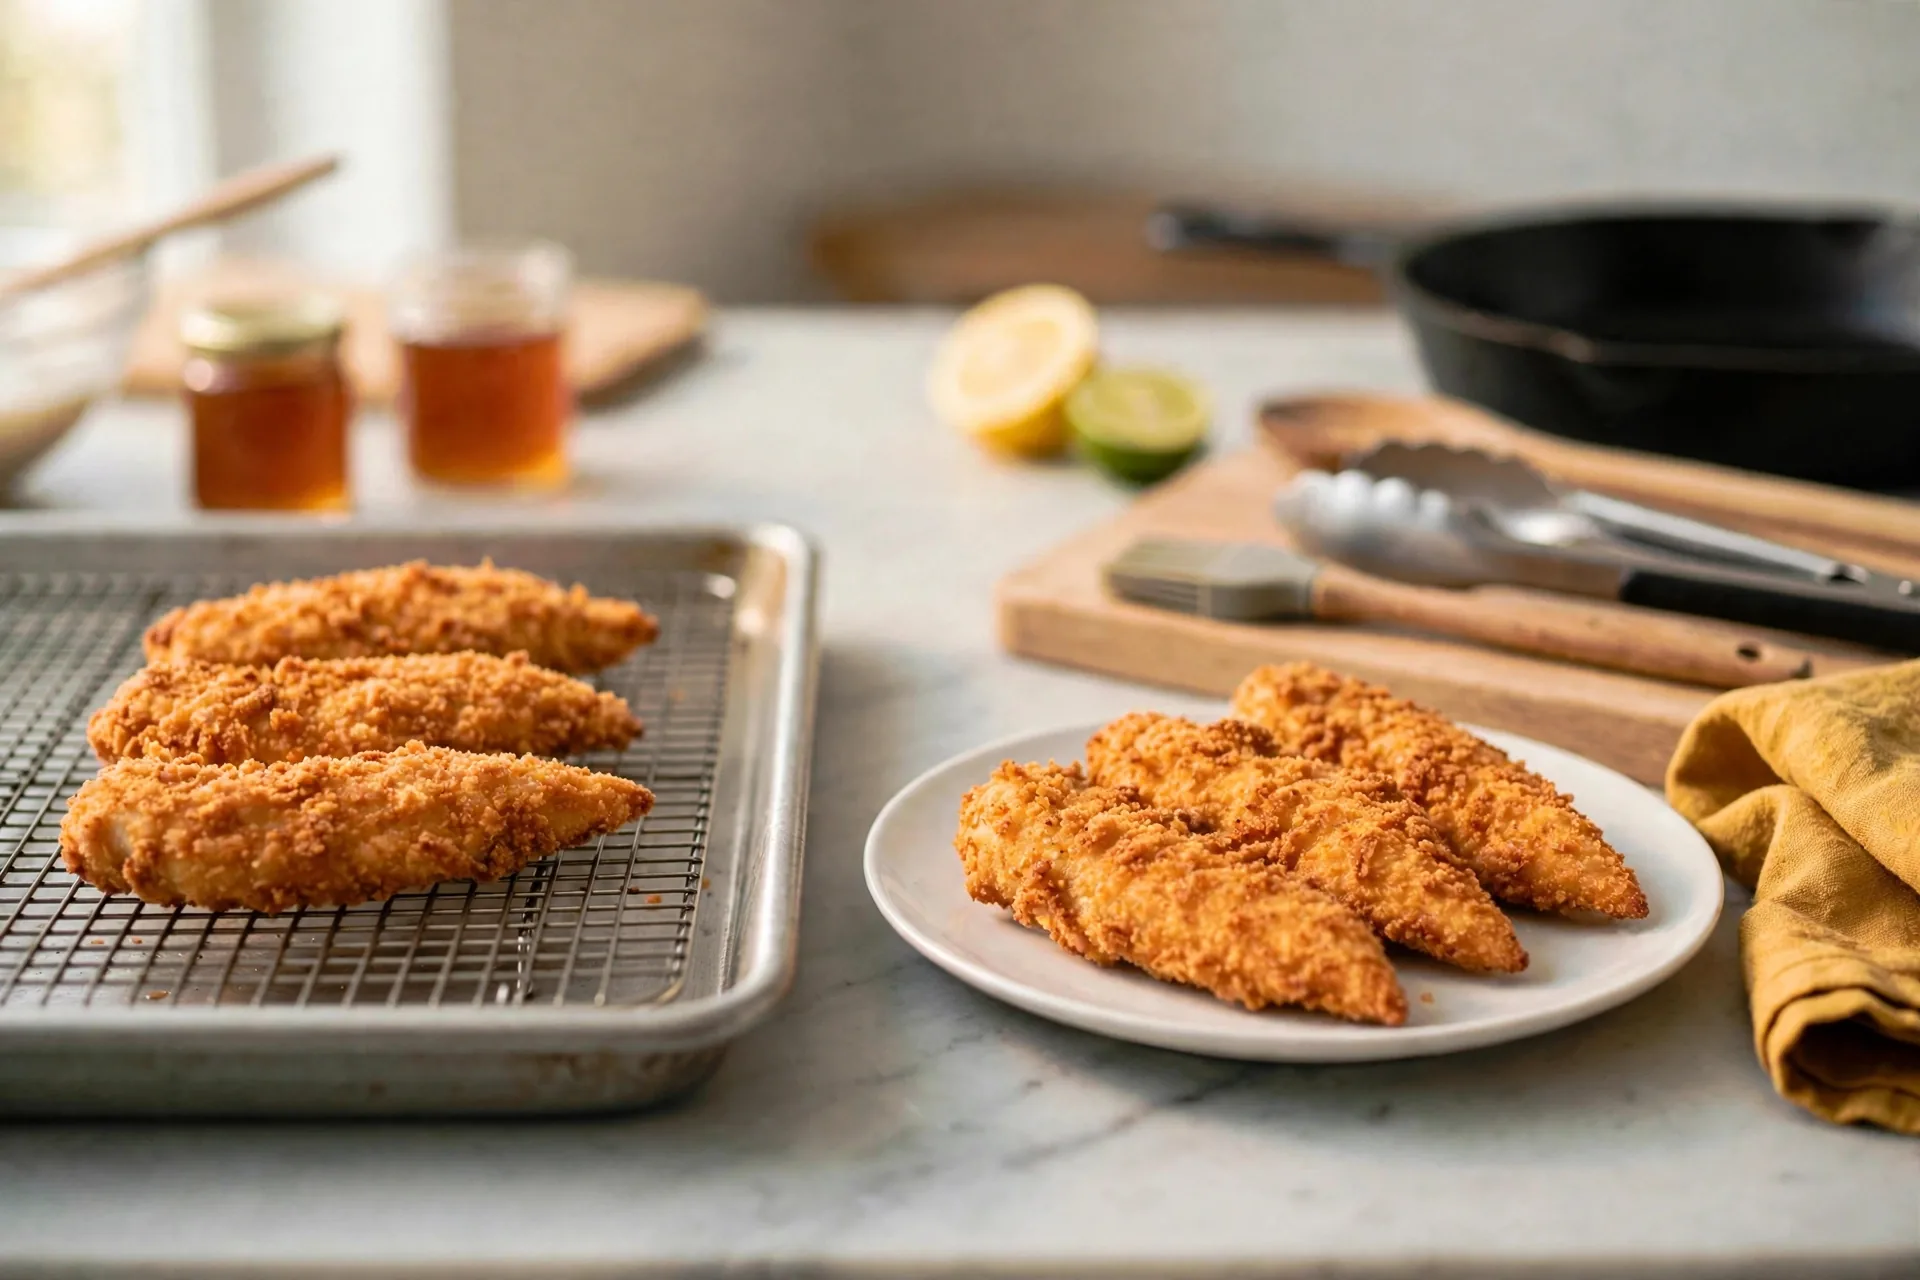
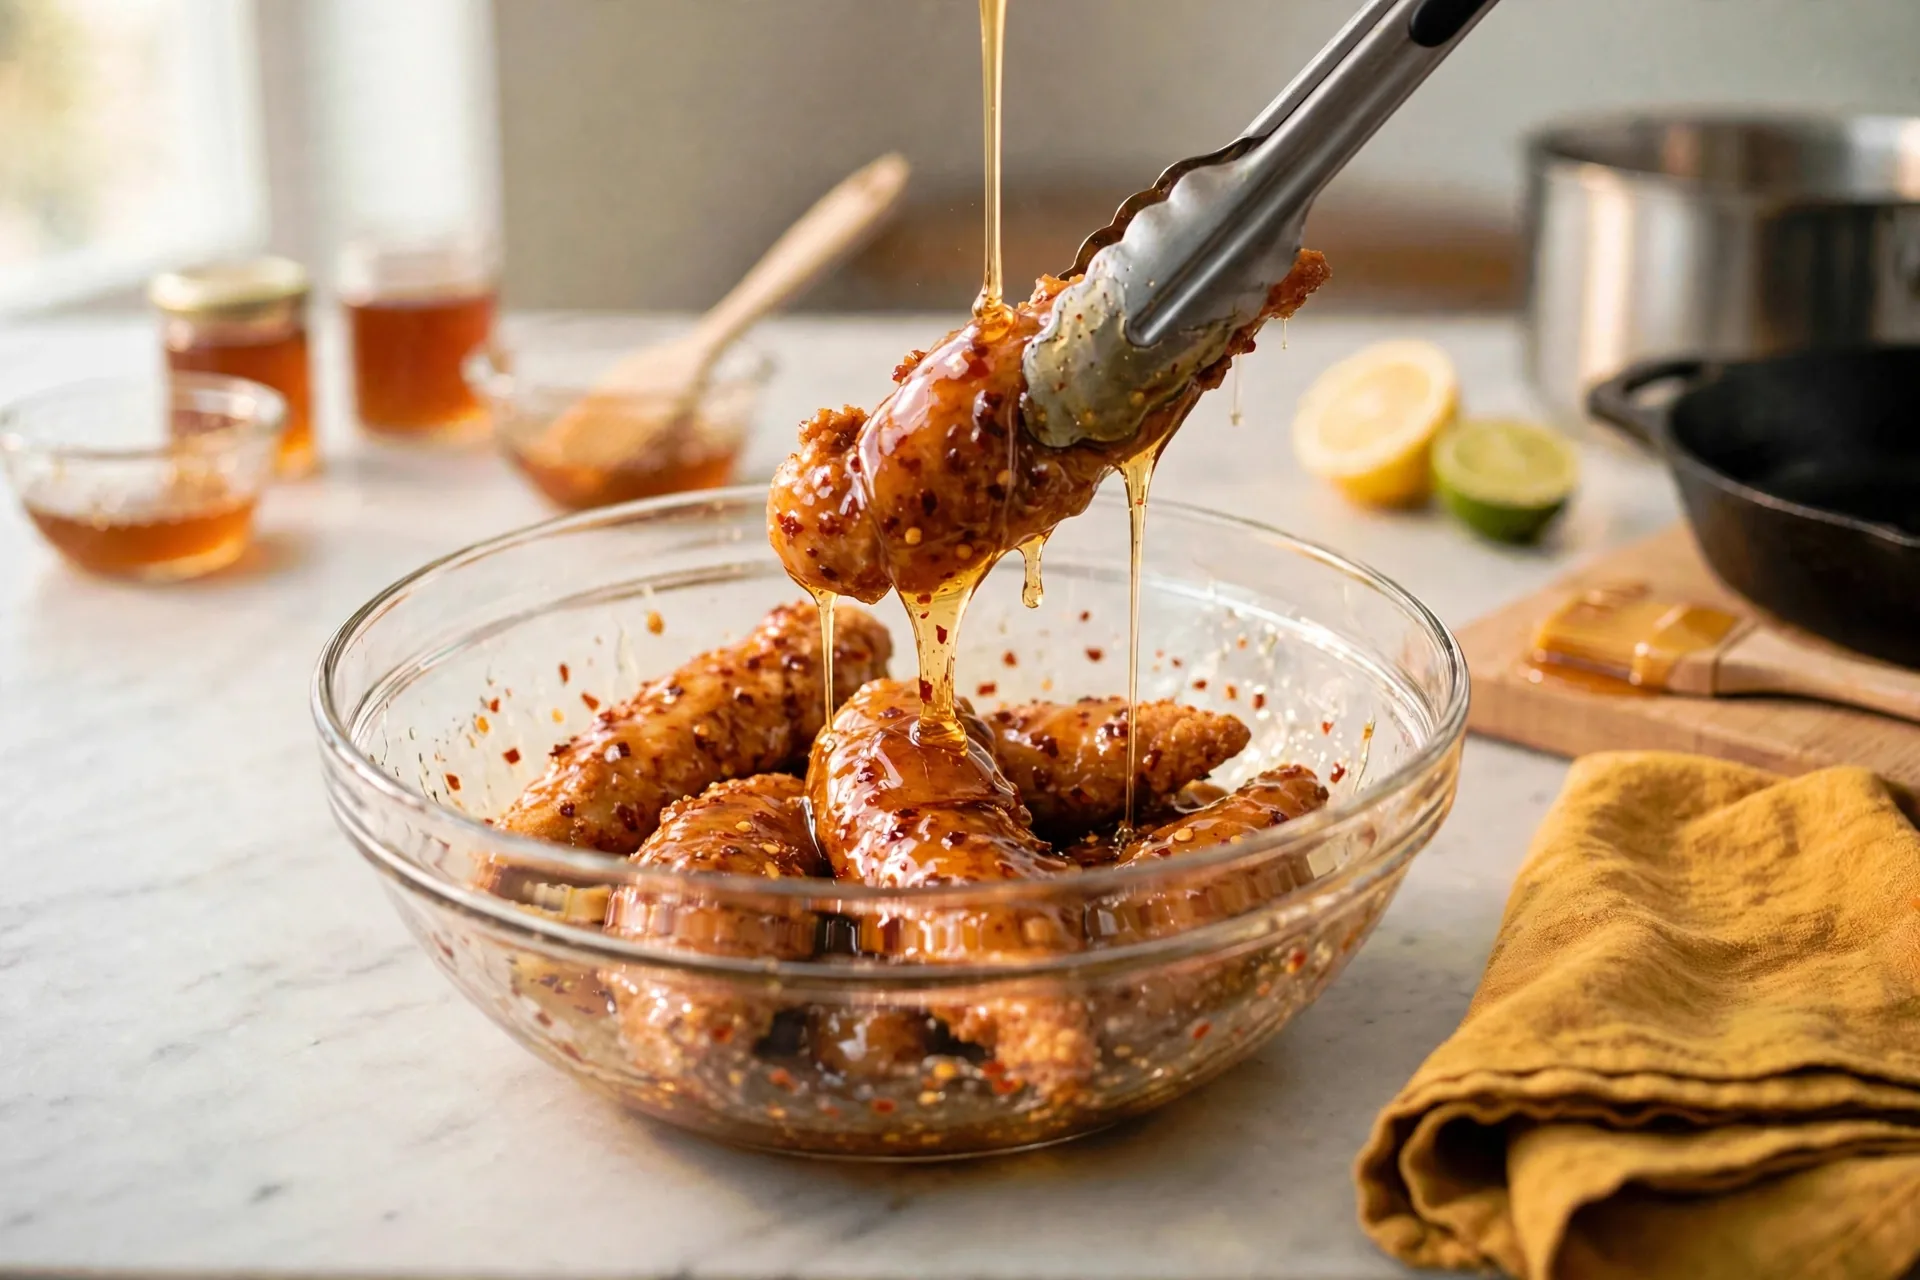
Toss the remaining tenders in a large glass bowl with hot honey. The amber honey drizzles over them, the tenders turn glossy, and chili flakes cling to the crust. Tongs lift one to show the coating. Toss while the tenders are still hot. Warm crust grabs honey and holds it, and cold crust lets it slide off into the bottom of the bowl.
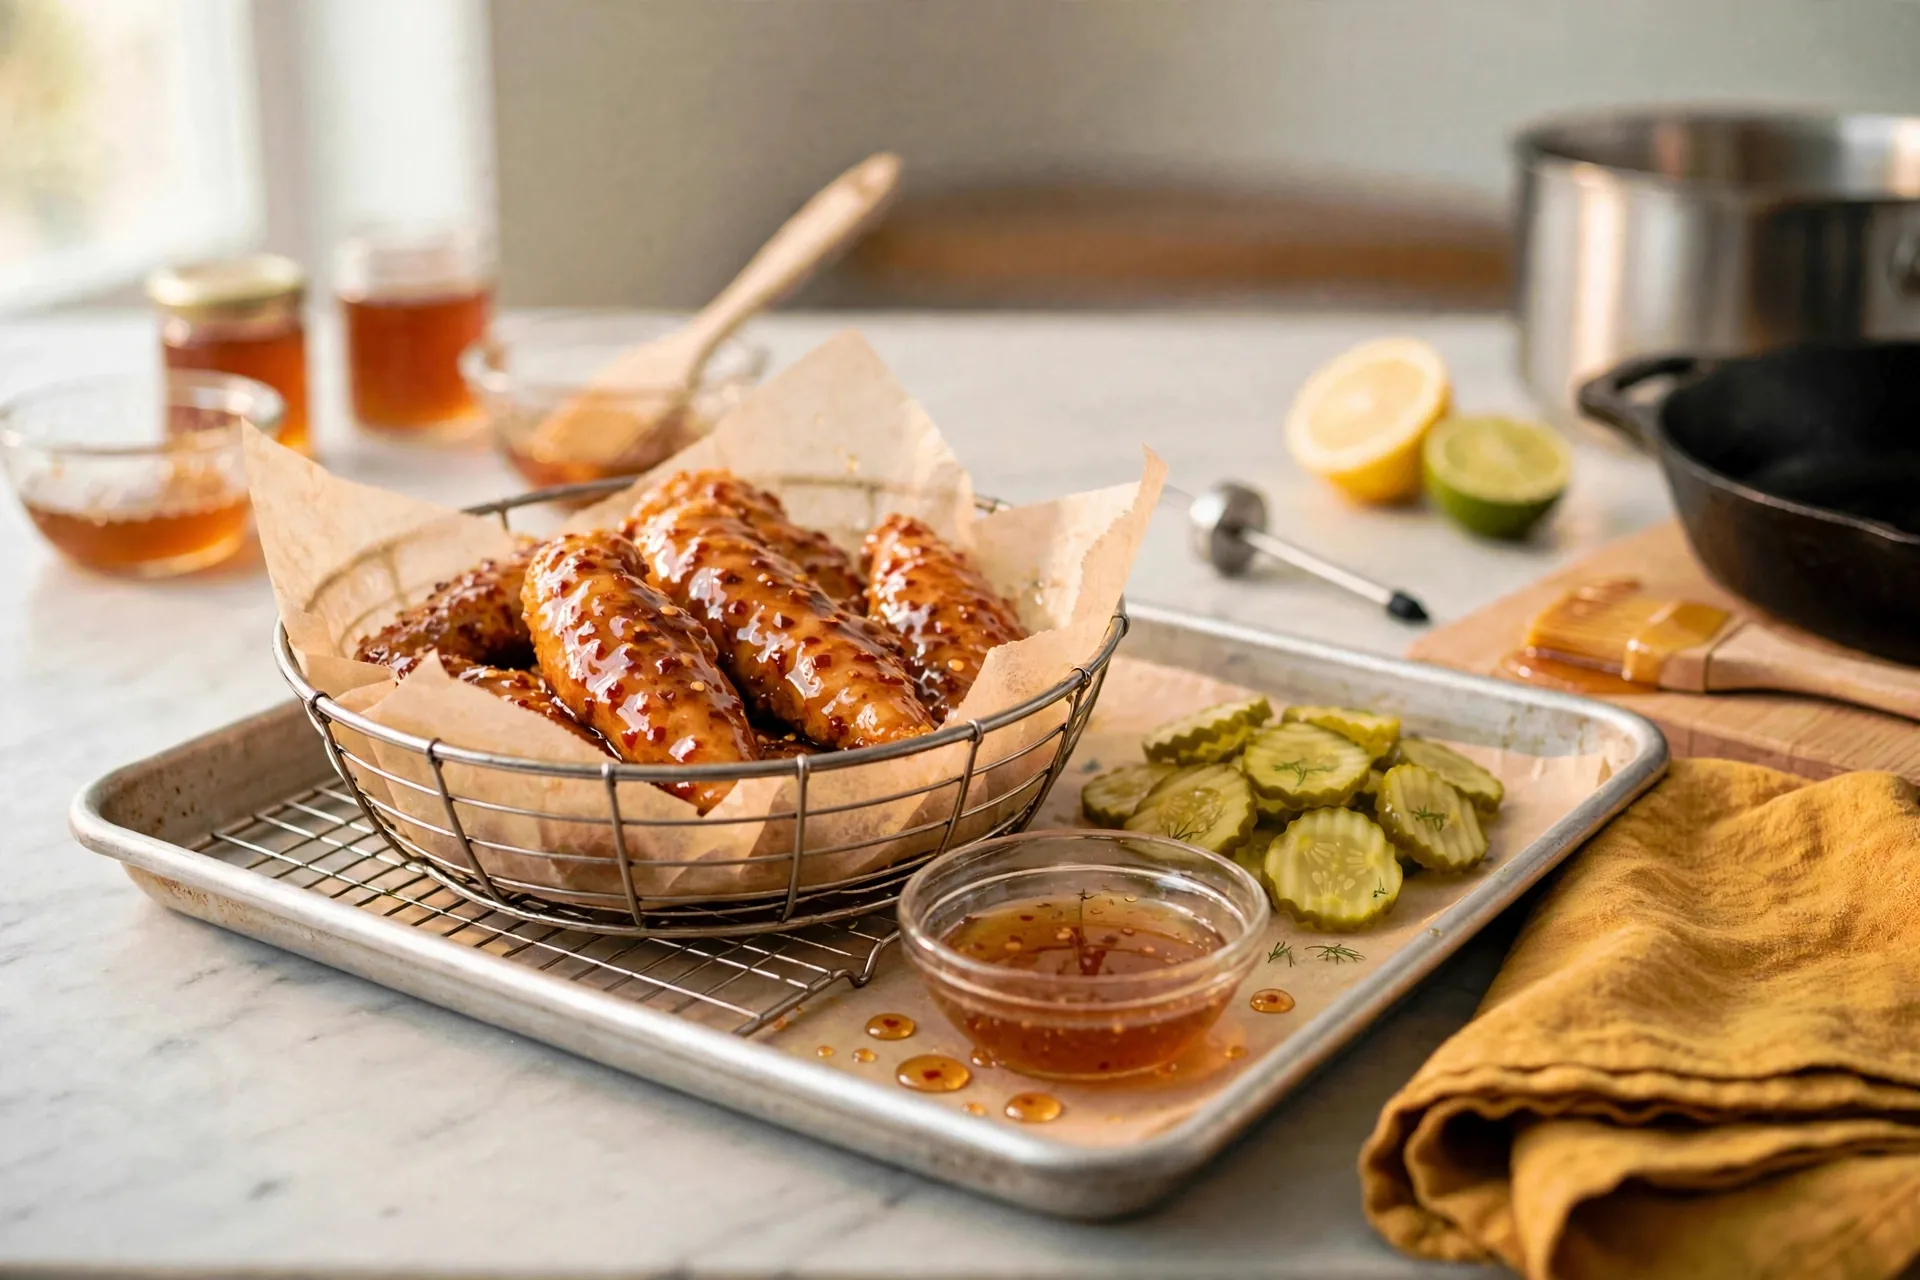
Fill a wire basket lined with parchment with the glossy tenders, set dill pickle chips beside them, and add a little dish of extra hot honey. The mustard-yellow towel sits at the side. Pickles are not a garnish afterthought here. Their brine cuts through the sweet heat and resets the palate between bites.
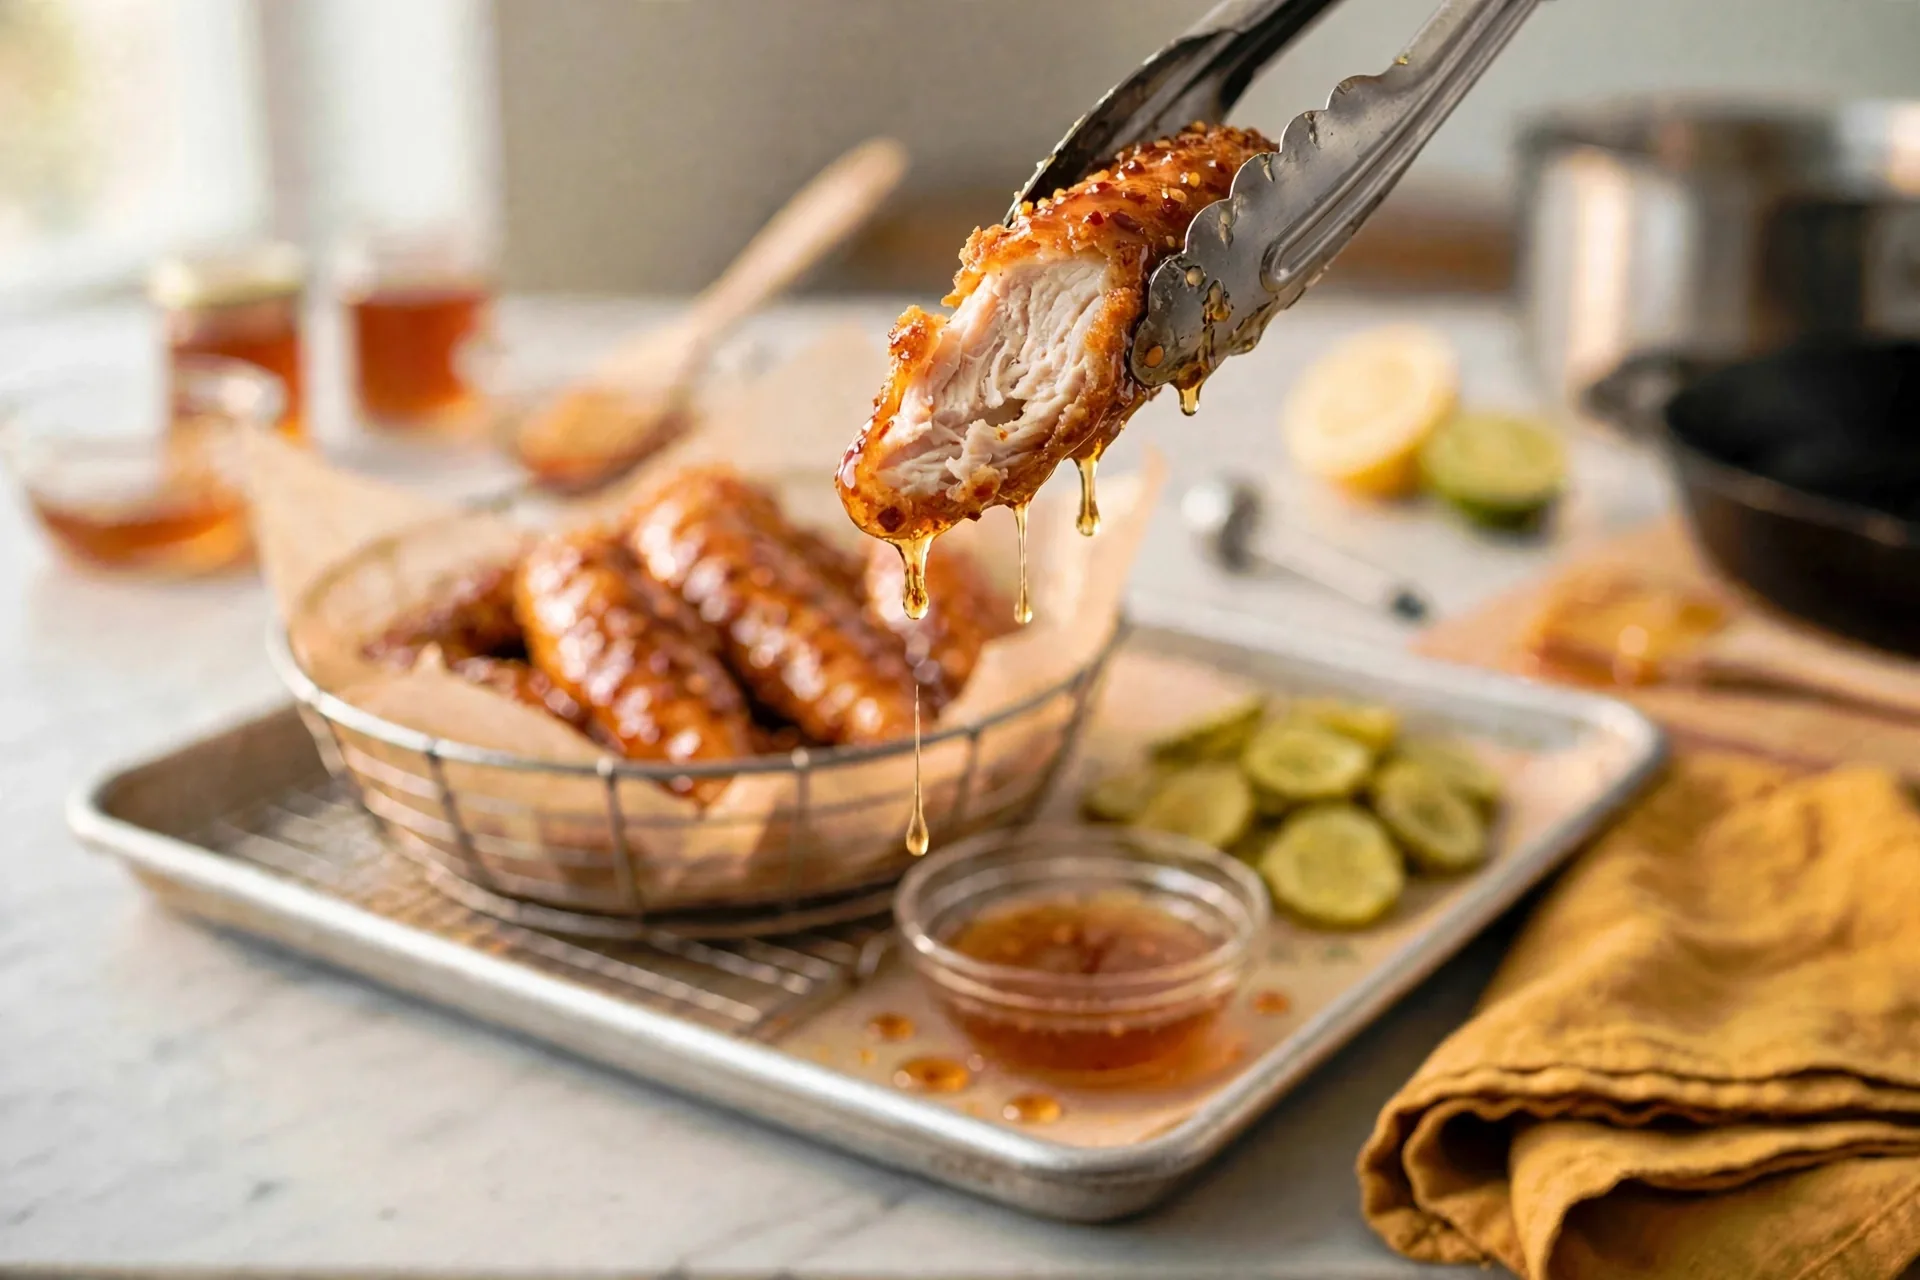
Break one tender in half over the basket. The interior is juicy and white, the crust stays crunchy and golden, and honey drips from the edge. A broken tender shows more than a whole one ever will: crumb thickness, interior color, and juice all read at once.
Timing note: tenders can also be fried instead of baked, about 4 minutes per side until golden, with the same 165°F check at the end. Baked tenders suit a full tray at once. Fried tenders suit a small batch when the oven is busy with something else.
Hot Honey Chicken Tenders
Ingredients
Method
- Submerge tenders in buttermilk, cover partly.
- Set up flour, egg, panko dishes and a rack over a baking sheet.
- Dredge in flour, shake off excess.
- Dip in beaten egg, let excess drip.
- Press firmly into panko.
- Space on rack, mist with oil, bake at 425°F until golden and crisp (or fry about 4 minutes per side).
- Check thickest tender reads 165°F (74°C).
- Set aside half plain for sliders.
- Toss remaining tenders in shared hot honey.
- Serve in a basket with pickle chips and extra hot honey.
Notes
Recipe 3
Chipotle Honey Chicken
Spice-rubbed boneless thighs in a dark, smoky chipotle-honey-lime glaze, seared and then simmered in the same skillet. This dish has its own glaze, separate from the shared hot honey, and the two taste different on purpose. Chipotle glaze runs darker and smokier, with lime cutting through it, where the shared hot honey stays bright amber with chili heat.
Mince the chipotles
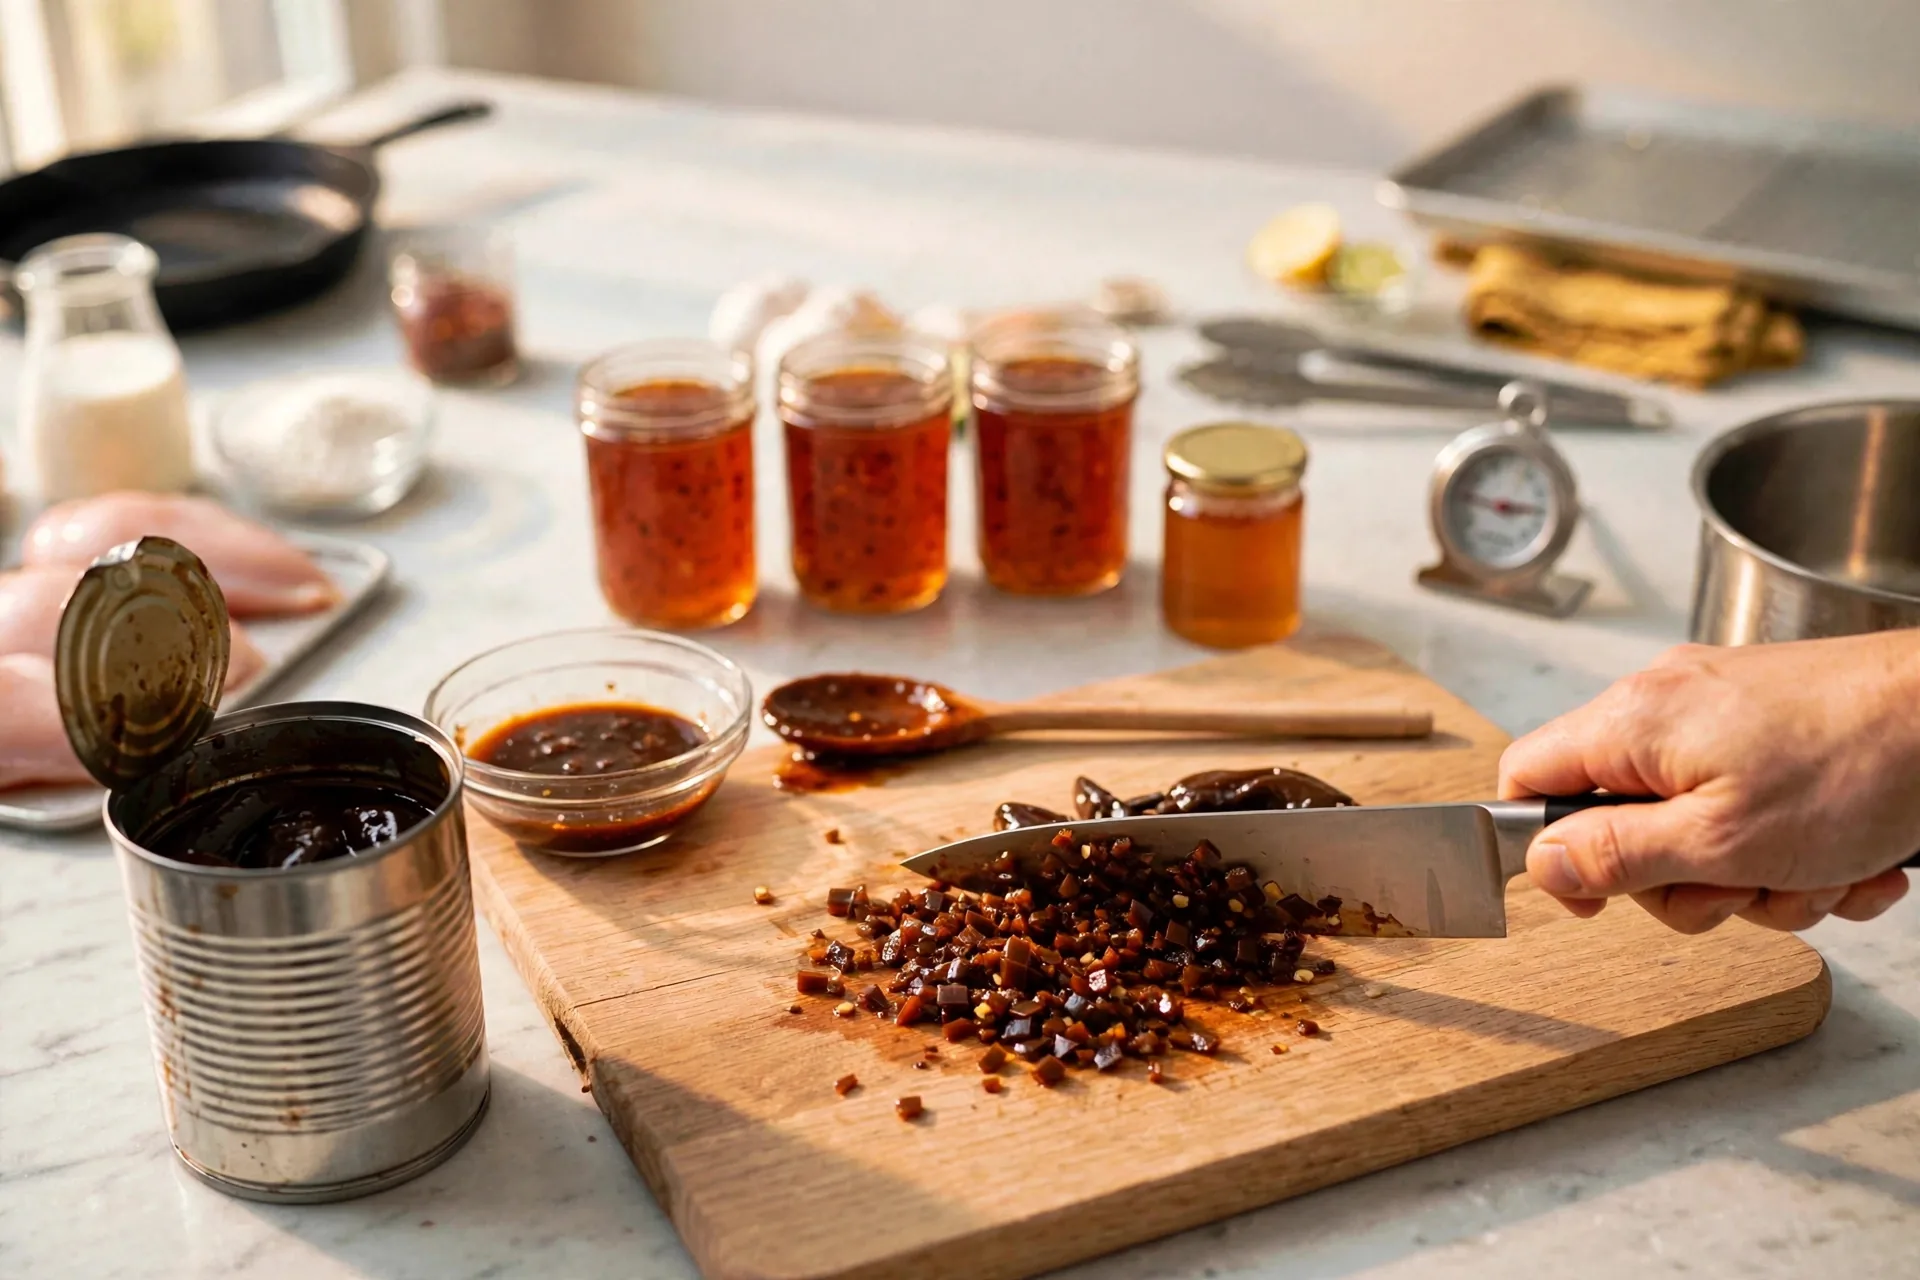
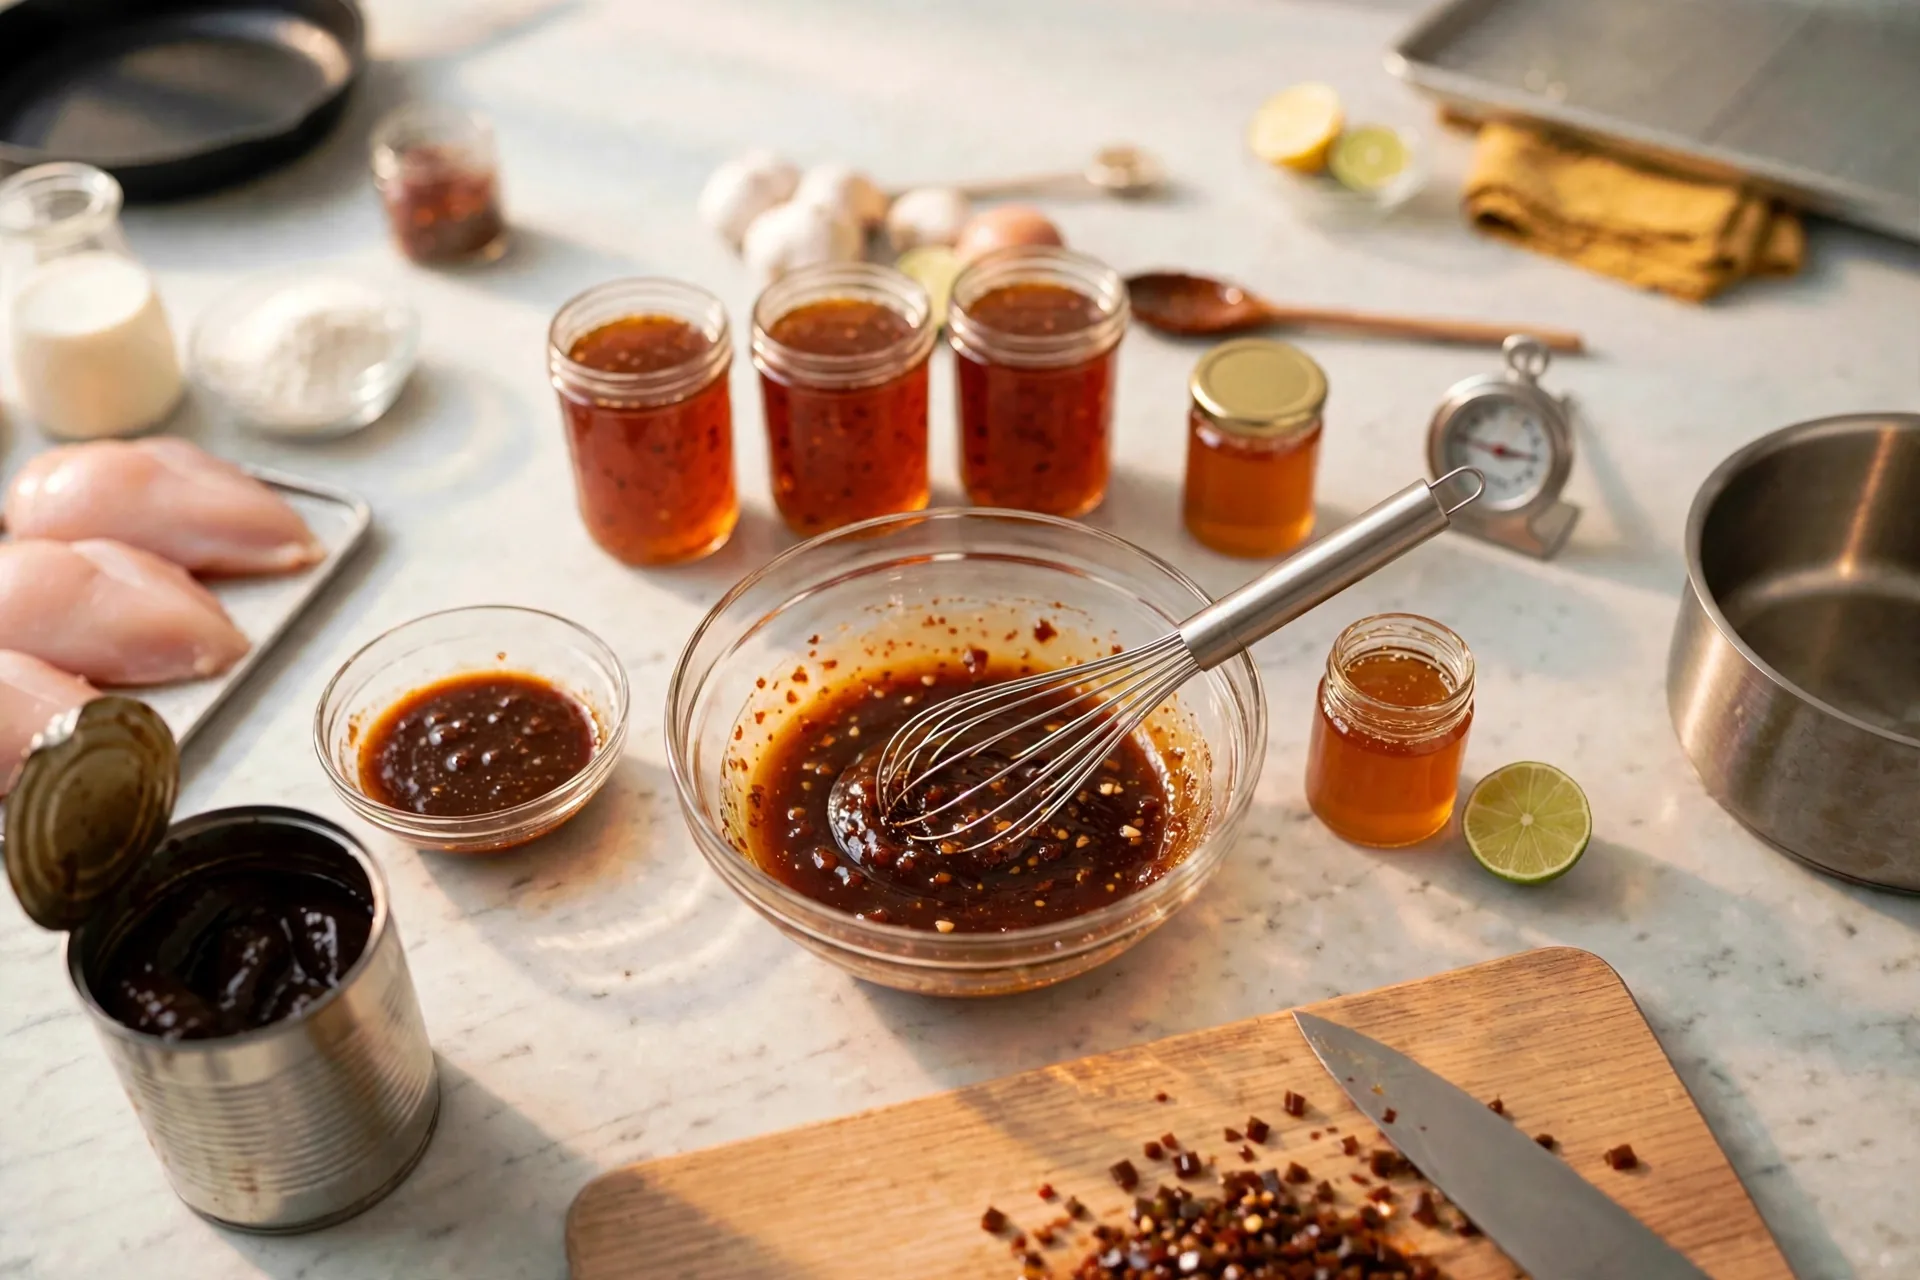
Mince dark chipotle peppers from a can of chipotle in adobo on the wooden board, with the open can and a small dish of adobo sauce beside it. The peppers are dark red-brown and glistening. Chipotles are smoked jalapeños packed in a tomato-vinegar sauce, and most of the smoke and heat lives in the peppers themselves, with the adobo sauce carrying the same flavors in liquid form. Mince fine so the glaze stays smooth later instead of chunky.
Whisk the glaze
Whisk honey, minced chipotle, adobo sauce, lime juice, and minced garlic together in a glass bowl into a deep red-brown, glossy glaze. A lime half and the honey jar sit beside it. Whisk until the honey loosens into the lime juice and no streaks of plain honey remain. A glaze mixed now coats evenly later, and a glaze mixed in the pan over searing chicken never quite catches up.
Pat dry and season
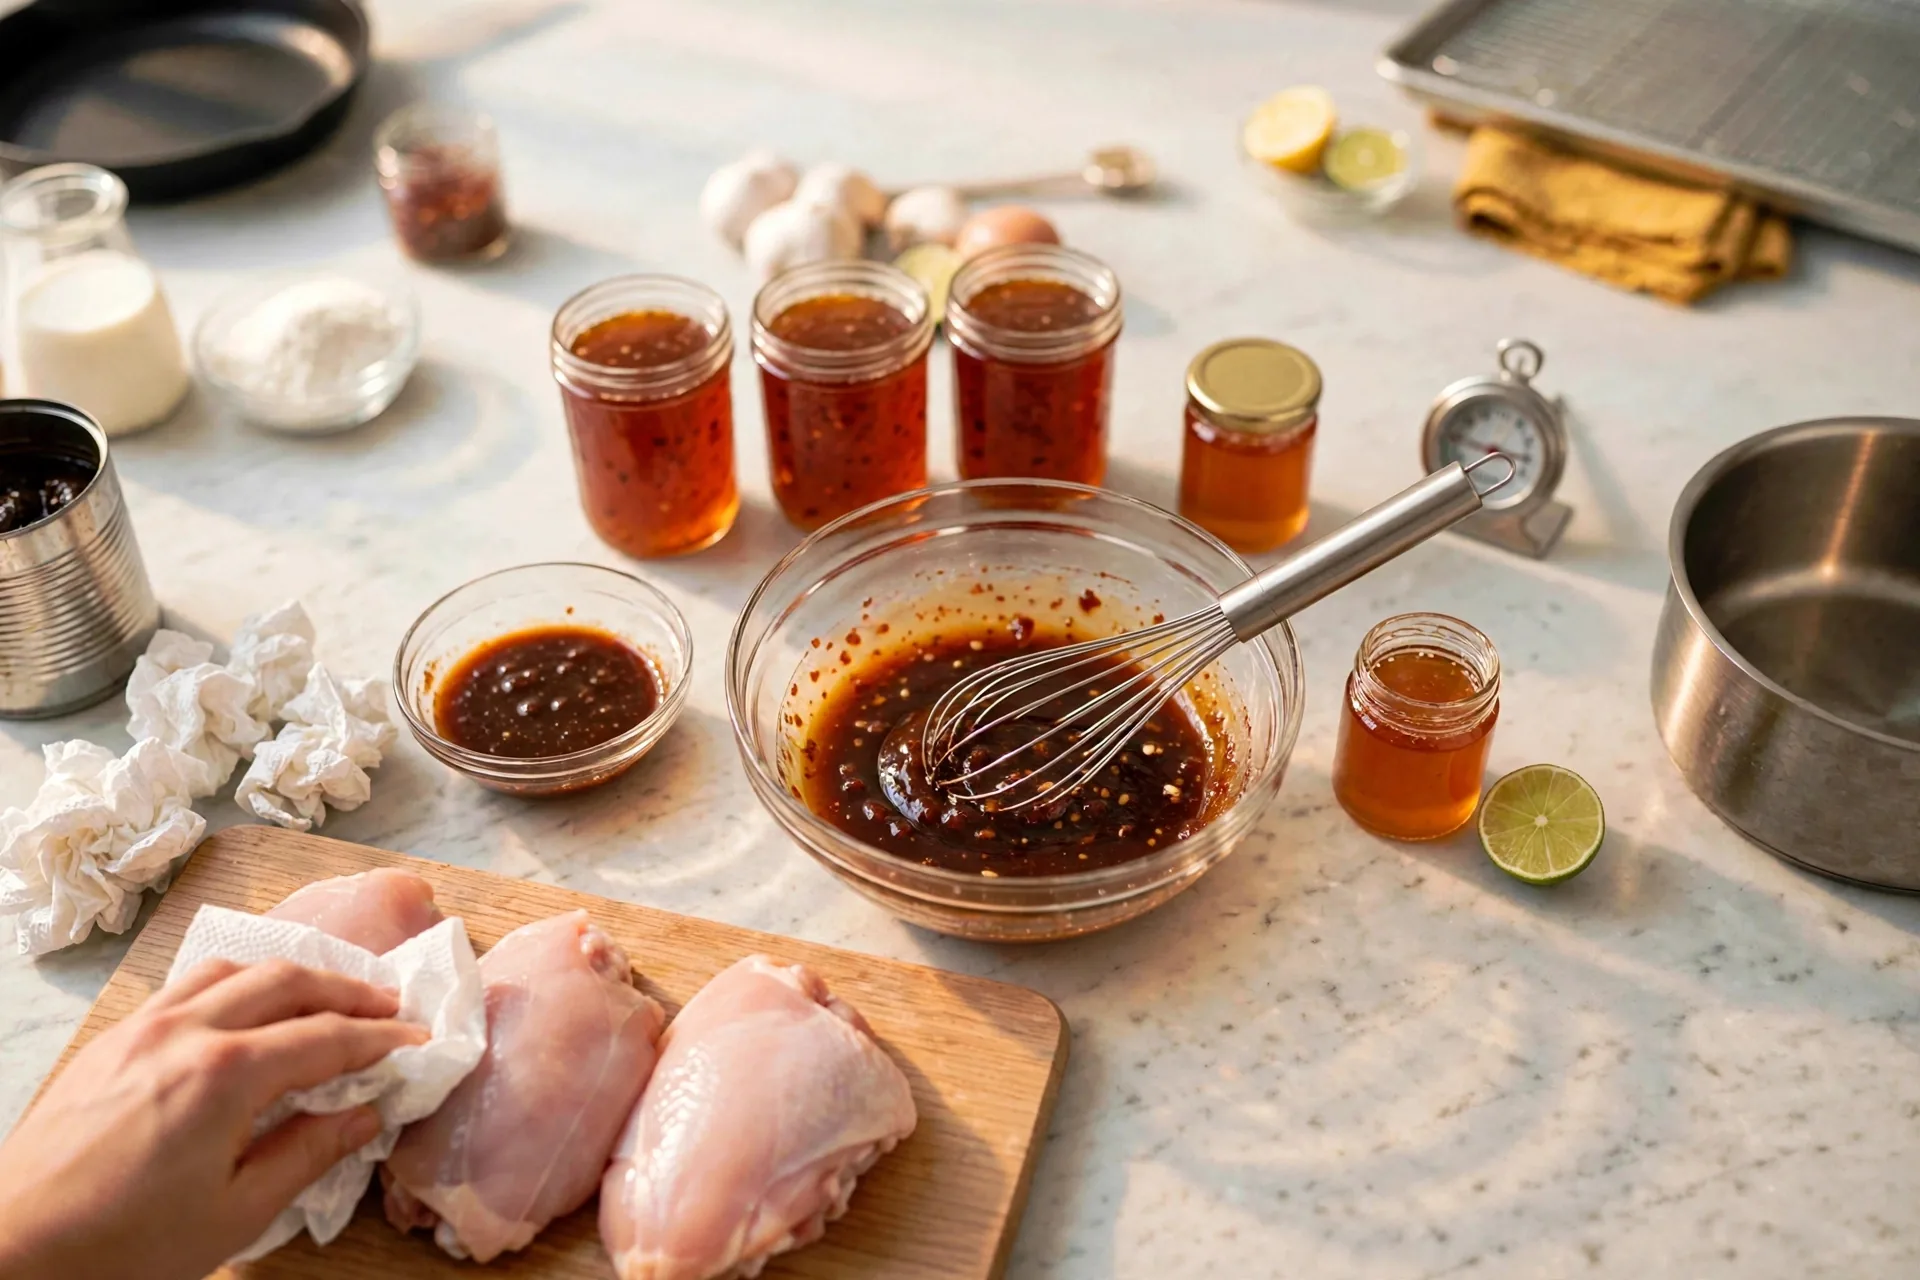
Press a paper towel onto the raw boneless skinless thighs on a separate board and blot them dry, with a pile of used paper towels beside the board. Raw thighs are pale pink at this stage. Dry surface browns. Wet surface steams, and a steamed thigh never builds the crust this dish needs before the glaze goes in.
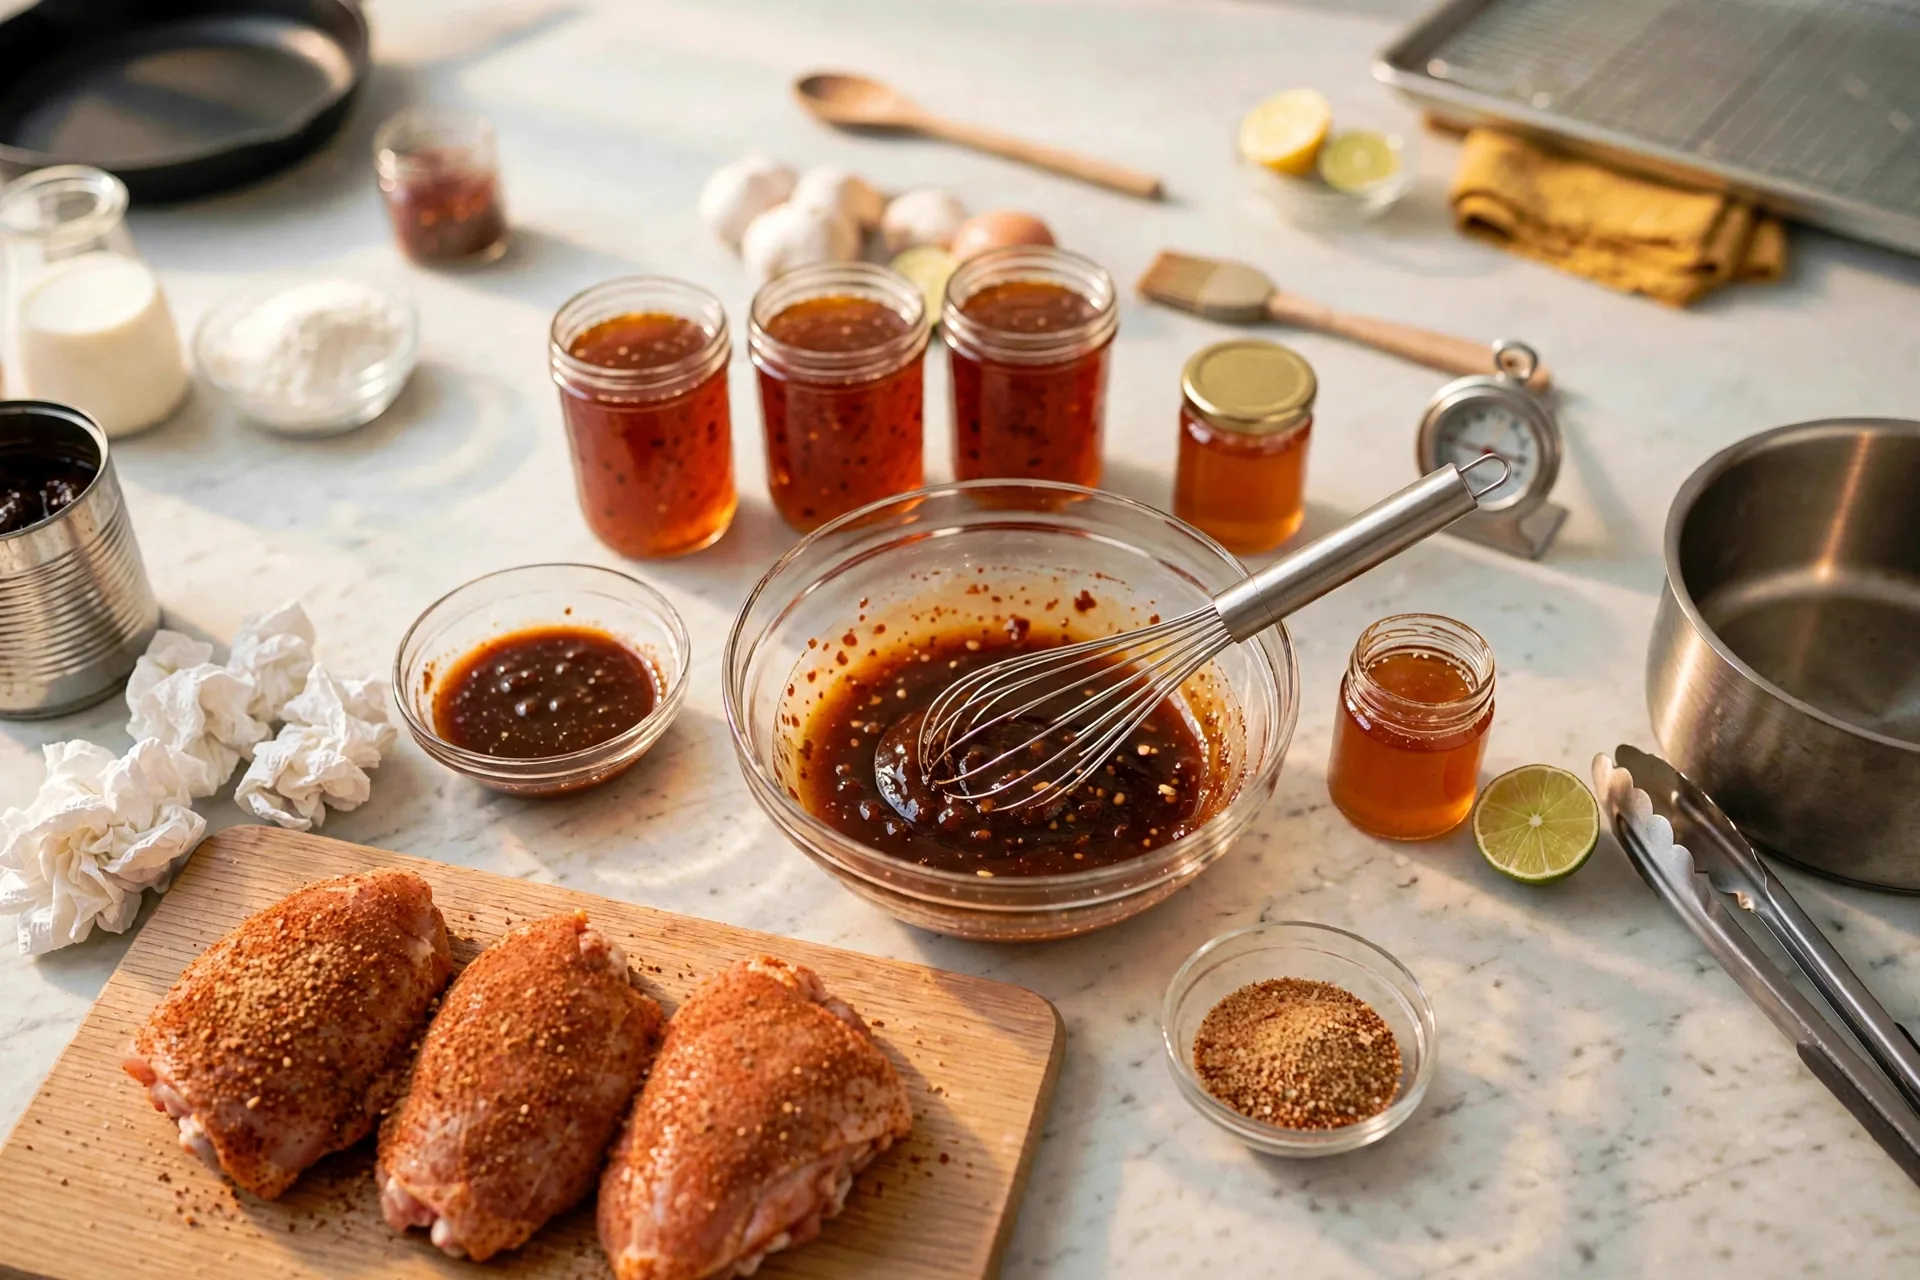
Rub the thighs with smoked paprika, cumin, garlic powder, brown sugar, and salt until a red-brown spice coating covers them, with a small bowl of the spice blend beside them. Brown sugar in a rub needs watching. It browns fast and burns faster, which is why the sear below stays quick and the glaze simmers gently rather than boiling hard.
Sear both sides
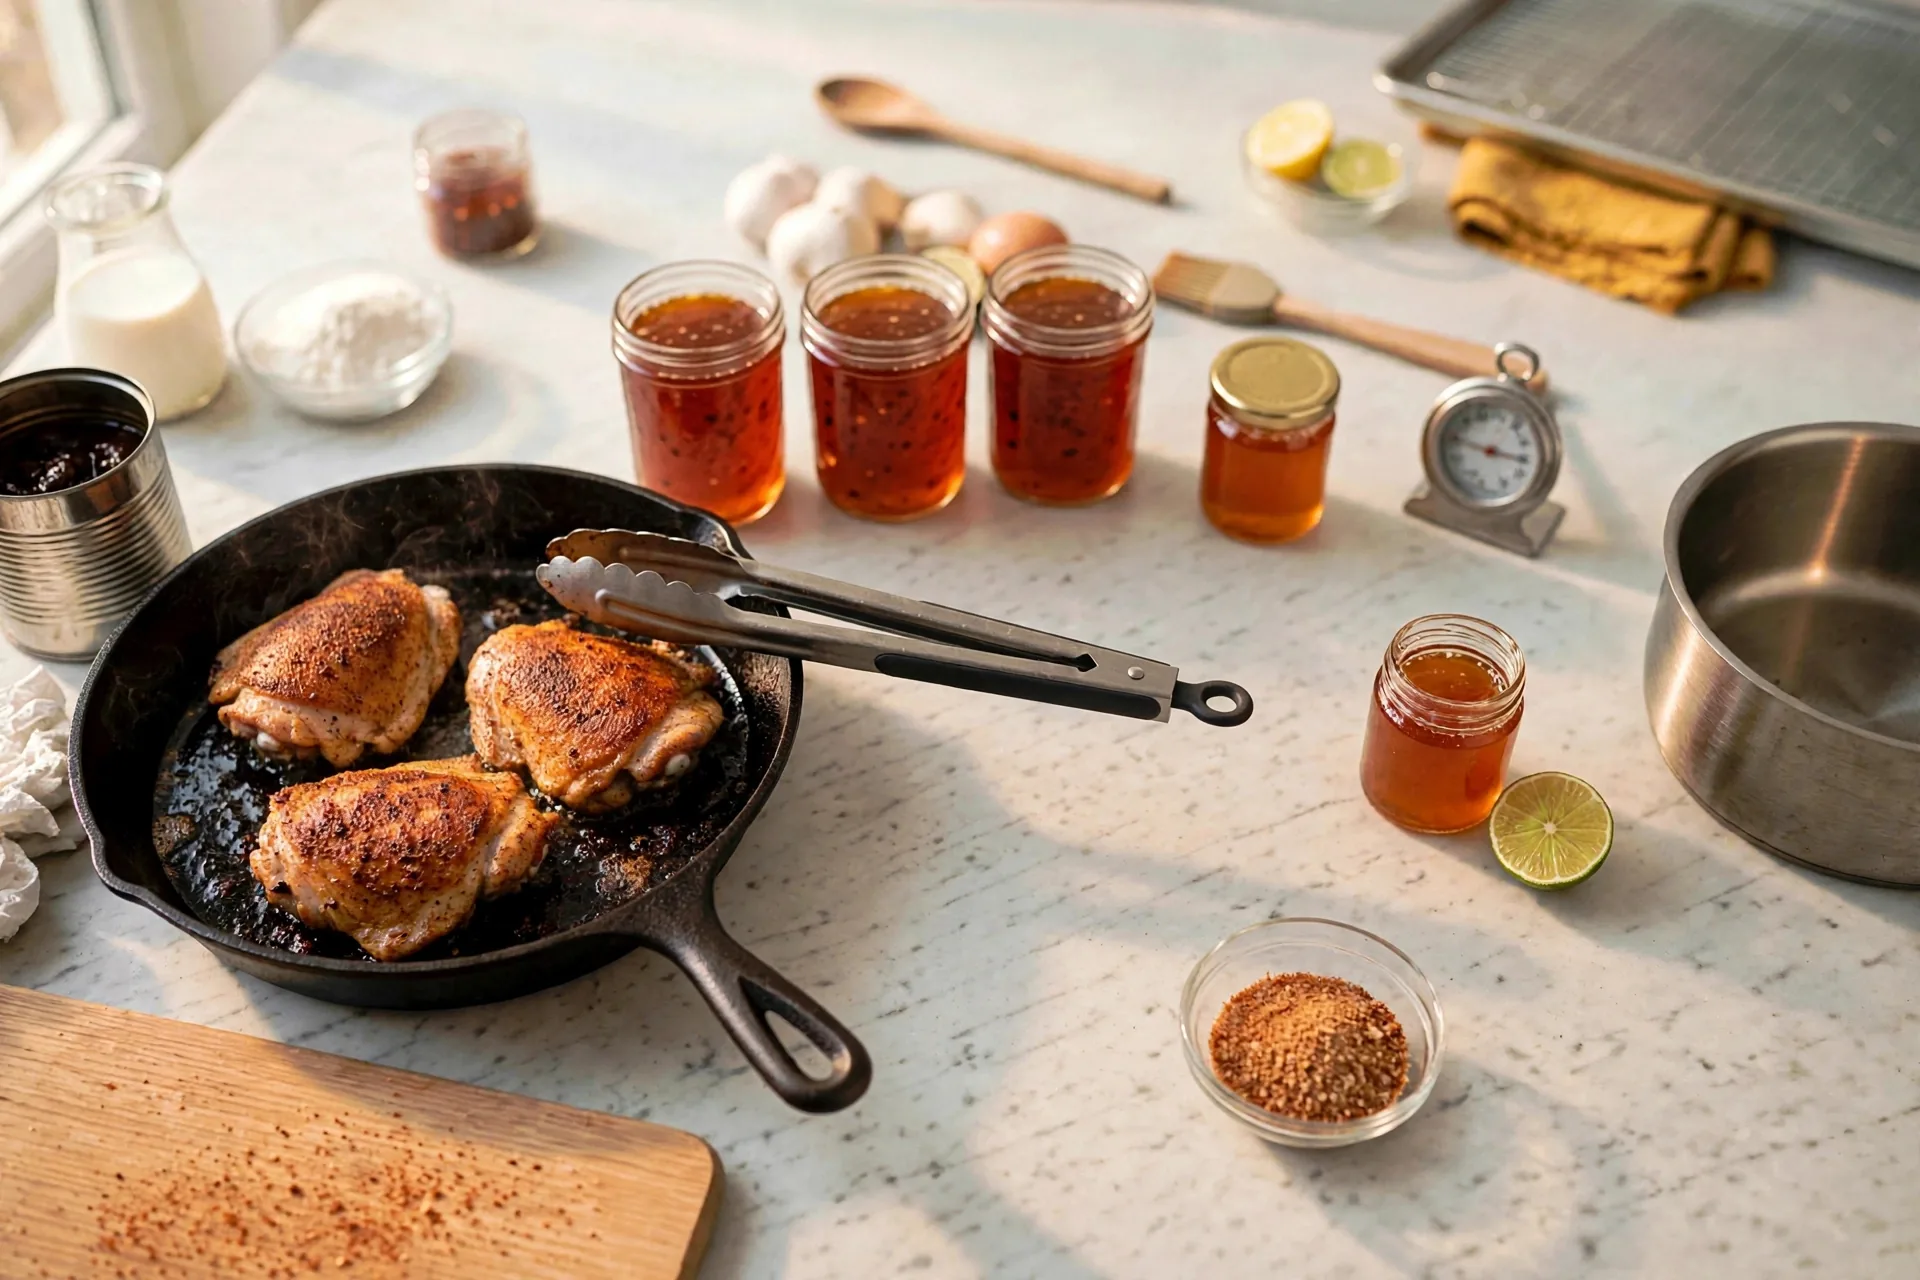
Sear the seasoned thighs in oil in the black skillet. The underside turns deeply golden-brown while the top stays raw and red-brown, with a light sizzle and a little steam. Leave the thighs alone once they land. Moving them early tears the crust before it sets.
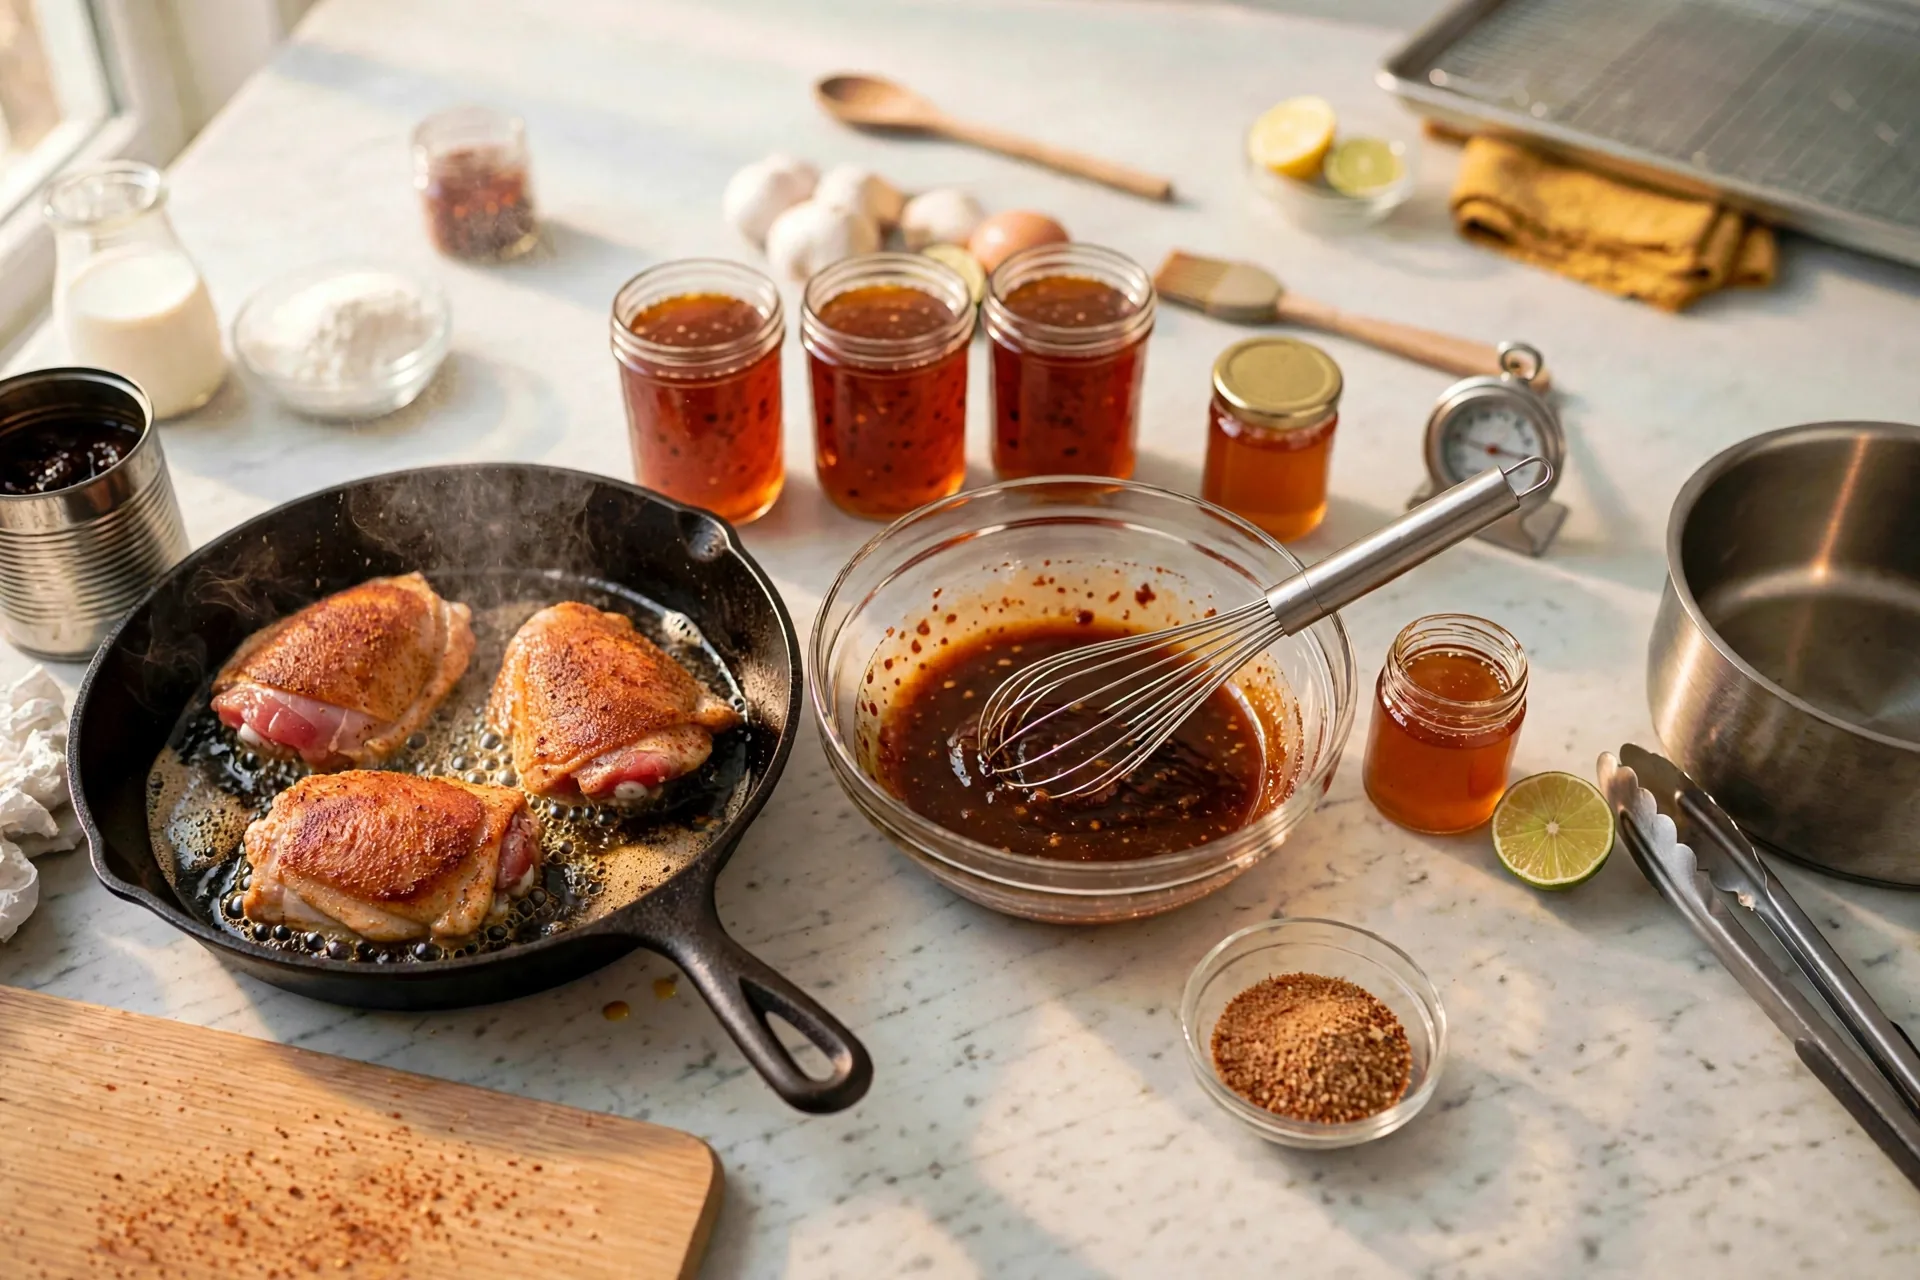
Turn the thighs over to show a deep golden crust with dark spice flecks, tongs resting on the skillet edge, fat and browned bits on the skillet floor. Those browned bits are not a mess to clean up. They dissolve into the glaze in the next step and deepen its flavor.
Glaze in the pan
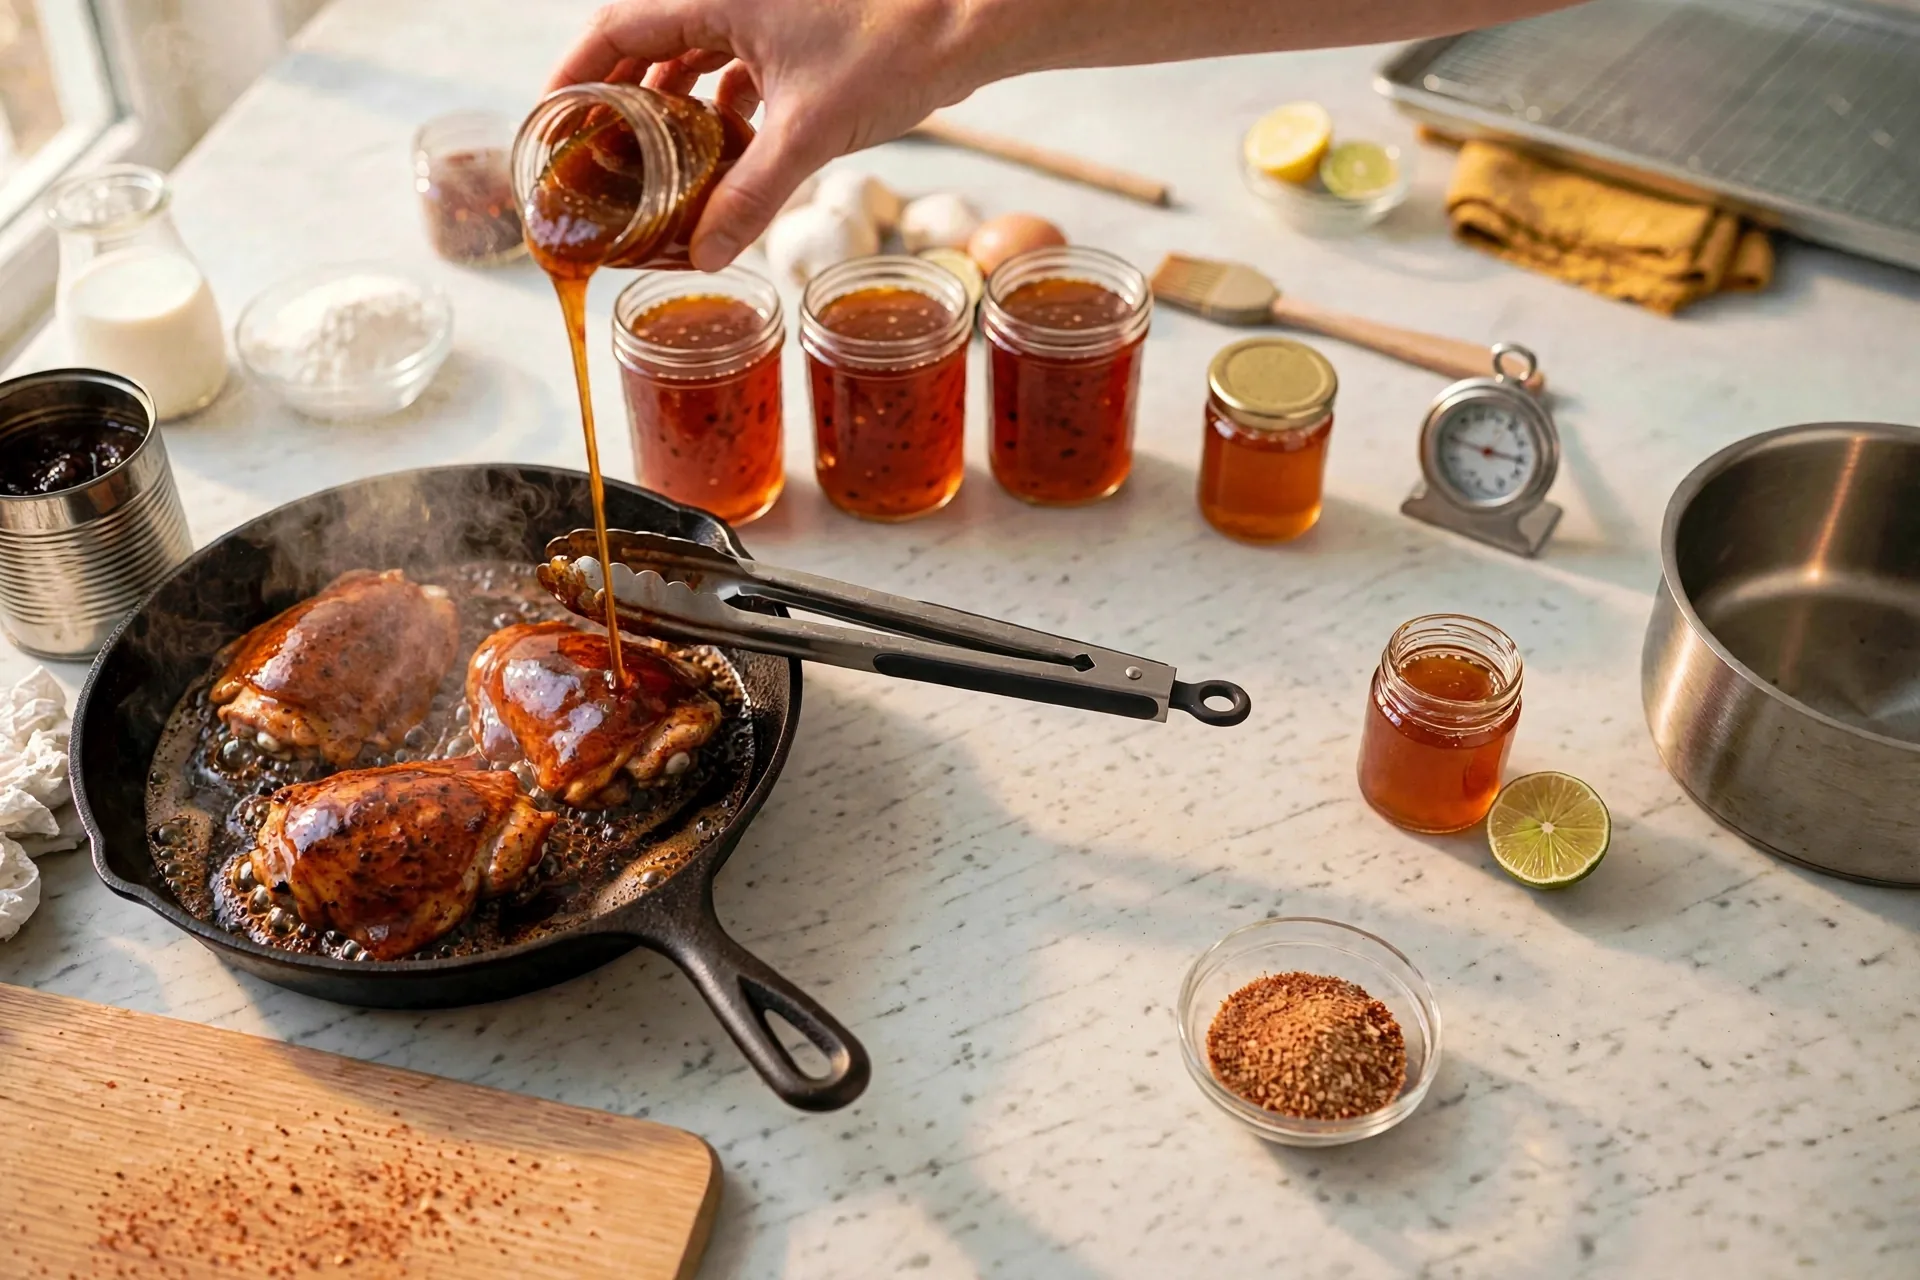
Pour the chipotle-honey glaze into the skillet around the seared thighs. The dark glaze bubbles at the edges and mixes with the pan juices, steam rising. Pour around the chicken rather than straight over it so the crust stays intact for a few more minutes while the sauce heats.
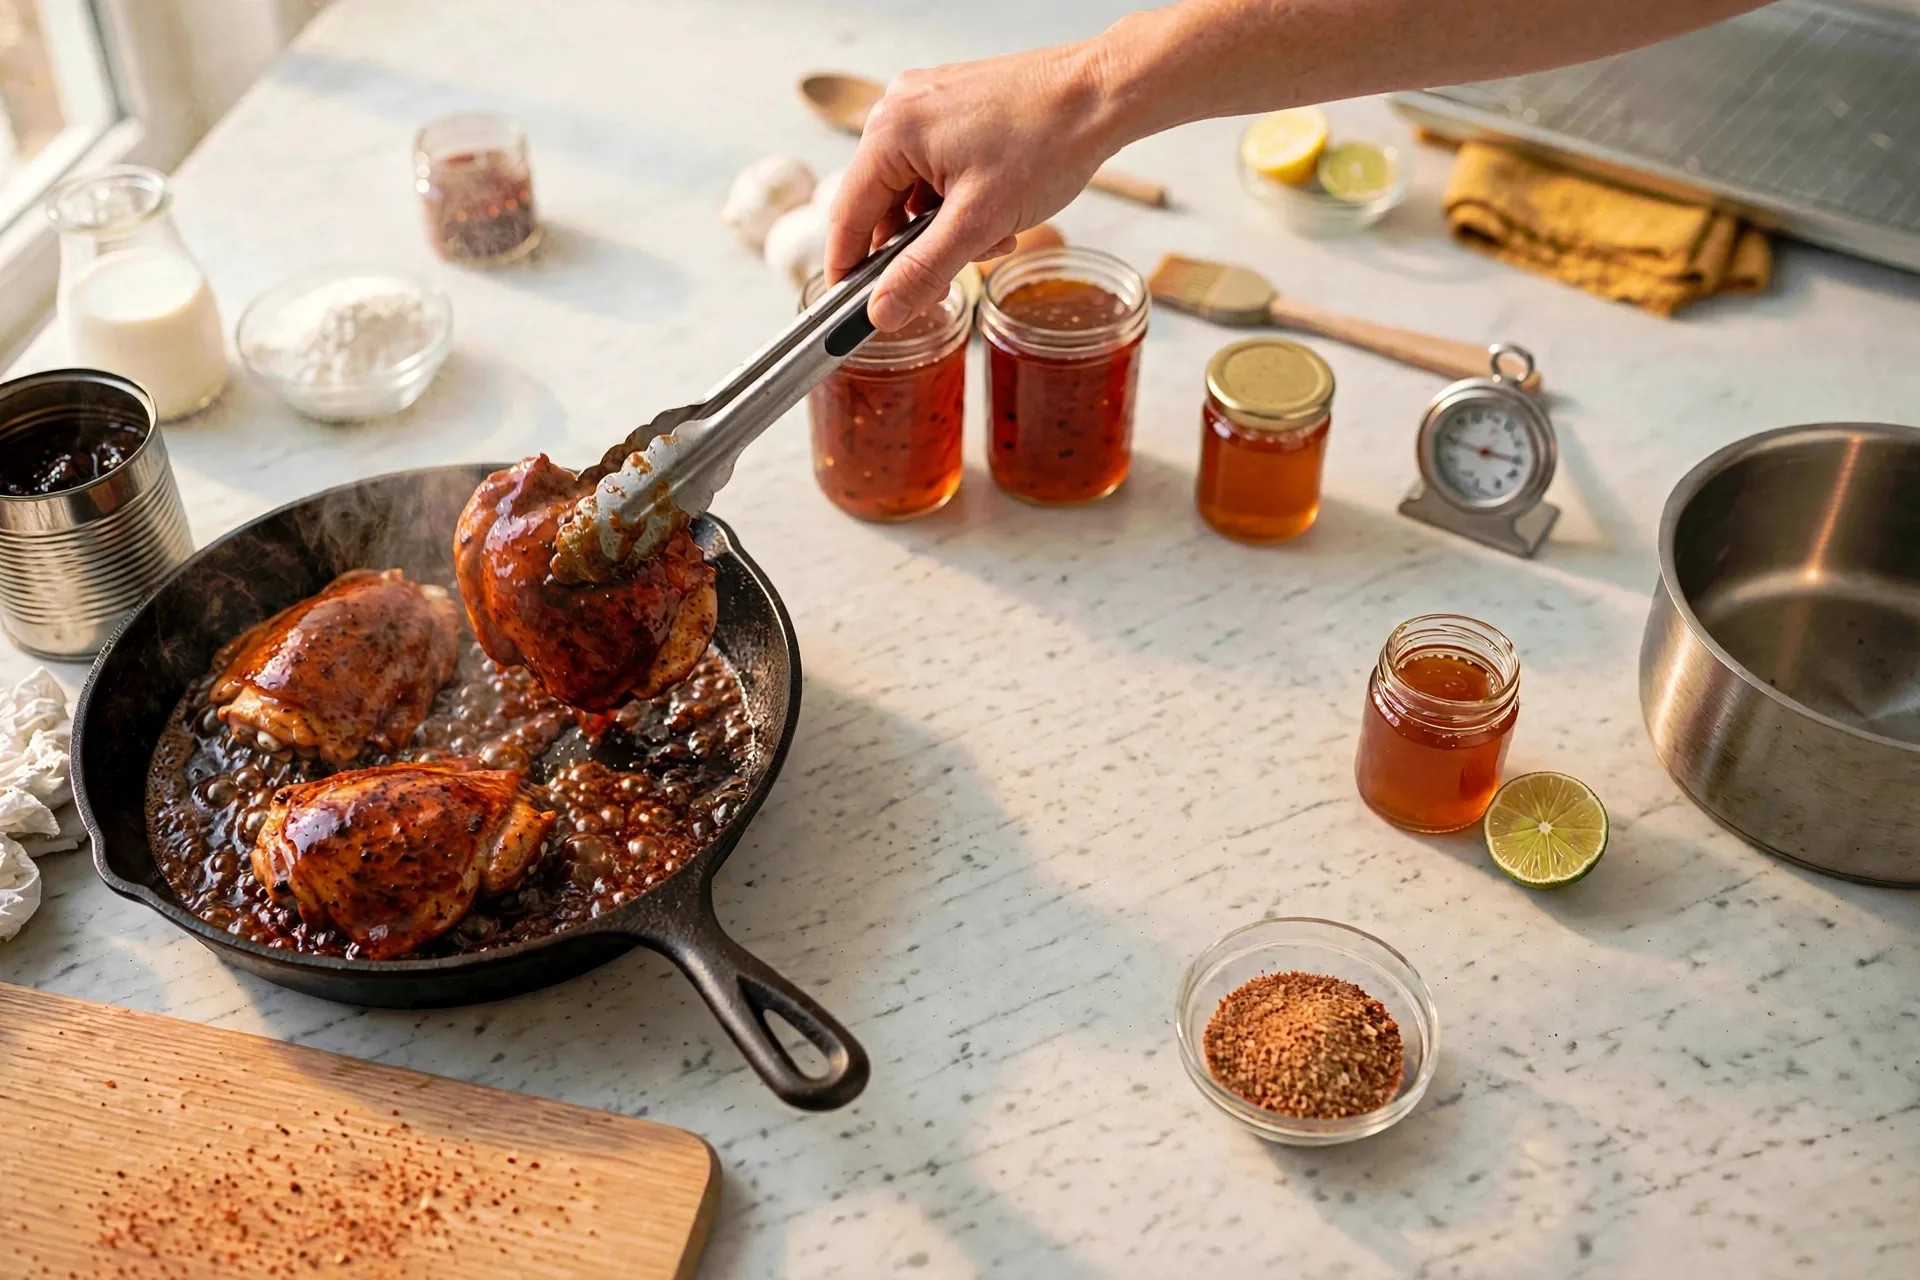
Turn the thighs in the thickened glaze with tongs until they are fully coated and glossy dark red-brown. The sauce clings and bubbles thickly at this point. Keep turning for even coverage, and watch the heat. A glaze with honey and sugar in it turns burnt with little warning if the burner runs too high.
Check, garnish, and serve
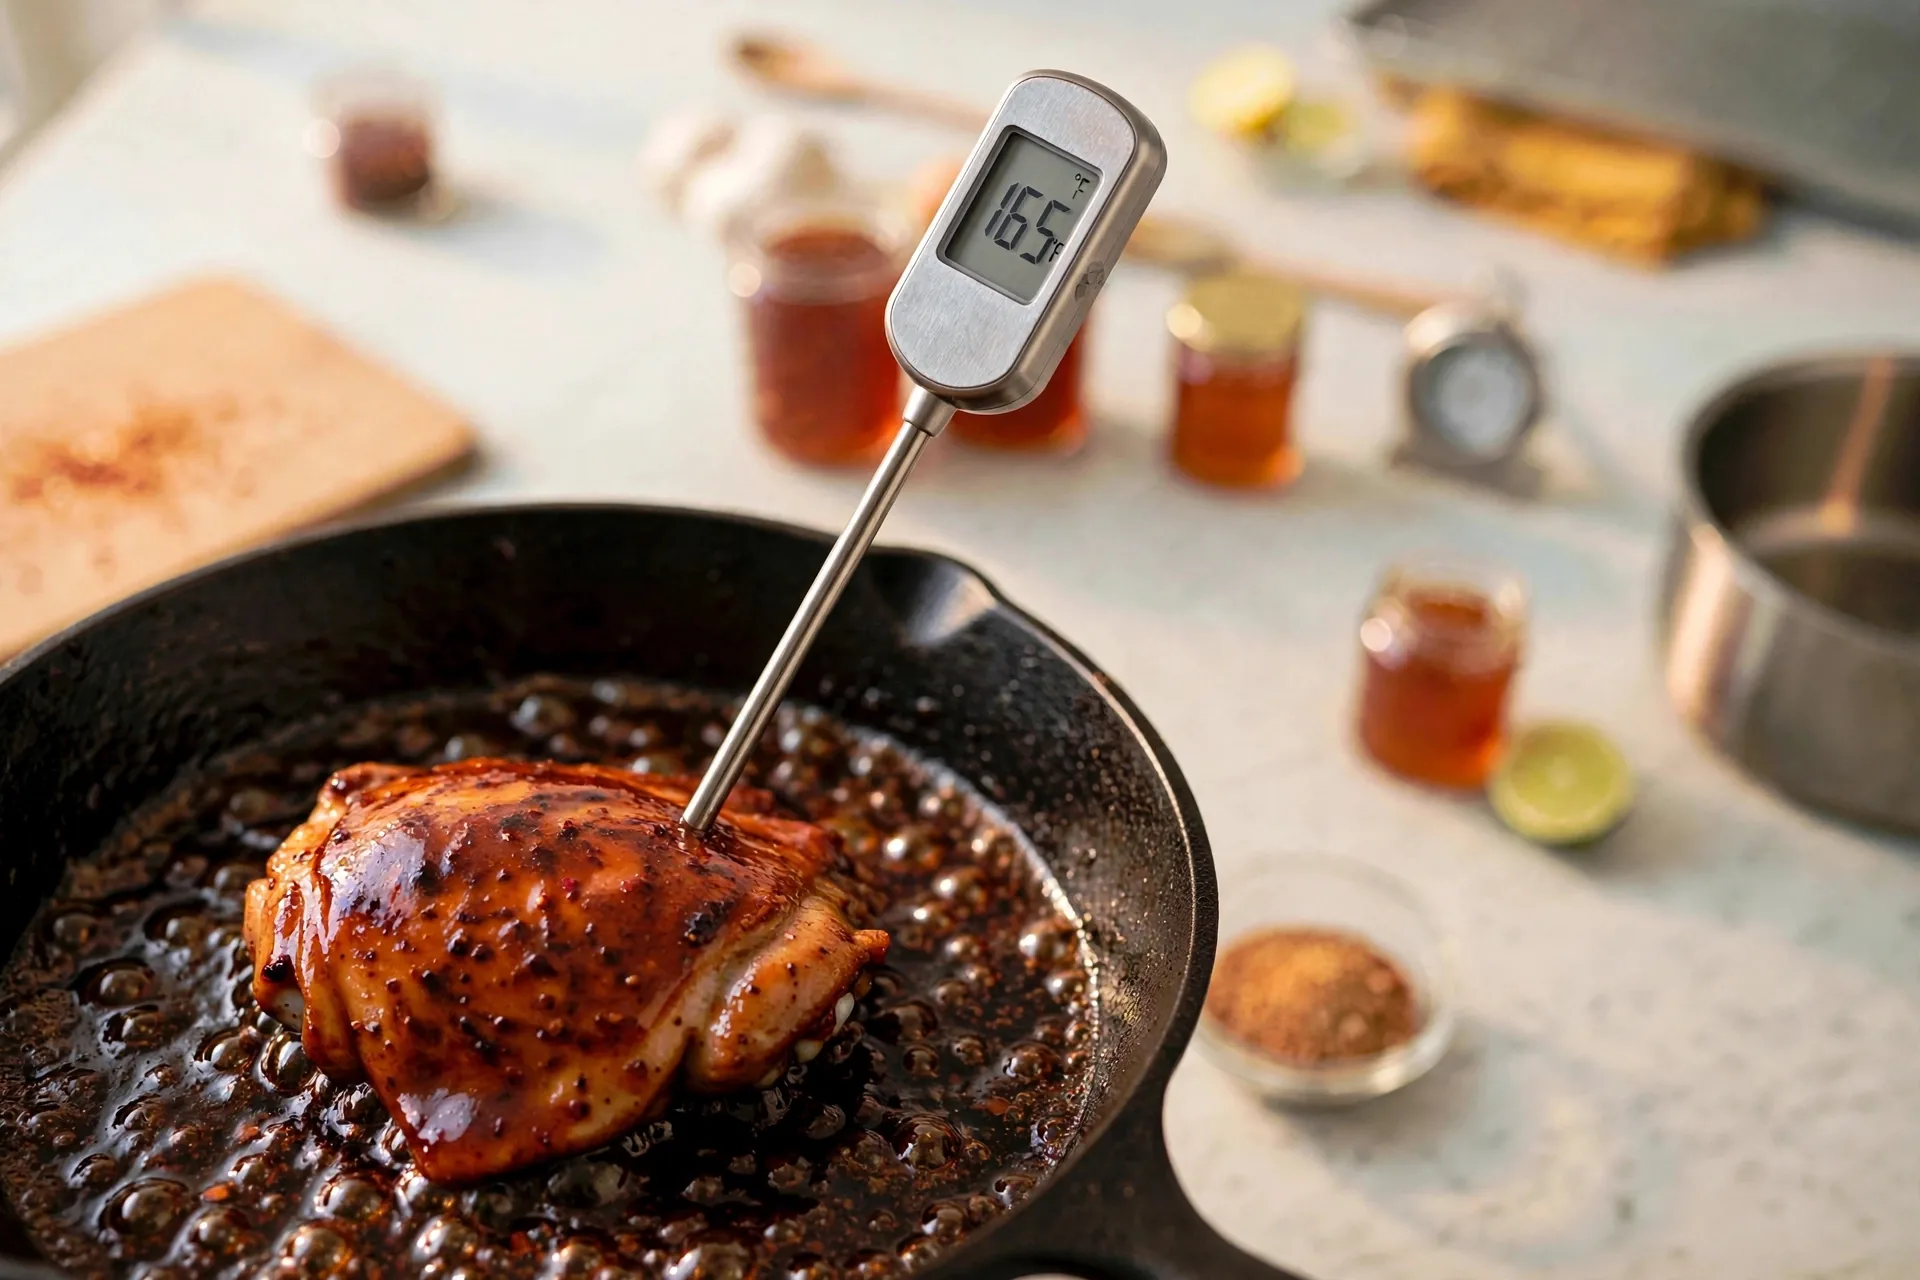
Push an instant-read thermometer into a glazed thigh and look for 165°F (74°C). The glaze is sticky and dark, and it shines on the surface. Thighs forgive a little more than breasts do, and they stay juicy past the first minute of doneness, but the thermometer still settles the question.
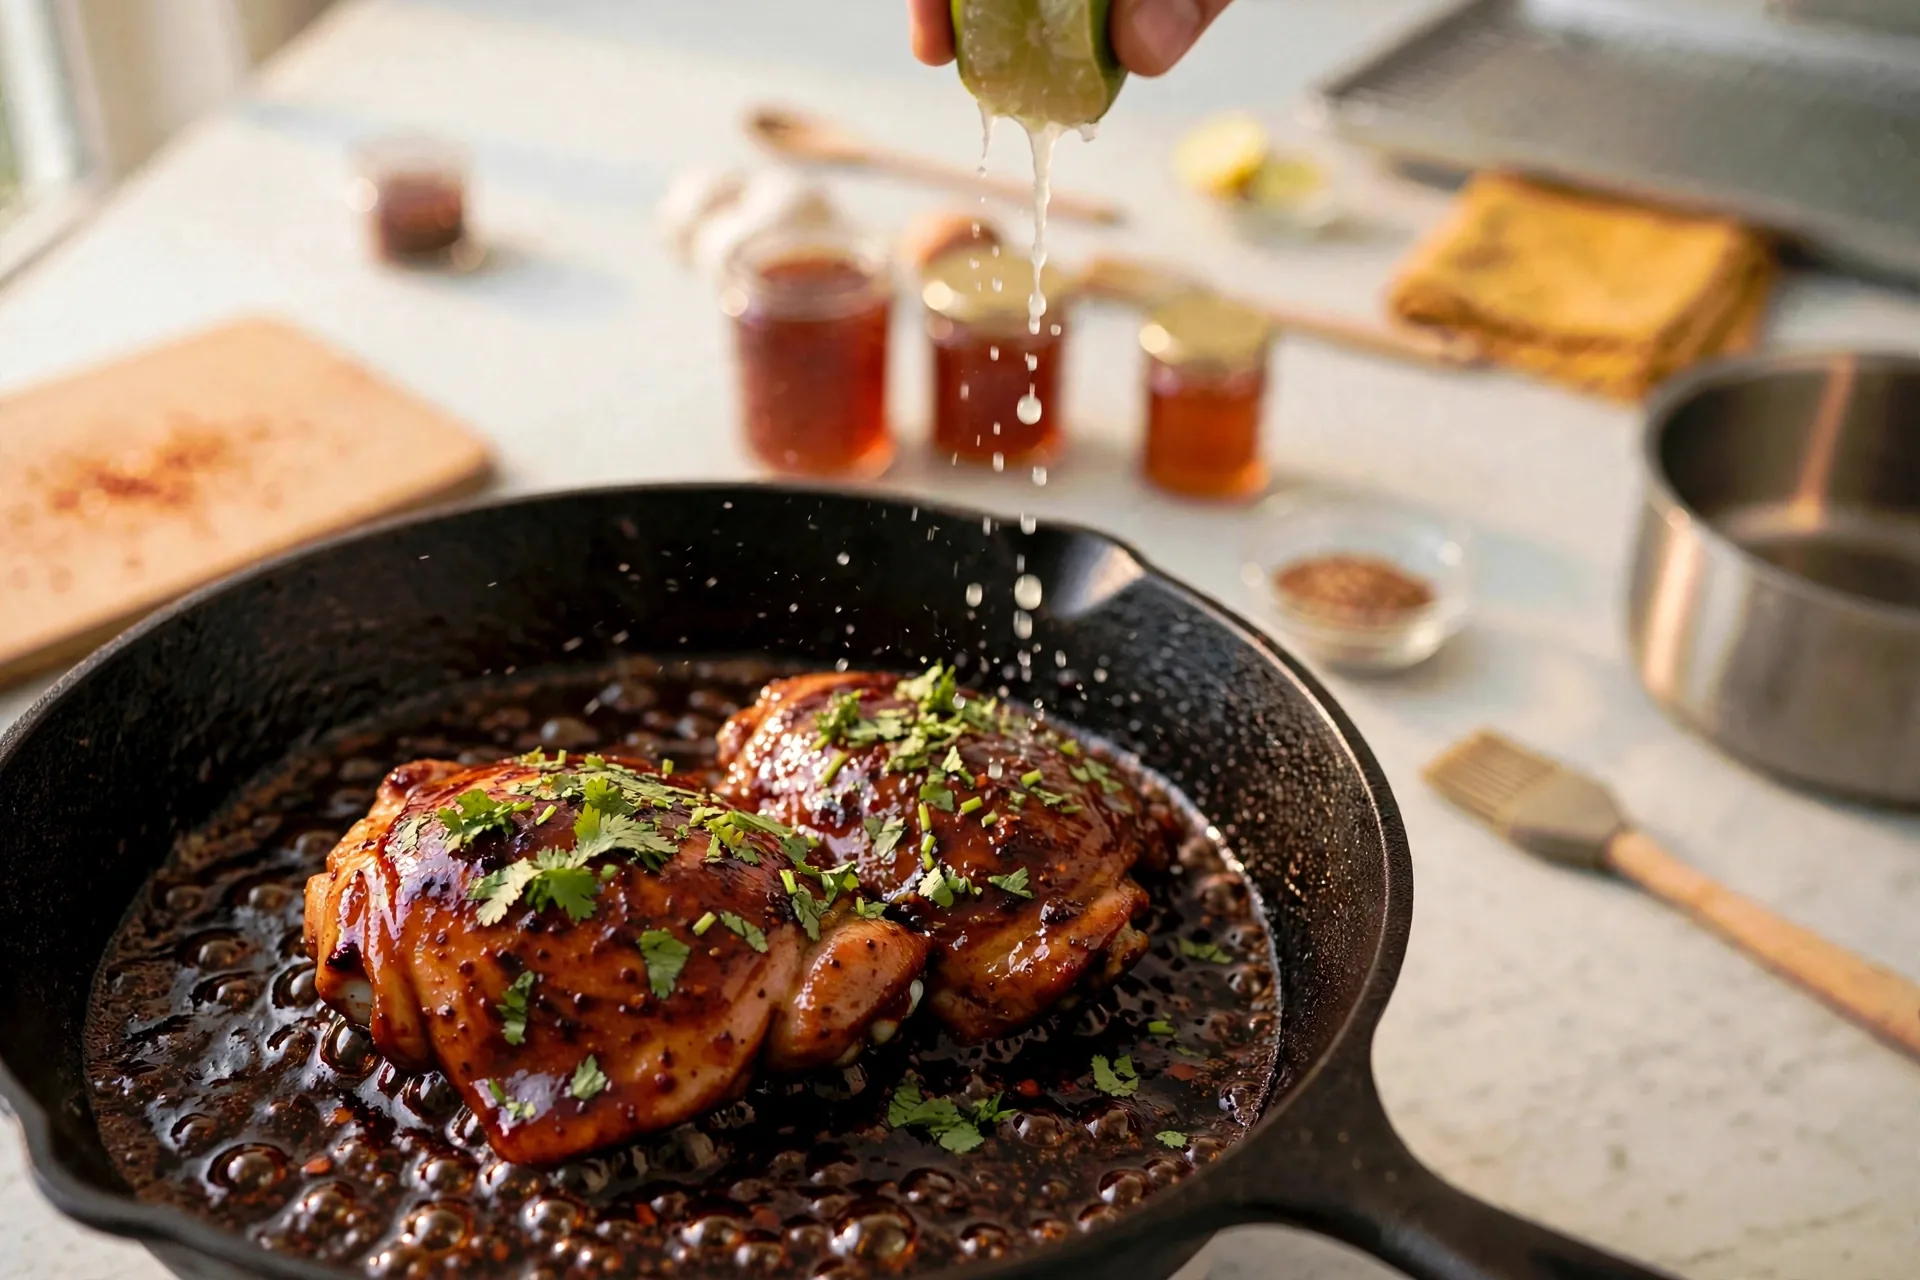
Sprinkle chopped fresh cilantro over the glazed thighs in the skillet, with a squeeze of lime juice falling mid-air and sauce pooled around the chicken. Cilantro and lime land last for a reason. Heat dulls fresh herbs fast, and lime juice added at the end keeps its edge instead of cooking into the glaze.
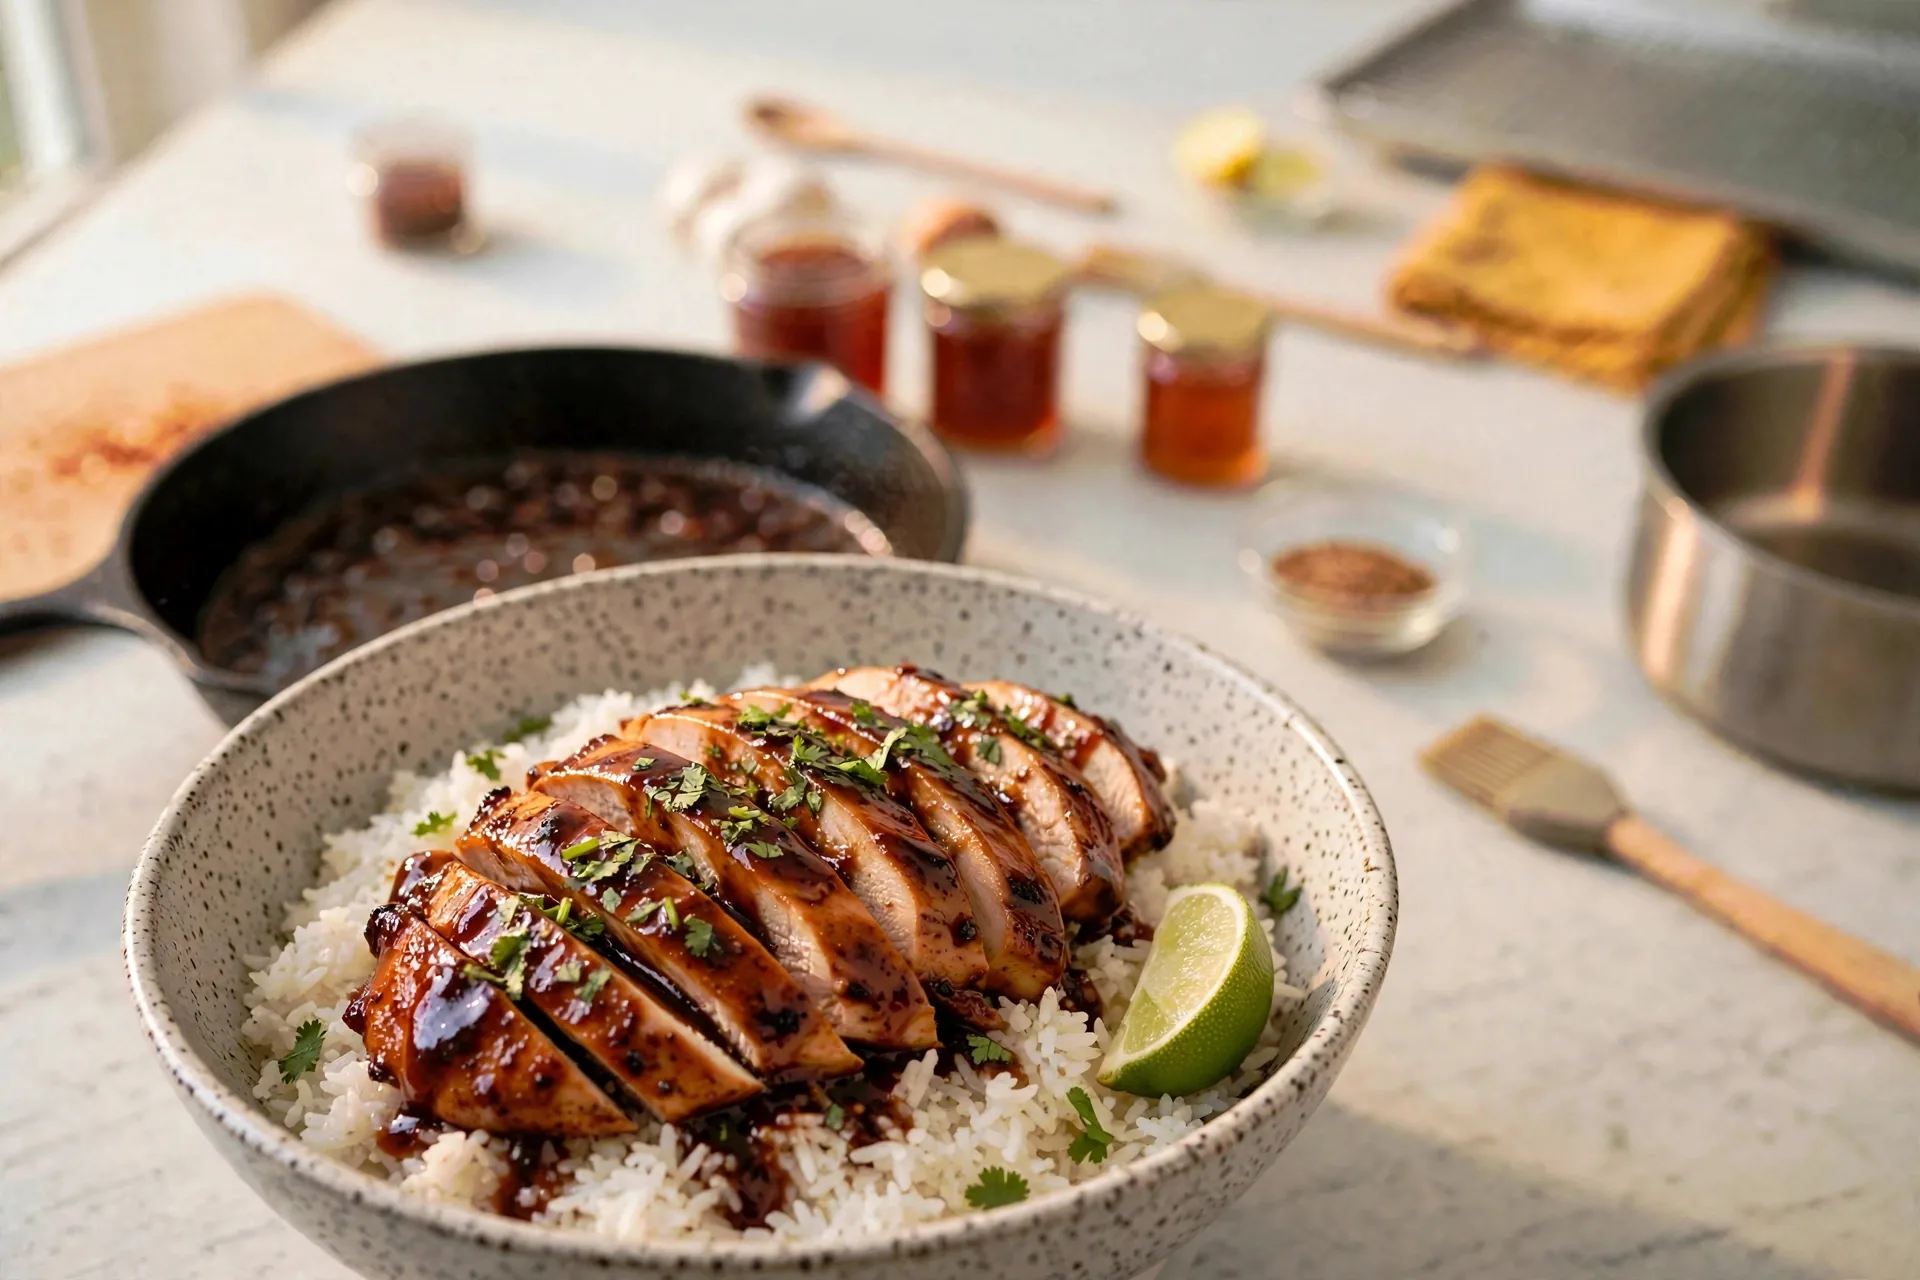
Slice the chipotle honey chicken and fan it over a bed of white rice in a speckled bowl. Spoon glossy dark sauce over it, with cilantro and a lime wedge. The skillet sits softly blurred behind. Rice soaks up the extra glaze, which is the point of serving it this way. The same chicken also works in tacos or in bowls with the salad and toppings of your choice.
A natural pairing for the rice here is a plain pot of lemon rice. The site’s 5 Instant Pot Rice Recipes covers white, basmati, jasmine, and brown rice, and any of them holds up under a dark glaze.
Chipotle Honey Chicken
Ingredients
Method
- Mince chipotles fine.
- Whisk honey, chipotle, adobo sauce, lime juice, garlic into a glaze.
- Pat thighs dry.
- Rub with smoked paprika, cumin, garlic powder, brown sugar, salt.
- Sear in oiled cast-iron skillet.
- Flip once crusted.
- Pour glaze around thighs, simmer gently.
- Turn to coat until glossy dark red-brown.
- Check a thigh reads 165°F (74°C).
- Garnish with cilantro and lime, serve over rice.
Notes
Recipe 4
Honey Chicken Thighs
Bone-in, skin-on thighs, baked until the skin crisps, glazed late with honey, soy, garlic, and lemon, then broiled to caramelize. The late glaze is the whole technique. Honey sugars brown fast, so glaze goes on after the skin has already crisped, not before.
Pat dry and season
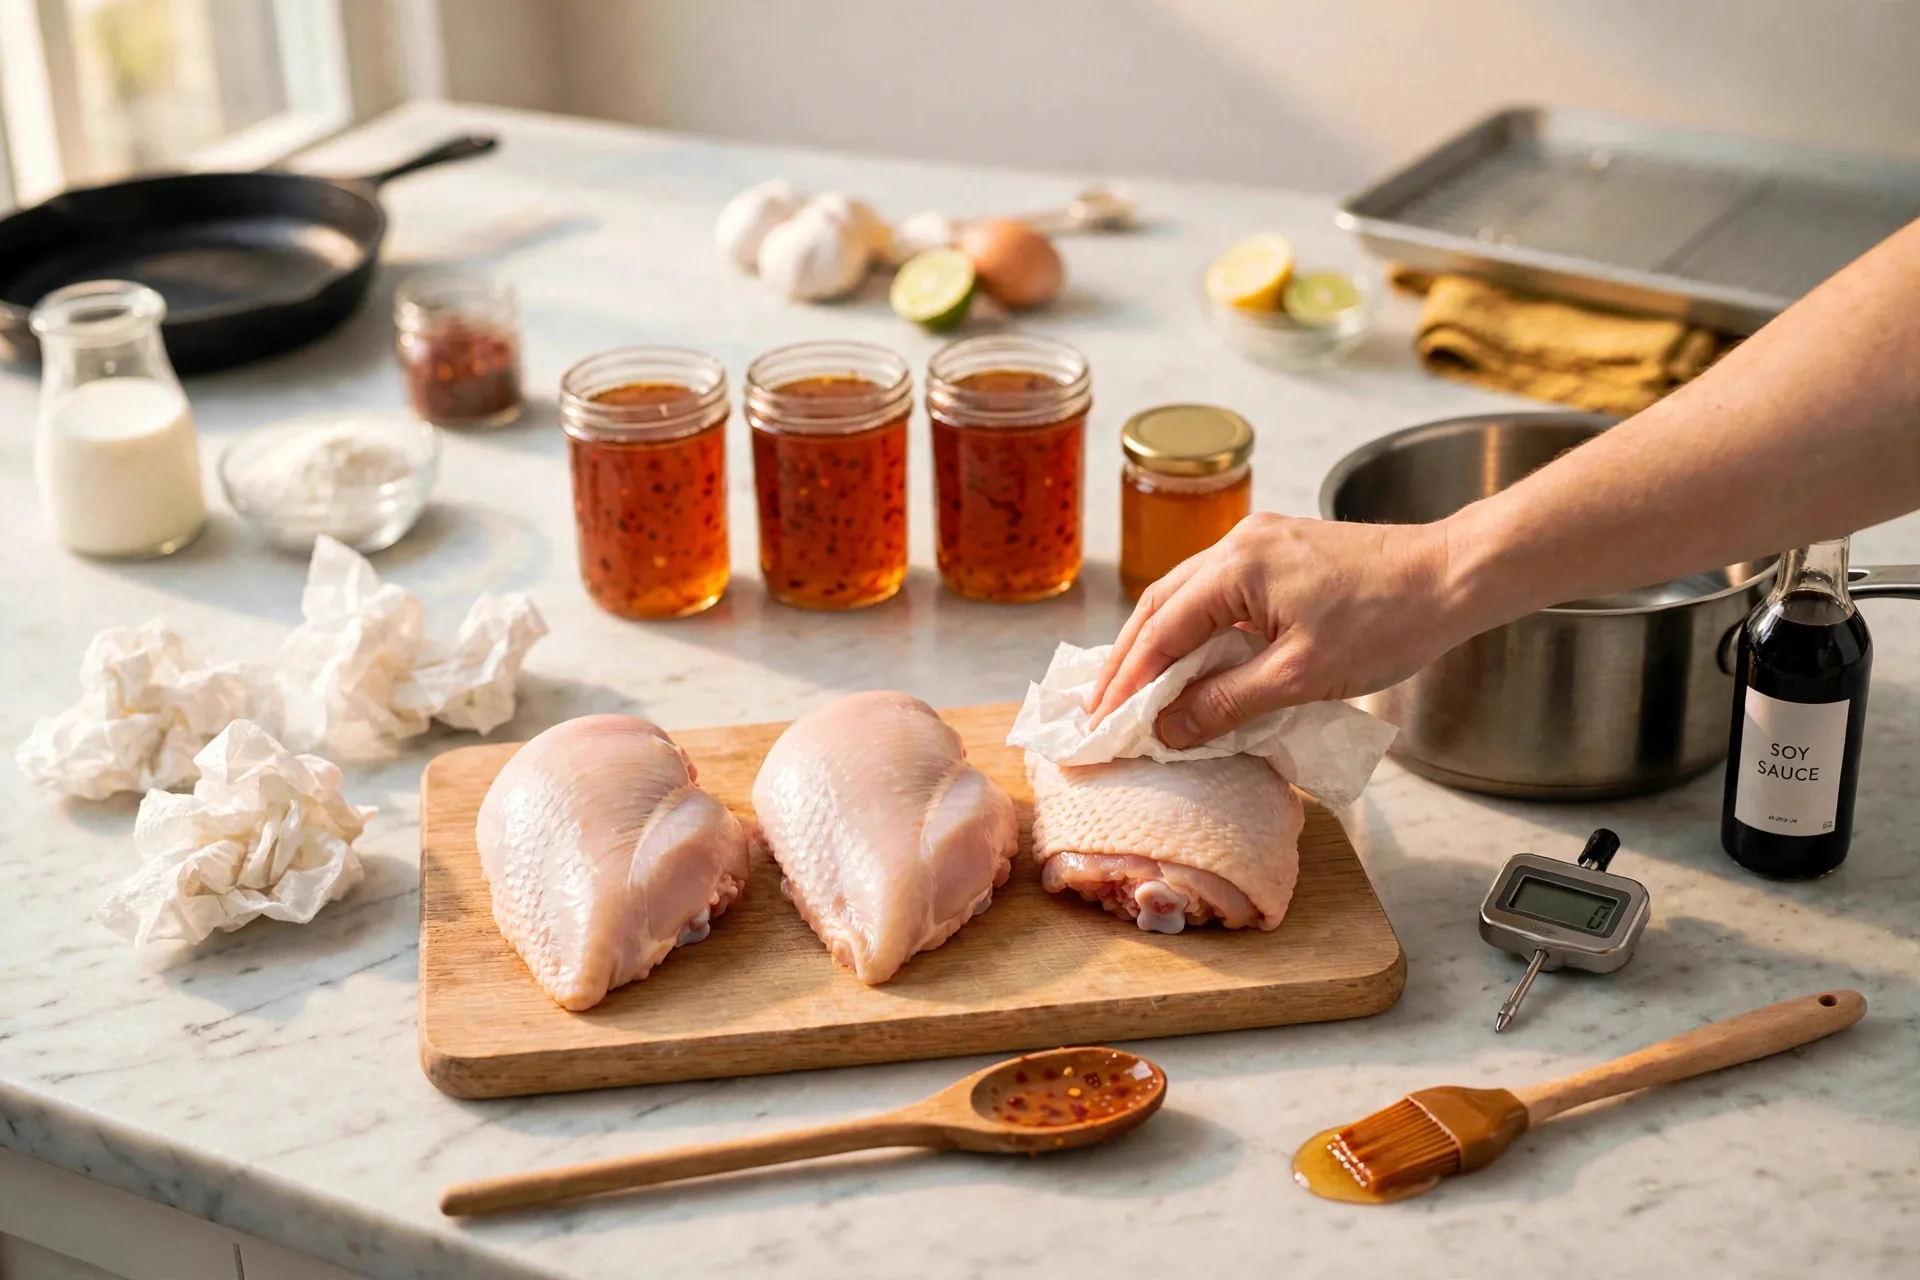
Press a paper towel onto the raw bone-in, skin-on thighs on a separate board and blot the skin dry, with used paper towels beside it. Raw skin is pale and slightly dimpled. Dry skin renders and crisps in the oven. Damp skin steams under its own moisture and stays soft no matter how long it bakes.
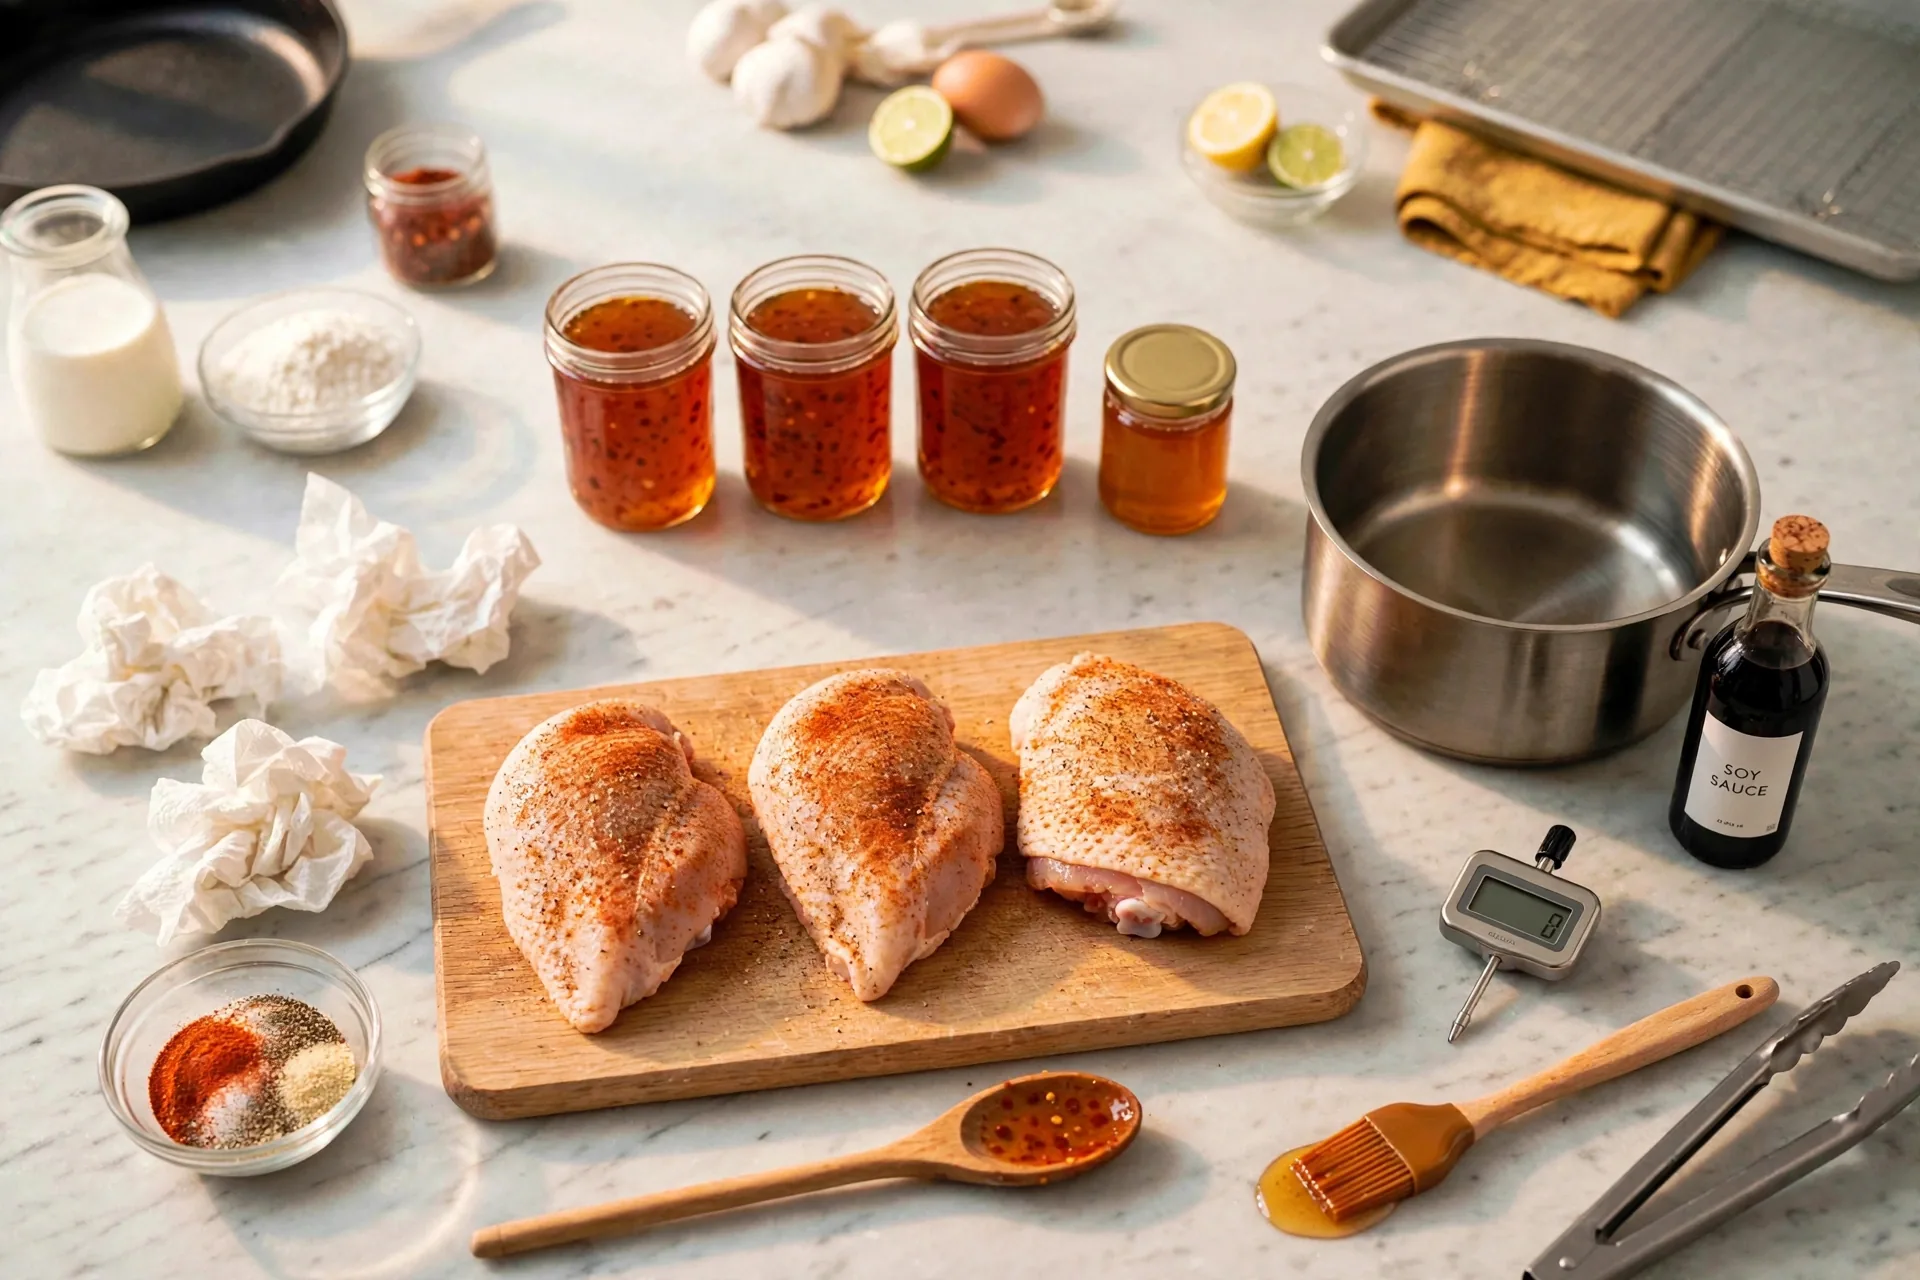
Season the thighs skin-side up with salt, pepper, garlic powder, and smoked paprika. A light red-orange dusting stays on the skin, and a small bowl of the seasoning sits beside them. Season the skin side well, since that is the side the eater meets first and the side the glaze will sit on later.
Bake the first stage
Arrange the seasoned thighs skin-side up in a single layer in the black cast-iron skillet, with space between them, skin still pale and raw, oven open in the background. Space lets hot air reach the skin on all sides. Thighs packed tight steam each other and never crisp properly.
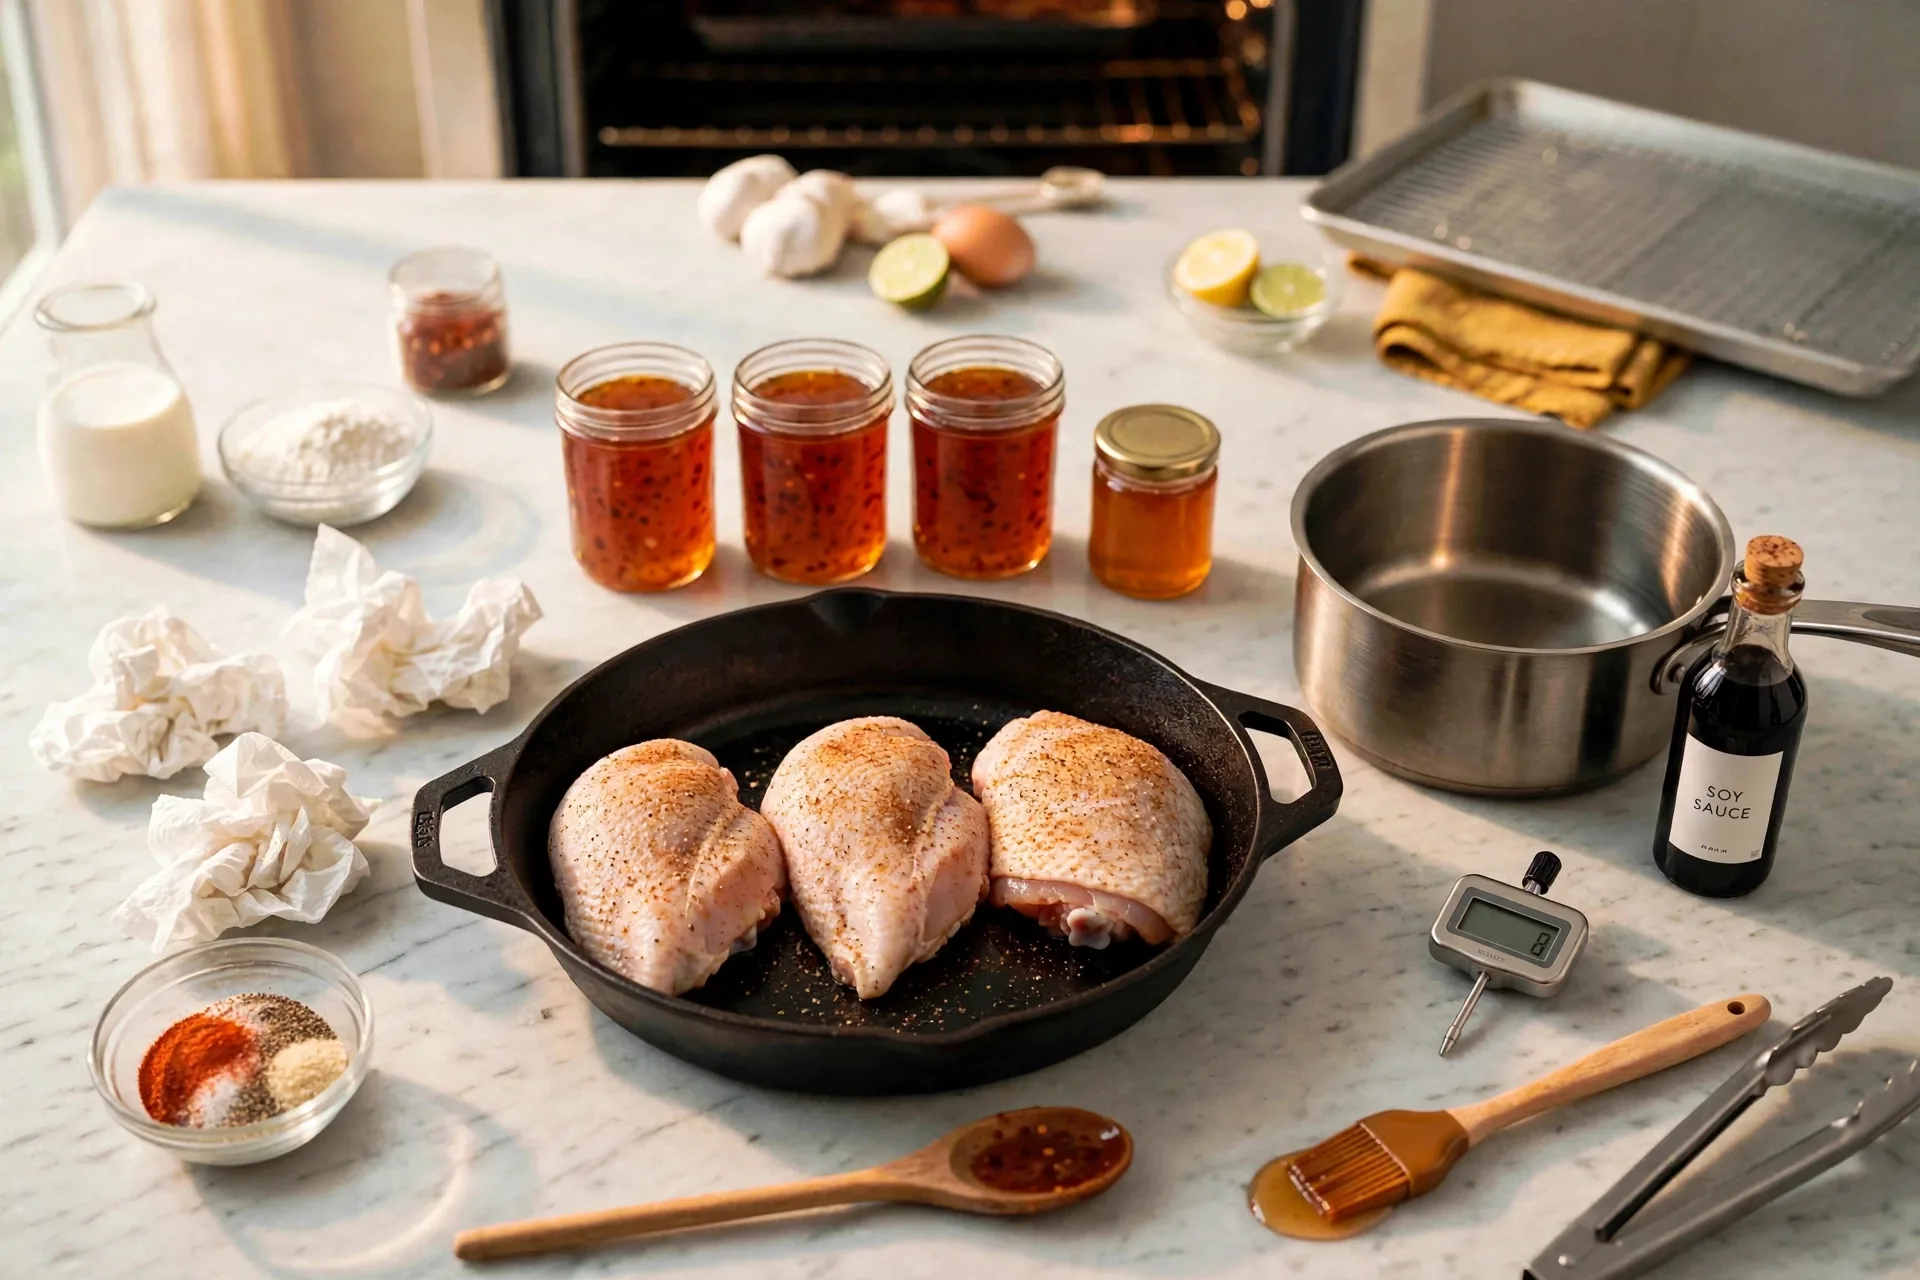
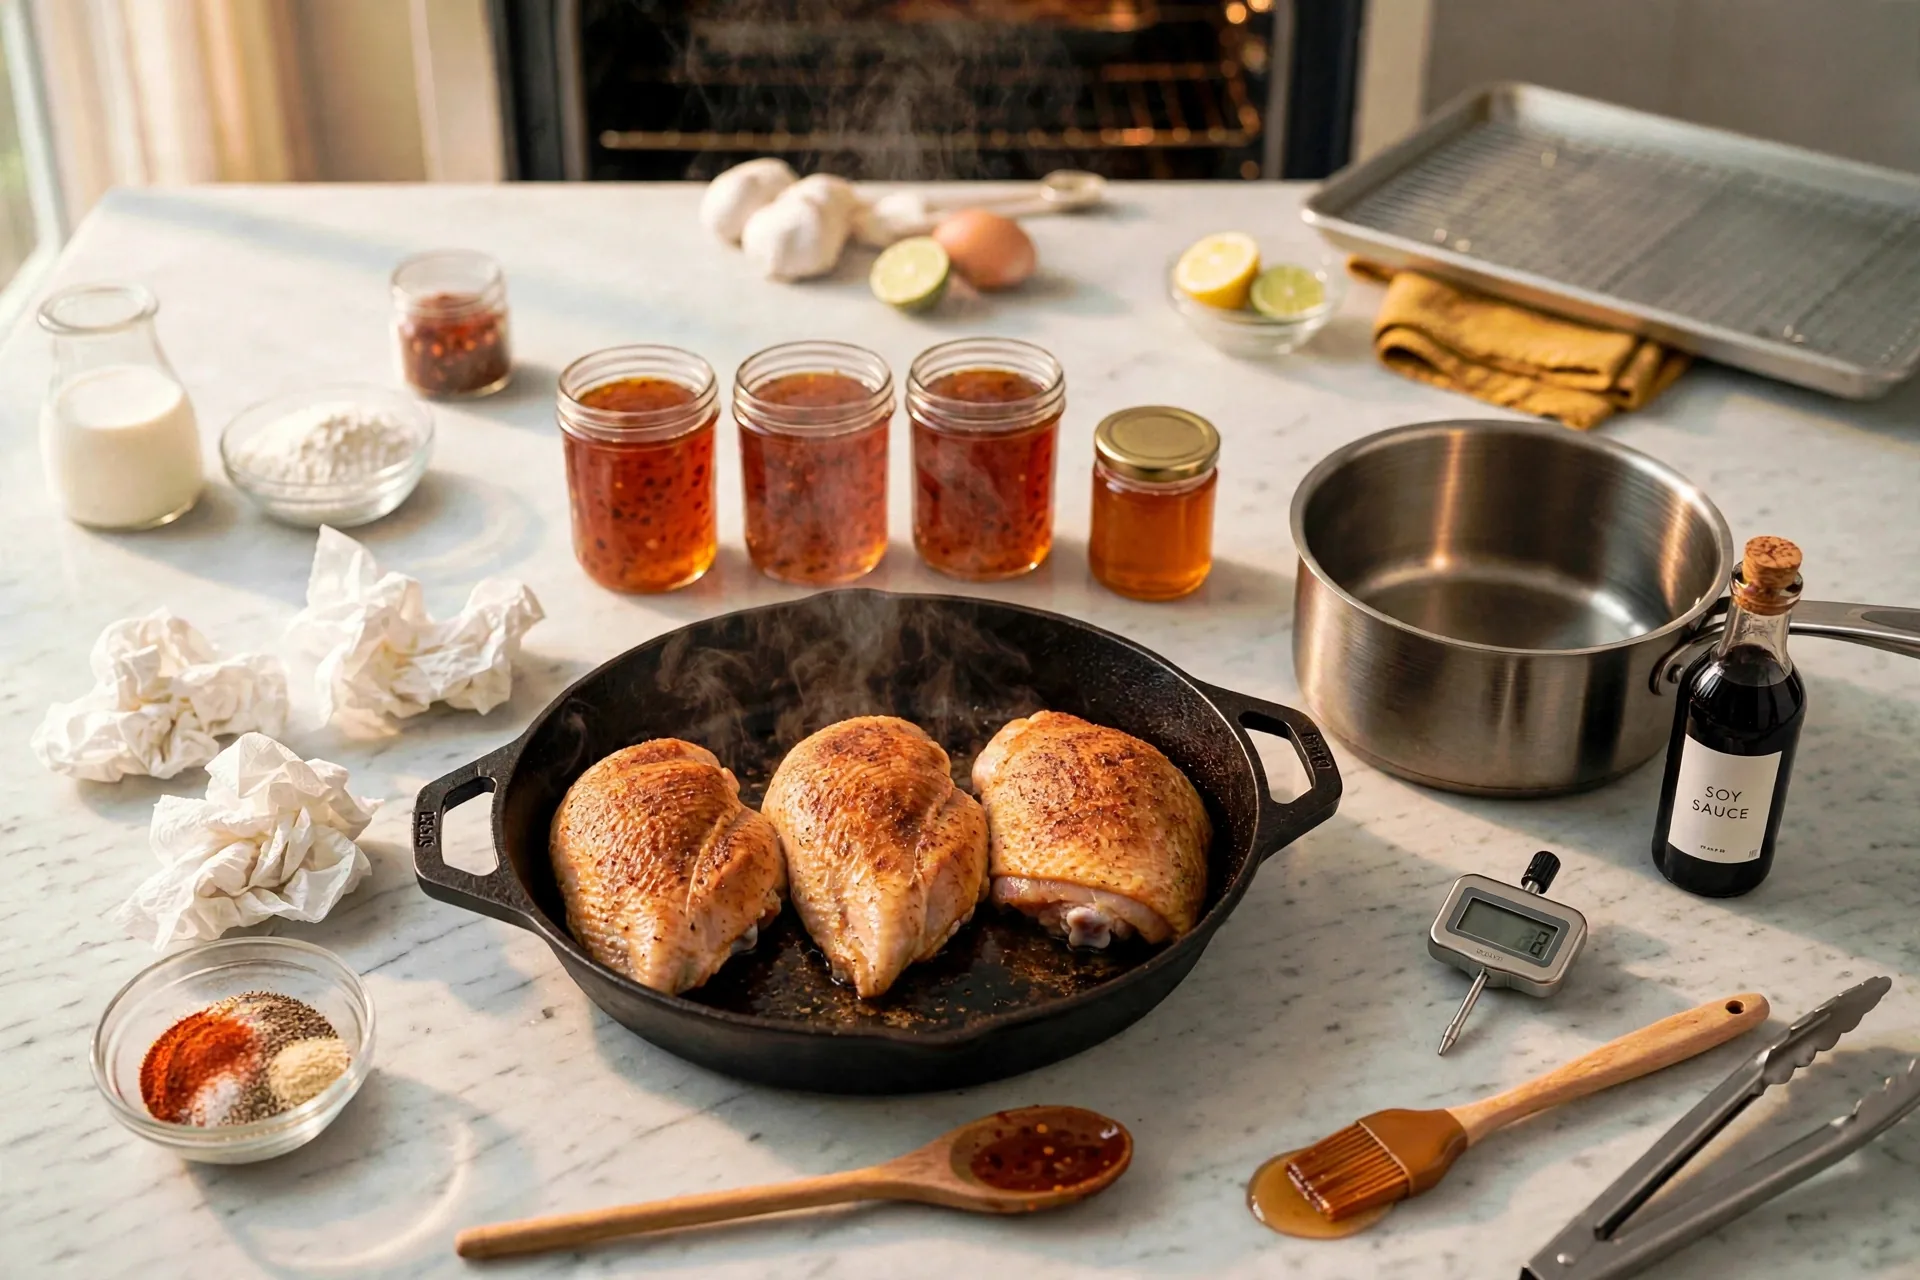
Bake at about 400°F until the skin turns golden-brown and crisp, fat rendered in the pan, steam rising, no glaze yet. This first bake does the real cooking. The meat firms up, the fat under the skin renders out, and the skin dries into a crisp layer that can hold a glaze without going soggy. No glaze at this stage is correct, and glazing early is the one move that spoils this dish.
Whisk the glaze while the thighs bake
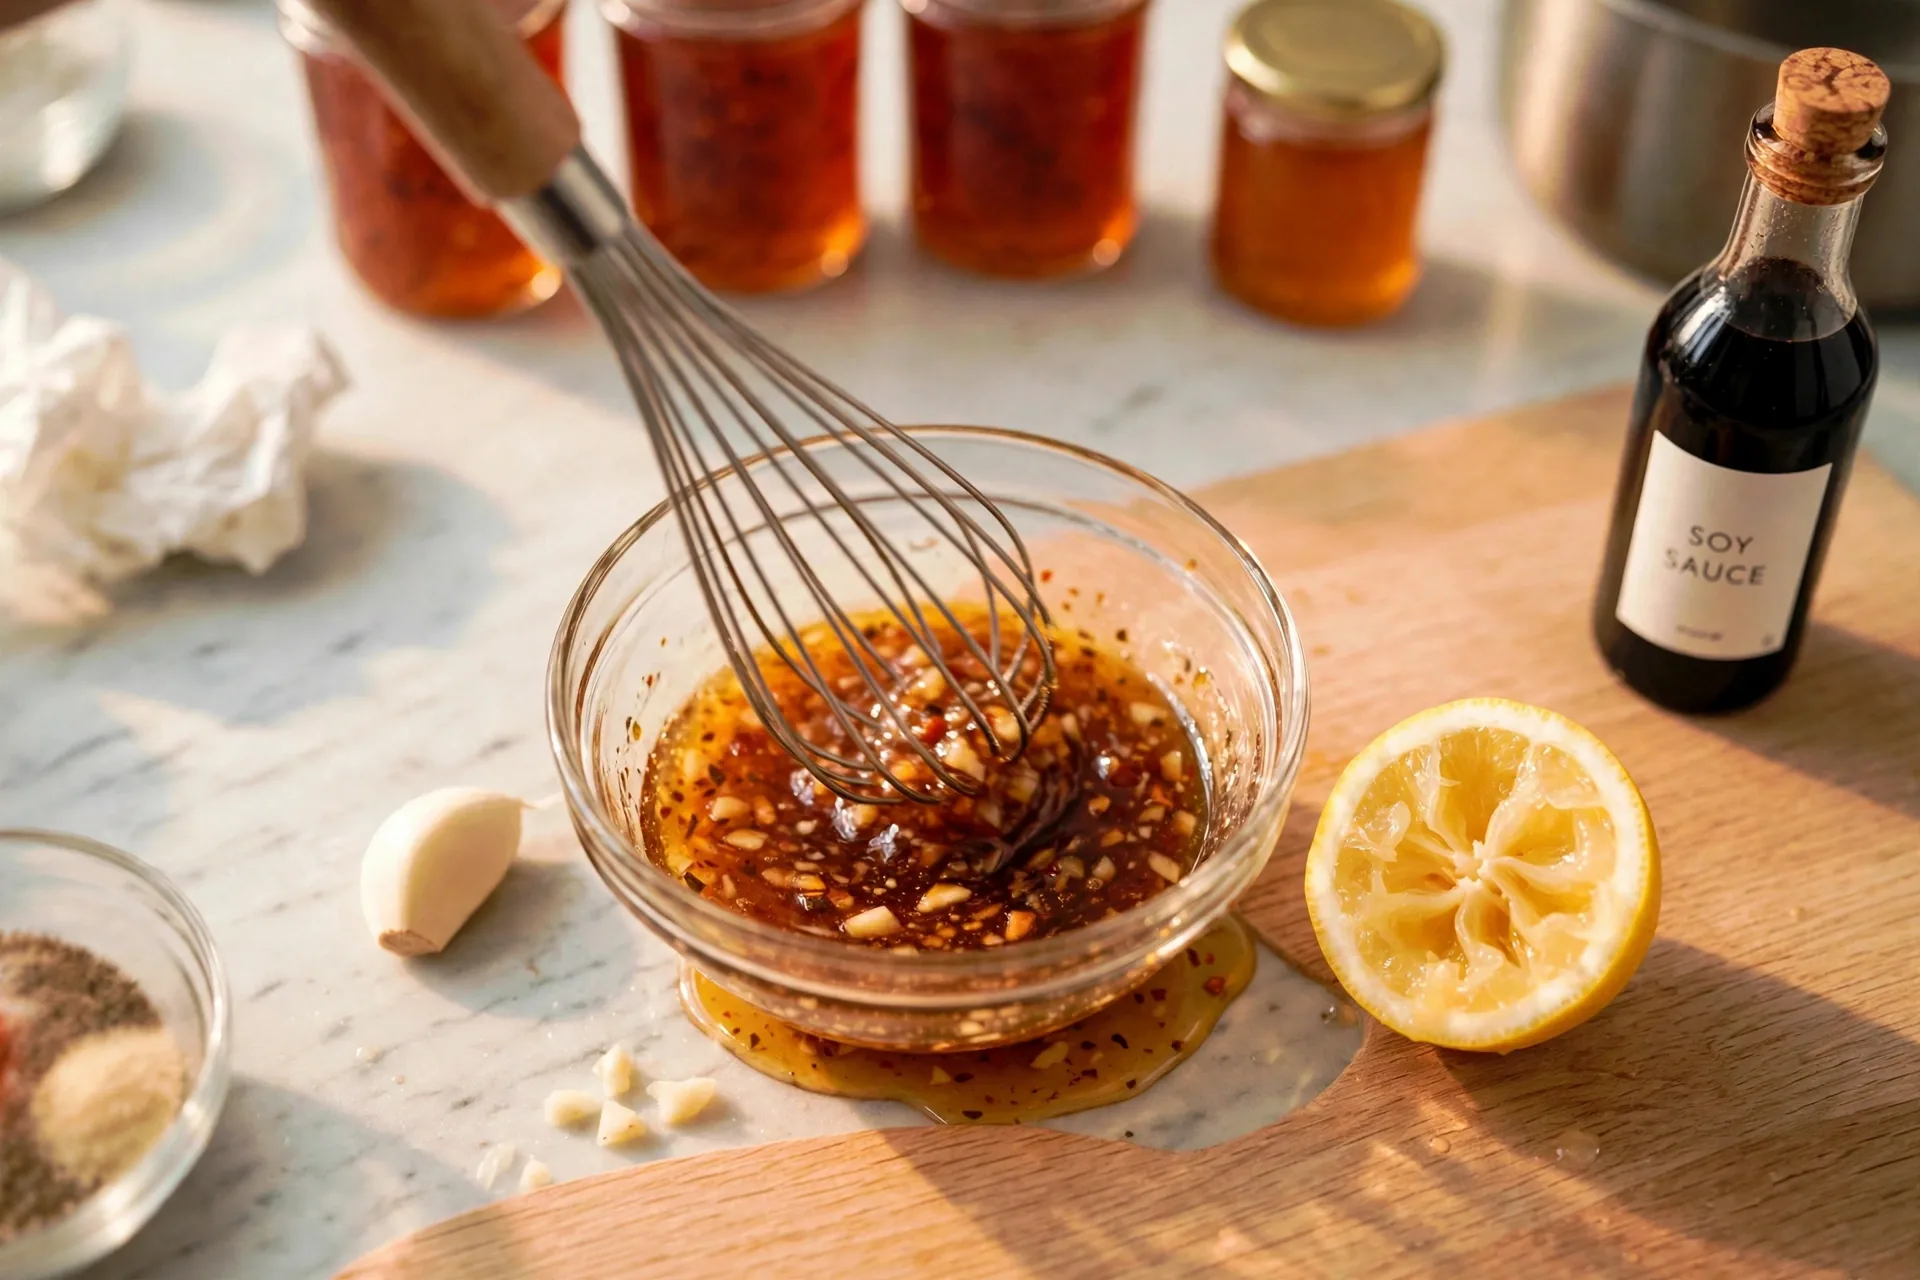
Whisk honey, soy sauce, minced garlic, and a squeeze of lemon in a small bowl into a glossy golden-brown glaze, with a garlic clove and a lemon half beside the bowl. Soy brings salt and depth, lemon brings sharpness, and garlic brings bite. Mixed while the thighs bake, the glaze is ready the moment the skin crisps, so the oven door stays open for seconds rather than minutes.
Glaze late, then broil
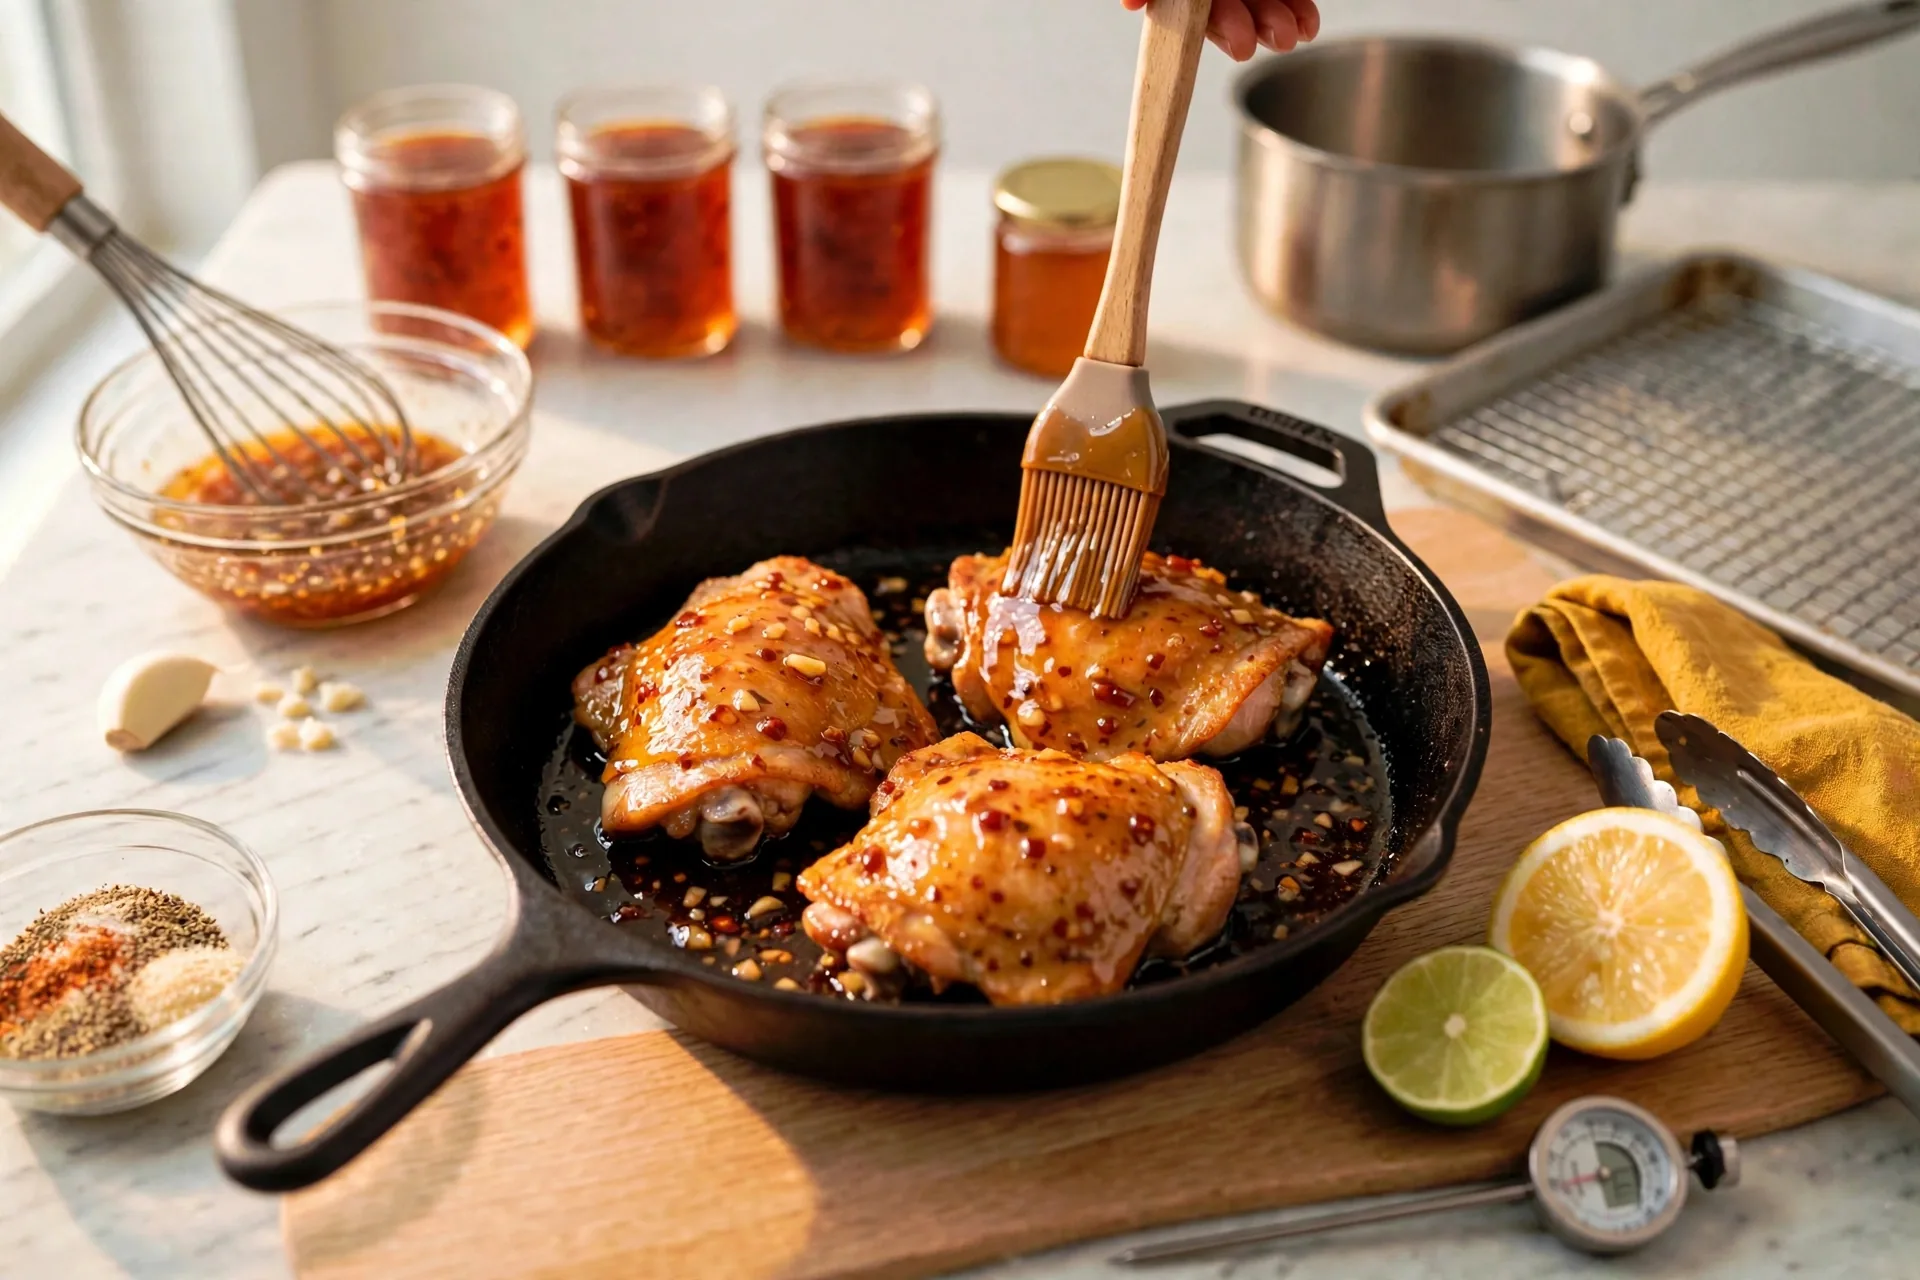
Brush the glossy honey glaze over the golden skin of the thighs in the skillet with a silicone brush. The glaze runs and pools in the pan, and the skin stays crisp underneath. Brush thin and even. A thick pool of glaze in one spot burns under the broiler while the rest stays pale.
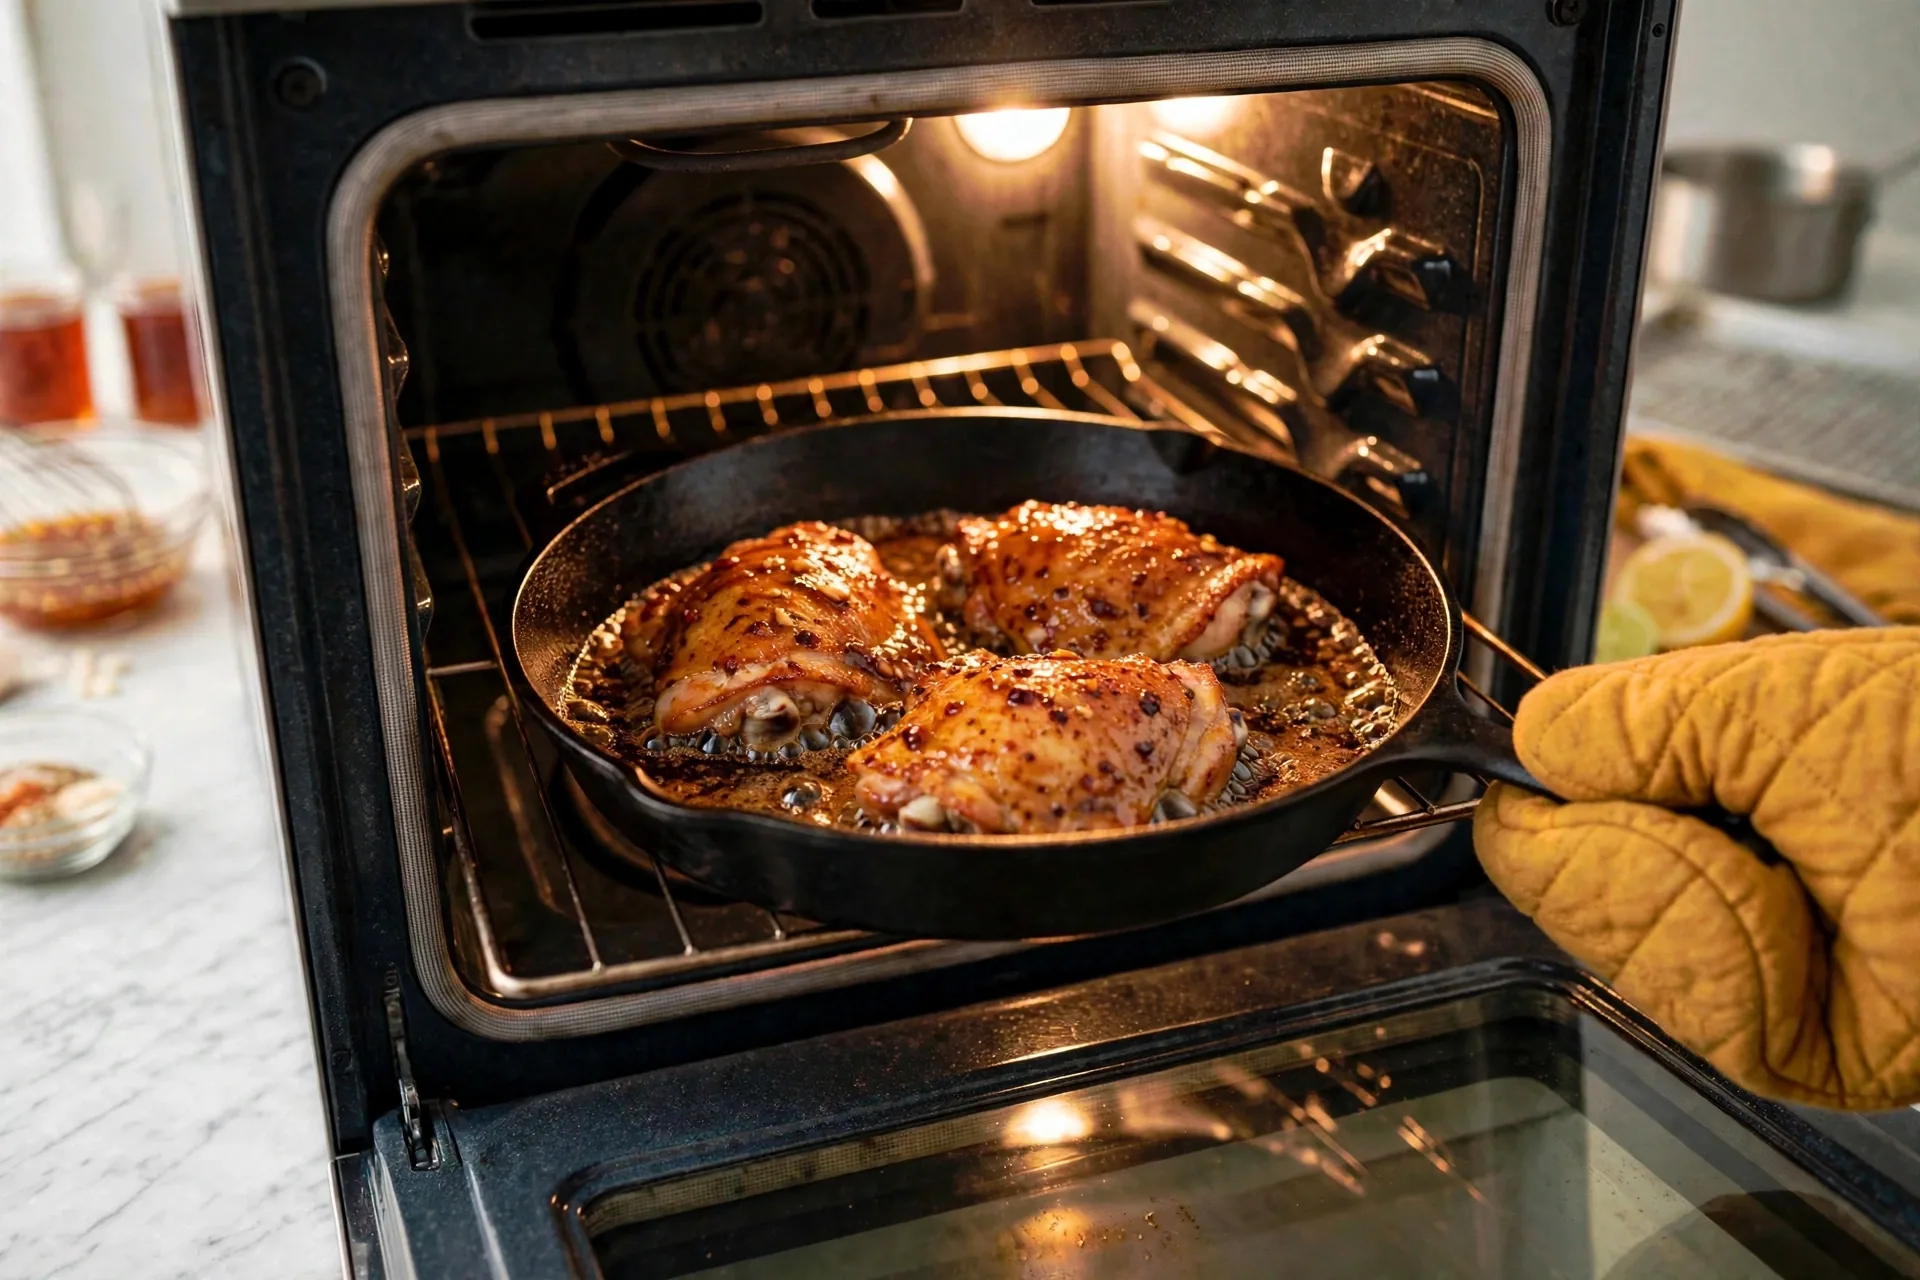
Slide the skillet under the oven broiler. The glaze bubbles and starts to caramelize, deep golden-brown with tiny dark spots, oven light glowing, a hand with an oven mitt at the edge of the frame. Watch it the whole time. Broilers vary a lot, and the gap between caramelized and burnt is short with honey in the glaze. Pull the pan as soon as the color turns deep golden.
Check the temperature and rest
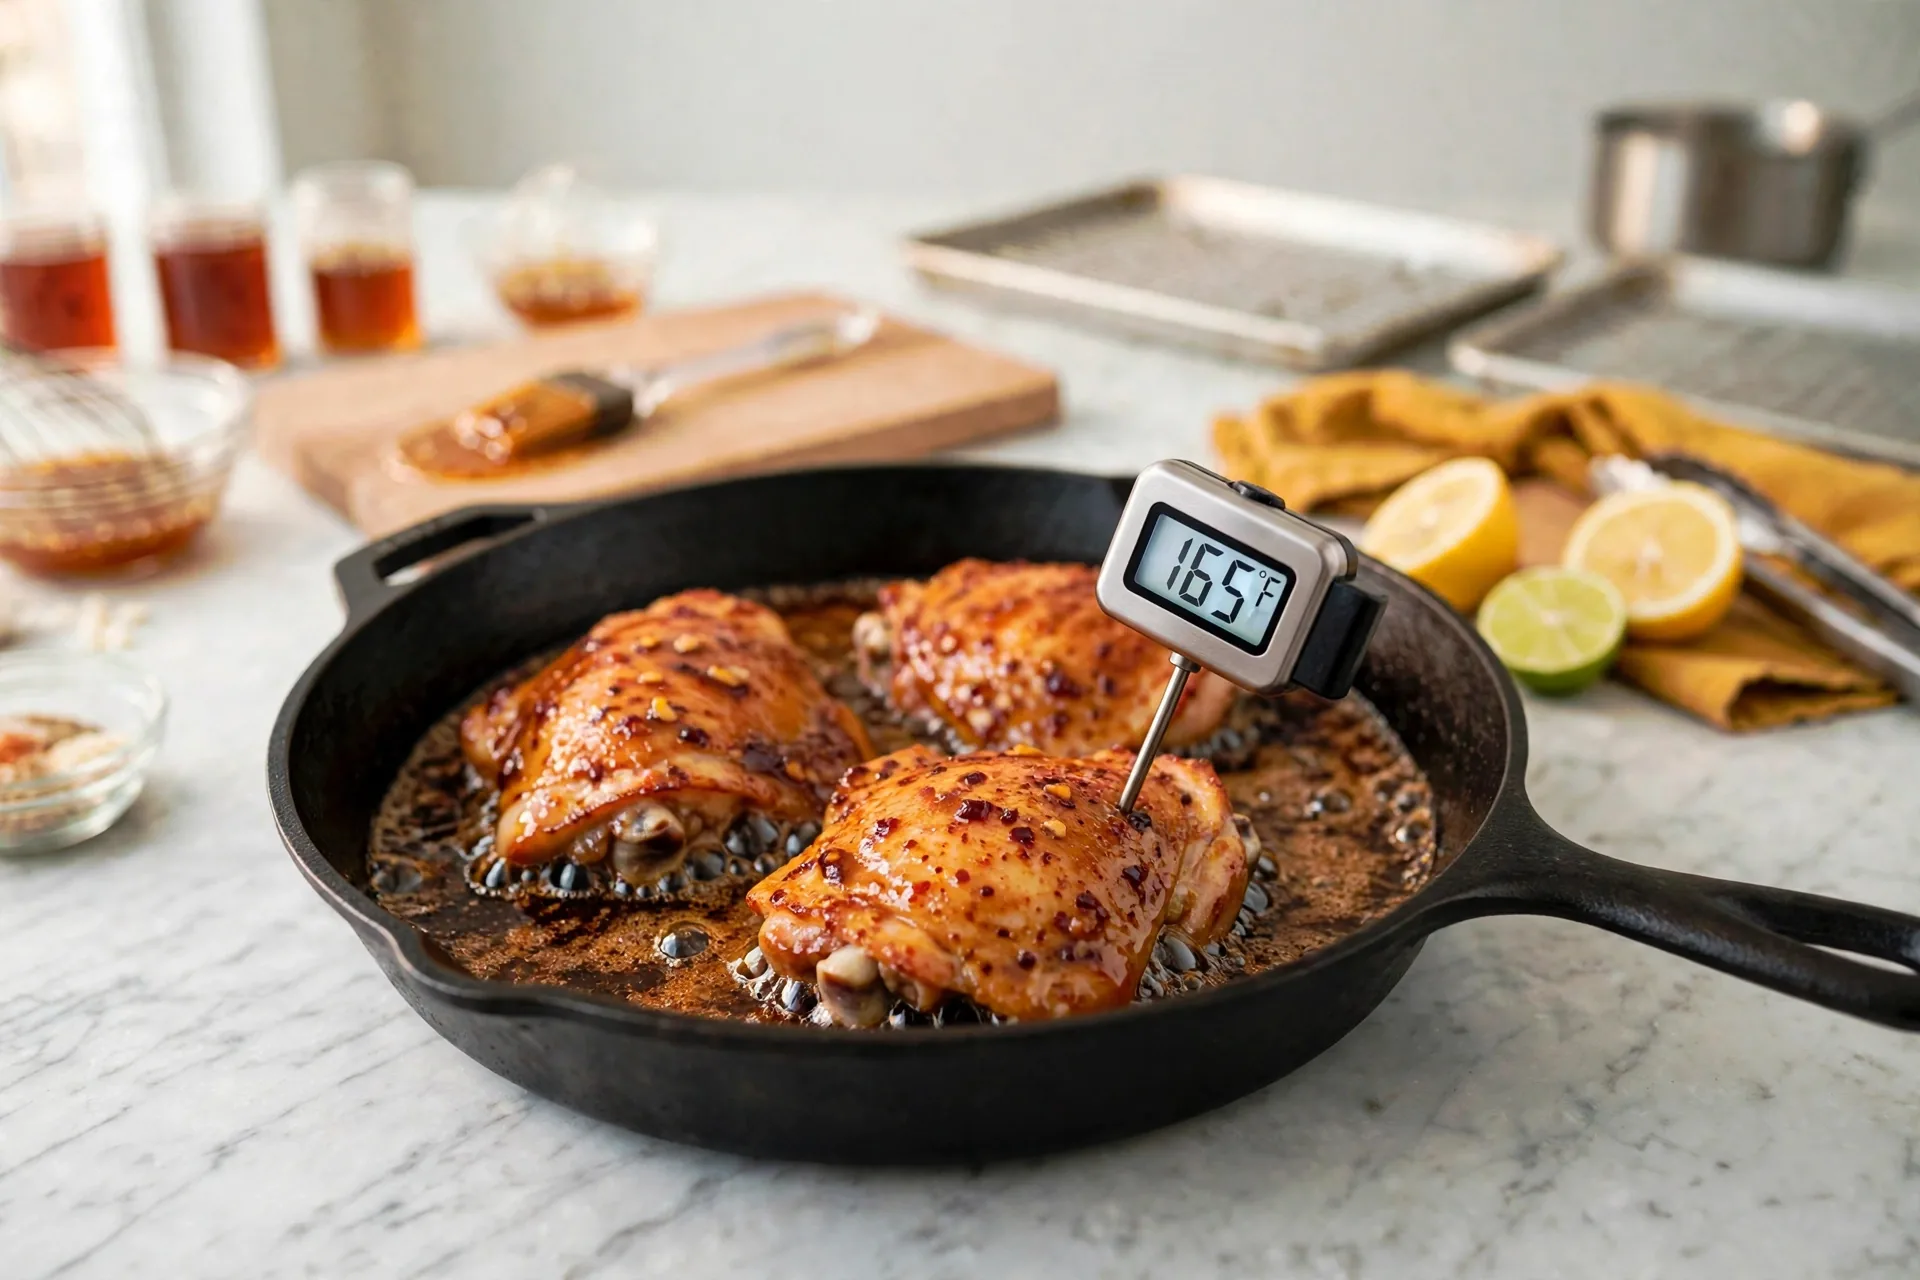
Push an instant-read thermometer into the thickest part of a thigh without touching the bone, and look for 165°F (74°C). The glaze is sticky and glossy at this point. Bone conducts heat differently from meat, so a probe resting on bone reads hotter than the meat around it and gives a false done reading. Aim for the thickest meat and keep clear of bone.
Spoon the bubbling glaze from the pan over the thighs after a short rest. The glaze drips over the crisp skin and shines. Resting lets the juices settle back into the meat instead of running out at the first cut, and the skin stays crisp while the pan glaze cools just enough to cling.
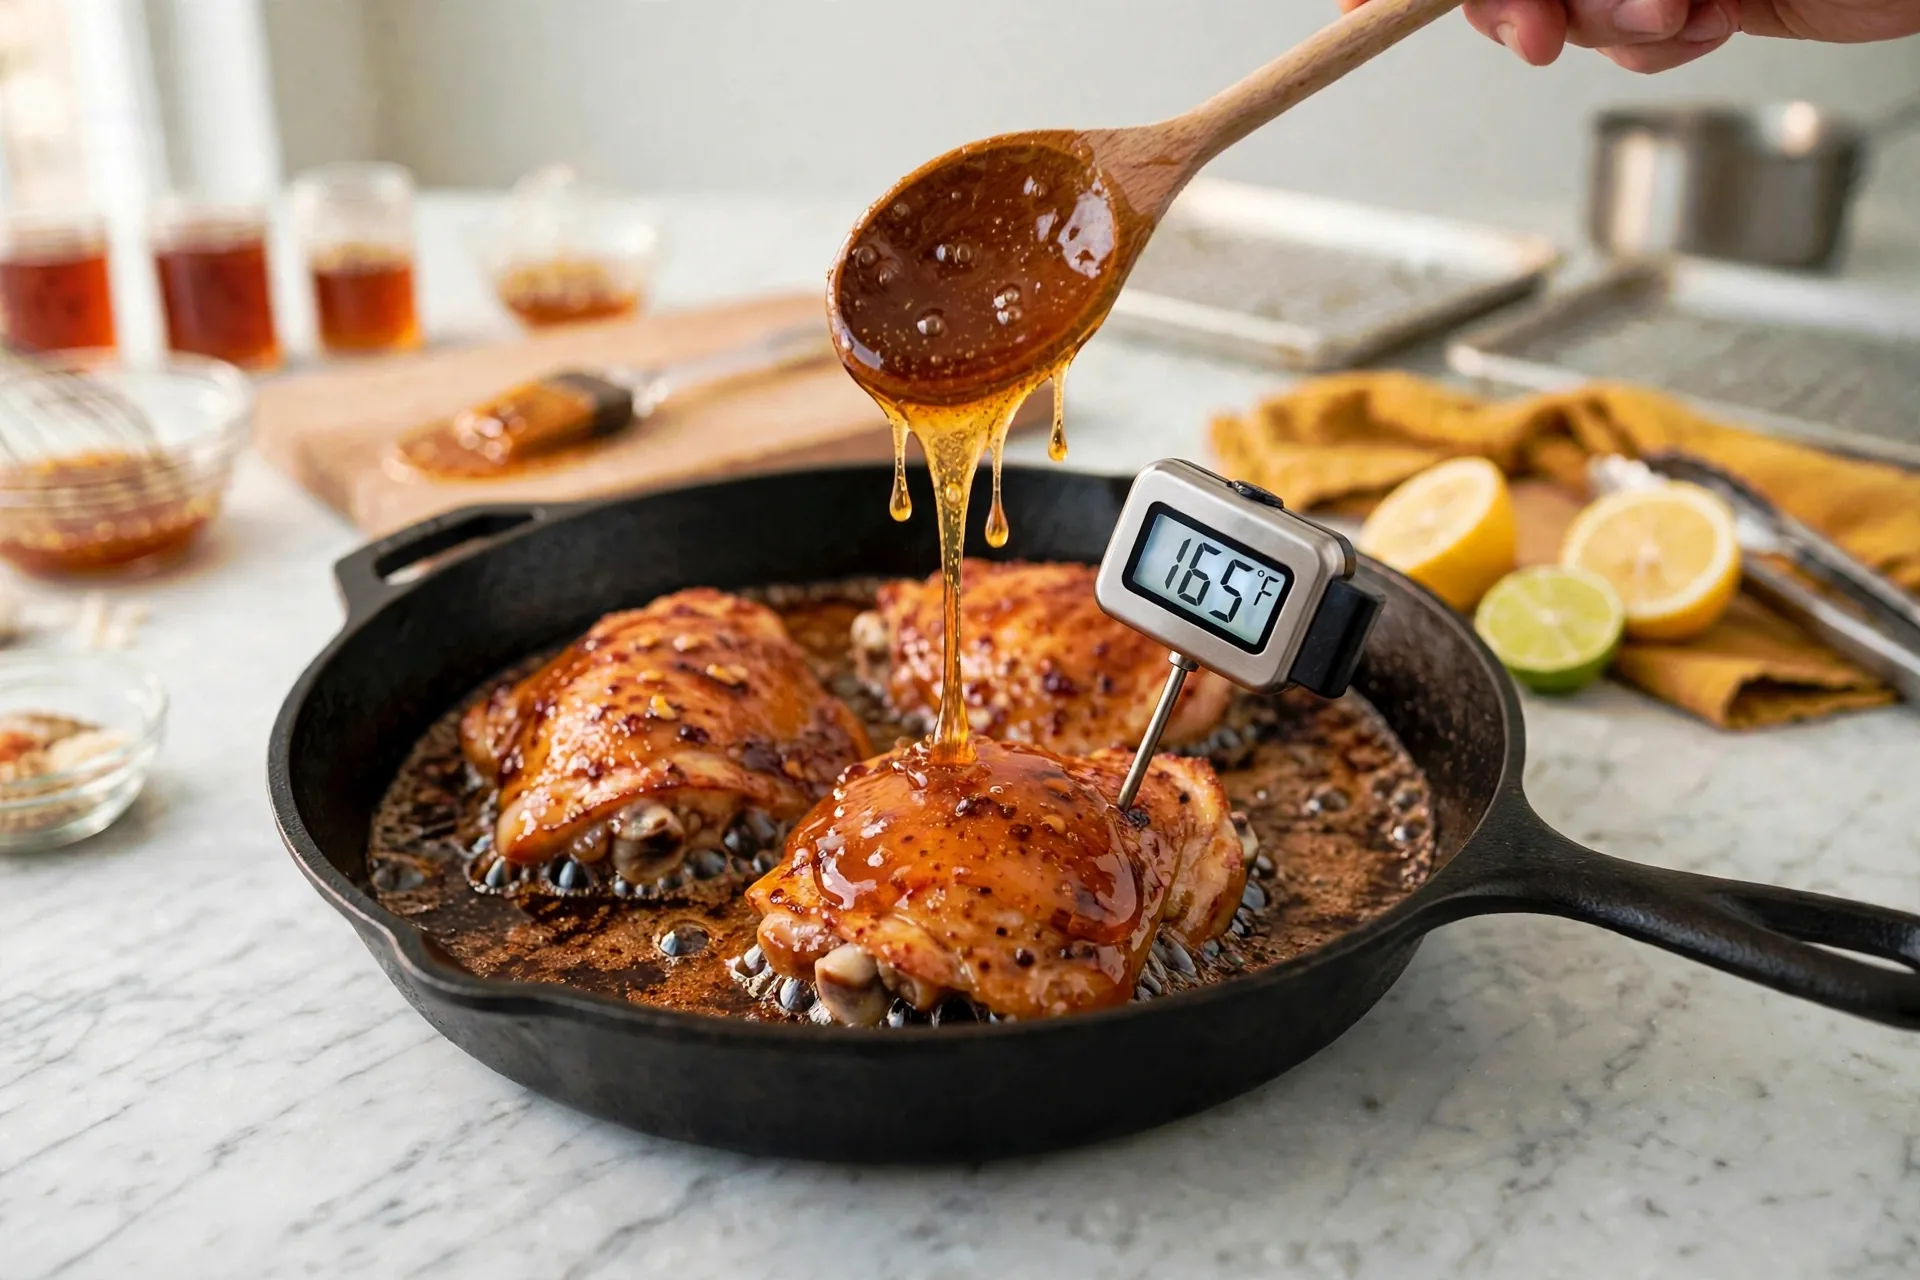
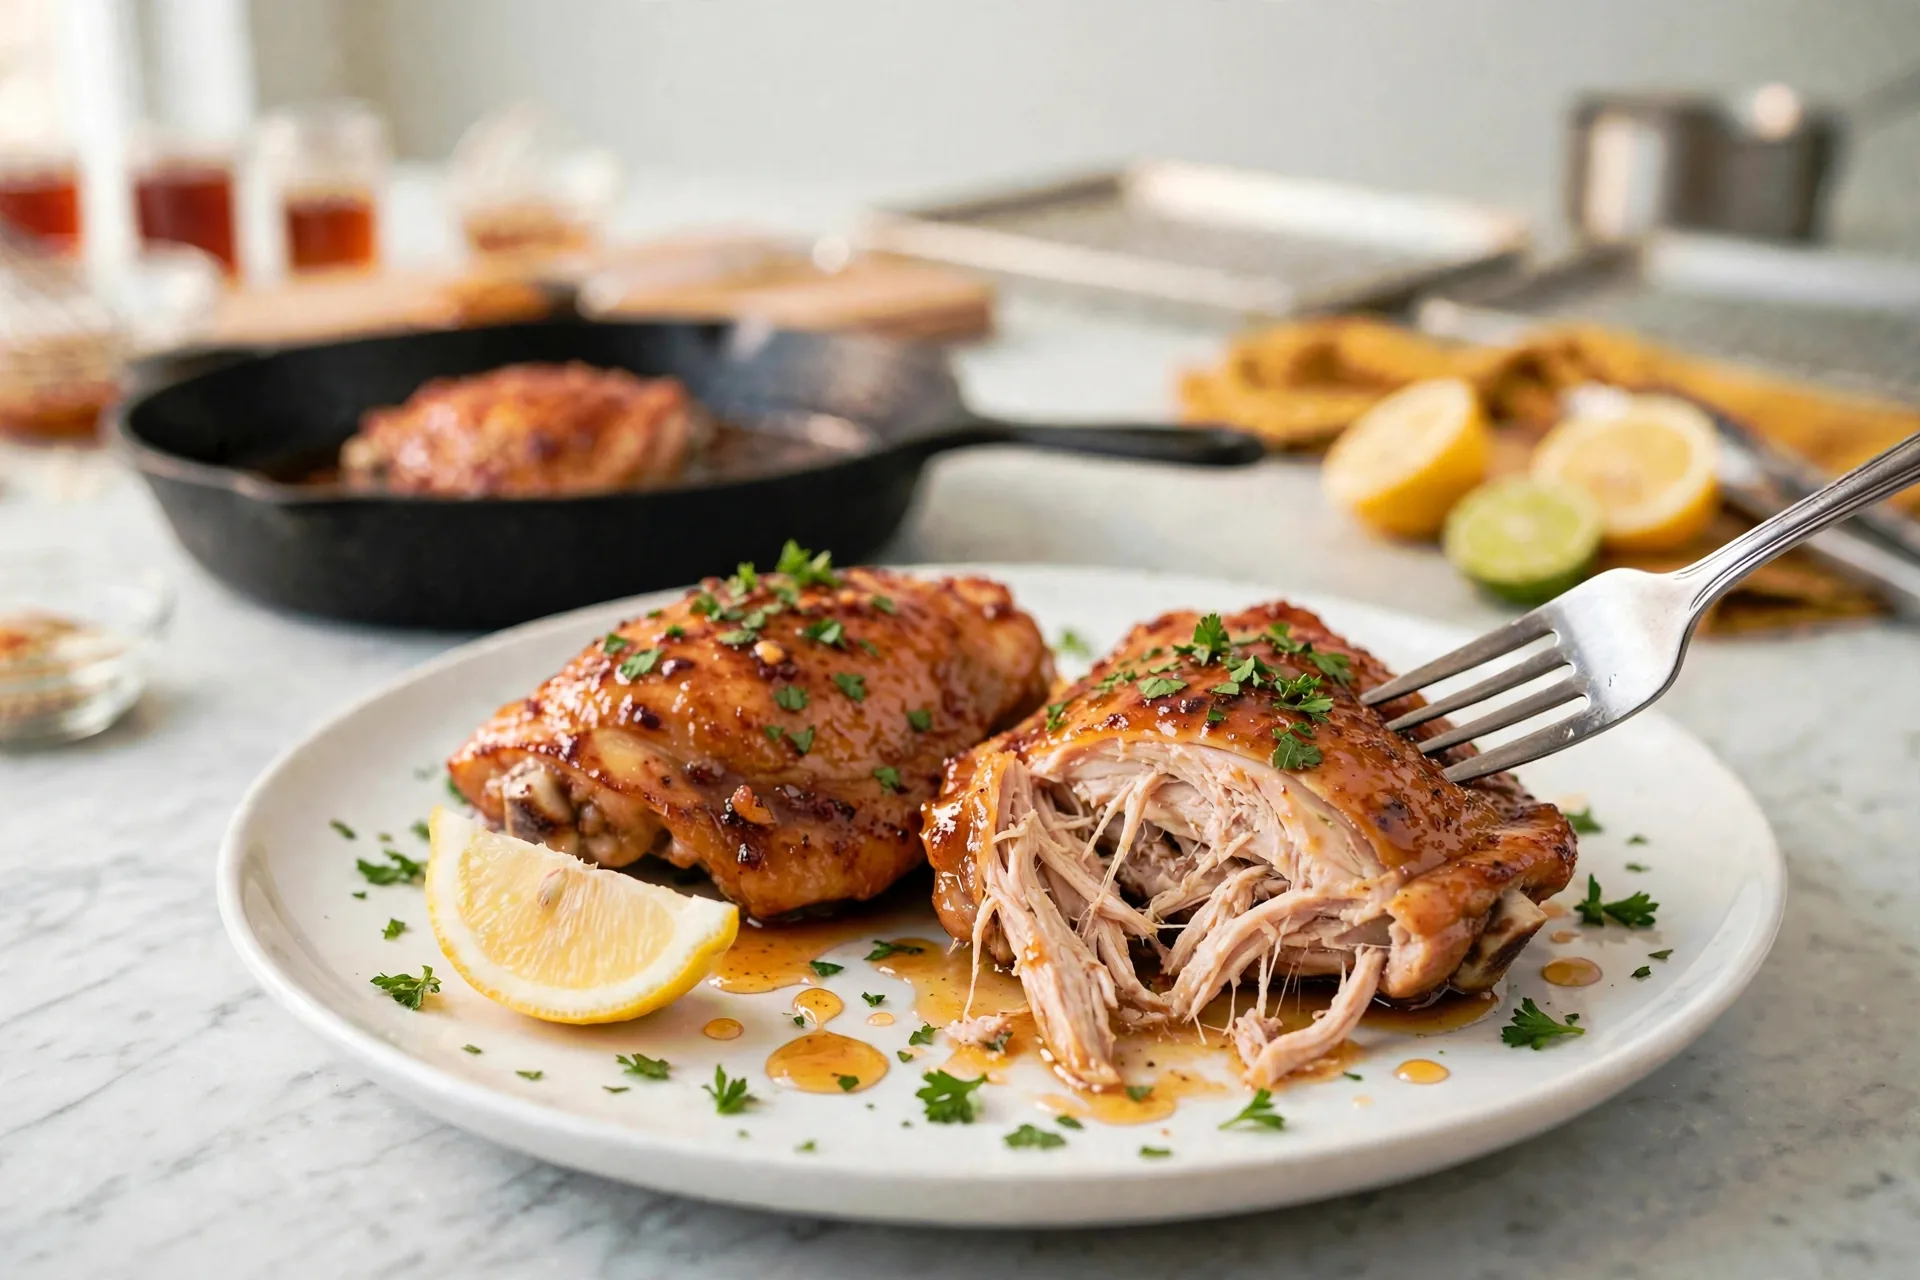
Plate two bone-in honey thighs, golden-brown and glossy, with a lemon wedge and a sprinkle of chopped parsley. A fork pulls meat from the bone to show the juicy interior, and the skillet sits softly blurred behind. Bone-in thighs carry more flavor than boneless cuts, and the bone also slows the cooking a little, which helps the meat stay juicy through a hot oven and a broiler finish.
Where this dish usually goes wrong: glazing before the first bake finishes. Honey in a hot oven browns, then blackens, and blackened honey tastes bitter across the whole pan. If the glaze darkens too fast under the broiler, pull the pan out, move the rack down one notch, and finish with a shorter second pass rather than leaving it in and hoping.
Honey Chicken Thighs
Ingredients
Method
- Pat thighs dry.
- Season skin-side up with salt, pepper, garlic powder, smoked paprika.
- Arrange skin-side up in a single layer in a cast-iron skillet.
- Bake at about 400°F until skin is golden-brown and crisp, no glaze yet.
- Whisk honey, soy sauce, minced garlic, lemon into a glaze.
- Brush glaze over crisp skin.
- Broil briefly, watched, until caramelized deep golden-brown.
- Check thickest part reads 165°F (74°C) without touching bone.
- Rest briefly, spoon pan glaze over, serve with lemon and parsley.
Notes
Recipe 5
Hot Honey Chicken Sliders
The set-aside tenders from Recipe 2, re-crisped, tossed in hot honey, and built on toasted slider buns with hot honey mayo and pickles. This recipe only works if Recipe 2 left half its tenders plain, so check the tray before you start. Honey-glazed tenders from the first round will not re-crisp cleanly, and the sliders need that crunch.
Split and toast the buns
Slice a tray of soft slider buns still joined together in half horizontally with a bread knife on the wooden board, tops and bottoms separated, the set-aside plain tenders visible on the rack in the background. Cutting the joined tray in one pass keeps the tops and bottoms matched, which makes stacking later much easier.
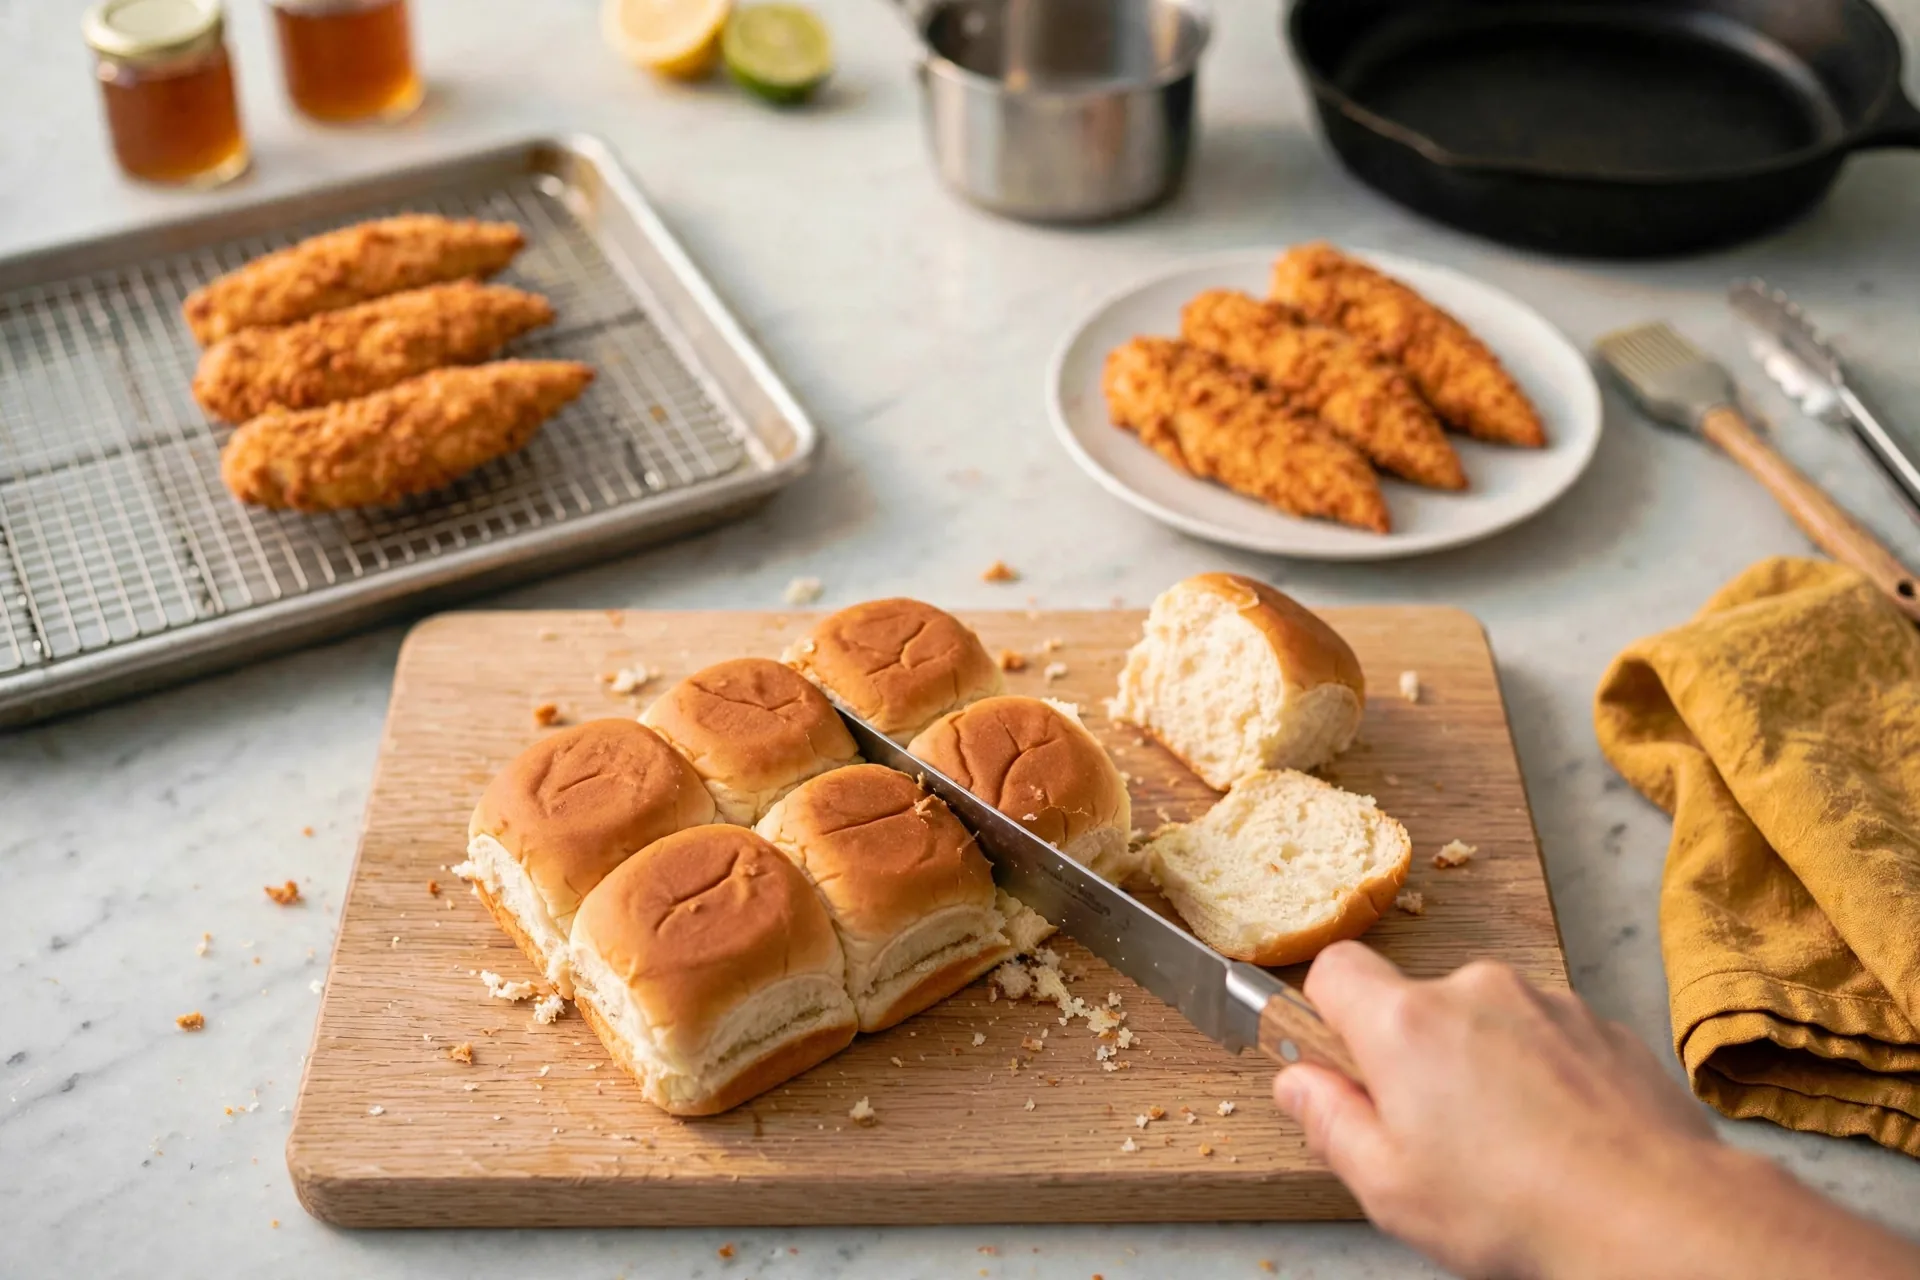
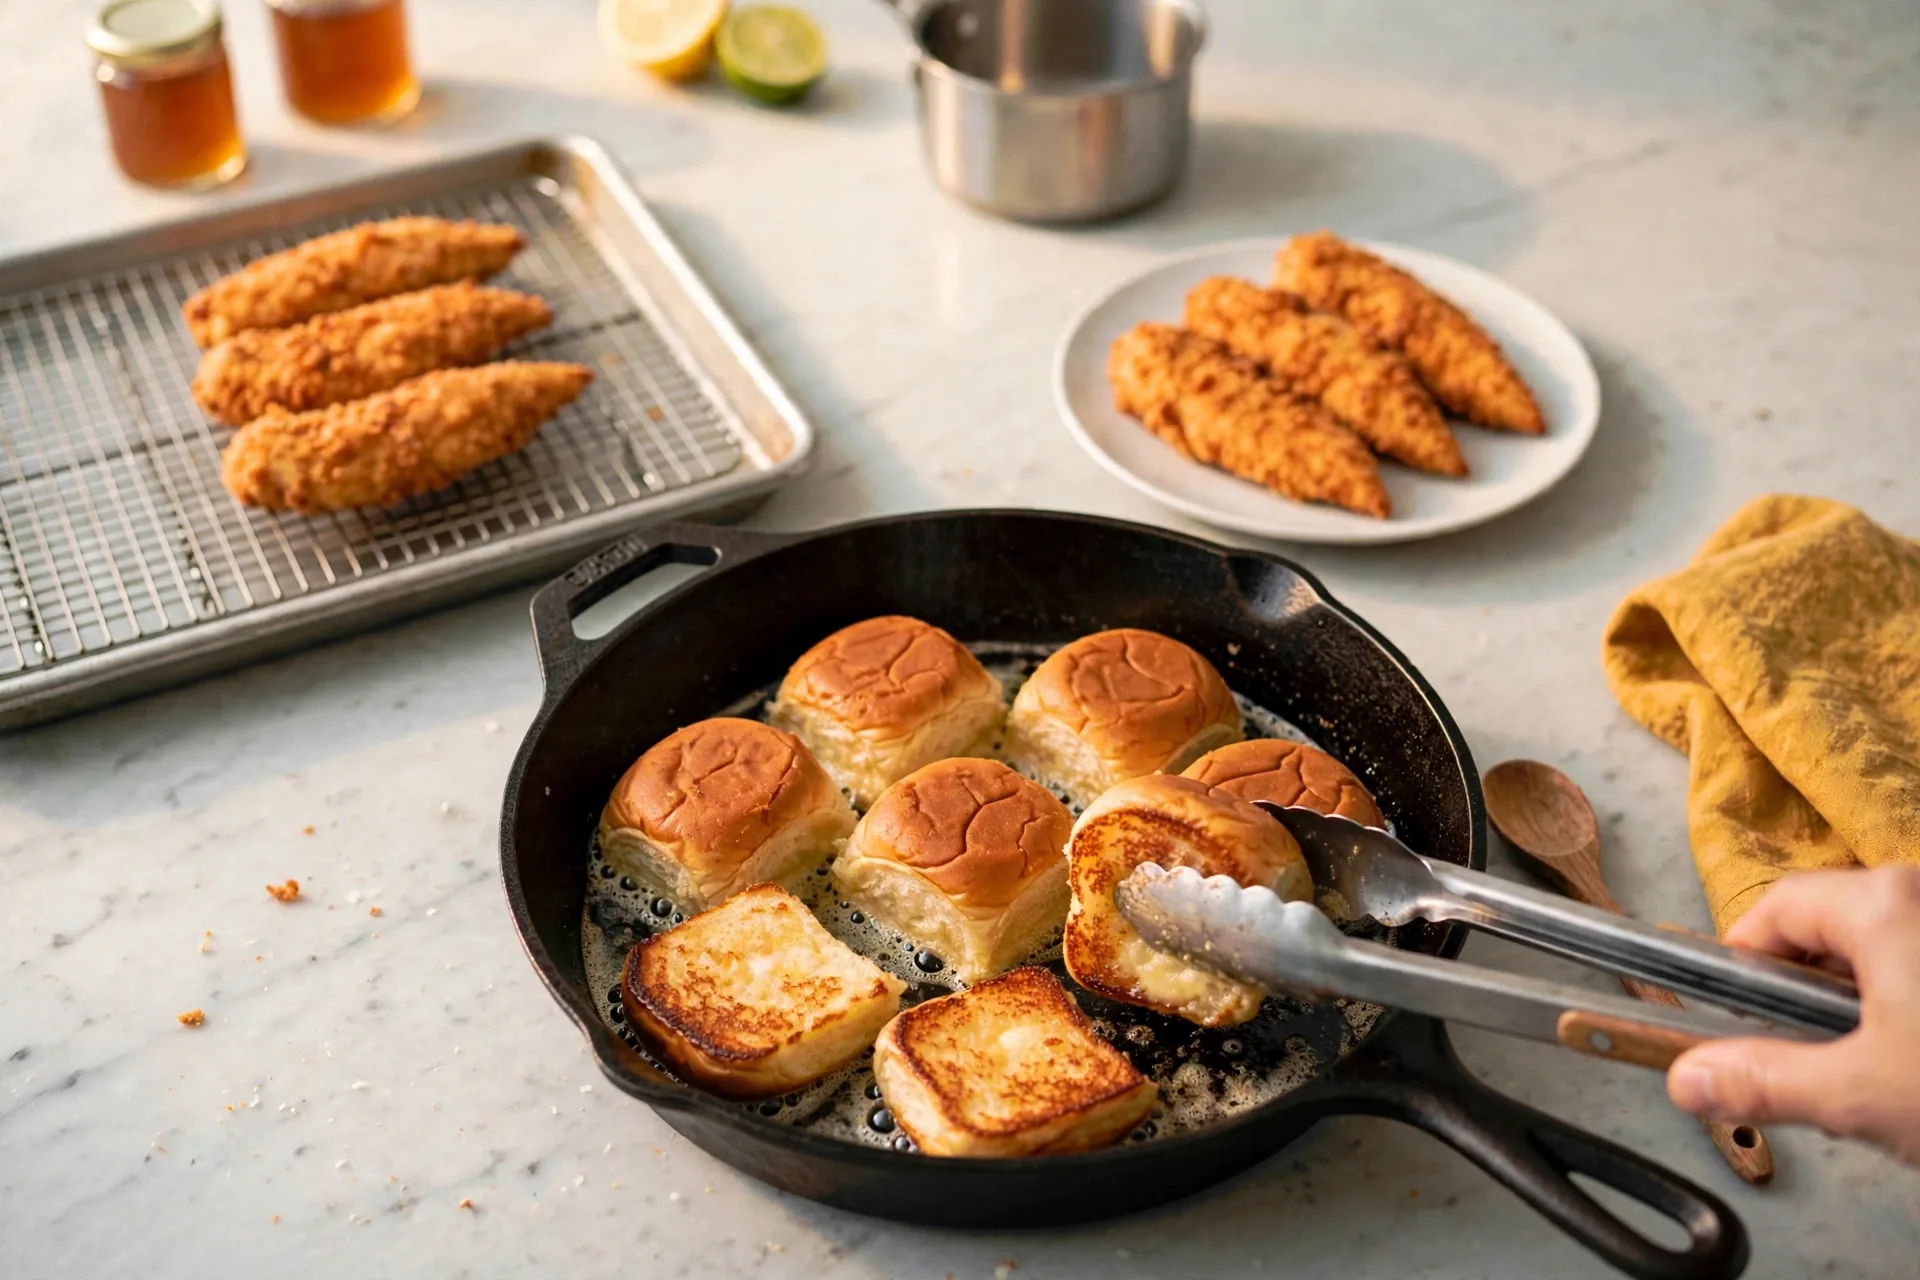
Toast the bun halves cut-side down in the hot skillet with melted butter. Lift one corner with tongs to show a light golden-brown toasted surface. Butter glistens on it. Toasting does two jobs. It adds flavor on its own, and it seals the cut surface so the mayo and honey do not soak straight through and collapse the bun.
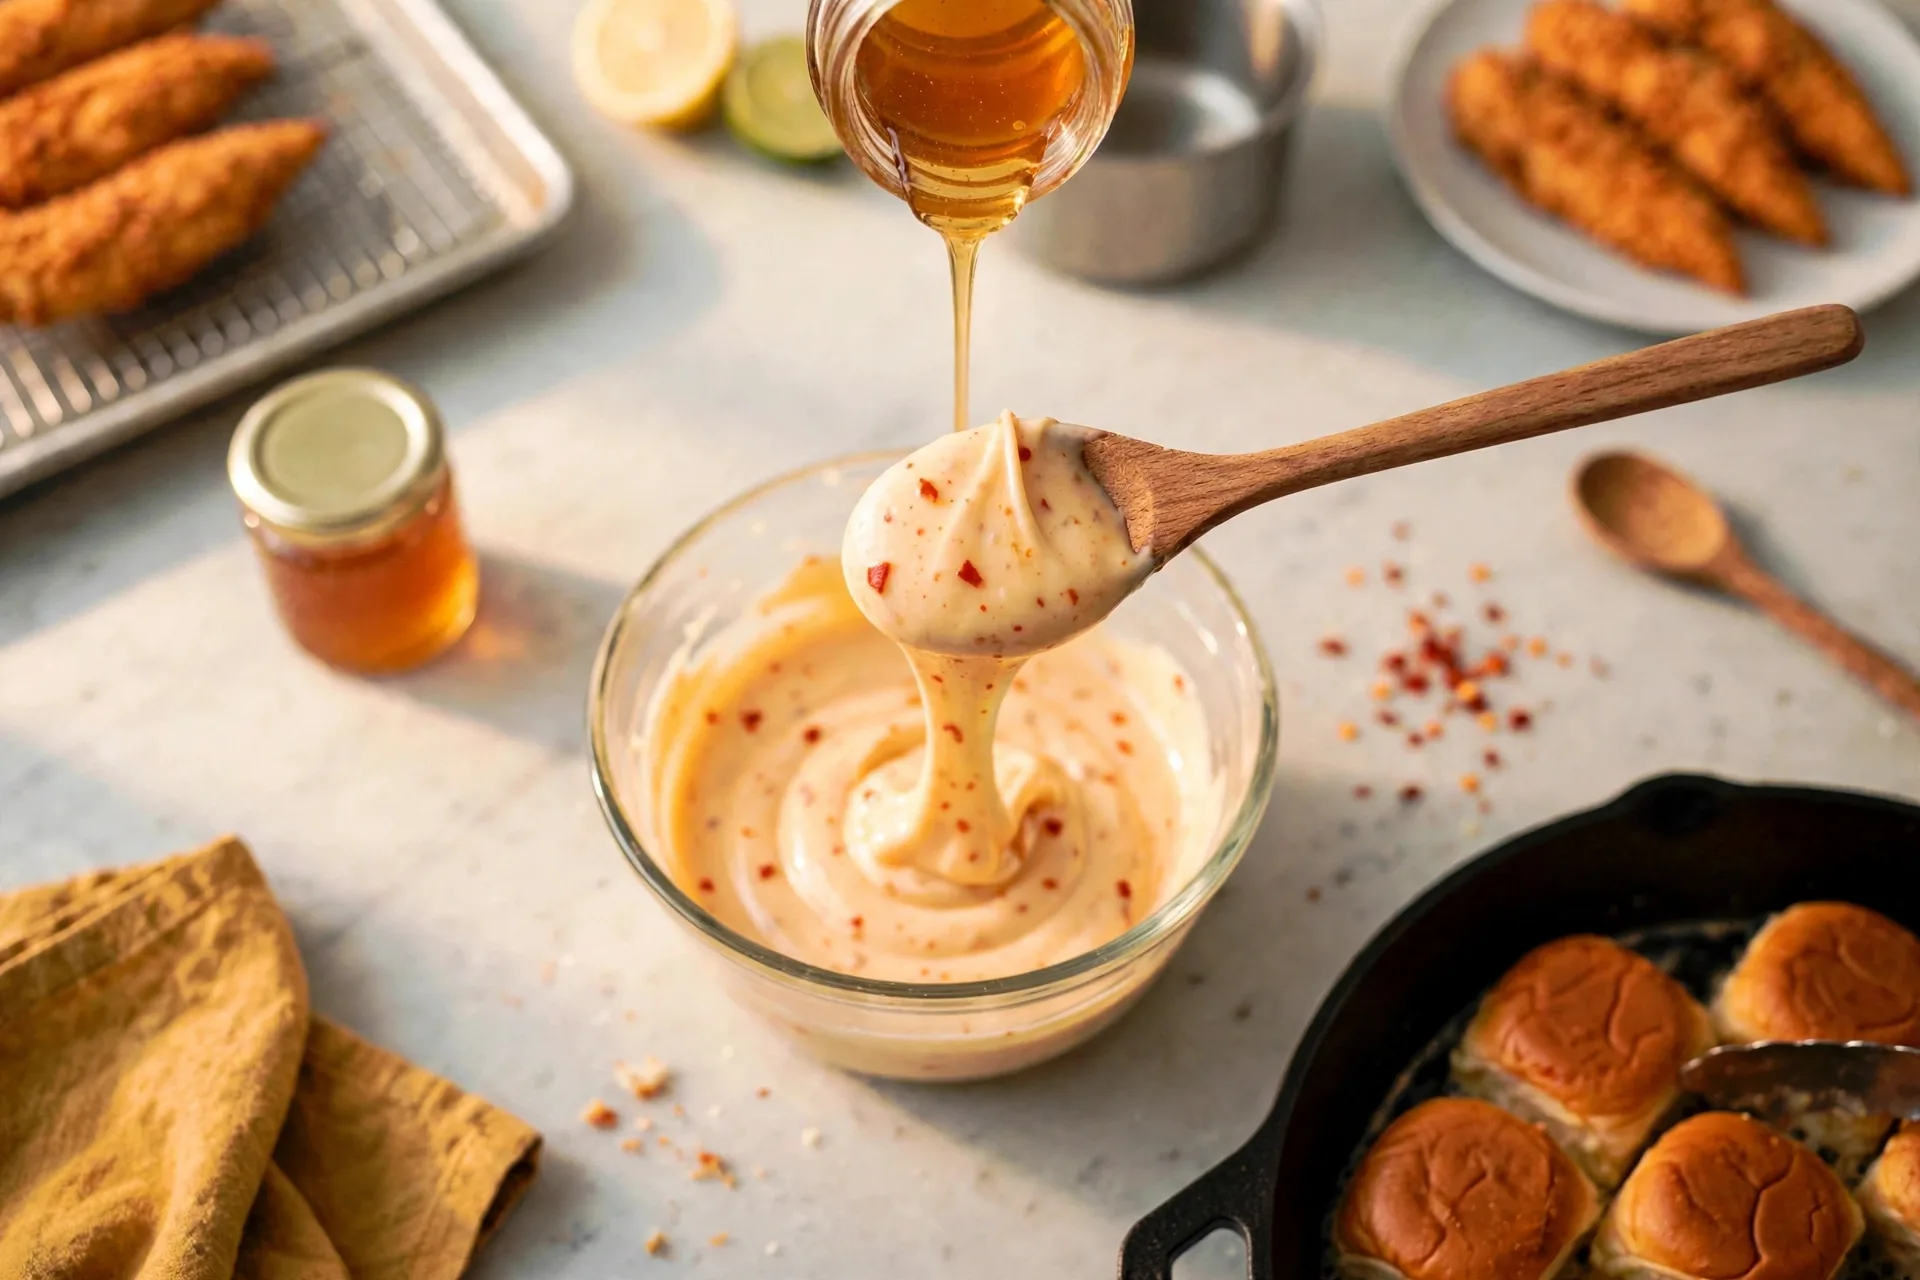
Mix the mayo and re-crisp the tenders
Stir mayonnaise and a drizzle of hot honey from the jar together in a small glass bowl into a pale orange, glossy sauce with a few chili flakes, a spoon lifting a ribbon of it. The mayo carries the heat gently, so the sliders taste warm rather than sharp, and the sauce doubles as a moisture barrier between bun and pickle.
Put the set-aside tenders back on the wire rack in a hot oven or air fryer basket until crisp, golden, and steaming, oven mitts beside the rack. The crust looks dry and crunchy at this point. Re-crisping matters more than reheating here. A tender warmed in a microwave turns soft and stays soft, and no amount of honey fixes a soggy crust afterward.
Toss and build
Toss the hot tenders in a glass bowl with hot honey. The amber honey coats the crisp crust, and tongs lift a glossy tender with chili flakes clinging to it. Toss right before building. A tender tossed too early sits and softens while the buns wait, and the crunch is the reason these sliders work.
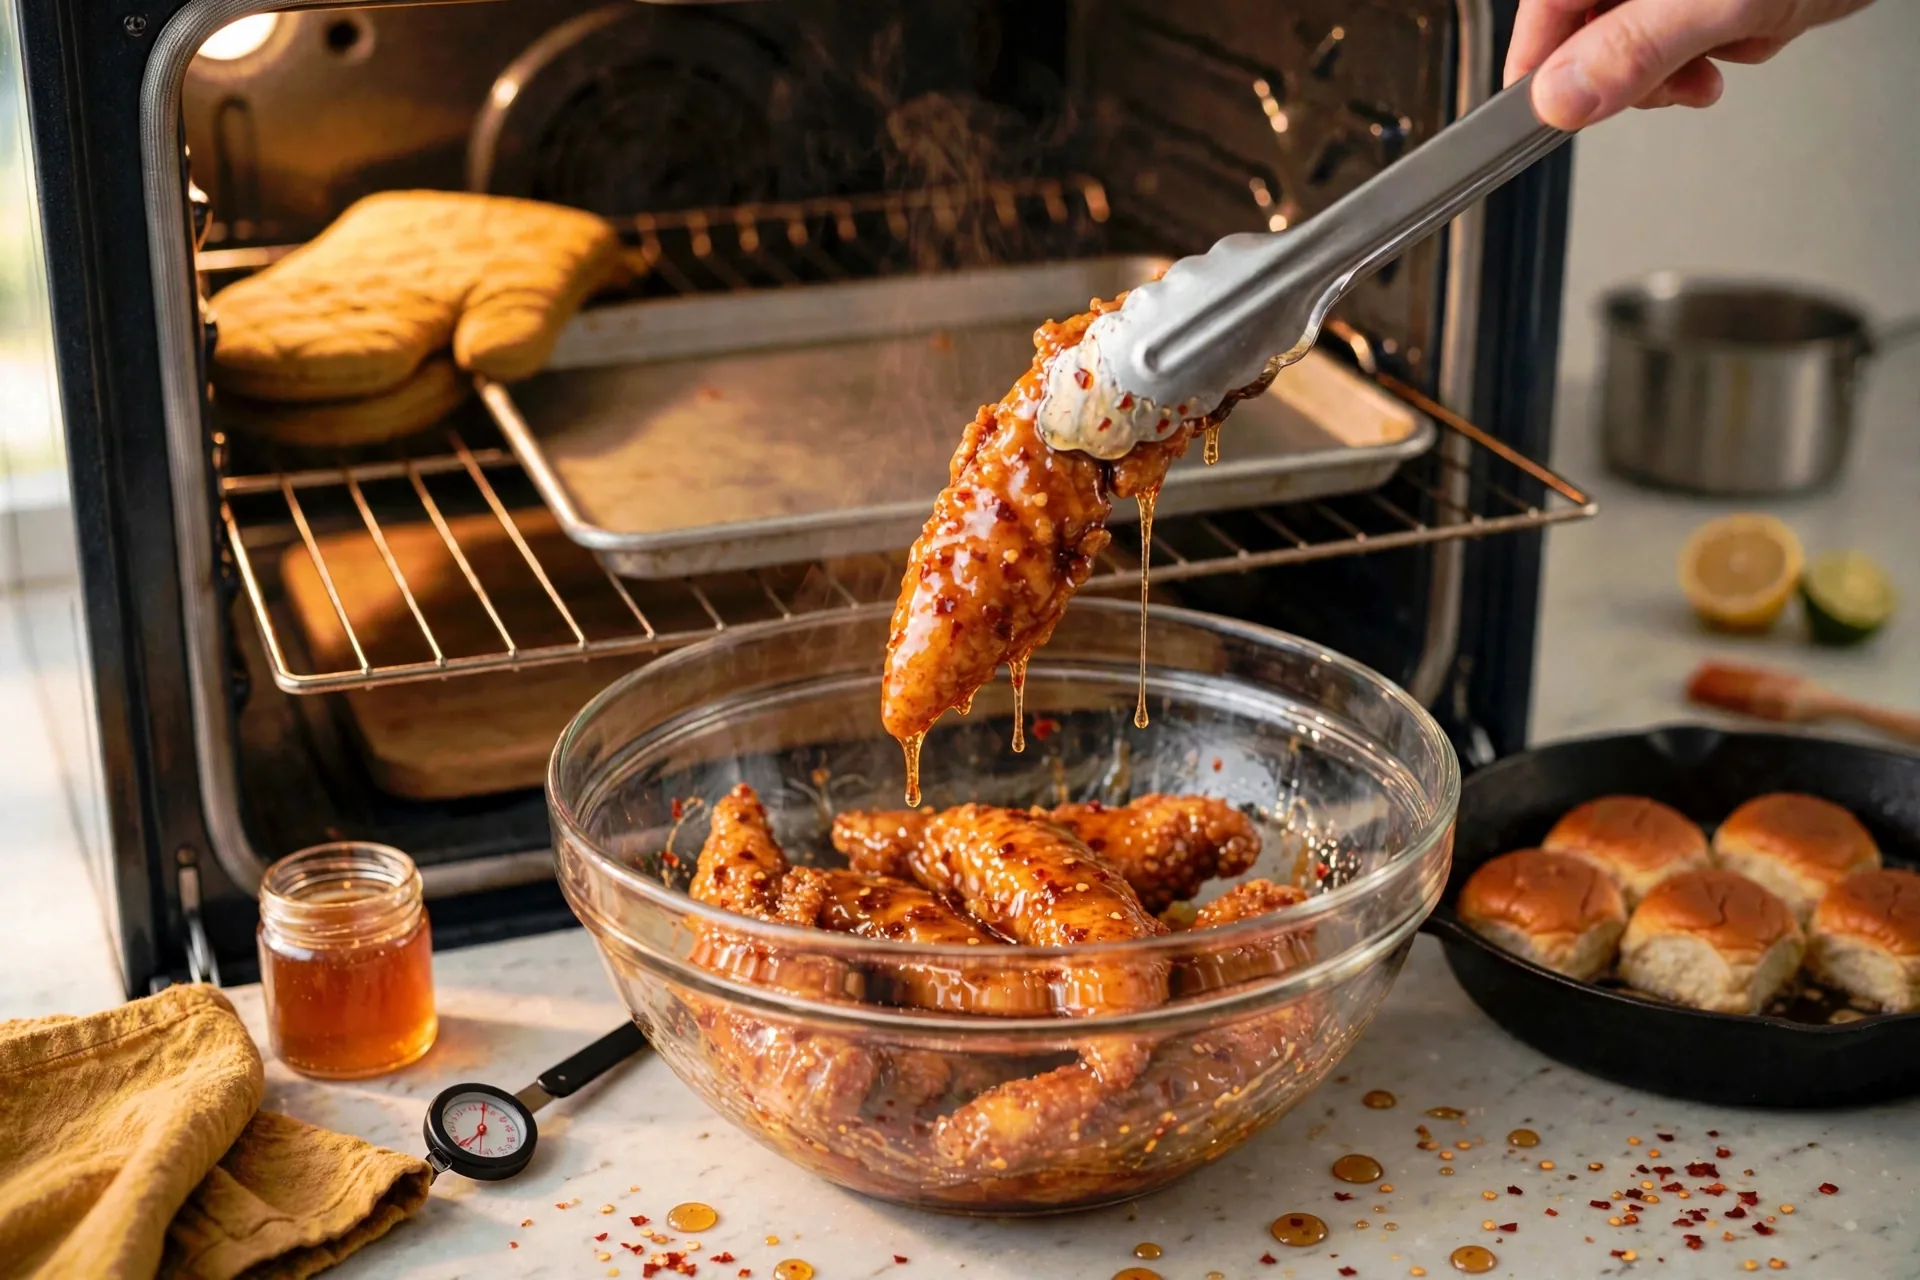
Line the toasted bottom buns up on the board, spread each with hot honey mayo, and top with two dill pickle chips. A spoon spreads the last of the mayo. Pickles go under the tender, not on top of it. Underneath, their brine soaks into the mayo rather than sliding off the honey glaze, and each bite gets pickle, sauce, and chicken together.
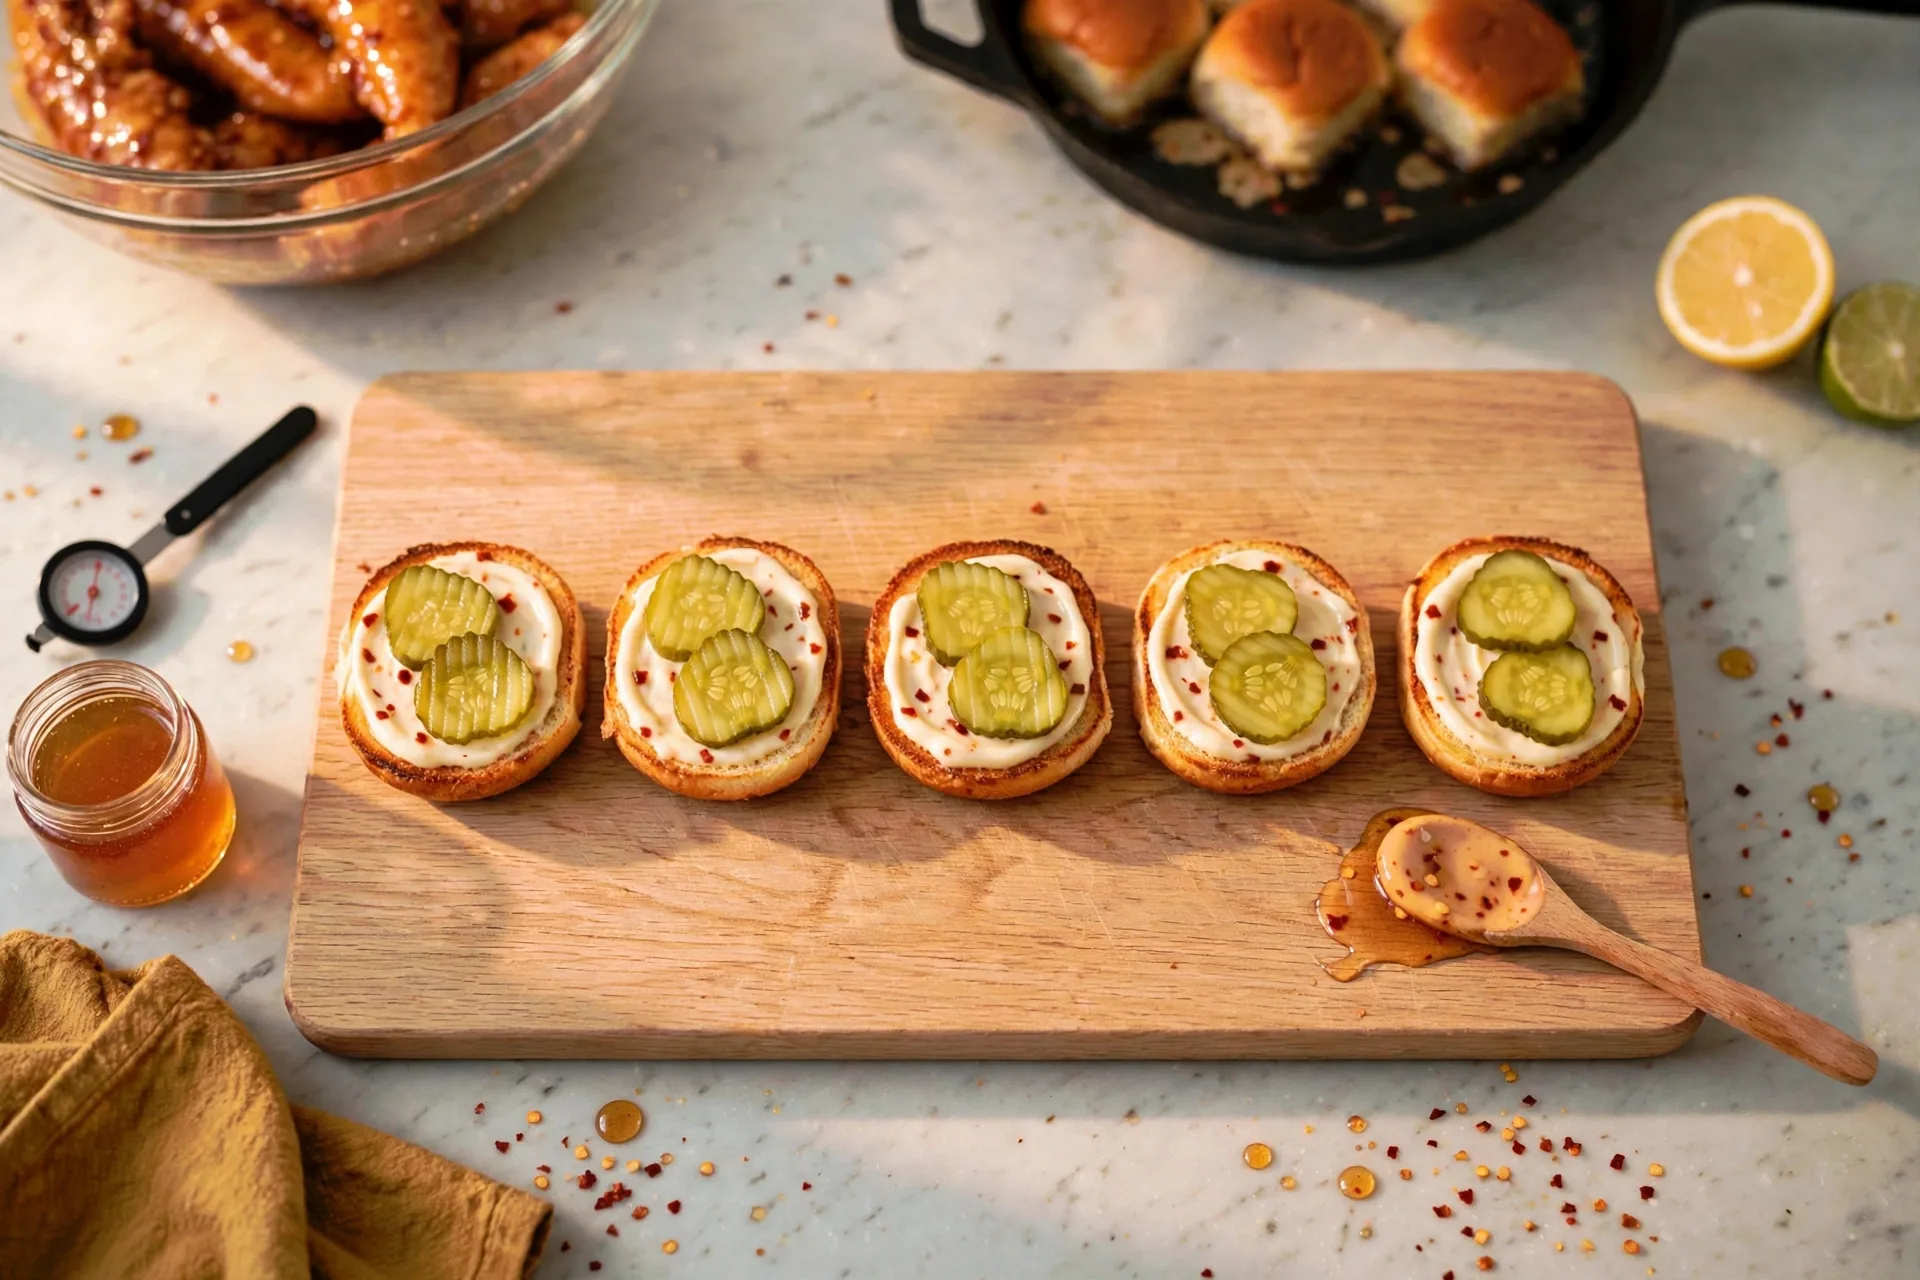
Place a hot-honey tender on each bun bottom over the pickles with tongs. The tenders sit slightly larger than the buns, glossy and golden. A tender wider than its bun looks generous and eats well, since the overhang stays crisp instead of getting trapped and steaming under a bun top.
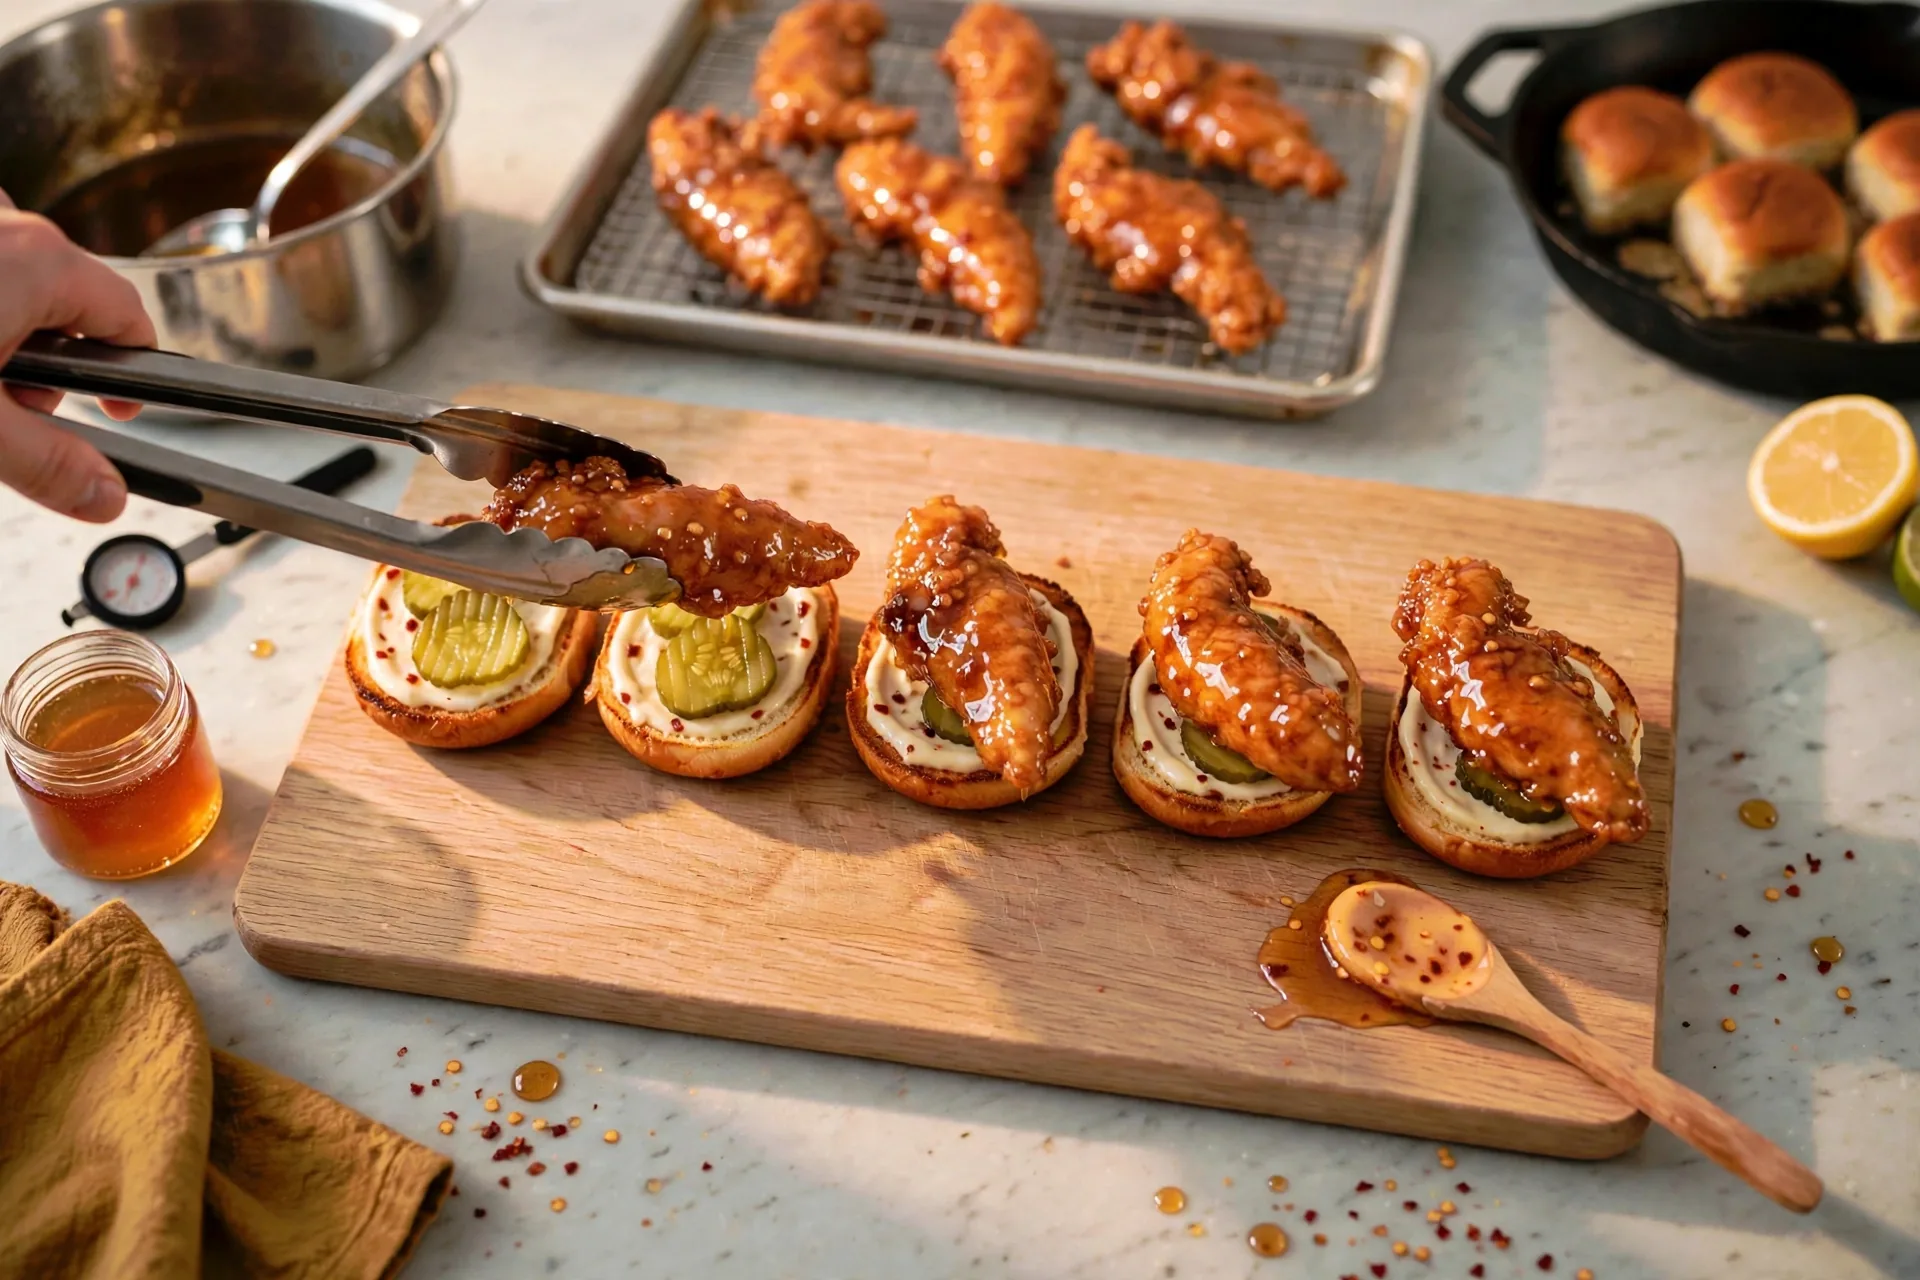
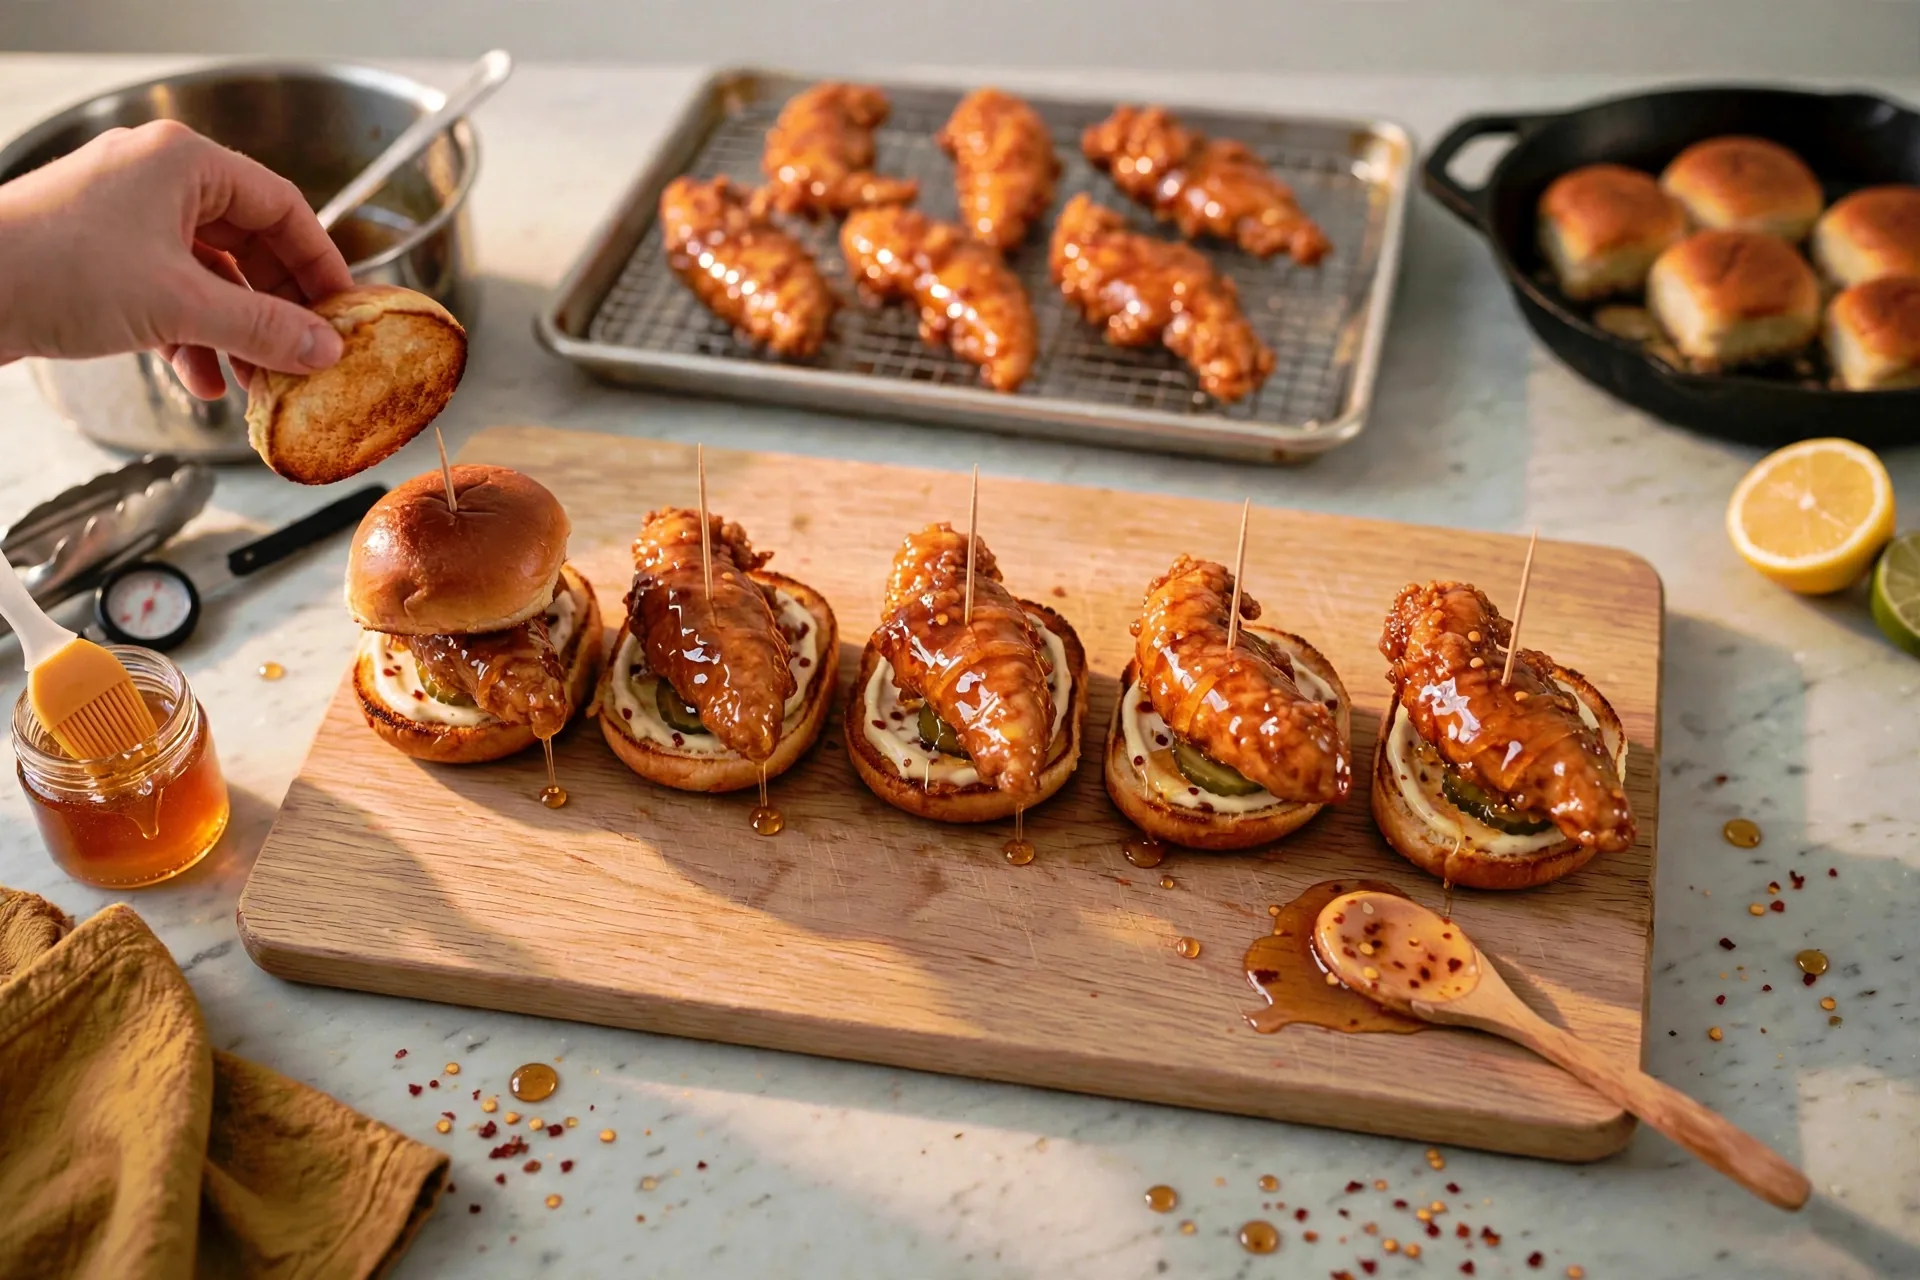
Drizzle hot honey over the tenders on the buns, then place a toasted bun top over one. A row of built sliders with toothpicks stands in the center of the board. Toothpicks hold the stack steady for serving, and one last drizzle on top means the heat hits first, before the mayo cools it down.
Hold a slider in a hand, with a bite taken to show the crisp tender, pickles, and glossy mayo, a board of more sliders softly blurred behind, honey dripping. The bite shot tells the truth about the build: layers in order, crust still crisp, sauce where it belongs.
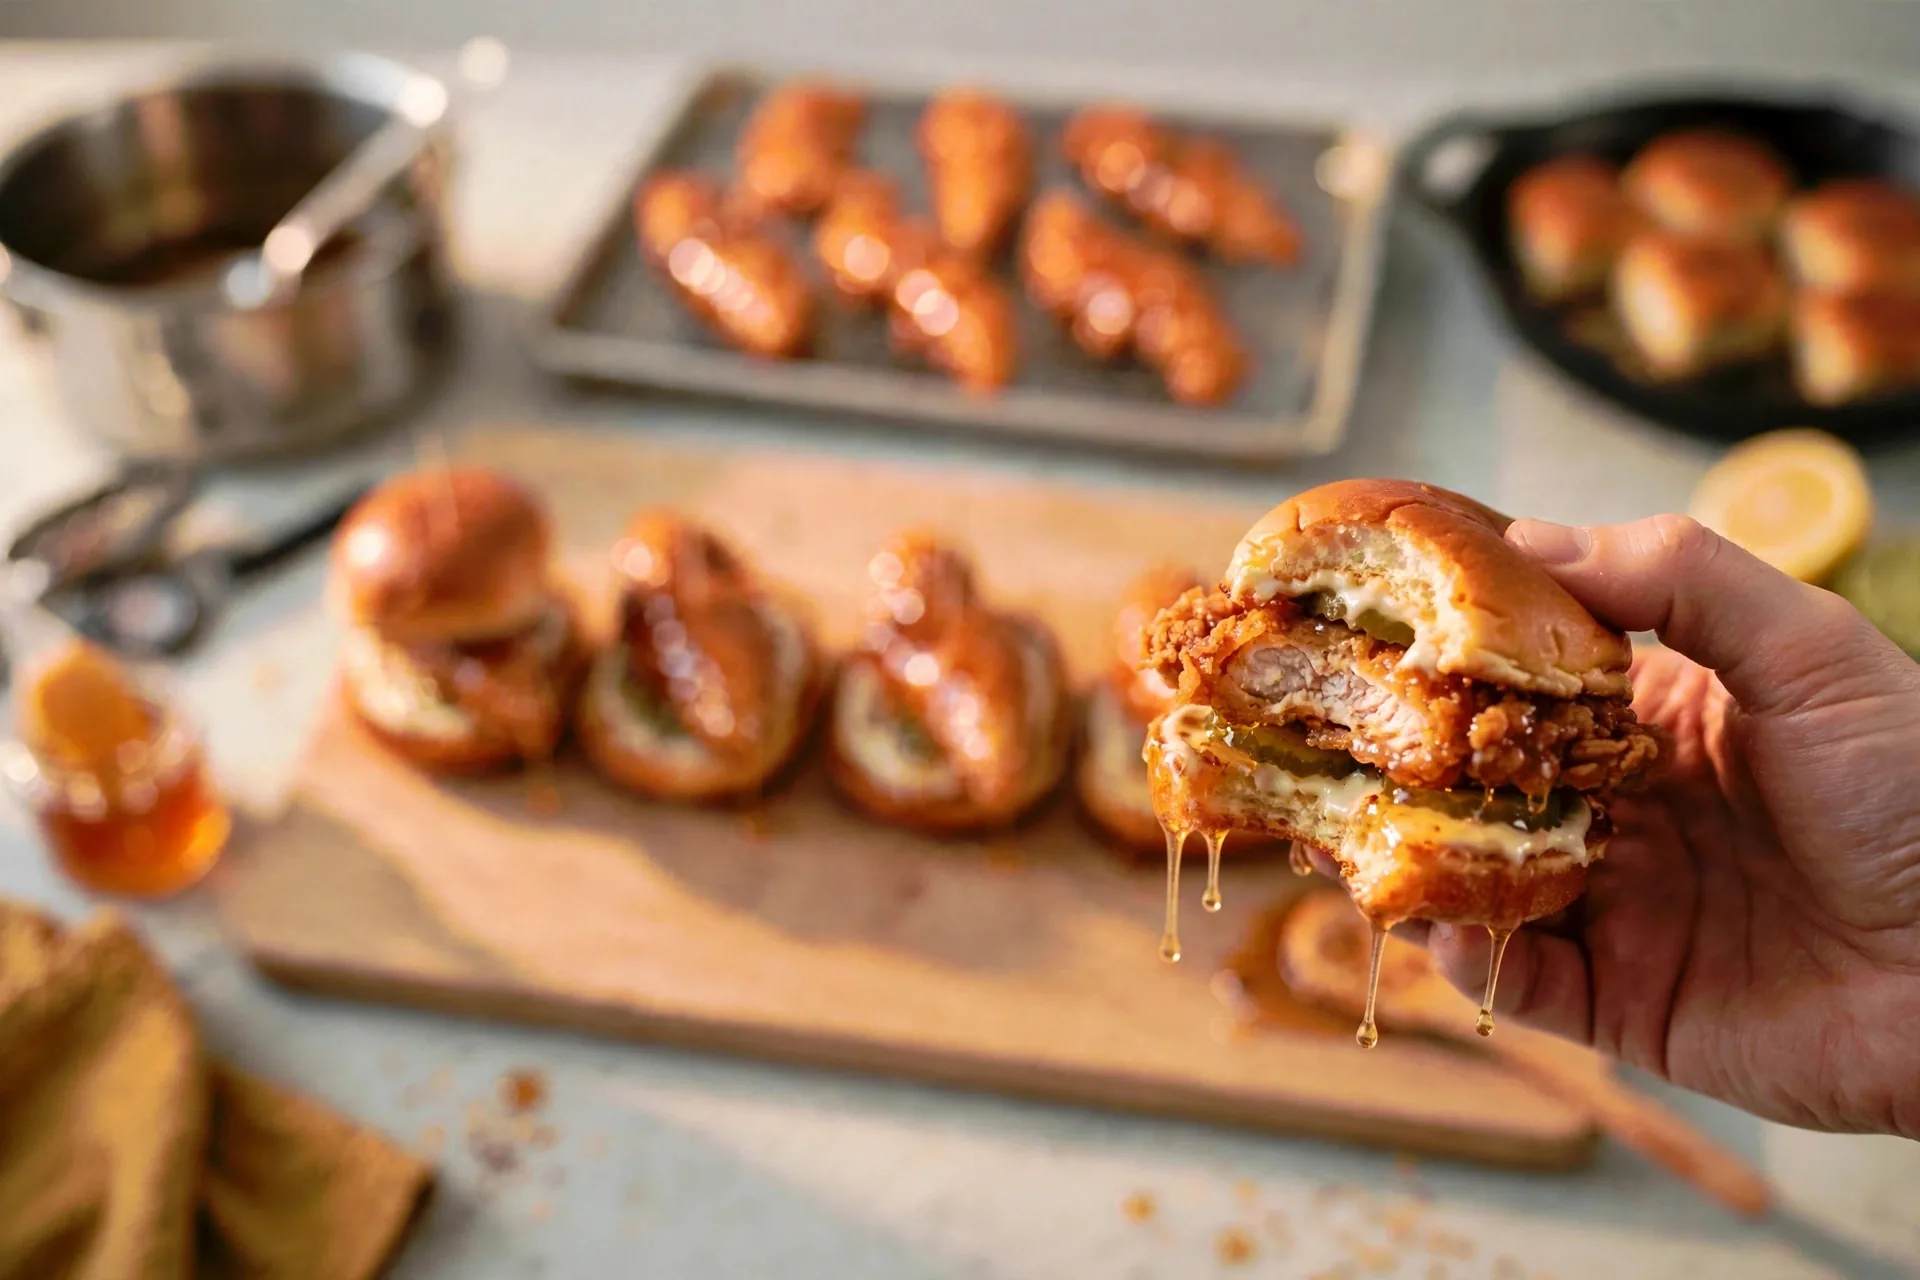
Breaded chicken with pickles is a combination this site returns to for good reason. The 5 Crispy Chicken Sandwiches post builds full-size sandwiches on the same idea, with hot honey among its variations, if a bigger sandwich is what the table wants.
Hot Honey Chicken Sliders
Ingredients
Method
- Split joined slider buns horizontally.
- Toast cut-side down in buttered skillet until light golden-brown.
- Stir mayonnaise with a drizzle of shared hot honey into hot honey mayo.
- Re-crisp set-aside tenders in a hot oven or air fryer.
- Toss hot tenders in shared hot honey.
- Spread bun bottoms with hot honey mayo, top with two pickle chips each.
- Place a tender on each bottom.
- Drizzle with hot honey, set bun tops on, secure with toothpicks, serve.
Notes
All five together
Swapping in what you already have
- No buttermilk: pickle juice from a jar of dill pickles works as the tender brine. It adds a little extra tang, and the salt in the juice means the flour seasoning can stay as it is.
- No panko: crushed cornflakes give a similar crunch, though they brown faster, so watch the tray near the end of the bake. Fine breadcrumbs work too, and they pack denser, so press a little lighter.
- No chipotle in adobo: the chipotle glaze has no true stand-in, since smoke is its whole character. Smoked paprika plus a pinch of chili flakes gives heat and some smoke, and the dish still works, but it will read as a different glaze rather than a chipotle one.
- No slider buns: small dinner rolls split in half hold a tender fine. Hot dog buns do not, since their shape leaves the tender sliding out sideways.
- No fresh cilantro: flat-leaf parsley gives freshness without the same flavor, and it suits the chipotle glaze well enough. Dried cilantro does not carry the same brightness and is better left out.
- Thigh swaps: boneless skinless thighs can stand in for bone-in thighs in Recipe 4, and they cook faster, so check the thermometer early. The reverse swap in Recipe 3 works too, with a longer cook and the same 165°F target.
Keeping leftovers good
Refrigerate leftover chicken in a sealed container once it cools. Keep sauces separate where possible: hot honey in its jars, mayo in its own container, glazed chicken in another. Separation keeps crusts from going soft overnight and keeps the mayo from picking up chili heat it was not meant to carry.
Reheat tenders and sliders’ chicken in the oven or air fryer, not the microwave. Dry heat brings back crunch, and microwaves steam it away. Glazed thighs reheat well covered in a low oven with a spoonful of pan juices over them, and the glaze loosens as it warms. Rice from Recipe 3 keeps separately and reheats with a splash of water so the grains steam instead of drying out.
Hot honey itself keeps in sealed jars in the fridge for several days. It thickens cold, so a short warm-up in a pan over low heat or a few seconds in a warm water bath brings it back to pouring consistency. Do not boil it during reheating, for the same reason it never boils during making.
Assembled sliders do not keep well. Buns soak through within hours, so store components separately and build fresh. Plain set-aside tenders keep better than glazed ones, which is one more reason Recipe 2 splits the tray before any honey goes on.
Facts
- Vinegar is the balancer, not a garnish. Honey on its own coats the tongue with sweetness, and a splash of apple cider vinegar cuts through it so the chili heat reads clearly instead of getting buried under sugar.
- 165°F is the USDA safe temperature for all chicken. Breasts, tenders, boneless thighs, and bone-in thighs share the same target, and bone-in cuts need the probe in the thickest meat, clear of bone, because bone reads hotter than the meat around it.
- Buttermilk brine works through acidity. The mild acid in buttermilk loosens surface fibers, which helps breading grip and helps the cooked tender stay juicy under a crisp crust.
- Honey burns because of its sugars. Honey is mostly sugar and water, and its sugars caramelize fast under high heat. That is why the thigh glaze goes on late and the broiler step stays short and watched.
- Panko crisps differently from fine breadcrumbs. Panko flakes are larger and airier, so they fry and bake into a lighter, crunchier crust with more surface area exposed to hot air.
FAQ
Can I make the hot honey ahead of time?
Yes. Make it, jar it, and refrigerate it for several days. Warm it gently before using so it pours and coats evenly. Boiling it during reheating dulls the vinegar edge, so keep the heat low.
Can I fry the tenders instead of baking them?
Yes, about 4 minutes per side in hot oil until golden, with the same 165°F check at the end. Fry in batches so the oil temperature stays up, and drain on the rack rather than on paper towels so the crust stays crisp.
What if I glaze all the tenders by mistake?
The sliders lose their chicken, since glazed tenders do not re-crisp cleanly. The fix is practical rather than clever: bake a second small batch of tenders, leave them plain, and use those for the sliders. The glazed batch still serves well on its own with pickles.
Can I use chicken breasts for the chipotle dish?
Boneless thighs stay juicier through a sear and a simmer, and breasts dry out faster in the same treatment. Breasts work if they are pounded even and pulled at 165°F without extra simmering time, but the glaze will not have as long to cling.
Why did my thigh glaze burn under the broiler?
Honey sugars brown fast, and broilers run hotter than their settings suggest. Move the rack down one notch, shorten the broiler pass, and watch the pan the whole time. A glaze that goes dark in spots is still usable if the burnt parts are small, but a fully blackened glaze tastes bitter and is better wiped off and re-brushed lightly.
Do the sliders work cold?
They eat best warm, when the crust is crisp and the honey flows. Cold sliders hold together fine for a packed lunch, and the flavors stay intact, but the crust softens, so expect a different texture rather than a failed dish.
Can I double the hot honey?
Yes, it scales cleanly. Double the honey, chili flakes, hot sauce, and vinegar together, keep the same gentle heat, and divide into more jars. The only step that changes is the warming time, which runs a little longer for a bigger pot.
Conclusion
Cook the shared hot honey and the tender tray first, and the rest of this post turns into assembly rather than five separate cooking sessions. Cutlets for a fast dinner, tenders for a crowd, chipotle thighs over rice for a darker, smokier plate, bone-in thighs when the oven is already on, and sliders when the set-aside tenders are waiting. The move that ties it together is simple: keep half the tenders plain, glaze late, and let the thermometer settle every doneness question. Make the honey on a quiet evening, jar it, and the next few chicken dinners start halfway done.